

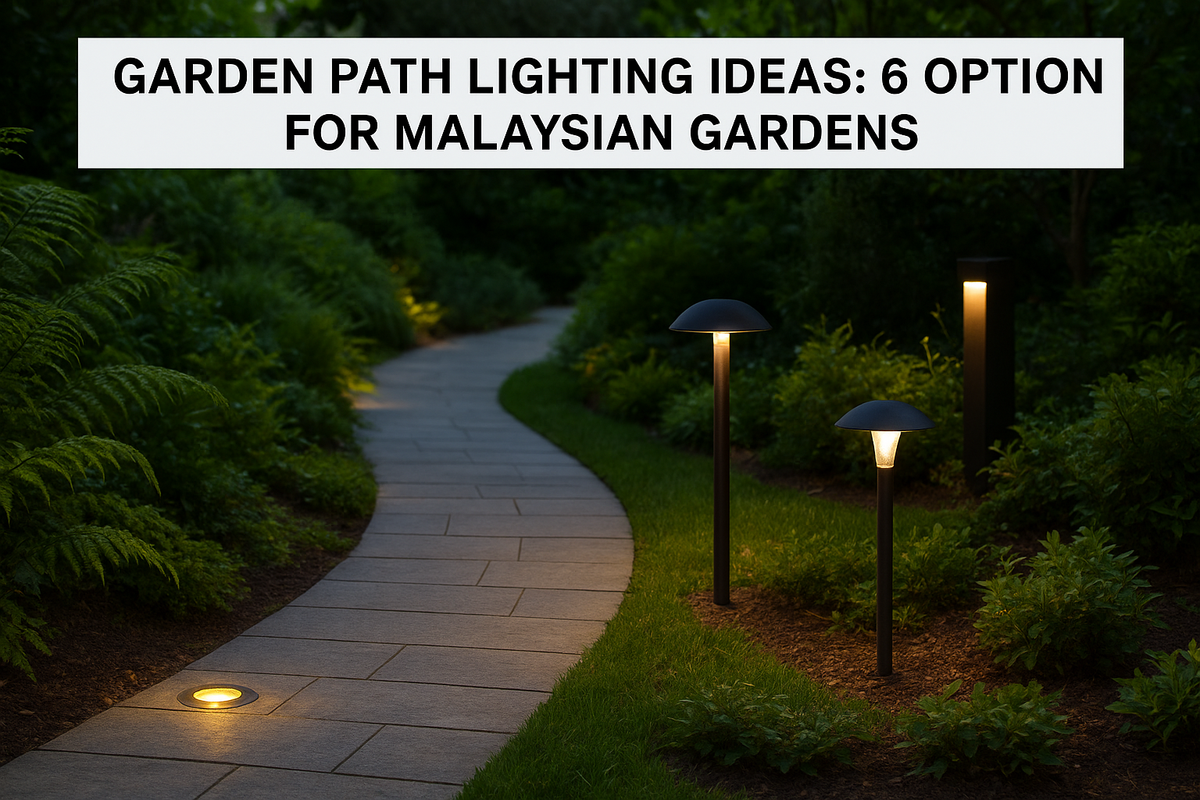
The best garden path lighting ideas use low, shielded, warm light that shows the edge of the path and the steps without glare. Recessed ground lights suit clean modern paving. Pole lights and bollards suit planted borders and wider paths. Solar stakes suit short paths and quick fixes. Step lights protect stairs, and uplights let your planting do the decorative work. Choose by how you walk the path at night, not by how the fixture looks in a catalogue.
Most people light a path badly in one of two ways. They buy a pack of cheap stakes and line them up like an airport runway, or they leave the path dark and rely on one bright floodlight that blinds everyone. In Malaysia you also have to deal with heavy rain, humidity, fast-growing plants and insects, which finish off the wrong fixtures within a season.
We design and build gardens in Malaysia, so these six options come from how paths behave on site. Each one covers how it works, where it fits and what to check before you buy.
1. Recessed ground and walkover lights
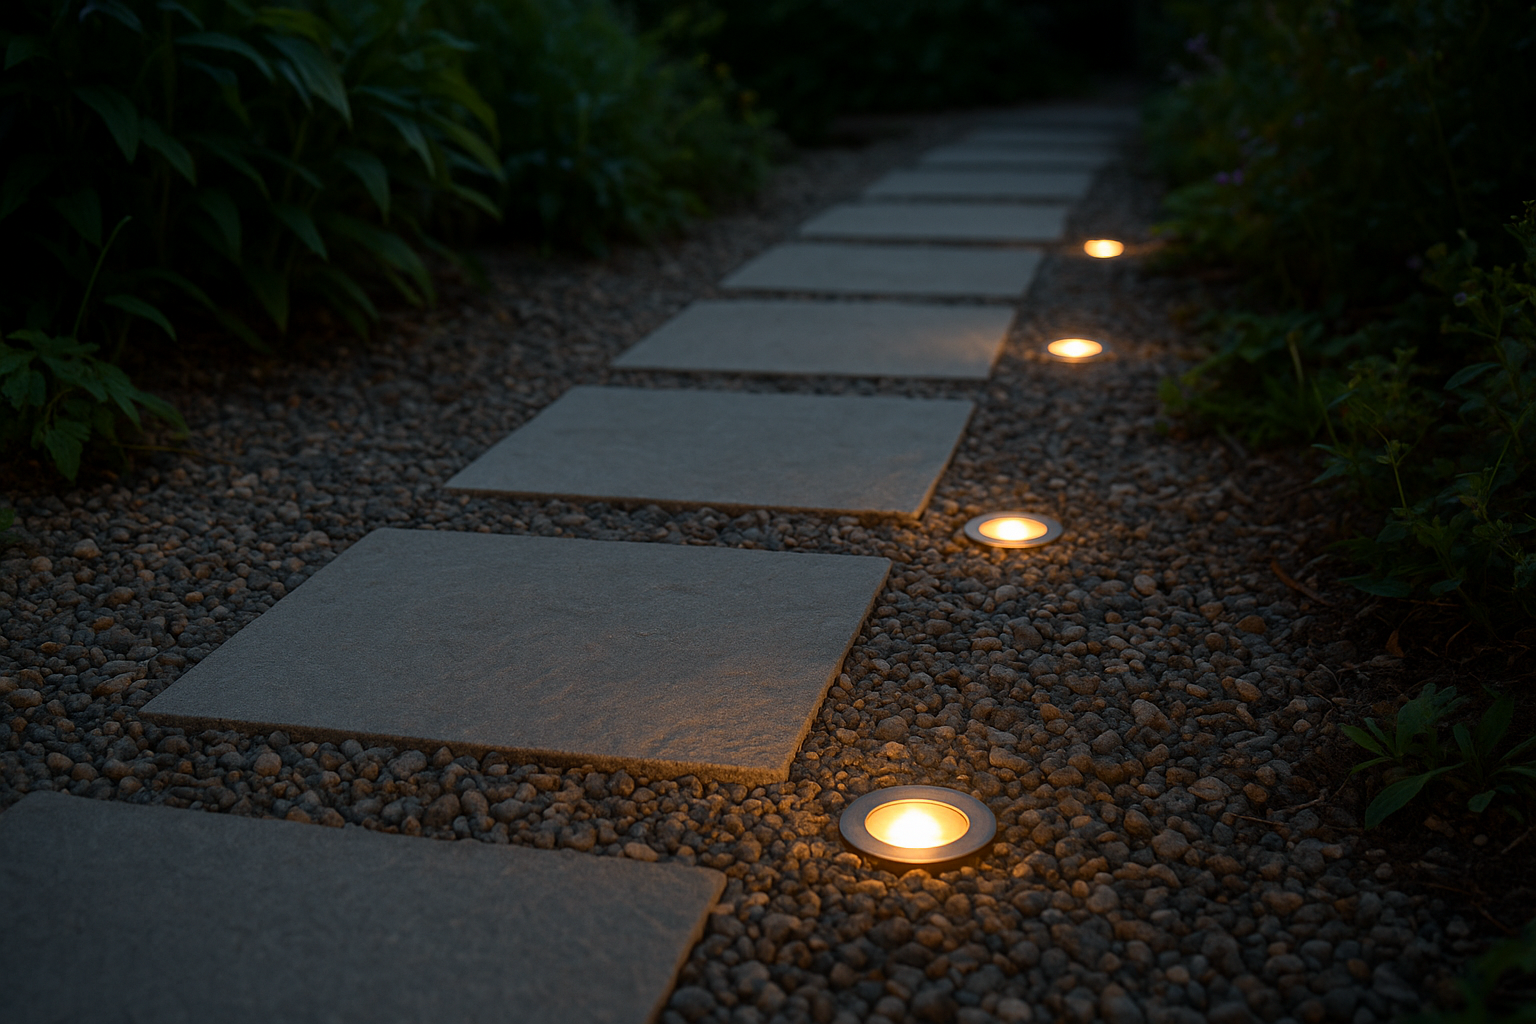
Recessed ground lights are the cleanest way to light a path, because the fixture sits flush with the surface and you only see the glow. They work best on paving, stepping stones and gravel.
How it works and where it fits
Each light is a small round or square unit set into paving, decking or gravel. It shines upward or outward depending on the lens, so you can mark the path edge or wash a wall beside it. Set the lights at staggered intervals for a relaxed rhythm, or in opposite pairs for a formal, even look.
Flush fixtures leave nothing to trip over and nothing for a lawnmower or wheelbarrow to catch. That makes them the best pick for narrow paths and stepping stones where plants spill over the edge and a pole light would be in the way. The trade-off is installation. You have to cut or core the paving, so plan them before the path is laid if you can.
A flush light shows you the path, not the fixture.
What to check before you buy
Rain is the real test here, because a flush fixture sits exactly where water collects. Check these points first:
- Load rating. Walkover lights take foot traffic. If a car will cross the path, you need driveover units.
- Water protection. Look for IP65 or higher, and make sure the base drains into gravel instead of sitting in a puddle.
- Beam control. Choose a hooded or recessed lens so the light does not glare into your eyes as you walk toward it.
- Light colour. Warm white at 2700K to 3000K is easy on the eyes and tends to draw fewer insects than cool white.
2. Low pole path lights
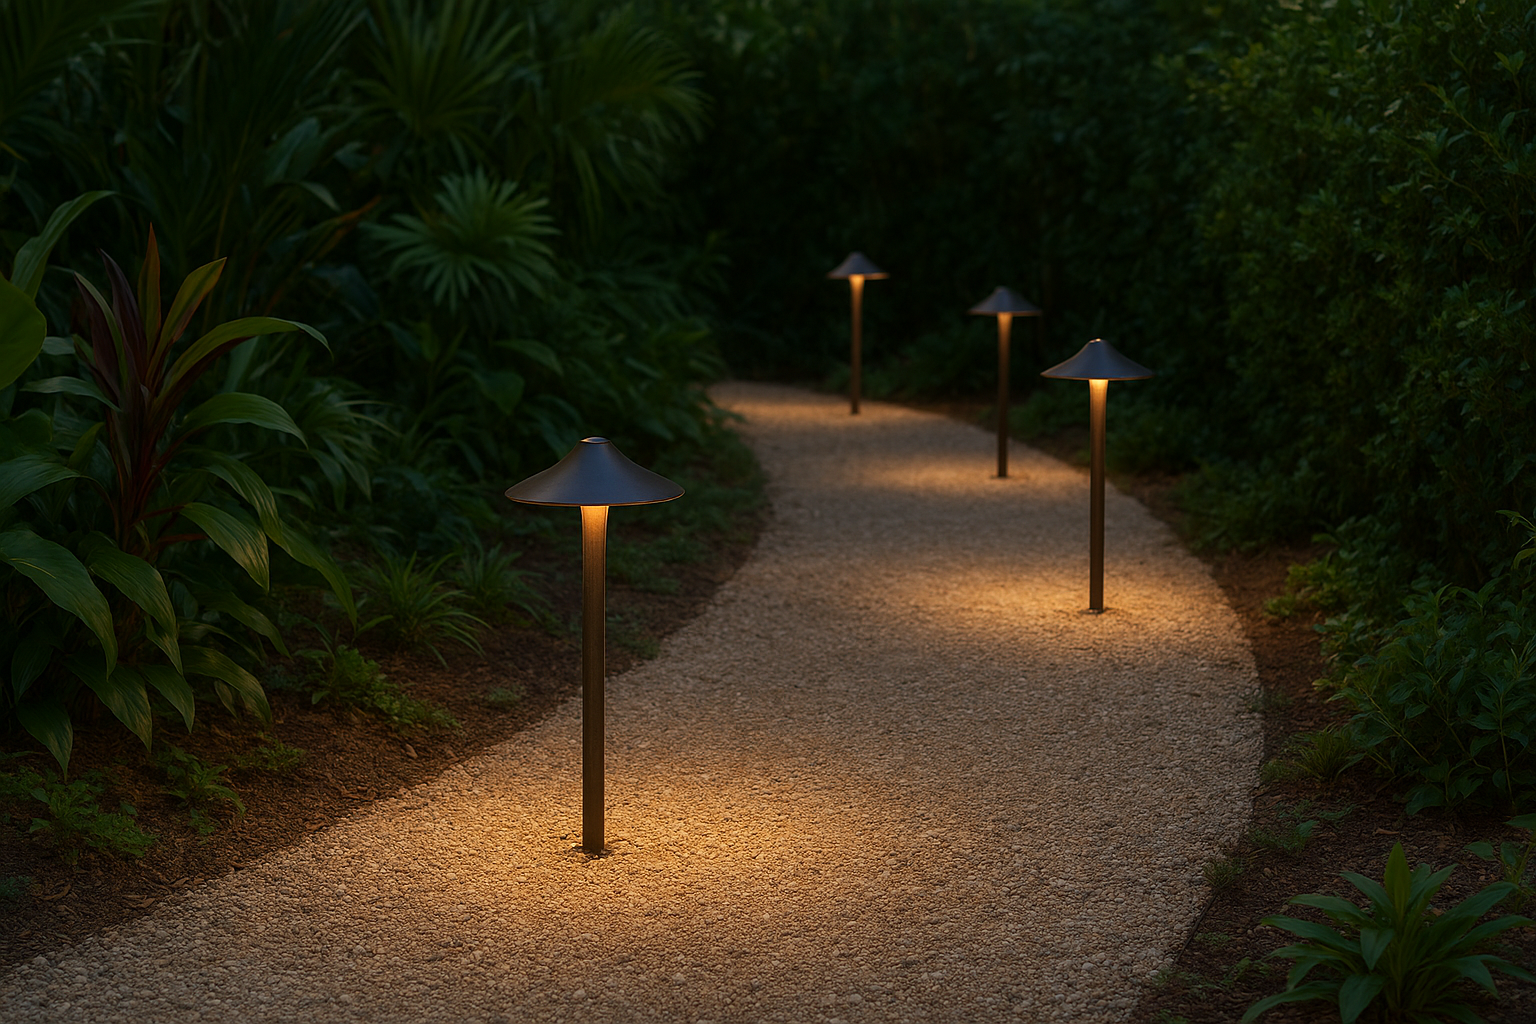
Low pole lights, often sold as mushroom or hat lights, are the classic path light. A short stem carries a shade that throws light down onto the ground around its base.
How it works and where it fits
The shade pushes light down and outward at about knee height, so you light the ground and not people's eyes. Each fixture makes a pool of light, and your job is to space the pools so they just meet. Read the beam diameter in the manufacturer's guide and place the next light just beyond it. For subtle lighting, 3 to 4.5 metres (10 to 15 feet) apart is a sensible starting point, and closer on winding or uneven paths.
Stagger the lights on alternate sides instead of lining them up like runway markers. A staggered line looks more natural and lights the full width of the path. Tropical planting grows quickly, so pick a stem tall enough that leaves will not swallow the shade within a few months, or plan to trim.
Space path lights so the pools of light just meet, and stop there.
What to check before you buy
Most pole lights run on low voltage, which needs a transformer to step the power down. Low voltage is safer if a child, pet or spade damages a cable. Have a licensed electrician handle any mains wiring. Then check:
- Material. Brass, copper and powder-coated or cast aluminium resist humidity far better than painted steel.
- Output. About 100 to 200 lumens per fixture is enough for a path.
- Mounting. A ground spike suits soil and gravel, while a base plate suits paving.
3. Bollard lights
Bollard lights are short, sturdy posts that give a wider wash of light than pole lights. They suit broad paths, driveways and entrances.
How it works and where it fits
A bollard is the heavier, more architectural cousin of the pole light. It marks a boundary as much as it lights the way, which is why it works well along a wide path or driveway edge. One bollard covers more ground than a mushroom light, so you need fewer of them. A short run of them gives a resort-style look.
Bollards also read as a design statement in daylight. Match the finish to your gate, wall lights and window frames so the path looks planned. In a modern garden, a slim, clean-lined bollard with a downward louvre looks better than an ornate lantern.
Bollards light a wide path with fewer fixtures, but only when the beam points down.
What to check before you buy
Bollards stand tall enough to sit in your line of sight, so glare is the main risk. Look closely at these details:
- Shielding. Choose a downward-facing louvre or a recessed lamp, never an exposed bulb.
- Power. Some bollards run on mains voltage and others on low voltage, so confirm which before you order. Mains cable needs a licensed electrician and buried conduit.
- Strength. Pick a tough housing and a base that bolts to a concrete footing, especially if vehicles pass nearby.
- Colour. Stay with warm white so the path matches the rest of your lighting.
4. Solar path lights
Solar path lights are the fastest fix, because each stake carries its own panel and battery and needs no wiring or trenching.
How it works and where it fits
A panel charges a battery during the day, and the light switches on at dusk. You push the stake into soft ground or fix it to a hard surface, and you are done in minutes. That makes solar ideal for short paths, rented homes and gardens where digging through established planting is not an option.
Be realistic about the limits. Malaysia gets plenty of sun, but afternoon storms and cloudy spells leave panels undercharged, and a panel under a tree barely charges at all. Use solar for guidance and accent, not for steps or any path where a fall would be serious.
Solar suits paths that sit in the sun, not paths that need guaranteed light.
What to check before you buy
Cheap packs vary a lot in quality. Test one before you buy eight, and check these points:
- Panel position. Place the panel where it gets open sky for most of the day, even if the light would look better elsewhere.
- Battery. Choose replaceable rechargeable batteries, because they wear out eventually.
- Brightness. Check the stated lumens and compare them with the 100 to 200 lumens of a good path light.
- Water protection and colour. Look for IP65 or higher and a warm 3000K tone.
5. Step and wall-mounted lights
Step lights put light exactly where a fall is most likely, so they come first whenever your path changes level.
How it works and where it fits
You can set a light into the riser under the lip of each tread, recess it into the wall beside the stairs, or mount a small wall light a few inches above the step, aimed down and out. Hooded versions throw light onto the tread without dazzling people walking down. The goal is simple: you must see the edge of every step.
Sloping plots often mean garden steps, and humidity and shade make them slippery with moss and algae. Light the top and bottom of every flight, and make sure the light falls across the whole tread. Light cannot fix a slippery step, but it lets you see the wet patch before you stand on it.
If your path has steps, light them before you light anything else.
What to check before you buy
Step lights are small, so details matter. Compare fixtures on the following:
- Hood or louvre. It should direct light downward so it never shines into the eyes of someone descending.
- Layout. One light per step is the safest layout. Use fewer only if a wall light covers the gaps.
- Cable routes. Plan them before the steps are built. Low-voltage lights use thin cable that is easy to hide.
- Rating. Choose IP65 or higher, since steps get splashed and soaked.
6. Uplights and spotlights in the planting
Uplights and spotlights light the plants beside the path. The glow frames the route without a single fixture on the path itself.
How it works and where it fits
A spike light aimed up through a shrub or palm creates a silhouette that marks the path edge softly. A spotlight placed in a tree can shine down through the branches, giving a moonlit effect over the ground. Large-leaved tropical plants such as palms and heliconias catch light well, so a single fixture makes a strong impression.
Treat this as the second layer, not the first. It makes the garden feel designed, but it does not show you the path surface. Pair it with low, path-level lighting such as ground lights or pole lights, so you get mood from the plants and safety from the path.
Light the plants for mood and the path for safety, and use both.
What to check before you buy
Because plants grow and move, uplights need more upkeep than the other options. Look for these features:
- Adjustable head. You will need to re-aim the light every few months as foliage fills in.
- Output. About 400 to 700 lumens suits trees and large features. Shrubs need far less.
- Glare and spill. Aim the beam so it does not hit your own eyes or your neighbour's windows.
- Colour. Stay with 2700K to 3000K so the foliage keeps a natural green.
Pick the layer your path needs first
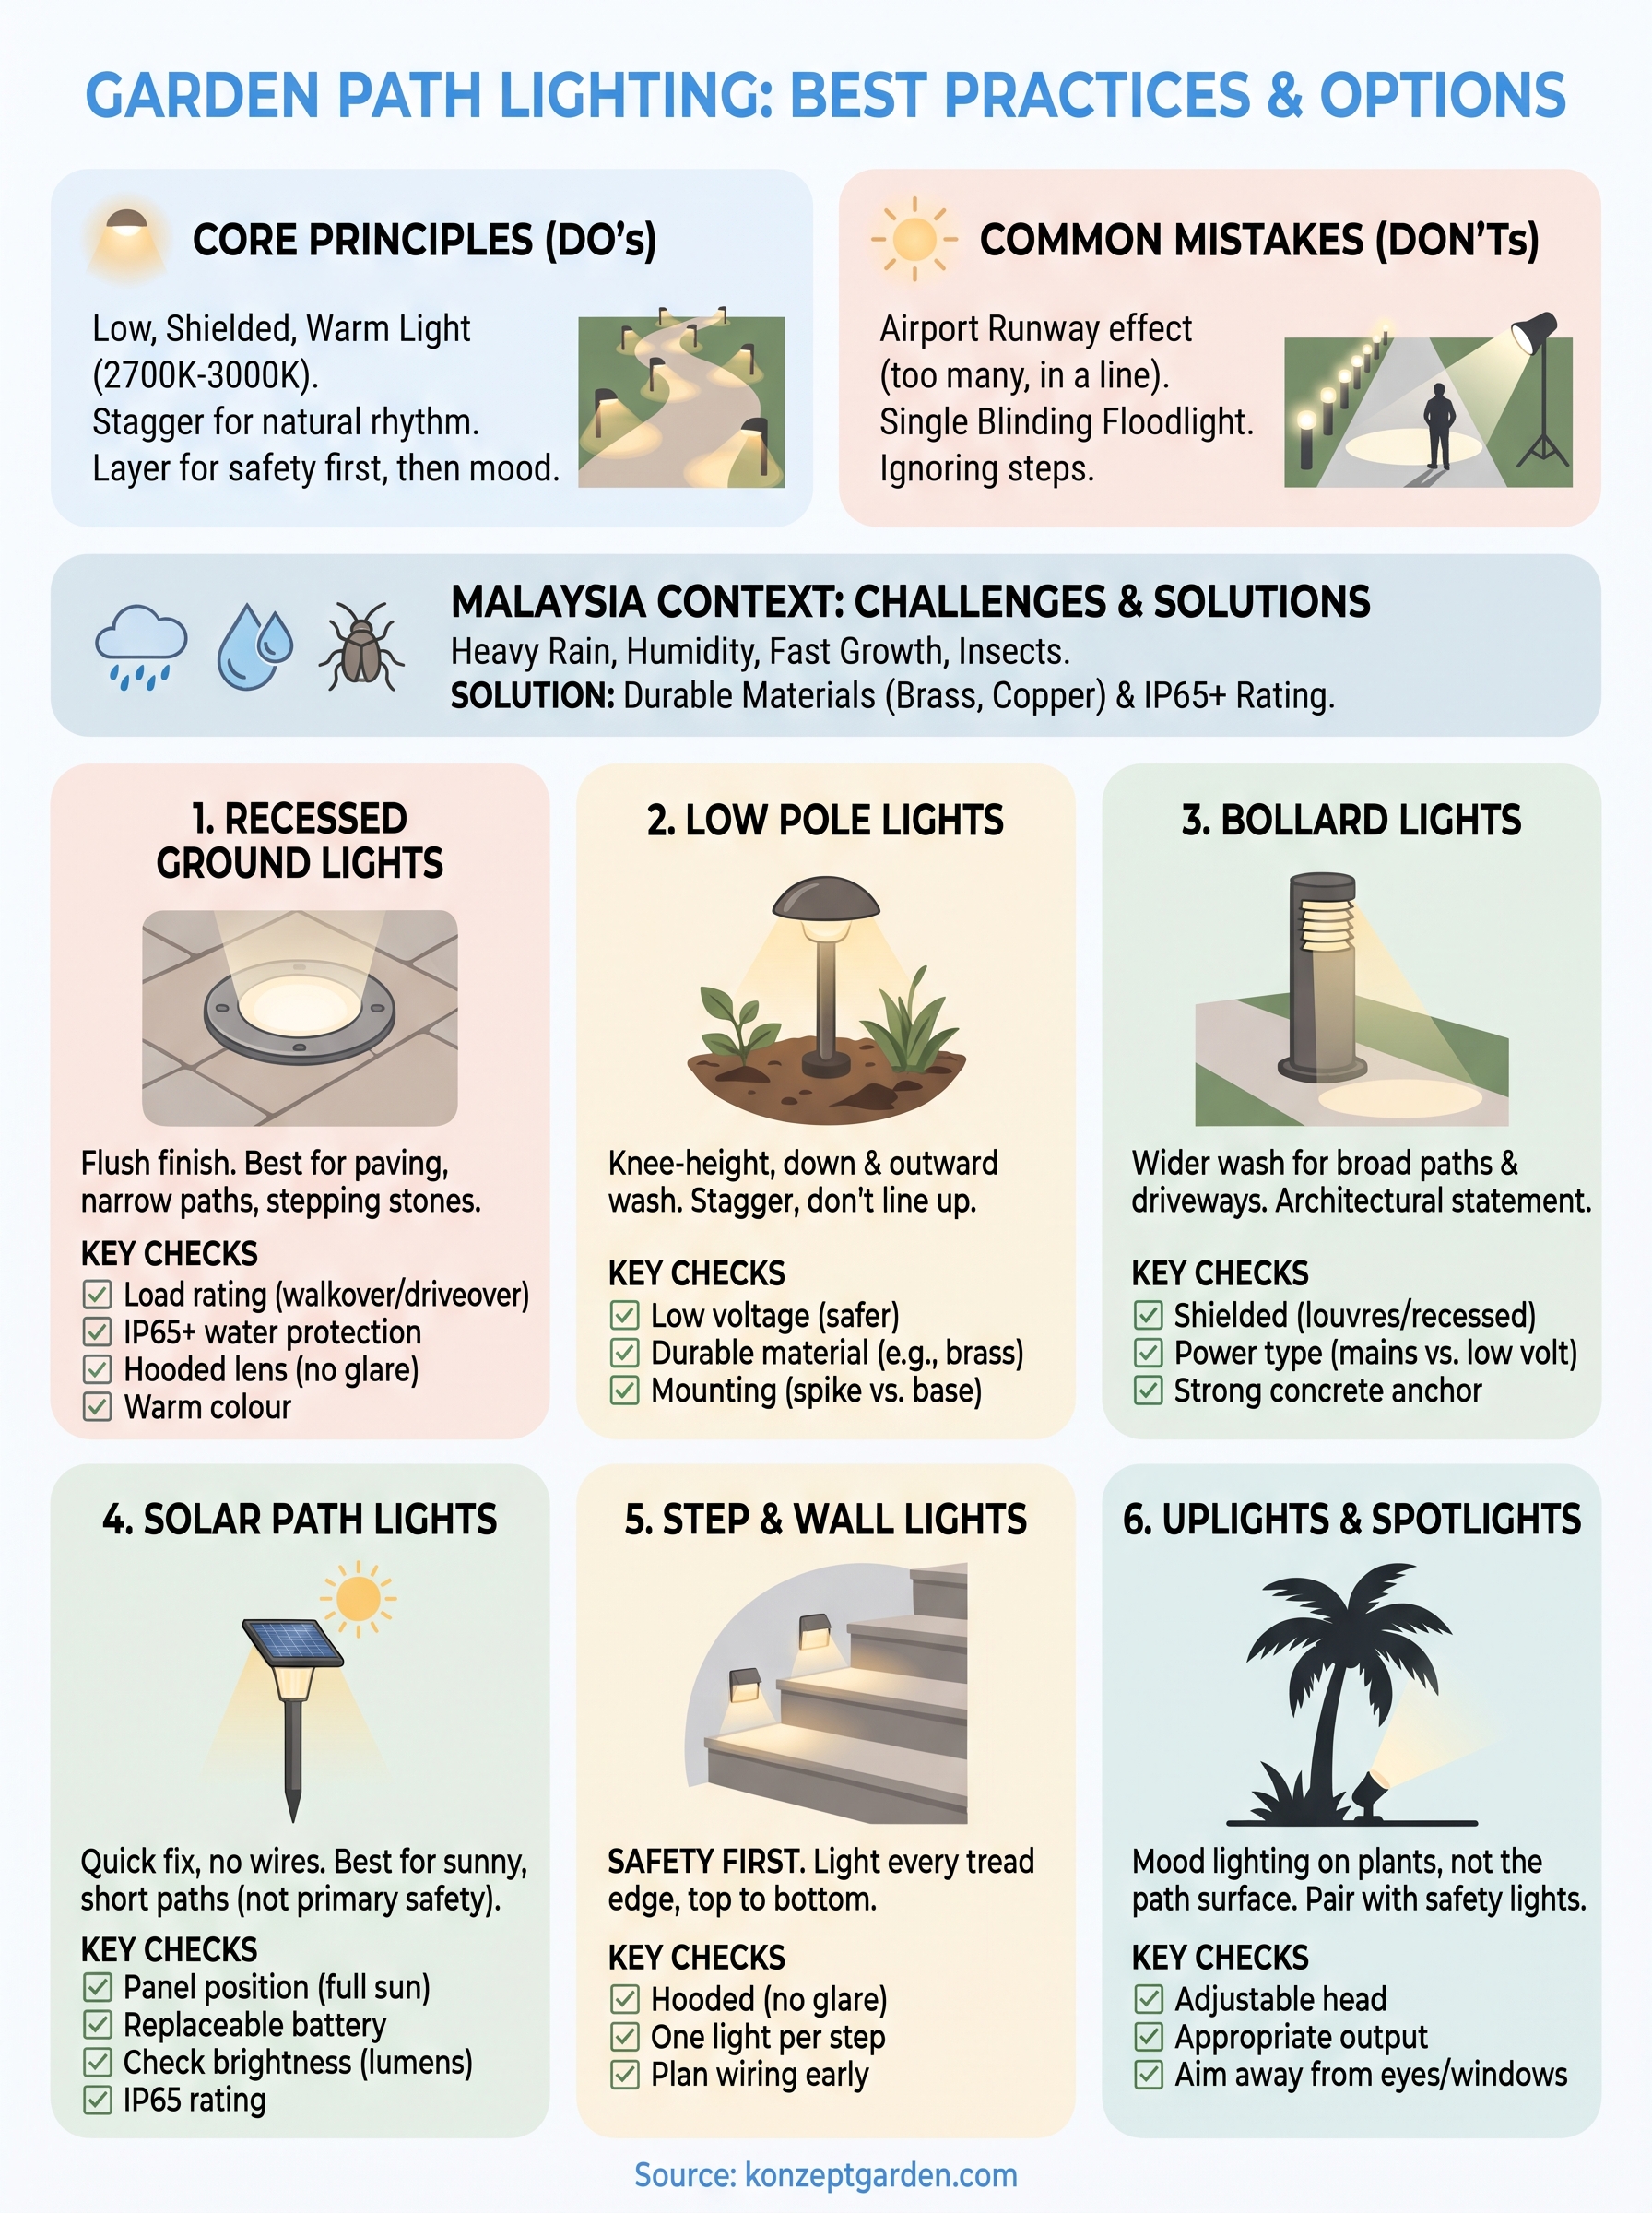
Good path lighting is layered. Start with the layer that protects you, which means step lights on any stairs and low path-level light such as ground lights or pole lights along the walking line. Add bollards if the path is wide. Then add uplights for atmosphere. Use solar only where a fixed system is not practical. Keep every fixture low, shielded and warm.
Decide the wiring before you decide the fixtures. Cable routes are cheap to plan before paving and planting, and expensive to retrofit afterwards. If you would like your path lighting planned together with the planting and hard surfaces, talk to our team and send photos and measurements of your site.