A Zen garden strips away everything unnecessary and leaves only what matters, stone, sand, space, and silence. If you've been researching how to design a zen garden, you've probably noticed that most guides either stay too abstract (talking endlessly about philosophy) or jump straight into a shopping list of gravel and rocks. Neither approach actually helps you build one. What you need is a clear bridge between the principles and the practice.
That's exactly what this guide covers. We'll walk through the core design philosophy behind Japanese rock gardens, break down how to plan your layout, choose the right materials, and select plants that belong, not just plants that look "zen" on Pinterest. You'll finish this article with a working framework you can apply to any space, whether it's a full backyard or a compact courtyard corner.
At Konzept Garden, we've designed and built contemplative outdoor spaces for clients across Malaysia, from private residential retreats to commercial wellness areas. Zen garden design is something our team practices hands-on, not just writes about. This guide draws from that real project experience combined with the traditional principles that have shaped these gardens for centuries. Let's get into it.
What a Zen garden is and what it is not
Before you start placing rocks or raking gravel, you need a clear picture of what you're actually creating. Zen gardens are widely misrepresented online, and starting with the wrong idea will push your design in the wrong direction fast. Understanding the real definition, and more importantly, the real limits of the concept, is the first step in learning how to design a zen garden that actually works.
The origins of the Japanese rock garden
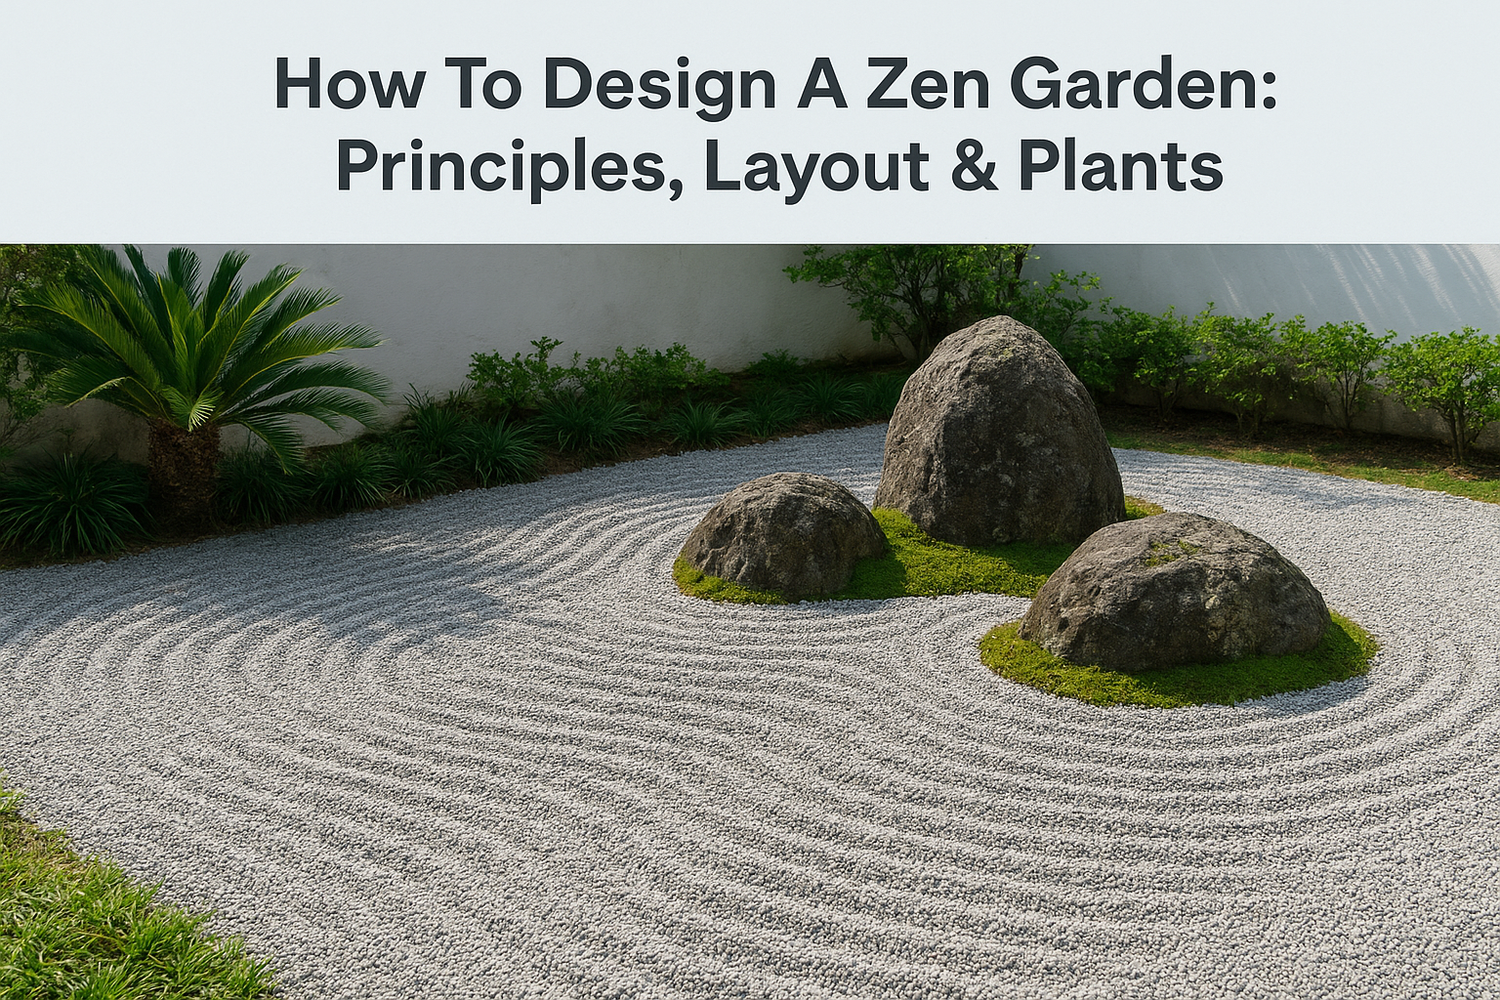
The Japanese rock garden, or karesansui (meaning "dry landscape"), developed in Japan during the Muromachi period, roughly between the 14th and 16th centuries. Zen Buddhist monks created these spaces primarily as tools for meditation and contemplation, not as decorative features. The garden was designed to be viewed, not walked through, and every element carried symbolic meaning. Raked gravel represented water or waves. Rocks represented mountains or islands. Empty space was treated with as much intention as the filled space.
A Zen garden is not a destination. It is a practice, and the act of raking, arranging, and maintaining is part of that practice.
Perhaps the most referenced example of this form is the Ryoanji temple garden in Kyoto, which consists of 15 rocks arranged in raked white gravel within a walled enclosure. No plants. No water. No decoration beyond the rocks themselves. It has drawn visitors and scholars for over 500 years because of its restraint, not in spite of it.
What makes a garden "Zen"
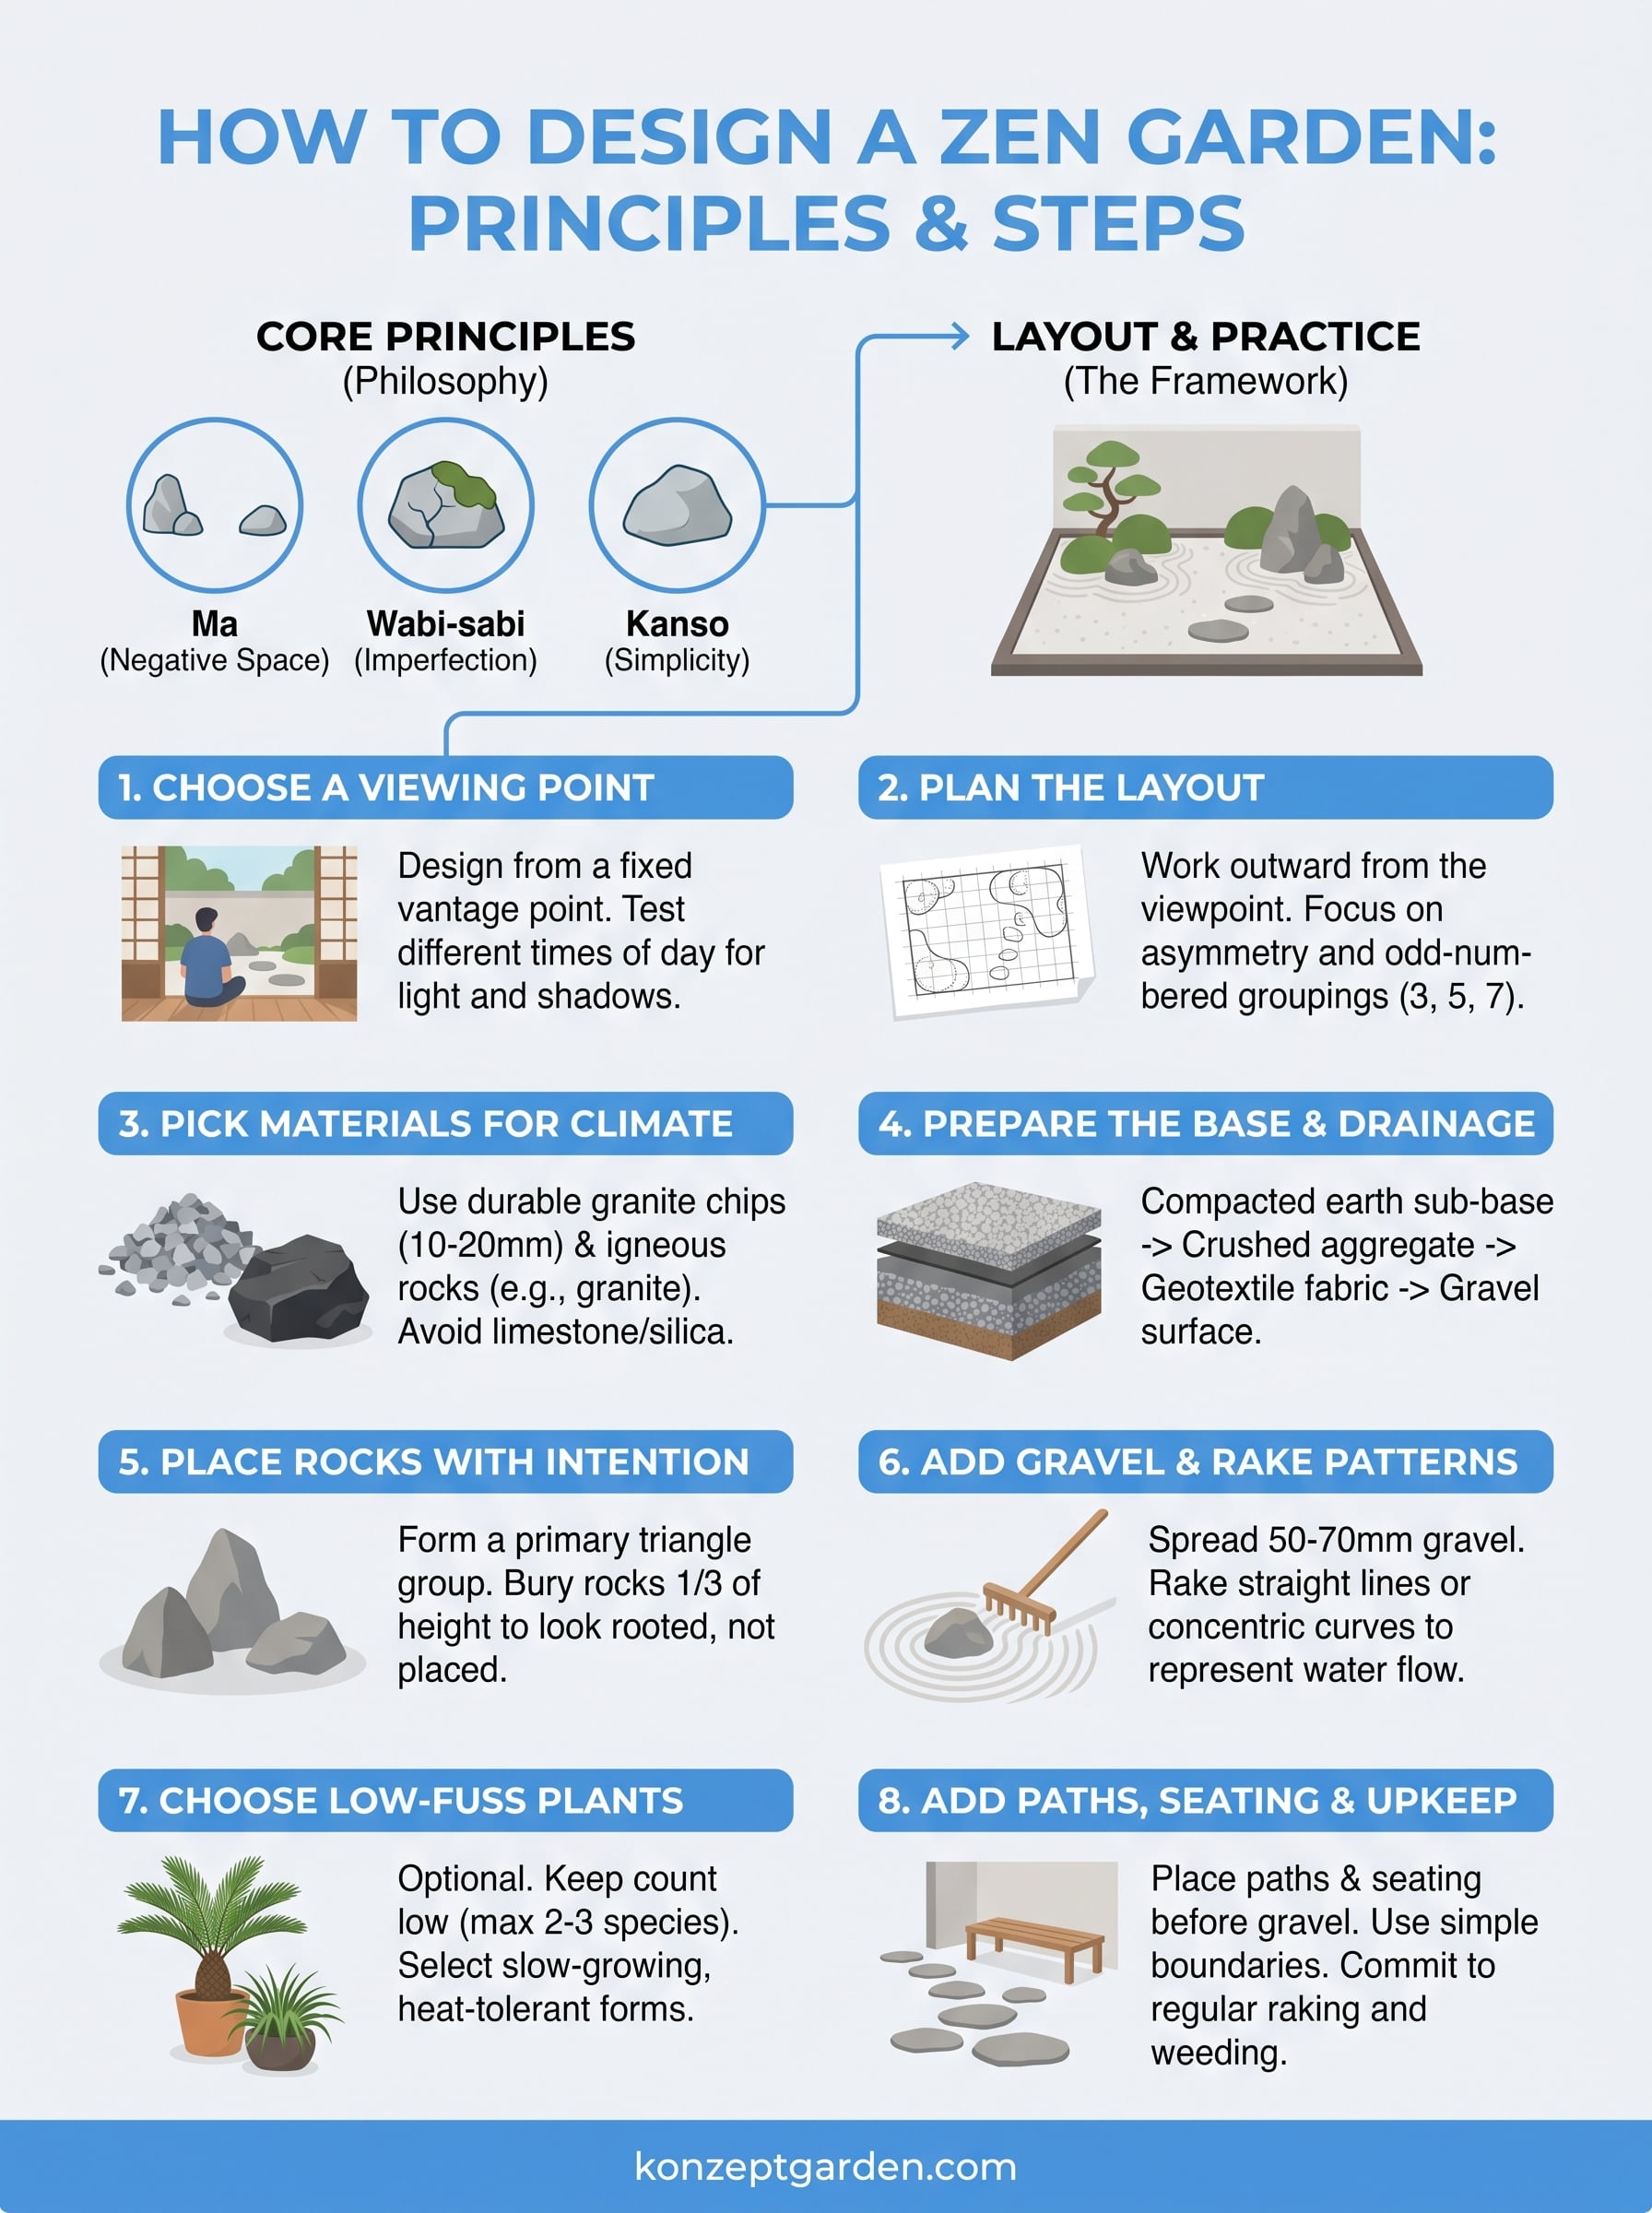
A garden earns the label "Zen" through its underlying organizing principles, not through a checklist of decorative items. The three core ideas are ma (negative space), wabi-sabi (the beauty of imperfection and impermanence), and kanso (simplicity). These principles push against clutter, symmetry, and ornamentation. A Zen garden gives your eye one or two focal points and removes everything else competing for attention.
Applying this in practice means your layout should feel deliberate and slightly asymmetrical. Rocks should sit in odd-numbered groupings, typically three, five, or seven. Gravel patterns should be clean and intentional. Plants, if you include them at all, should be few, slow-growing, and chosen for texture and form rather than for bold color.
What a Zen garden is not
This is where most residential projects go wrong. A bamboo water feature, a stone lantern, and some pebbles scattered around a flower bed is not a Zen garden. It is a garden with Japanese-inspired accessories. The difference matters because adding elements without understanding why they belong leaves you with something that looks busy rather than calm.
A Zen garden is also not a low-maintenance space by default. The gravel or sand needs regular raking, and in Malaysia, heavy rain and constant leaf fall can disturb patterns quickly. Moss spreads across rock surfaces. Weeds push through gravel beds. The maintenance is genuinely part of the philosophy, but you still need to budget real time for it, especially in a tropical climate where growth cycles are faster and more aggressive than in Japan.
Finally, a Zen garden does not require a large plot of land. Some of the most effective karesansui gardens fit within just a few square meters. What they require is proportion, clear intention, and a defined boundary that separates the contemplative space from the rest of the garden. Size is far less important than discipline in what you include and what you leave out.
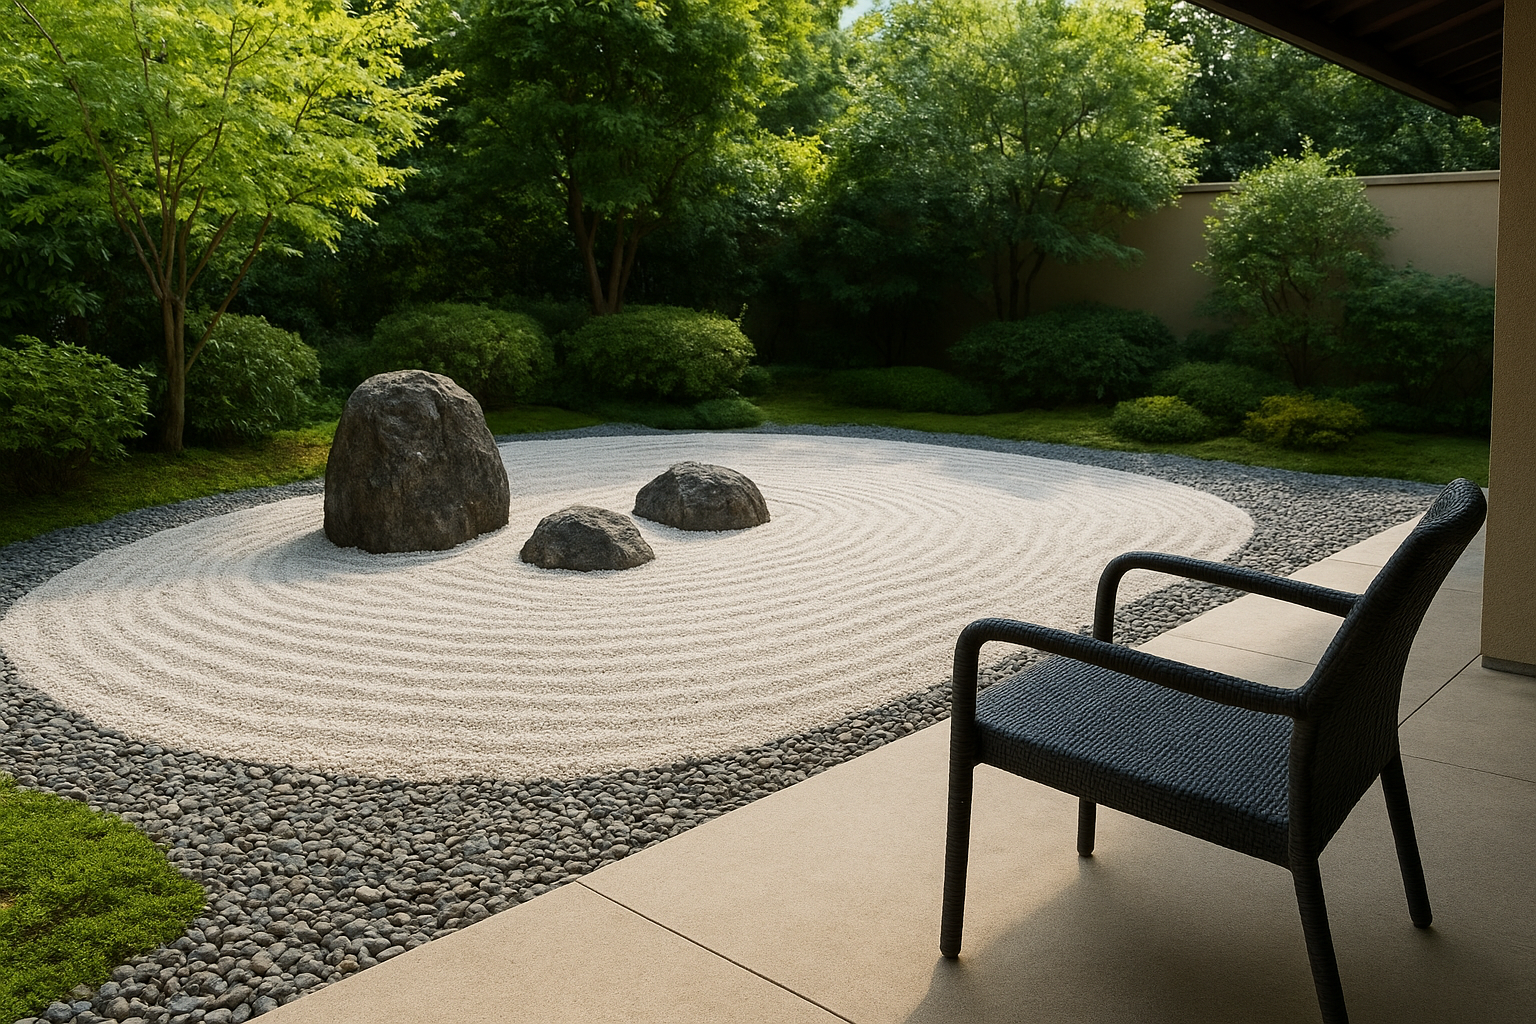
Step 1. Choose a site and the main viewing point
Site selection is the most consequential decision you'll make in the entire process. Get it wrong and everything that follows, the rock placement, the gravel patterns, the plant choices, will fight against you. When you're working out how to design a zen garden, the site is not just where the garden happens to fit. It is the canvas that shapes every design decision after it, so you need to approach it with real deliberation before you move a single stone.
Identify where you will sit or stand
A Zen garden is built to be observed from a fixed vantage point, not experienced by walking through it. That means your first move is deciding where you will actually be when you look at the garden. This might be a seat on a covered veranda, a chair inside through a glass door, or a defined spot along a garden path. Walk around your outdoor space and physically stop at different points. The view from your chosen spot determines the entire composition of what you build.
Design the garden for the eye that will see it most often, and let that view drive every placement decision from there.
Once you have your viewing point locked in, test it at different times of day. In Malaysia, morning light from the east creates softer shadows on rock surfaces, which tends to read better for a contemplative space than harsh midday sun. If your best viewing spot faces west, you'll want overhead shade or a roof structure to make that space usable in the afternoon without squinting.
Evaluate sun, shade, and drainage
Malaysia's climate adds two site factors that traditional Japanese Zen garden guides rarely mention: intense sun and high rainfall. A garden bed that sits in full, unshaded sun all day will fade certain gravels, heat rock surfaces uncomfortably, and stress any plant material you include. Look for a spot that receives filtered light or partial morning sun, with natural shade from a wall, existing tree canopy, or a built shade structure covering at least part of the area.
Drainage is non-negotiable. Gravel beds that sit in standing water after rain develop algae, moss, and compaction problems fast. Before you commit to a location, pour a bucket of water on the ground and watch where it goes. If it pools, you'll need to address the base layer in Step 4, but it's easier to start with ground that already drains reasonably well. A gentle slope of 1 to 2 percent away from any structure is ideal.
Step 2. Plan the layout with Zen design principles
Once you've locked in your site and viewing point, you can start translating Zen principles into an actual layout on paper. Sketching the layout before you move any material saves you significant rework later, and it forces you to make deliberate decisions about proportion and empty space. This is the stage in figuring out how to design a zen garden where philosophy becomes a practical spatial exercise.
Work from your viewing point outward
Start your sketch by marking your viewing position at the edge of the page. Then draw the boundary of the garden space and work inward from there. The foreground, the area closest to you, should hold your primary rock grouping or the element you want the eye to land on first. The background can hold lower material like clipped moss, ground cover, or a boundary wall. This approach keeps the composition layered and readable from a single vantage point.
A layout that reads well from your viewing point will feel naturally calm, while one built without that anchor will feel scattered regardless of how good individual elements look on their own.
Use a simple grid on your sketch paper, with each square representing 30 cm of real space. Mark immovable features first, like drainage outlets, existing walls, and utilities. Then place your focal rock group in the front-to-middle zone before you commit any gravel or plant positions around it.
Apply the rule of odd numbers and asymmetry
Zen garden layouts avoid symmetry entirely, and this single rule shapes your whole plan. Rocks sit in groups of three, five, or seven. A single accent plant stands alone rather than paired. Gravel pathways curve rather than run straight. Odd numbers create visual tension that the eye naturally tries to resolve, which keeps attention moving and makes the space feel considered.
Here is a simple layout reference you can apply to most small-to-medium spaces:
| Zone | Element | Placement rule |
|---|---|---|
| Foreground | Primary rock group (3 rocks) | Offset left or right of center |
| Middle ground | Raked gravel field | Fills majority of the space |
| Background | Single accent plant or moss | Placed asymmetrically |
| Boundary | Low wall, fence, or hedging | Encloses without competing visually |
Keep at least 60 percent of the total area as open gravel or bare ground. Resist filling every corner, because negative space is doing active design work in a Zen layout, not sitting idle.
Step 3. Pick the right materials for Malaysia conditions
Material choices in Malaysia need to account for heat, humidity, and heavy rain, not just aesthetics. Traditional karesansui gardens were designed for a dry, temperate Japanese climate, so direct substitutions often fail here. When you think about how to design a zen garden in a tropical setting, every material on your list needs to pass one practical test: will it hold up after a month of afternoon downpours without cracking, staining, or becoming a surface for algae?
Gravel and sand for tropical settings
White silica gravel is the most common choice globally, but in Malaysia's humidity it develops a grey algae film within weeks if left in direct sun with poor airflow. A better alternative is light grey or off-white granite chips, sized between 10 mm and 20 mm. Granite resists staining longer, drains faster, and rakes cleanly. Avoid limestone chips because they dissolve slowly in acidic rainwater and leave white powder residue across your garden surface over time.
Choosing the right gravel size matters more than choosing the right color, because gravel under 10 mm shifts too easily during heavy rain and won't hold a raked pattern.
For the raking layer, lay gravel at a depth of 50 mm to 70 mm. Anything shallower lets weeds push through from below. Anything deeper makes raking harder and adds unnecessary weight over your drainage base.
| Gravel type | Pros | Cons |
|---|---|---|
| Granite chips (10-20mm) | Durable, drains well, holds patterns | Slightly less bright than white silica |
| White silica | Traditional look | Algae-prone in humid climates |
| Pea gravel | Affordable | Rolls out of place easily, hard to rake |
| Limestone chips | Easy to source | Degrades in acidic rain, leaves residue |
Rock selection and boundary materials
Locally sourced igneous rocks like granite or basalt work best structurally and visually in Malaysian conditions. They don't crack in heat, they take on a natural patina over time, and they sit in weight categories that a small team can handle safely. Avoid sandstone and sedimentary rocks because they absorb water, split along fault lines, and break down faster than you'd expect given their appearance in a garden center.
For boundary walls and edging, tumbled concrete pavers or rough-cut granite coping create clean lines without competing with your rock focal points. Timber edging is tempting but degrades quickly in constant moisture unless you use treated hardwood like chengal or merbau, both of which are widely available across Malaysia and hold their structure reliably for years.
Step 4. Prepare the base and solve drainage first
Base preparation is the step most people skip, and it's the reason many Zen gardens look worn and patchy within a single rainy season. Before you place a single rock or spread any gravel, the ground underneath needs to be properly layered and compacted. This foundation work is unglamorous, but it determines whether your raked patterns hold their shape after a heavy downpour or turn into a muddy, weed-filled mess within weeks. When you're learning how to design a zen garden in Malaysia, getting the base right is non-negotiable.
Build the drainage layer correctly
Start by excavating the garden area to a depth of 150 mm to 200 mm below your finished gravel surface level. Remove all existing topsoil, roots, and organic matter, because any organic material left in the sub-base will decompose, creating voids that cause the surface to sink unevenly over time. Once you've cleared the excavation, compact the exposed earth firmly using a plate compactor or a hand tamper for smaller areas.
A poorly compacted sub-base causes rock clusters to tilt and settle over months, which destroys the intentional balance you worked to create at placement.
After compacting, lay a 50 mm to 75 mm layer of coarse crushed aggregate, typically 20 mm granite screenings, across the entire excavated area. This layer handles the bulk of your water movement after rainfall. Rake it level, then compact it again before moving to the next layer. Below is a simple reference for the full base stack from bottom to top:
| Layer | Material | Depth |
|---|---|---|
| Sub-base | Compacted earth | Existing ground |
| Drainage aggregate | 20mm crushed granite | 50-75mm |
| Weed barrier | Geotextile fabric | Single layer |
| Gravel surface | Granite chips (10-20mm) | 50-70mm |
Set the weed barrier and compact the sub-base
Once your aggregate layer is flat and compacted, roll out a heavy-duty non-woven geotextile fabric across the entire surface, overlapping each strip by at least 150 mm at the seams. Avoid perforated plastic sheeting here, because it traps water rather than letting it pass through, which defeats the drainage work you just did below it. Pin the fabric edges down with landscape staples every 300 mm along boundaries and seams to stop it shifting when you add gravel on top.
Cut precise openings in the fabric only where rocks will sit permanently, keeping each opening tight to the rock base. This stops weeds from finding the gap and establishing themselves right at the base of your focal stones, which is exactly where they tend to appear first in a tropical garden setting.
Step 5. Place rocks with intention and natural balance
Rock placement is where most people reveal whether they've understood the principles or just memorized the aesthetics. In learning how to design a zen garden, this step separates a garden that feels genuinely calm from one that feels like rocks were dropped in at random. Before you move anything into position, handle each rock to understand its weight distribution, its natural grain, and which face reads best from your established viewing point. The rock should look like it was always there, not like it was delivered yesterday.
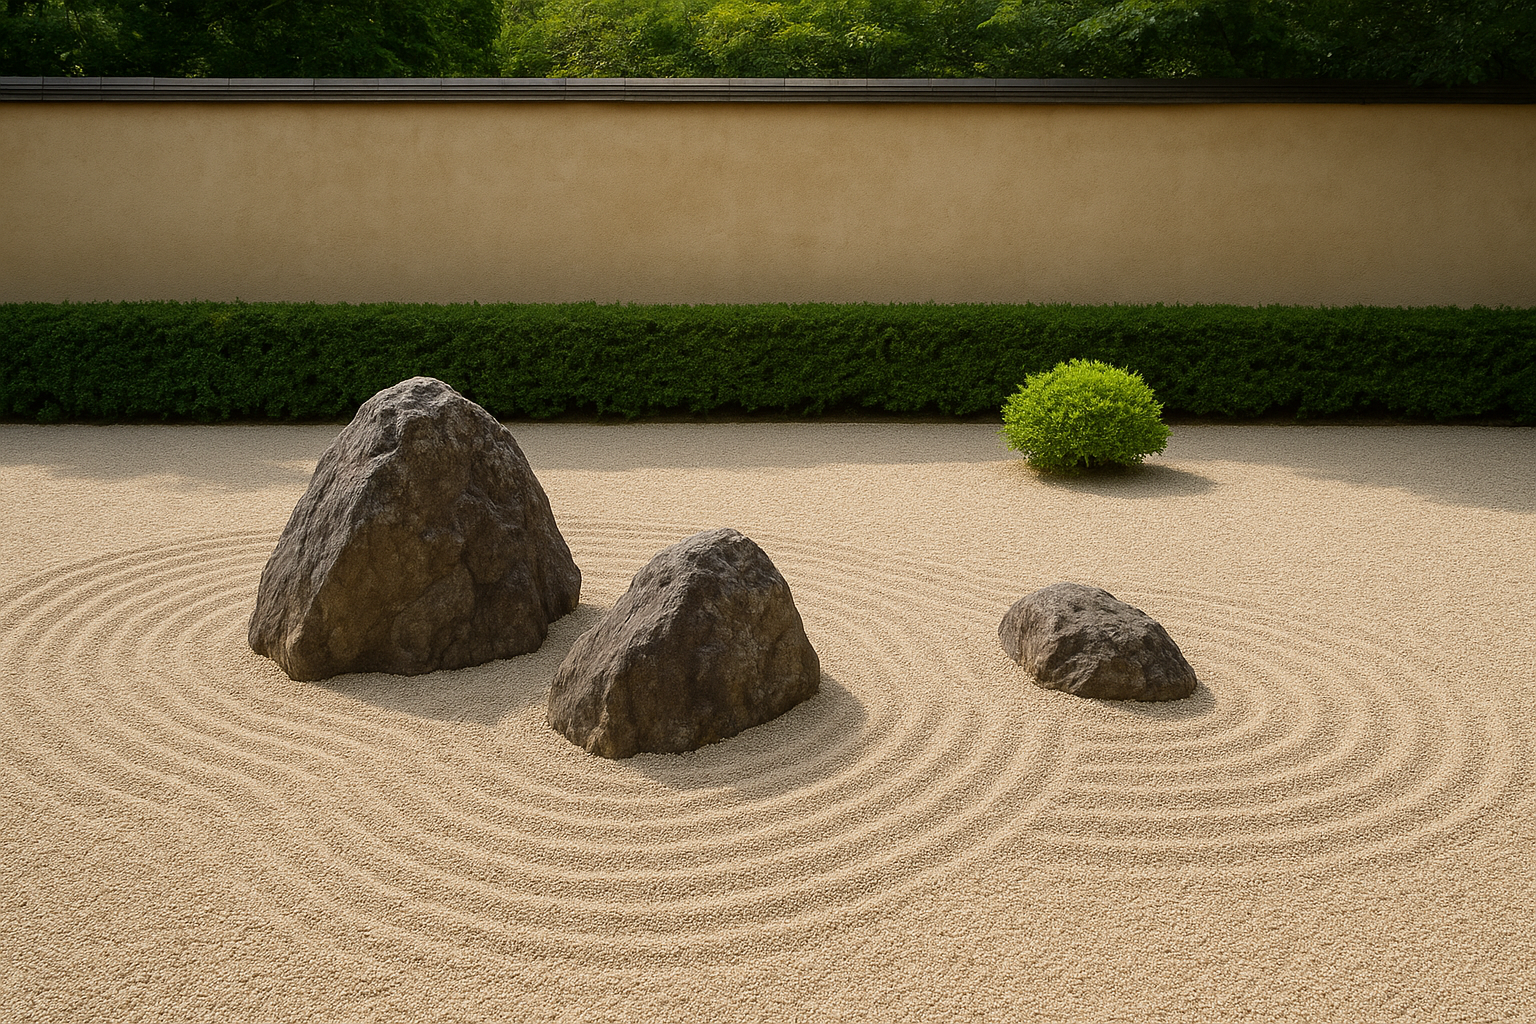
Use odd numbers and the triangle principle
Groups of three rocks form the foundational unit in traditional karesansui composition, and this is the arrangement you should build your primary focal point around. Place your largest rock first, setting it firmly so that roughly one-third of its total height sits below the gravel surface. This burial depth is critical because it makes the rock read as rooted, not propped. Then position your two supporting rocks at different distances and angles from the main stone, forming a rough triangle when viewed from your fixed vantage point.
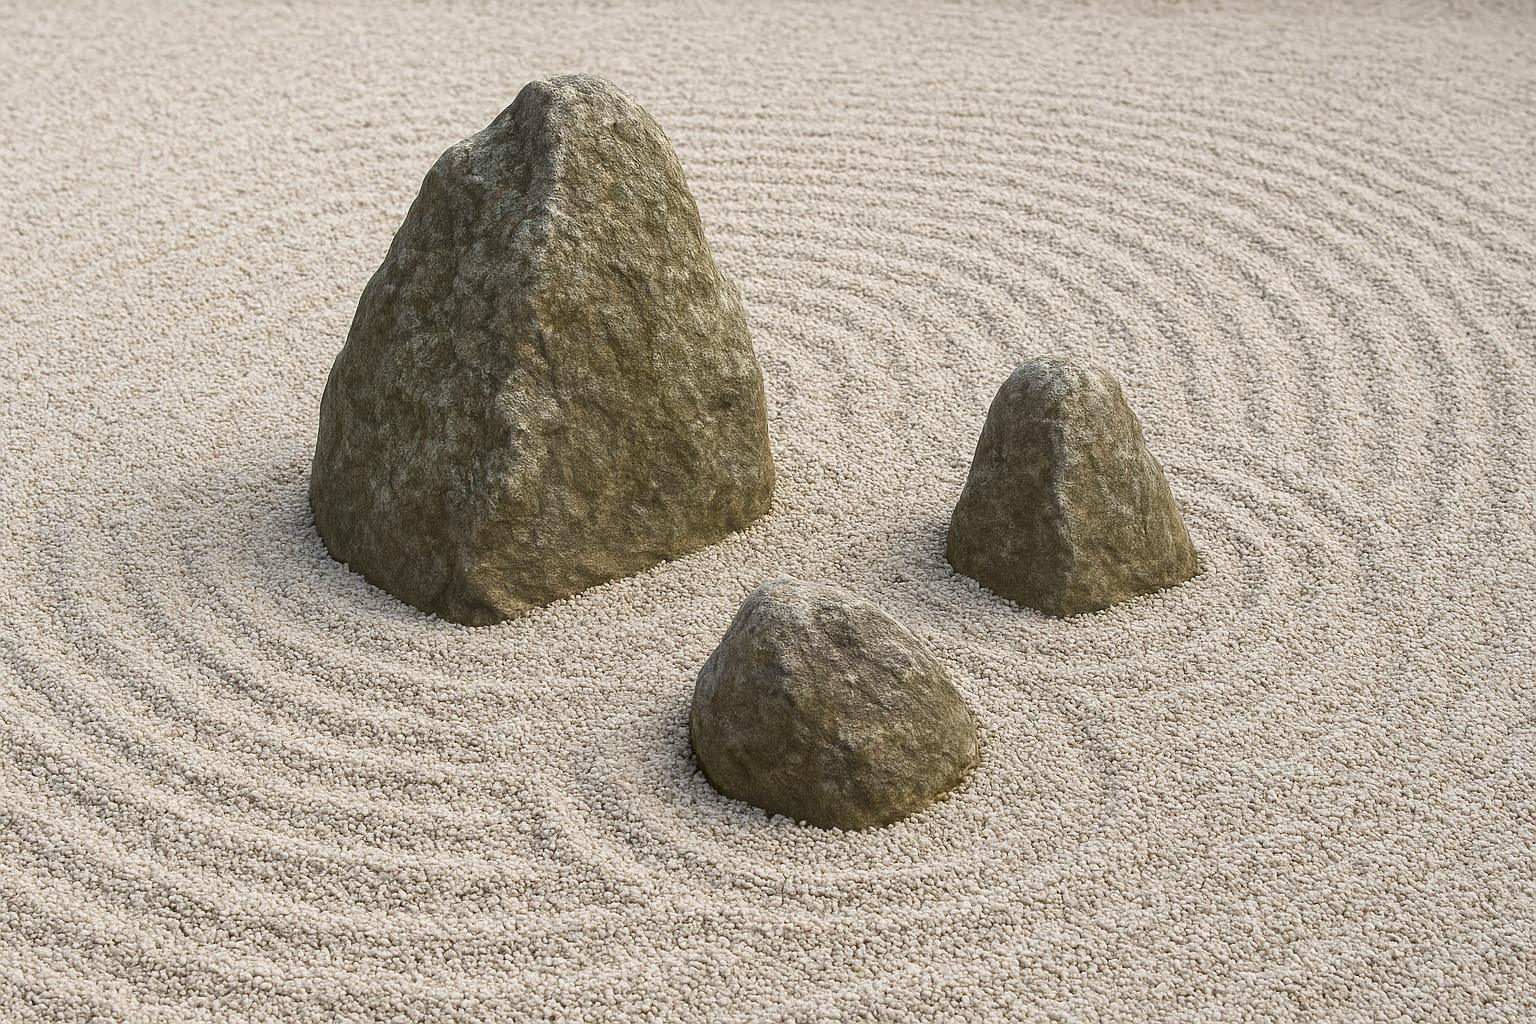
No two rocks in a group should be the same height, the same distance from the viewer, or rotated to face the same direction.
Here is a simple reference for placing a three-rock primary group:
| Rock | Relative size | Burial depth | Angle from viewer |
|---|---|---|---|
| Main (anchor) | Largest | 30-35% of height | Slightly turned left or right |
| Secondary | Medium | 20-25% of height | Set back and offset |
| Accent | Smallest | 15-20% of height | Placed to close the triangle |
Set each rock so it looks buried, not placed
Rocks that sit on the surface rather than in it will always look artificial, no matter how good the gravel patterns around them are. For each rock, dig a pocket into your aggregate base layer that matches the natural flat or low point of the rock's underside. Place the rock into that pocket, check the view from your seating position, then backfill firmly around the base with a mix of your aggregate and compacted earth so the rock cannot tilt or shift over time.
Resist moving rocks repeatedly once they're set. Every time you lift and reset a rock, you disturb the compacted base material beneath it, which creates soft spots that show as surface irregularities once you spread gravel across the area. Commit to each position, check it from your viewing point before backfilling, and move on.
Step 6. Add gravel or sand and rake clean patterns
With your rocks set and your base compacted, you're ready to fill the open ground area with gravel. This step in how to design a zen garden looks simple from the outside, but the spreading, leveling, and raking sequence matters. Rush through it and you'll end up with an uneven surface that makes patterns impossible to maintain. Work through it methodically and you'll have a clean, stable gravel field that holds its form through Malaysia's frequent downpours.
Spread and level your gravel correctly
Pour your granite chips in sections rather than all at once, working from the boundary inward toward your rock groupings. Use a straight-edged screed board or a long piece of timber to pull the gravel flat across each section, checking your finished depth sits between 50 mm and 70 mm throughout. Avoid walking directly on freshly spread gravel because foot pressure creates depressions that show immediately once you start raking. Use a wide plywood sheet laid flat to distribute your weight if you need to reach the center of a large area.
Once the entire surface is level, stand at your viewing point and scan the gravel field from side to side. Any low spots will catch shadow and draw the eye away from your rock focal point. Fill those spots and rescreen before you pick up a rake.
Rake patterns that hold their shape
Start with straight parallel lines across the full gravel field, running them in the direction that reads most naturally from your viewing point, typically away from you toward the background. Use a wooden or bamboo rake with tines spaced 25 mm to 30 mm apart, which creates the clean ridges associated with traditional karesansui patterns without pulling gravel out of place.
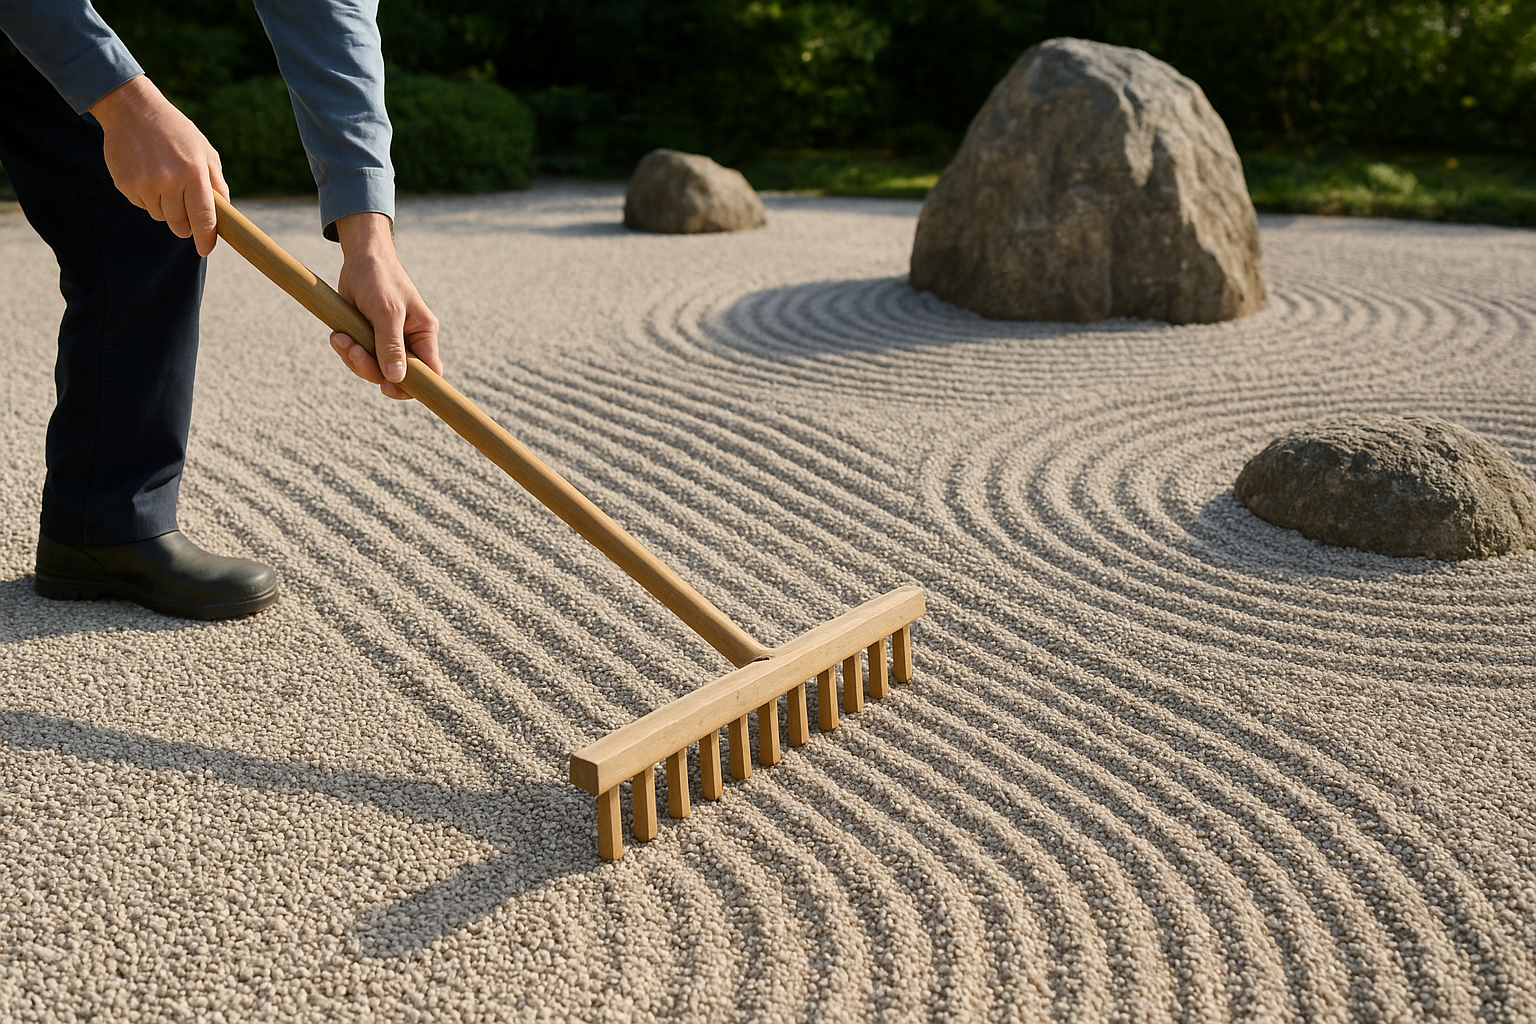
The pattern you rake is not decoration. It represents water movement, and it should flow logically around your rocks the way a current would move around stones in a river.
Once straight lines are established, add concentric curves around your rock groupings by pivoting the rake from a fixed point at the base of each rock cluster. Here are the three most practical raking patterns and when to use each:
| Pattern | Description | Best use |
|---|---|---|
| Straight parallel lines | Even rows across the full field | Large open areas |
| Concentric circles | Rings radiating outward from a rock | Around primary focal rocks |
| Wave pattern | Flowing curves across the full field | Narrow rectangular gardens |
Re-rake after every significant rainfall to restore the ridges, since heavy tropical rain flattens gravel patterns within a single storm if the tine depth was too shallow on your last raking pass.
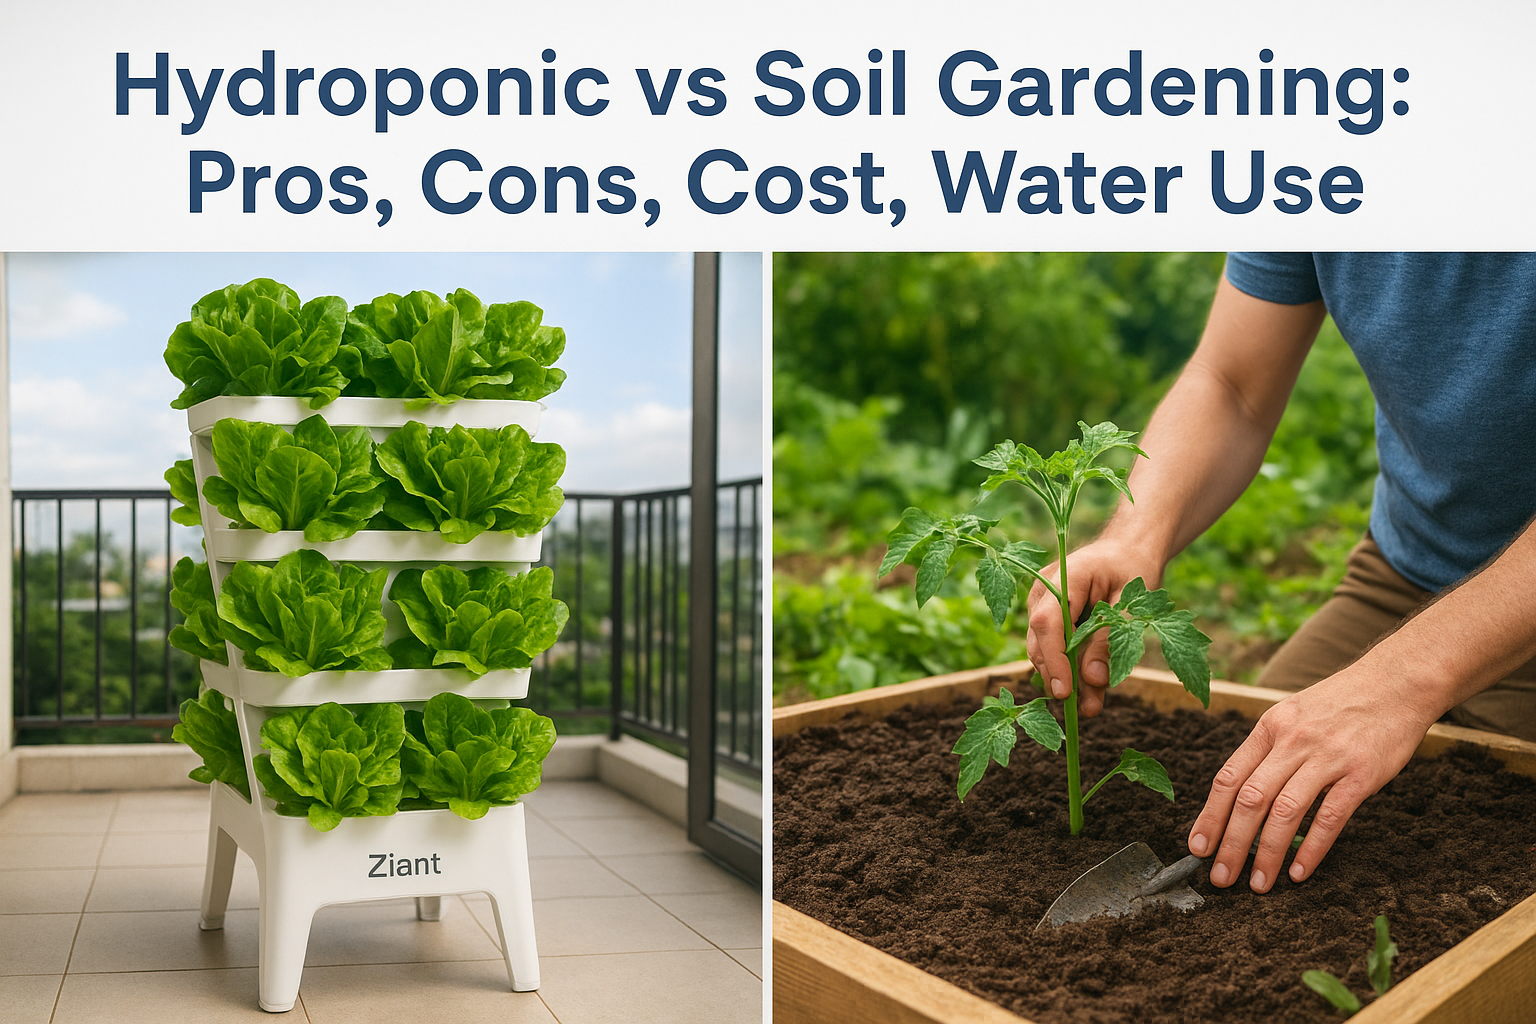
Step 7. Choose calm, low-fuss plants for a Zen look
Plants are optional in a Zen garden, and that point is worth repeating before you head to a nursery. The original karesansui gardens used no plants at all, relying entirely on rocks, gravel, and empty space to carry the composition. When you're working out how to design a zen garden in Malaysia, the honest question is not "which plants should I add?" but "do I need plants here at all?" If a plant doesn't sharpen the composition from your viewing point, leave that space as gravel.
Plants in a Zen garden earn their place through form and texture, not through flower color or visual volume.
Keep the plant count very low
A maximum of two or three plant species across the entire garden keeps the space from shifting into general ornamental planting. Use a single specimen as an accent, not a cluster. Place it asymmetrically, offset toward the background, and let it stand in the gravel field the same way a supporting rock would. Avoid mixing multiple small plants in groups because that creates the kind of busy, competing detail that undermines every calming effect you've worked to build in the previous steps.
Repeated species across a garden read as pattern, which conflicts with the deliberate asymmetry of Zen composition. Choose one species for a structural role, and if you add a second, make sure it serves a completely different function, such as ground-level texture at the base of a wall rather than a second vertical accent competing with your first choice.
Best plant choices for Malaysia's climate
Malaysia's heat and rainfall rule out many traditional Japanese garden plants like Japanese maples and pines, which need cool winters to thrive. Focus on slow-growing, architectural plants that hold their shape without frequent pruning and tolerate humidity without developing fungal issues.
| Plant | Form | Why it works |
|---|---|---|
| Cycas revoluta (Sago Palm) | Symmetrical, structural | Slow growth, strong silhouette |
| Ophiopogon japonicus (Mondo Grass) | Low ground cover | Dense texture, tolerates shade |
| Ficus microcarpa (Chinese Banyan) | Tree, bonsai form | Rootable in containers, dramatic |
| Scindapsus aureus (pruned hard) | Controlled trailing | Works along boundary walls only |
| Bamboo (containerized) | Vertical screen | Use only in containers to limit spread |
Containerizing bamboo is important in Malaysian conditions because it spreads aggressively in open ground and will push through gravel beds and geotextile fabric within one growing season, undoing your base layer preparation entirely. A large ceramic pot keeps the root system controlled while still delivering the vertical silhouette bamboo contributes to a Zen composition.
Step 8. Add paths, privacy, seating, and upkeep habits
The structural elements around your Zen garden, the paths that lead to it, the screening that frames it, and the seat you'll actually use, all belong to the same design decision you've been making since Step 1. Finishing the garden without addressing these elements leaves the space feeling incomplete, like a room with furniture but no door. When you've worked through the whole process of how to design a zen garden, these final layers are what make the space function as a daily retreat rather than a one-time project.
Define paths and seating before you finalize the gravel field
Stepping stone paths into a Zen garden should be placed before you spread your final gravel layer, because adding them afterward disturbs the surface you've already leveled. Use large, flat igneous stones set flush with the gravel surface, keeping the gaps between stones consistent at roughly 400 mm center-to-center, which matches a natural walking stride without forcing awkward steps. Place your seating, whether a timber bench or a simple concrete stool, at your primary viewing point and anchor it firmly so it doesn't shift over time.
The seat isn't an afterthought. It is the destination the entire garden is organized around, so place it before you commit to any other element near the viewing zone.
Build in privacy without adding visual noise
A Zen garden needs a defined visual boundary to separate it from the rest of the outdoor space, but that boundary should recede, not compete. In Malaysia, a simple rendered masonry wall painted in warm grey or off-white works well because it reflects light softly and doesn't introduce color contrast that pulls the eye away from your rock grouping. Avoid decorative fencing styles or anything with repeated patterns along the top, because those details accumulate visual noise at exactly the level your eye scans the background.
Containerized bamboo placed at corners gives vertical presence without requiring a solid structure to build. Keep the containers large enough so they don't look undersized against a full-height wall, and space the plants so their canopies don't overlap.
Set a realistic upkeep schedule
Consistent upkeep is what keeps a Zen garden looking intentional rather than neglected, and in Malaysia's climate, that means building a short routine rather than reacting to problems after they develop. Follow this basic weekly and monthly schedule:
| Frequency | Task |
|---|---|
| After each rainfall | Re-rake gravel patterns, remove fallen debris |
| Weekly | Check rock positions, remove weeds at base of stones |
| Monthly | Trim any plant growth that breaks the silhouette |
| Every 3 months | Inspect geotextile edges and repin loose sections |
Spending 15 minutes after each major rain to re-rake and clear debris protects all the base work you put in during earlier steps and keeps the garden performing the way it was designed to.
Next steps for your Zen garden
You now have a complete, step-by-step framework for how to design a zen garden that holds up under Malaysia's climate conditions. From site selection and base preparation through to rock placement, gravel raking, and plant choices, every decision in this guide connects back to the same core principle: remove what doesn't belong and give full attention to what remains. That discipline is what separates a garden that genuinely calms you from one that just looks calm in photos.
The next move is to walk your outdoor space with fresh eyes. Pick your viewing point first, then let that anchor every material and placement decision that follows. If you want professional help translating these principles into a design built for your specific site, our team at Konzept Garden works on residential and commercial projects across Malaysia. You can also explore our Zen Bio Koi Pond if water is part of your vision.
