
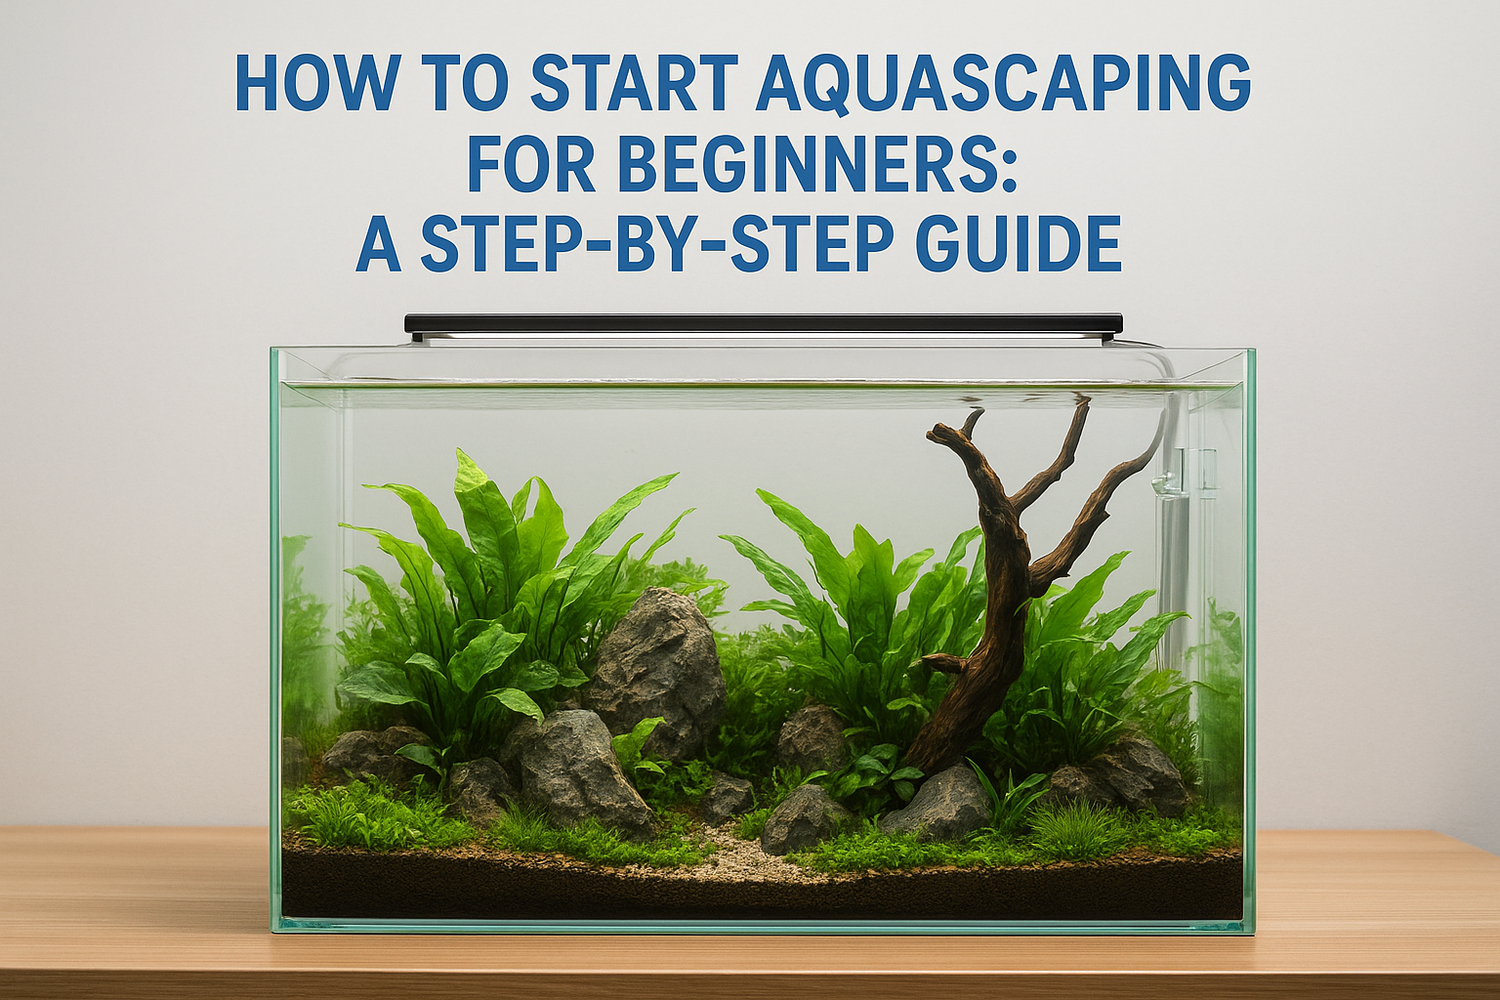
Staring at an empty glass tank and a bag of gravel is intimidating if you have never touched aquascaping for beginners before. You want a tank that looks like a slice of a riverbed or forest floor, not a cluttered fish bowl with plastic plants. The good news is that a planted aquarium follows the same design logic as a garden: light, structure, and the right plant choices matter more than expensive equipment.
This guide gives you the actual steps: picking a tank size, choosing a substrate and lighting setup that won't leave you fighting algae in week two, laying out hardscape with rocks and driftwood, and selecting easy beginner plants that forgive mistakes while your tank finds its balance. You'll also learn how to cycle the water properly before adding any fish or shrimp.
At Konzept Garden, we design outdoor koi ponds and water features for a living, so we know how much a well-planned water layout changes a space, indoors or out. Use this step-by-step guide to build your first aquascape with confidence, and treat any early mistakes as part of learning how living water gardens actually work.
What is aquascaping and why it's worth trying
Aquascaping is the art of arranging live plants, rocks, wood, and substrate inside a tank to create a miniature underwater landscape. Think of it as garden design shrunk into glass: you're working with the same principles of focal points, layering, and negative space that a landscaper uses outdoors, except your canvas is filled with water and lit from above. The hobby grew out of Japanese and European fishkeeping circles in the 1990s, and it now spans everything from a small desktop bowl with moss to competition tanks that mimic entire river valleys. If you've ever admired a lush, forest-like fish tank and assumed it needed a professional budget, that's not true. Aquascaping for beginners is entirely doable with a modest tank, basic lighting, and a handful of hardy plants.
Unlike a standard fish tank where decorations sit on top of gravel, an aquascape treats the plants and hardscape as the main event, with fish and shrimp playing a supporting role. That shift in priorities changes how you shop, how you set up the tank, and how you maintain it week to week. You're not just keeping animals alive, you're cultivating a living planted aquarium that grows and changes shape over months, much like a garden bed fills in after a season.
Why beginners find it rewarding
People get hooked on aquascaping because it rewards patience in a way few other hobbies do. A tank planted on a Sunday afternoon looks sparse and awkward for the first few weeks, then slowly fills in as stems branch out and carpeting plants spread across the substrate. Watching that transformation teaches you more about plant biology, water chemistry, and light than any care sheet could. It's also genuinely calming; studies on aquarium viewing, including research summarized by the National Institutes of Health, have linked watching aquatic environments to lower heart rate and reduced stress. For many hobbyists, that's reason enough to keep a tank running year-round.
A planted tank rewards patience more than money, and that's exactly why beginners can succeed at it.
The building blocks you'll be working with
Before you buy anything, it helps to understand the handful of elements every aquascape shares, regardless of style or budget. Grasping these now saves you from buying the wrong gear later.
- Hardscape: rocks, driftwood, and stones that form the skeleton of your layout
- Substrate: the nutrient-rich soil or gravel that anchors roots and feeds plants
- Lighting: the energy source that drives photosynthesis and plant growth
- CO2 and nutrients: supplemental inputs that speed up growth in more advanced setups
- Livestock: fish, shrimp, or snails added only after the tank has stabilized
Getting comfortable with these five categories is really the whole game. Every step in this guide builds on one or more of them, from the substrate you pour on day one to the CO2 decisions you might make months down the line once you're hooked.
Why it's worth trying over a standard fish tank
Setting up a plain fish tank is faster, sure, but it skips the part of the hobby that actually keeps people engaged long term. Real plants filter ammonia and nitrate far more efficiently than plastic decorations ever could, which means a well-planted tank often needs less frequent water changes once it matures. Xolume also gets a boost: dense planting gives shrimp and small fish places to hide, graze, and breed, so you see more natural behavior than in a bare tank. Volume of upkeep does shift toward trimming and dosing rather than scrubbing algae off fake plants, but most beginners find that trade worthwhile once they see the results. Trying aquascaping, even at a small scale, gives you a living centerpiece that keeps evolving instead of a static display you set up once and ignore.
Step 1. Choose your aquascaping style
Before you touch a bag of substrate, decide what kind of underwater scene you actually want to build. Aquascaping styles differ in how much hardscape they use, how many plant species you juggle, and how much trimming they demand each week. Picking a style first keeps you from buying mismatched rocks, wood, and plants that fight each other visually once the tank is full of water.
The main styles worth considering
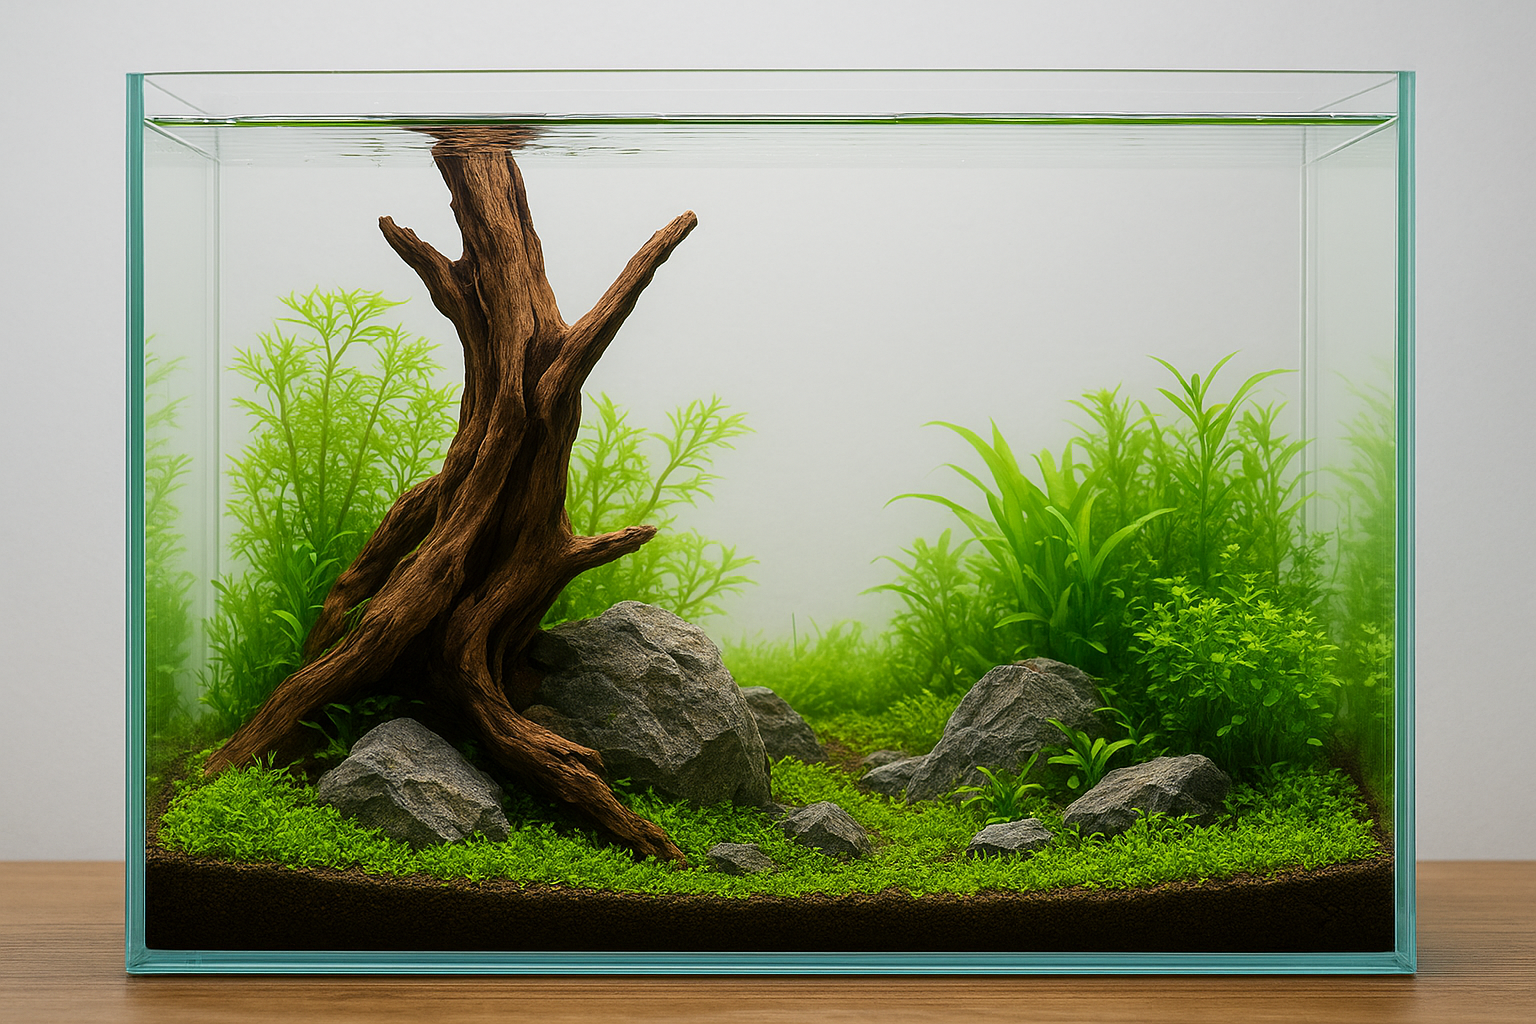
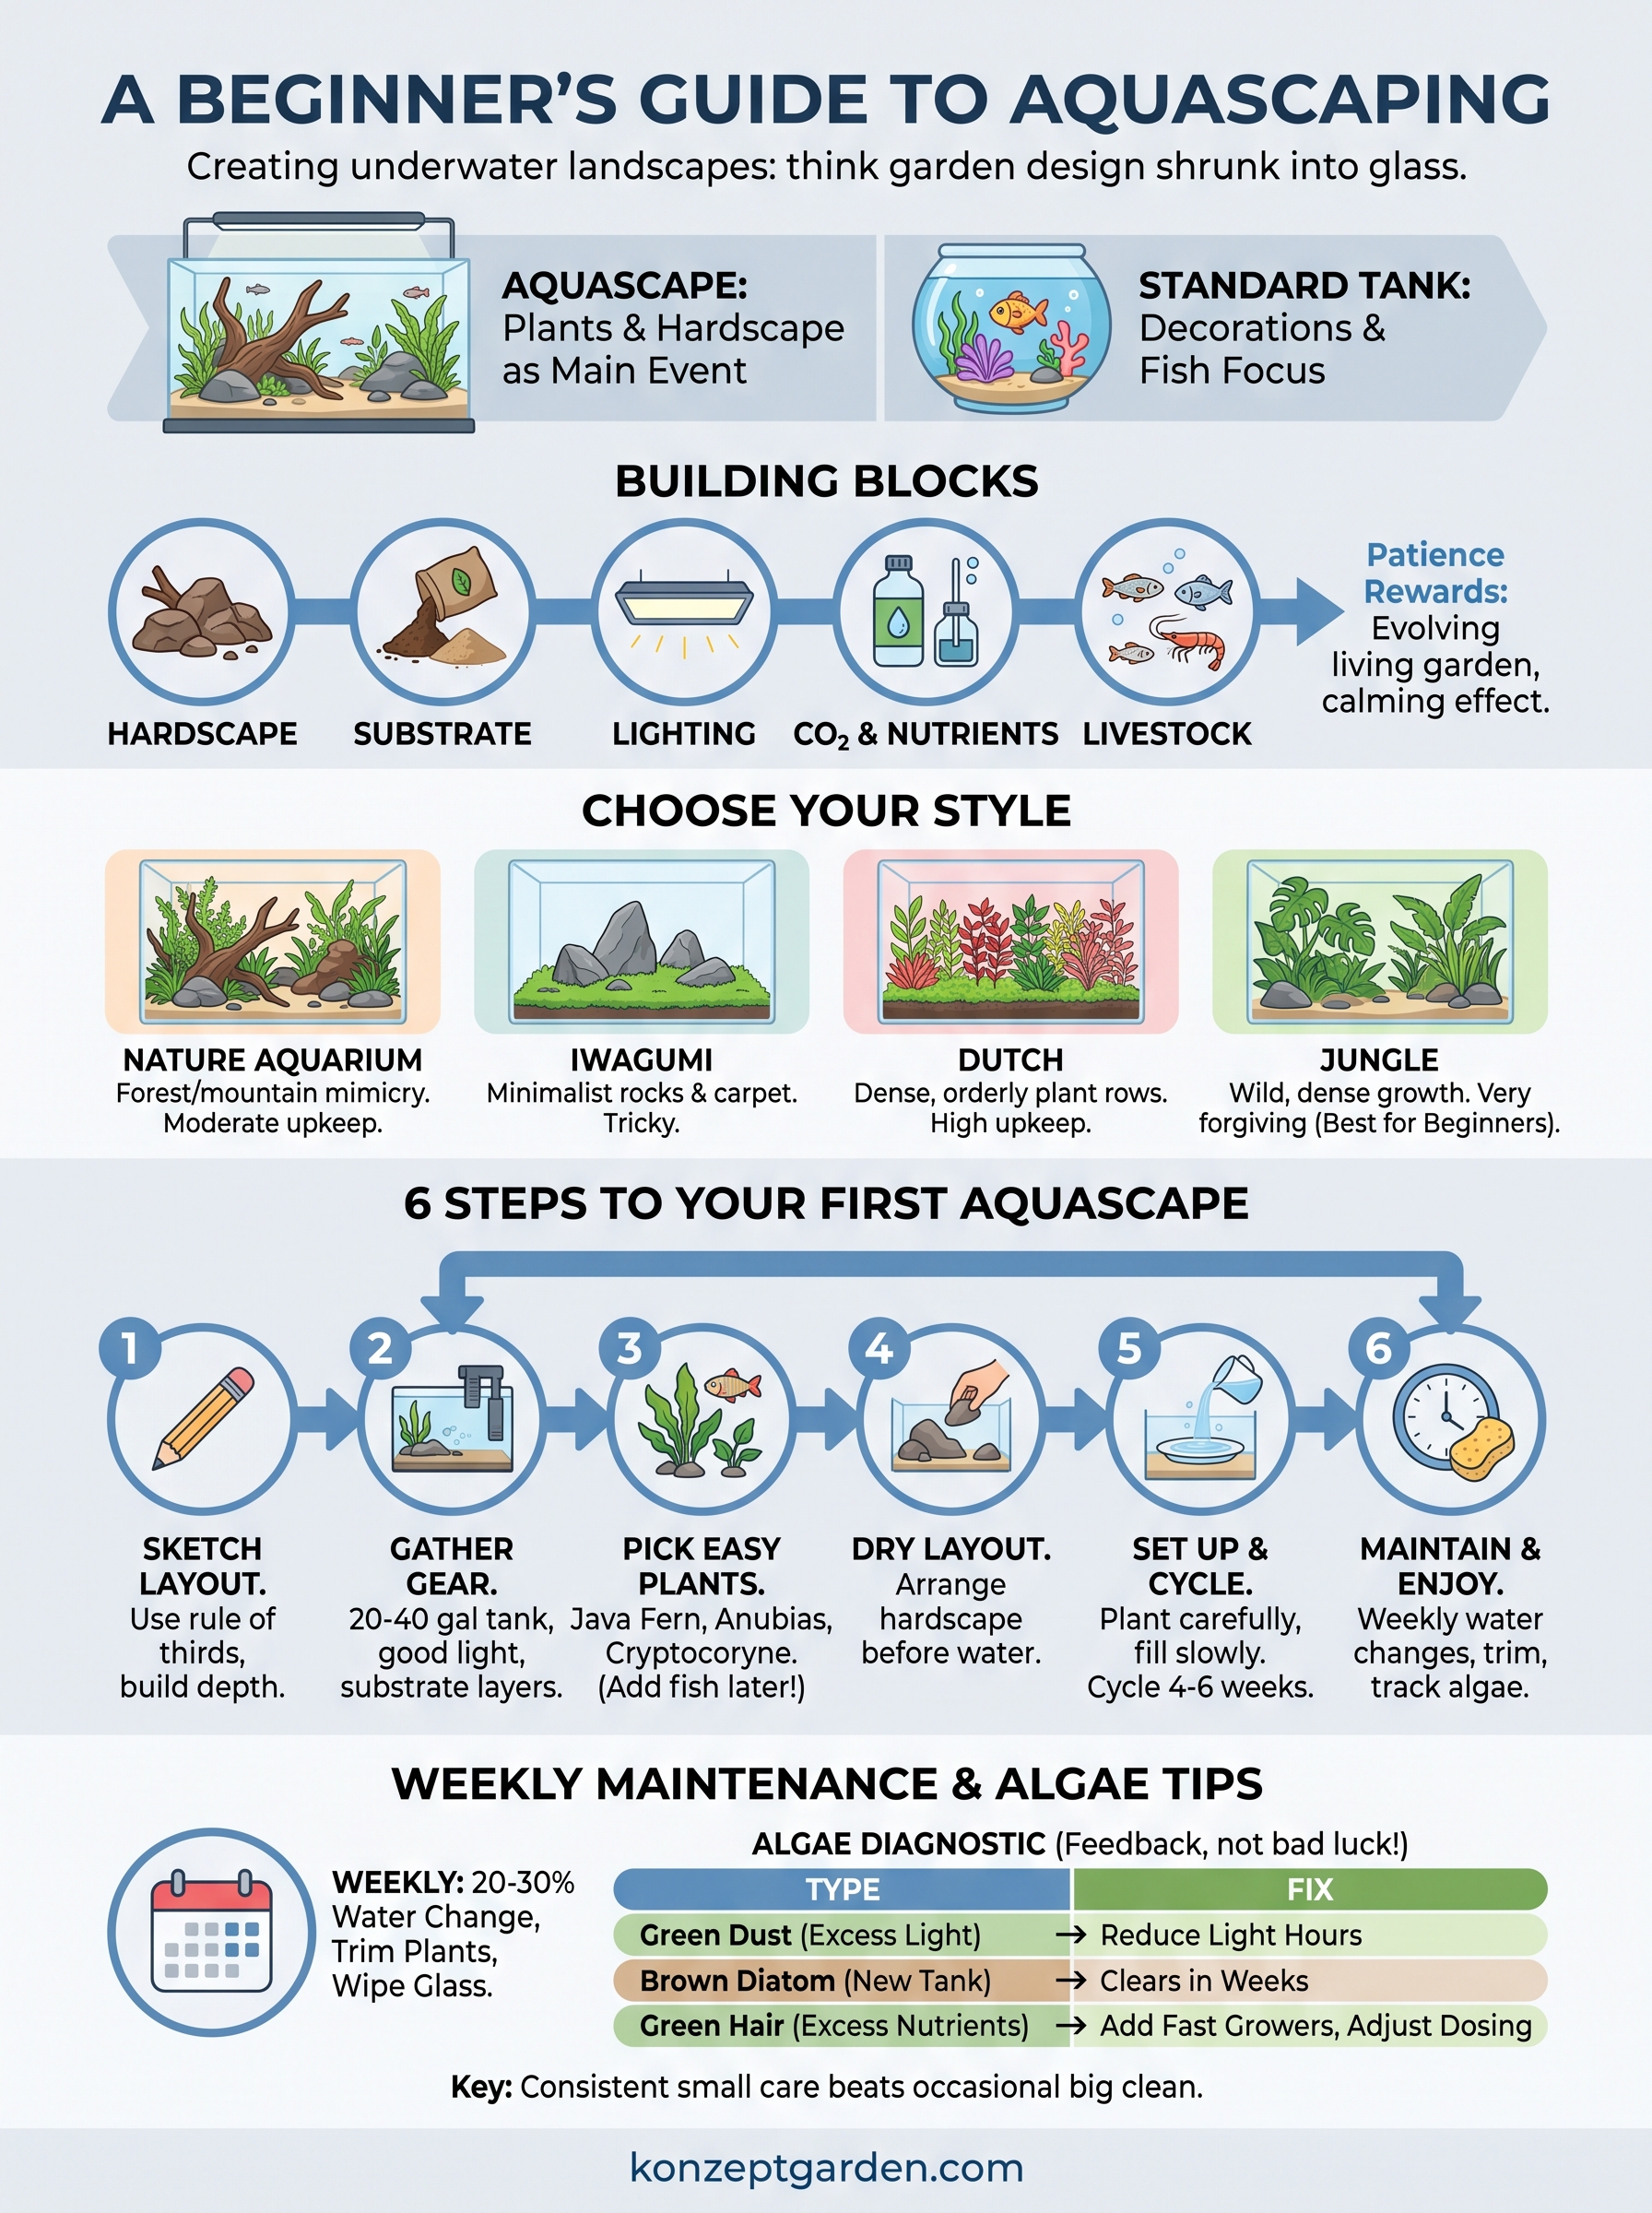
Nature Aquarium style, popularized by the late Takashi Amano, blends driftwood and stone into layouts that mimic forests or mountain valleys, using a mix of stem and carpet plants. Iwagumi is a stripped-down version of that same philosophy, relying on odd numbers of stones (usually three or five) as the entire hardscape, with a single carpeting plant filling the rest of the tank. Dutch style skips rocks and wood almost entirely and instead groups colorful stem plants in dense rows, closer to a terrestrial flower bed than a landscape. Jungle style is the most forgiving: dense, fast-growing plants are left to sprawl with minimal pruning, which hides small mistakes while you learn.
| Style | Hardscape use | Plant variety | Weekly upkeep | Good for beginners? |
|---|---|---|---|---|
| Nature Aquarium | High | Medium-high | Moderate | Yes, with patience |
| Iwagumi | High (stones only) | Low (1-2 species) | Low, but strict trimming | Tricky, low margin for error |
| Dutch | Low | High | High (frequent trimming) | Not ideal for a first tank |
| Jungle | Low-medium | Medium | Low | Yes, very forgiving |
Jungle and simplified Nature Aquarium layouts are the two styles most new hobbyists succeed with on their first attempt.
Pick a style with room for error, not the one that looks best on a competition photo.
Match the style to your tank size and time
Small tanks under 20 gallons suit Iwagumi or jungle style because there's less real estate to fill and fewer species to balance. Larger tanks give you room for the layered, multi-species look of a full Nature Aquarium setup, but that layout also demands more consistent trimming, dosing, and light management to keep the different growth rates in check. Think honestly about how many minutes a week you'll actually spend on maintenance; a jungle-style tank with hardy plants like java fern and anubias survives a skipped week far better than a Dutch layout does. Once you've settled on a style, keep a reference photo or sketch nearby. It'll guide every equipment and plant decision in the steps that follow, so you're not improvising once the tank is full of water.
Step 2. Gather your tank, substrate and equipment
Once you know your style, shop with a list instead of wandering the aisles of a pet store. A beginner aquascape kit doesn't need to be expensive, but every piece should match the layout you sketched in Step 1. Skimping on lighting or grabbing the wrong substrate now means redoing work later, so buy once and buy right.
Choosing the right tank size and shape
Rectangular tanks between 20 and 40 gallons give you enough depth for layered hardscape without becoming unwieldy to maintain. Anything smaller than 10 gallons swings in temperature and water chemistry too fast for a first attempt, and anything much larger adds cost and weight you don't need yet. Look for a rimless glass tank if your budget allows; the clean edges make photos and viewing angles far more forgiving than a tank with a thick plastic frame cutting across your composition.
Building your substrate layers
Substrate does double duty: it anchors roots and feeds your plants for months. Most beginner layouts use two layers, a nutrient-rich base topped with a finer, more decorative cap.
| Layer | Material examples | Depth | Purpose |
|---|---|---|---|
| Base layer | Aqua soil, root tabs | 1-2 inches | Feeds roots, buffers pH slightly acidic |
| Cap layer | Fine gravel, sand | 0.5-1 inch | Holds base in place, controls final look |
Pour the base layer first, slope it higher toward the back of the tank, then add the cap layer on top before you add any water.
Get the substrate right before you fill the tank; you can't fix it easily once plants and water are in.
Lighting, filtration and CO2 basics
Quality lighting drives everything else in a planted tank, so don't cut corners here even if you cut them elsewhere. A full-spectrum LED fixture rated for planted tank aquascaping, running 6 to 8 hours a day on a timer, gives most beginner plants enough energy without triggering algae blooms from excess light hours. Filtration keeps water moving and clear; a simple hang-on-back or small canister filter handles a 20 to 40 gallon tank without dominating the layout.
Here's the core equipment list to have on hand before planting day:
- Rimless or standard glass tank, 20-40 gallons
- Full-spectrum LED light with a timer
- Hang-on-back or canister filter
- Aqua soil base substrate plus a sand or gravel cap
- Heater if your room temperature swings below 72°F
- Optional CO2 diffuser kit for faster growth later
Gathering everything upfront means Step 3, choosing plants and fish, becomes a much simpler decision.
Step 3. Pick beginner-friendly plants and fish
Now that the tank and substrate are sorted, it's time to choose living things that actually survive your first few months of mistakes. Beginner aquascape plants need to tolerate inconsistent dosing, occasional light swings, and the odd missed water change without melting overnight. Fish and shrimp come later, once the tank has cycled, so treat this step mainly as a plant shopping list with a short note on livestock to plan around.
Plants that forgive early mistakes
Stick to species that grow slowly enough to manage but hardily enough to bounce back from stress. Java fern, anubias, and various mosses attach to driftwood or rock instead of rooting in substrate, which makes them nearly impossible to uproot by accident. Cryptocoryne species root well and tolerate lower light, while dwarf hairgrass or monte carlo work as beginner carpet plants if your lighting is strong enough to support them.
| Plant | Placement | Light needs | Difficulty |
|---|---|---|---|
| Java fern | Midground, attached to wood | Low-medium | Very easy |
| Anubias | Foreground/midground, attached | Low | Very easy |
| Cryptocoryne | Foreground/midground, rooted | Low-medium | Easy |
| Dwarf hairgrass | Foreground carpet, rooted | Medium-high | Moderate |
| Java moss | Anywhere, attached | Low | Very easy |
Choose plants that survive neglect first, and chase the fussy carpet species once your tank is stable.
Fish and shrimp to add once the tank stabilizes
Hold off on livestock until your nitrogen cycle finishes, which usually takes four to six weeks of dosing ammonia and testing water. Rushing this step is the single most common reason beginner tanks crash. Once ammonia and nitrite both read zero, ease in hardy species gradually rather than dumping the whole stocking list in at once.
- Neon or ember tetras for peaceful schooling activity
- Cherry shrimp for algae grazing and easy breeding
- Nerite snails to control algae without reproducing out of control
- Amano shrimp if you want a larger, hardworking algae cleaner
Growing tanks reward restraint here. Adding fewer fish than you think you need gives plants time to establish root systems and biofilm time to build, both of which keep water quality stable long after the initial setup phase ends.
Step 4. Sketch a layout using design principles
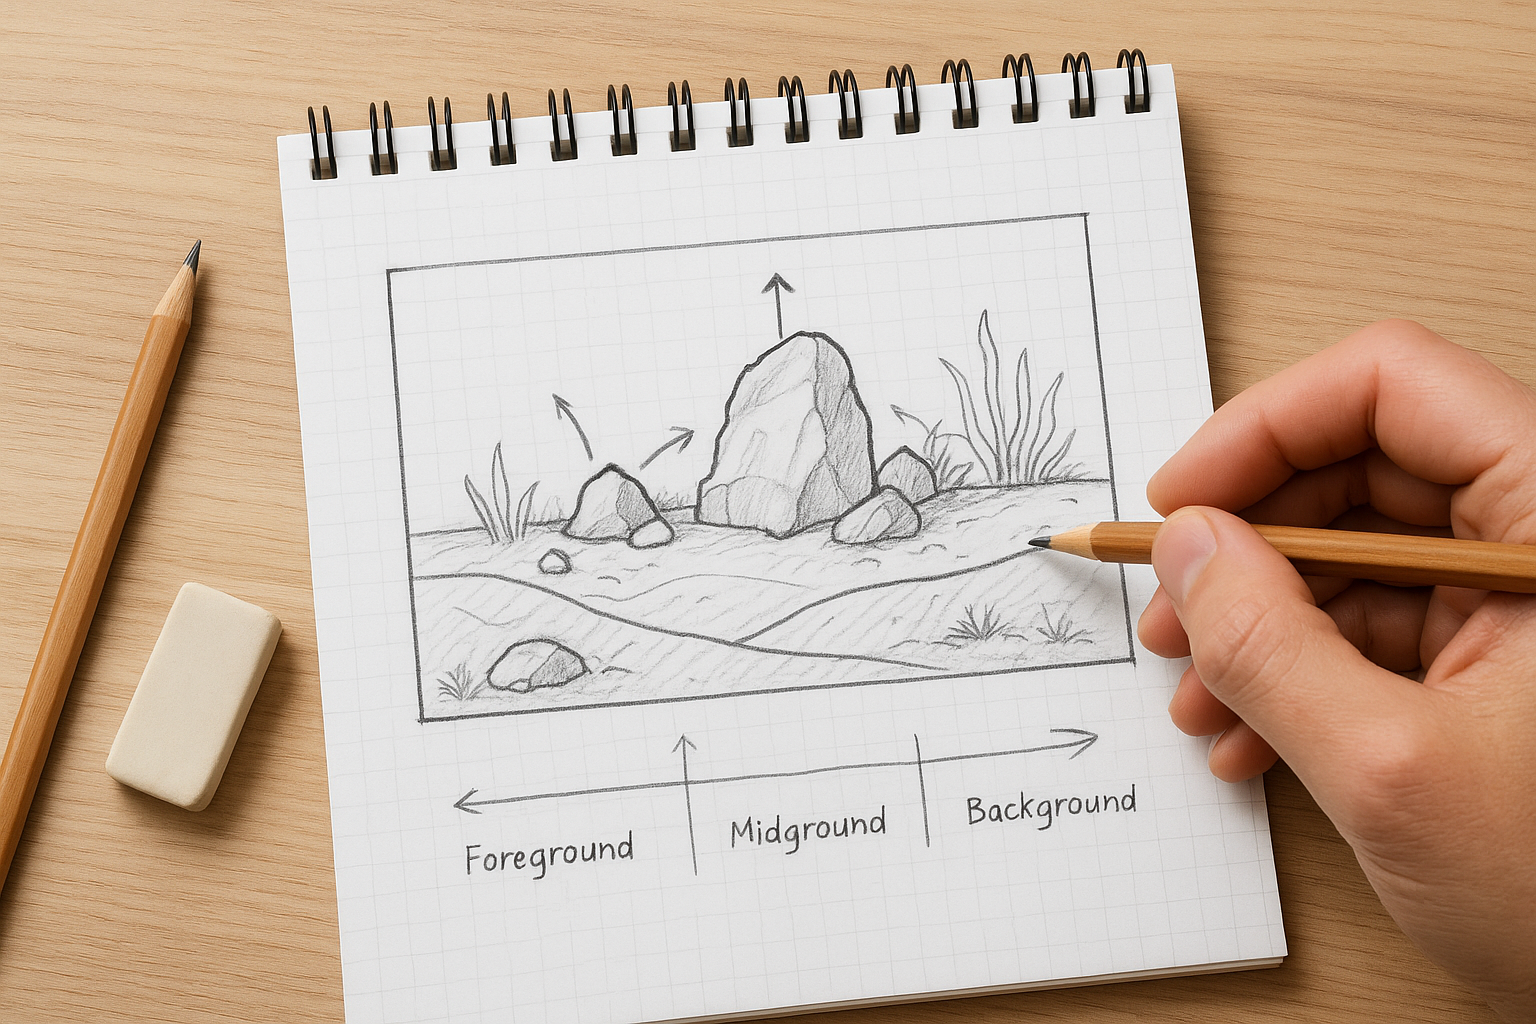
Grab a pencil before you touch a single rock. A rough sketch on paper stops you from cramming every hardscape piece you bought into one corner, and it forces you to decide where the eye should land before the tank is full of water and impossible to rearrange. Aquascape layout planning doesn't need artistic skill; a few boxes and arrows showing where hardscape, substrate slopes, and plant zones go is enough to guide the whole build.
Use the rule of thirds and a clear focal point
Borrow the same trick photographers and garden designers use: divide your tank into a 3x3 grid and place your main hardscape piece, usually the largest rock or piece of driftwood, on one of the four intersection points rather than dead center. Centered layouts read as static and a little lifeless, while an off-center focal point pulls the eye across the whole scene. Pick one dominant element as your focal point, then arrange everything else, smaller stones, plant clusters, secondary wood, to support it rather than compete with it.
A tank with one clear focal point looks intentional; a tank with five looks cluttered.
Build depth with layering and negative space
Real landscapes have foreground, midground, and background, and your tank needs the same layering to avoid looking flat against the glass. Slope your substrate higher at the back, plant taller stems there, and keep the front third low with carpeting plants or bare substrate so the whole scene doesn't feel crowded. Leaving open water space, what aquascapers call negative space, actually makes the planted areas look more deliberate, the same way an empty corner in a garden bed draws attention to the plants around it.
When sketching, work through this checklist before you commit to placement:
- Mark your focal point on a third-line intersection, not the center
- Draw a substrate slope rising from front to back
- Block out three depth zones: foreground, midground, background
- Leave at least one open water zone as negative space
- Group hardscape in odd numbers (three or five pieces) for a more natural look
Translate the sketch into a dry layout
Once the sketch feels balanced, do a dry run inside the empty tank before adding substrate or water. Move rocks and driftwood around until the arrangement matches your drawing, stepping back every few minutes to view it from normal seating height rather than standing over the tank. Photograph the dry layout from the front; it's much easier to spot an awkward gap or lopsided pile in a photo than while you're hovering inches from the glass. This dry-fit stage is your last cheap chance to change your mind before Step 5, when substrate and water make every adjustment ten times harder.
Step 5. Set up and plant your aquascape
Setting up an aquascape for beginners is where your sketch finally becomes real, so slow down and work in the right order: hardscape, substrate, planting, then water. Rushing this stage clouds your water, floats your plants, and undoes the layout you spent time planning on paper.
Filling the tank without disturbing your layout
Place a plate or a folded plastic bag on top of the substrate before you pour in water, and aim the stream directly onto that surface rather than the substrate itself. This one trick prevents the classic beginner mistake of blasting a crater through your carefully sloped soil. Fill slowly to about a third of the tank height first, add your rooted plants while there's still easy access from above, then top off the rest of the water once planting is done. Treat tap water with a dechlorinator before it touches the tank, since chlorine and chloramine kill the beneficial bacteria you're about to cultivate.
Planting techniques for different plant types
Different plants need different handling, and mixing up the method is a common reason new stems melt within days.
| Plant type | Planting method | Common mistake to avoid |
|---|---|---|
| Stem plants (rotala, hygrophila) | Push 1-2 inches into substrate in small clusters | Planting single stems too far apart |
| Rooted plants (cryptocoryne) | Bury roots fully, keep crown above substrate | Burying the crown, causing rot |
| Attached plants (anubias, java fern) | Tie to wood or rock with thread or glue | Burying the rhizome in substrate |
| Carpet plants (dwarf hairgrass) | Plant small tufts a few inches apart | Planting one dense clump instead of spreading out |
Use tweezers for anything smaller than a fingertip; your fingers alone will uproot half the carpet trying to plant the other half.
Get the planting method right for each species, and you'll skip weeks of melting, rotting, and replanting.
Cycling before you add fish
Once everything is planted and the water is clear, resist the urge to add fish immediately. Bacteria that break down ammonia into safer nitrate haven't established yet, and a fresh tank without them poisons livestock within days. Dose the tank with pure ammonia to roughly 2 ppm, then test daily with a liquid test kit until ammonia and nitrite both read zero, which typically takes four to six weeks. Only then is your planted aquarium biologically ready for the fish and shrimp you picked out in Step 3.
Step 6. Maintain water quality and control algae
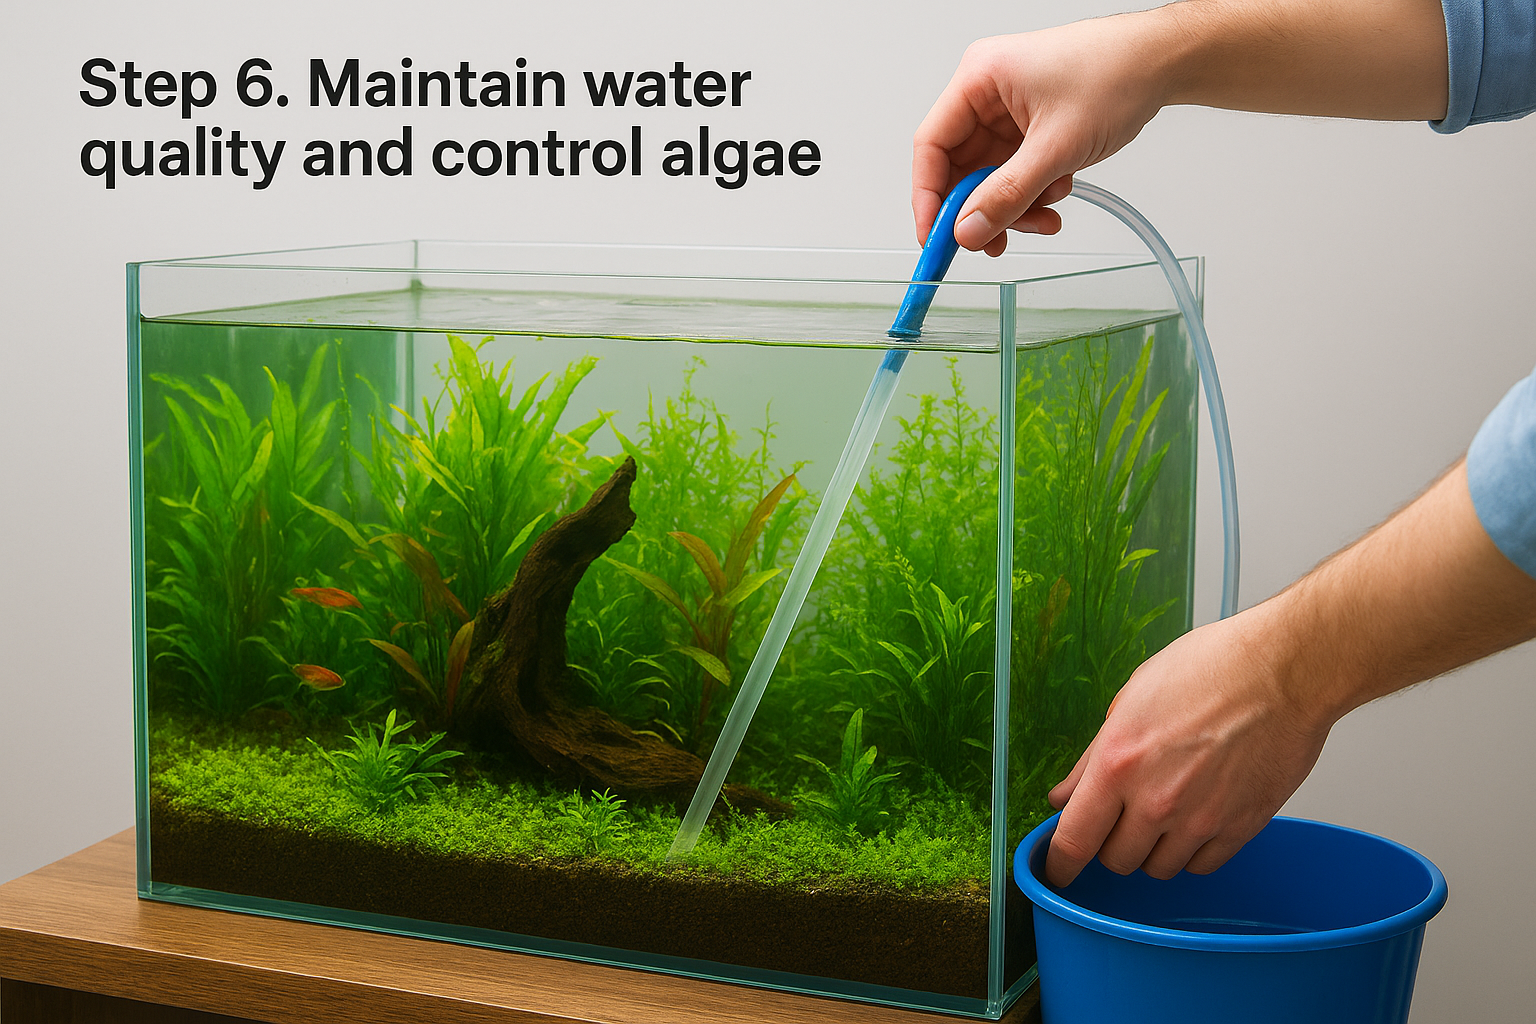
Once your tank has cycled and the initial planting stress fades, maintenance becomes a routine rather than a project. Weekly aquarium maintenance is what separates a tank that thrives for years from one that crashes after a few months, and most of it takes less time than washing dishes. Skipping water changes is the single fastest way to undo everything you built in Steps 1 through 5, so treat this step as non-negotiable rather than optional upkeep.
Build a weekly maintenance routine
Consistency matters more than intensity here. A short list done every week beats an exhausting overhaul done once a month.
- Change 20-30% of the water weekly, matching temperature to avoid shocking plants and fish
- Trim stem plants before they reach the surface and block light to lower growth
- Remove dead or decaying leaves that cloud water and spike ammonia
- Wipe glass and clean filter media in old tank water, never tap water, to protect bacteria colonies
- Test ammonia, nitrite, and nitrate monthly once the tank is established
Gardeners will recognize this pattern immediately: it's the same logic as deadheading spent blooms and topping up mulch, just underwater.
Consistent small maintenance beats occasional deep cleans every time.
Reading algae as a diagnostic tool
Algae isn't bad luck, it's feedback. Different types point to different imbalances, and learning to read them saves you from guessing.
| Algae type | Common cause | Fix |
|---|---|---|
| Green dust/film | Excess light hours | Reduce lighting to 6-7 hours daily |
| Brown/diatom algae | New tank, low light adaptation | Usually clears on its own in weeks |
| Black beard algae | Inconsistent CO2 or nutrients | Stabilize dosing schedule |
| Green hair algae | Excess nutrients, understocked plants | Add fast growers, reduce dosing |
Rather than reaching for chemical treatments first, adjust the root cause: light duration, nutrient dosing, or plant mass competing for the same resources.
Keep a light maintenance log
Writing down what you change each week, whether that's trimming length, dosing amount, or light duration, turns guesswork into pattern recognition within a month or two. According to research summarized by the U.S. Environmental Protection Agency on nutrient cycles in aquatic systems, algae blooms almost always trace back to an excess of light or nutrients relative to plant uptake, which is exactly the balance your log will help you spot. Within two or three months, most beginners can glance at a tank and diagnose an algae bloom before it spreads, the same instinct an experienced gardener develops for spotting pests before they take over a bed.
Enjoying your first planted aquarium
Your first aquascape won't look like a magazine spread in week one, and that's fine. Melting leaves and cloudy water are part of the process, not signs of failure, and every hobbyist you admire online killed a few plants before their tank found balance. Give it a few months of consistent trimming and dosing, and the layout you sketched on paper starts to look genuinely intentional.
Gardeners already understand this rhythm better than most beginners realize: plant, wait, adjust, repeat. If arranging rock, wood, and greenery into a living scene appeals to you underwater, chances are you'd enjoy applying that same eye outdoors too. Konzept Garden builds water features that carry the same layered, natural look into a garden setting, including the Zen Bio Koi Pond, so once your tank is thriving, reach out and let's talk about bringing that same living water feature into your backyard.