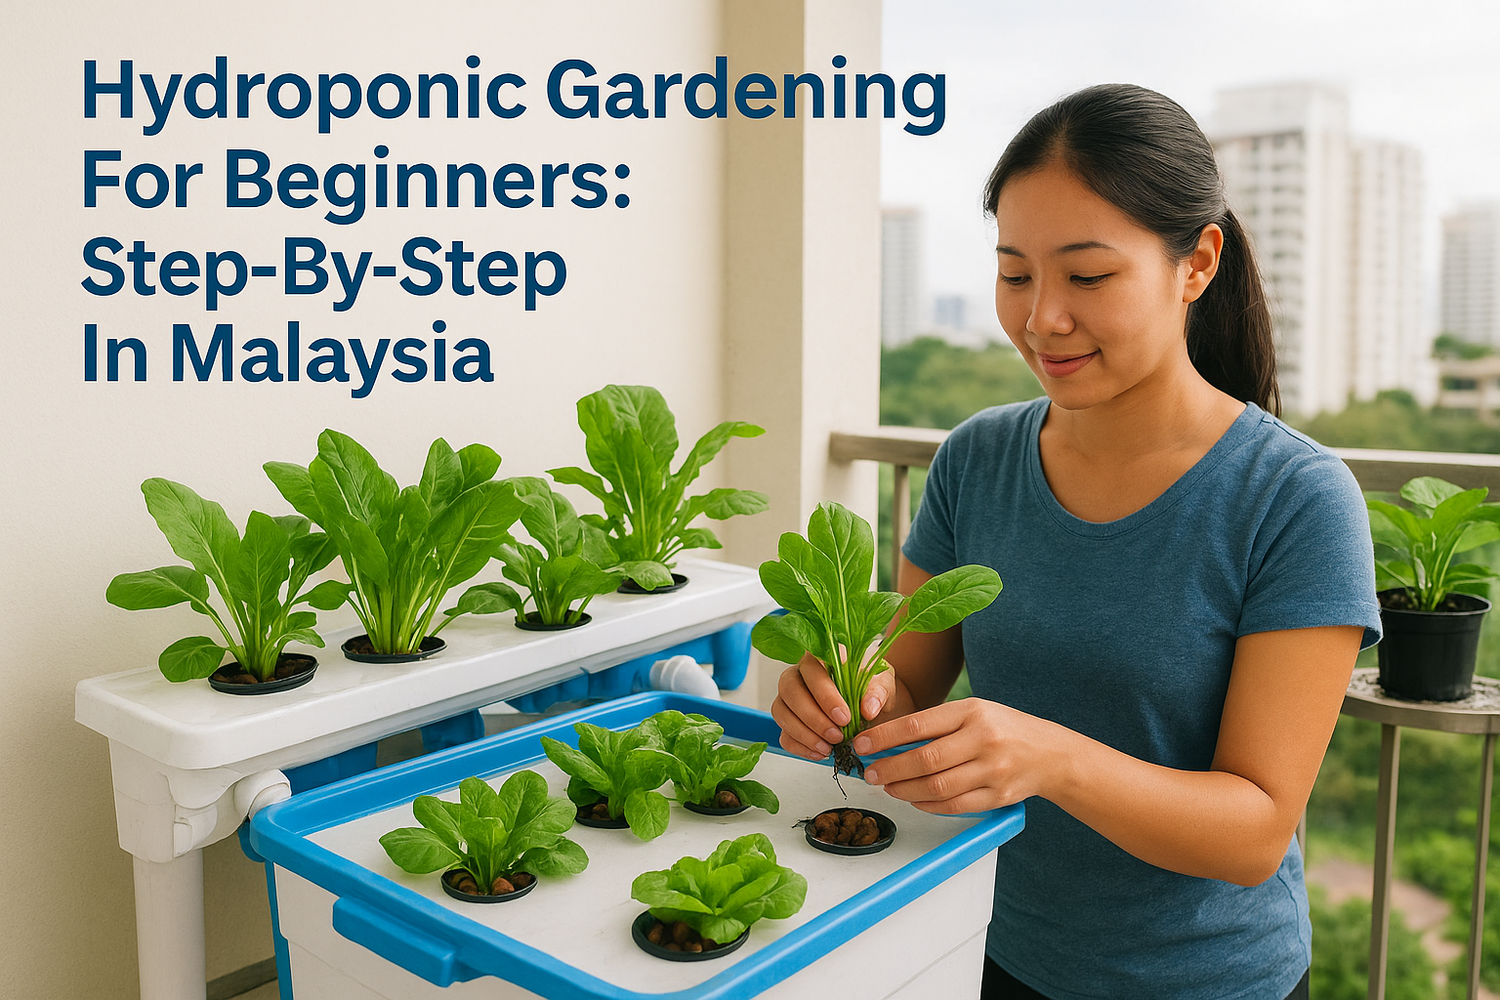
You don't need a big backyard, or any soil at all, to grow fresh herbs, leafy greens, and vegetables at home in Malaysia. Hydroponic gardening for beginners is more accessible than most people think, and the tropical climate here actually gives you a head start with year-round growing conditions that many countries can only dream of.
At Konzept Garden, we design and build outdoor spaces across Malaysia, from full landscape transformations to self-watering planter systems like our Ziant Hydro Planter. We've seen firsthand how more homeowners are turning to soilless growing methods, whether on a condo balcony in KL or a terrace house in Johor. The demand is real, and so are the questions: What system should I start with? What equipment do I actually need? How much does it cost to set up?
This guide breaks it all down. You'll learn how hydroponic systems work, which beginner-friendly setups suit Malaysian homes best, what nutrients your plants need, and how to get your first system running step by step, without the guesswork. Whether you want to grow kangkung, lettuce, or Thai basil, everything you need to know starts right here.
Hydroponics basics and who it suits
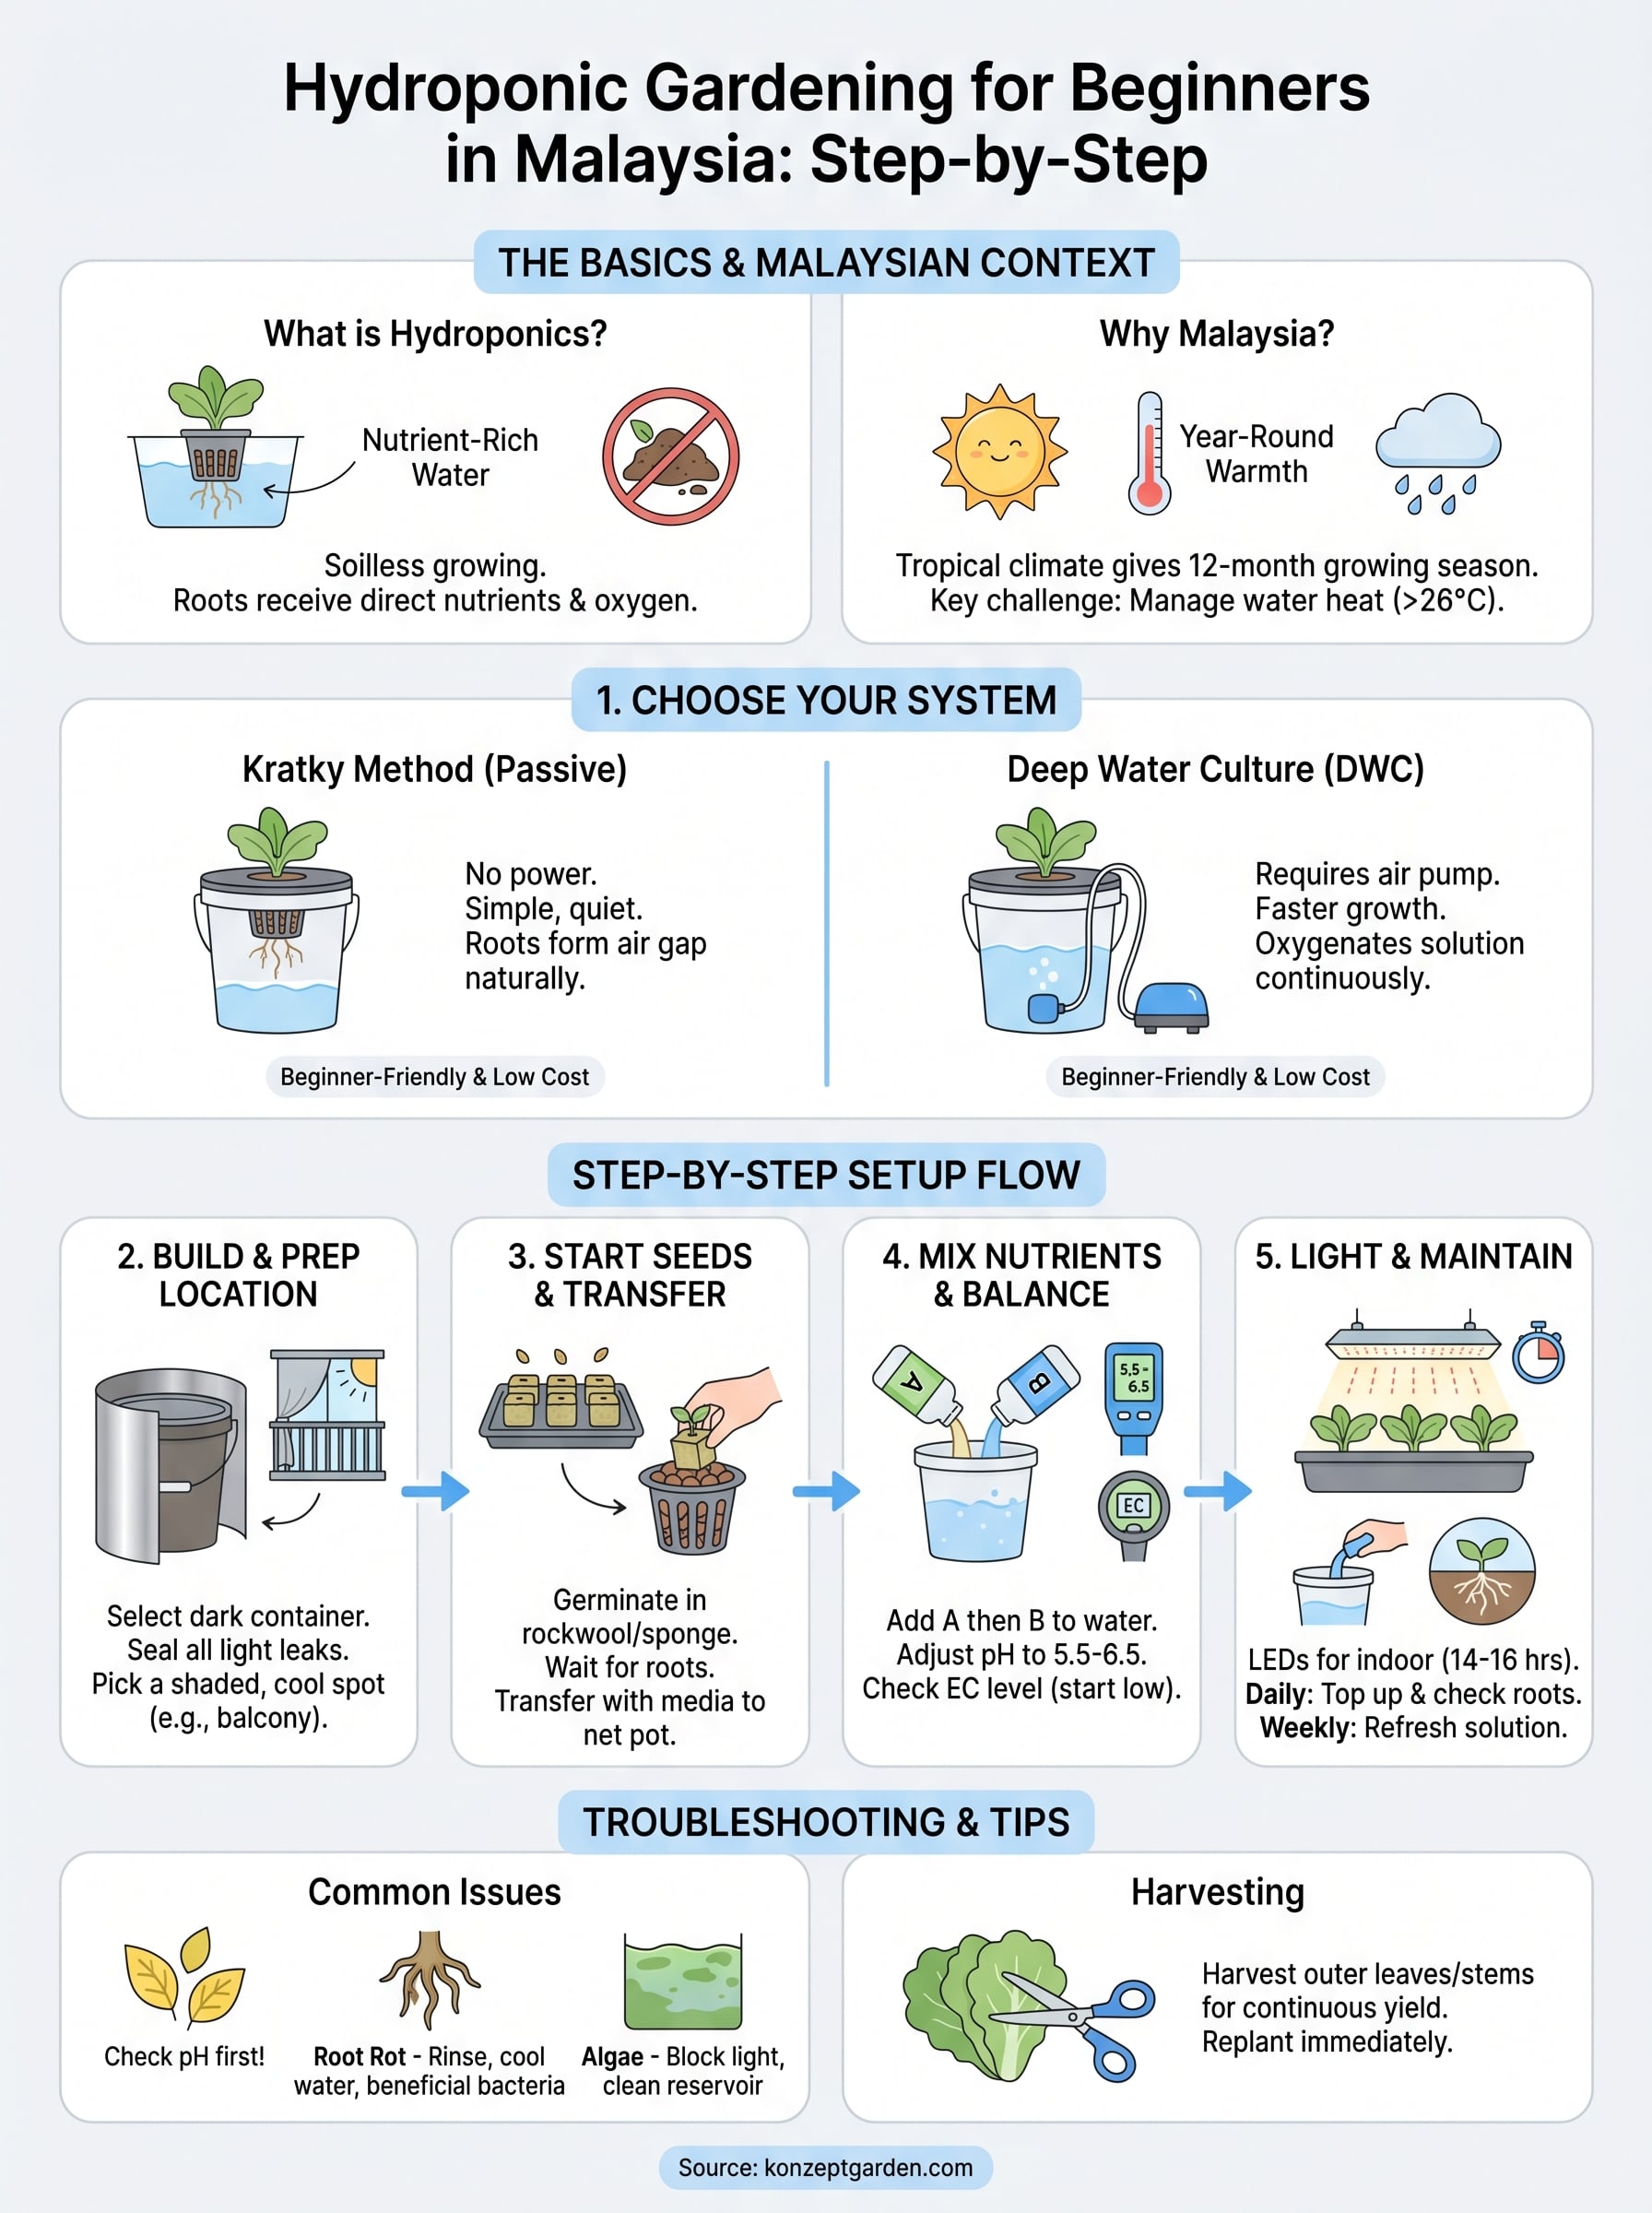
Hydroponics is a method of growing plants in nutrient-rich water rather than soil. Instead of roots searching through dirt to find minerals, they sit in or near a water-based nutrient solution that delivers everything the plant needs directly. The result is faster growth, fewer pests, and full control over what your plants consume. For anyone exploring hydroponic gardening for beginners, understanding this core concept makes every other step easier to follow.
How hydroponics works without soil
Plants need six things to grow: water, nutrients, light, carbon dioxide, oxygen, and the right temperature. In a conventional garden, soil acts as a buffer that holds nutrients and allows roots to breathe. In a hydroponic system, you replace that buffer with a controlled solution. The roots either sit directly in oxygenated water, hang in air and receive misted nutrients, or draw moisture up through an absorbent medium like clay pebbles or rockwool.
The key insight is that plants don't actually need soil. They need what soil normally provides, and hydroponics gives them those inputs directly and on demand.
Your plants respond by putting less energy into root expansion and more into leaf and fruit production. A lettuce that takes 60 days in soil can be harvest-ready in 30 to 40 days in a well-managed hydroponic setup. That speed advantage compounds quickly once you run a system continuously.
Why Malaysia's climate suits this growing method
Malaysia's heat and humidity create one challenge and one major advantage. The challenge is that outdoor temperatures between 28°C and 35°C can stress nutrient solutions and accelerate algae growth inside your reservoir. The advantage is that you never have to worry about frost, cold snaps, or a short growing season. Your plants can grow 12 months a year, and when you move the system indoors, you only need to manage one variable: heat.
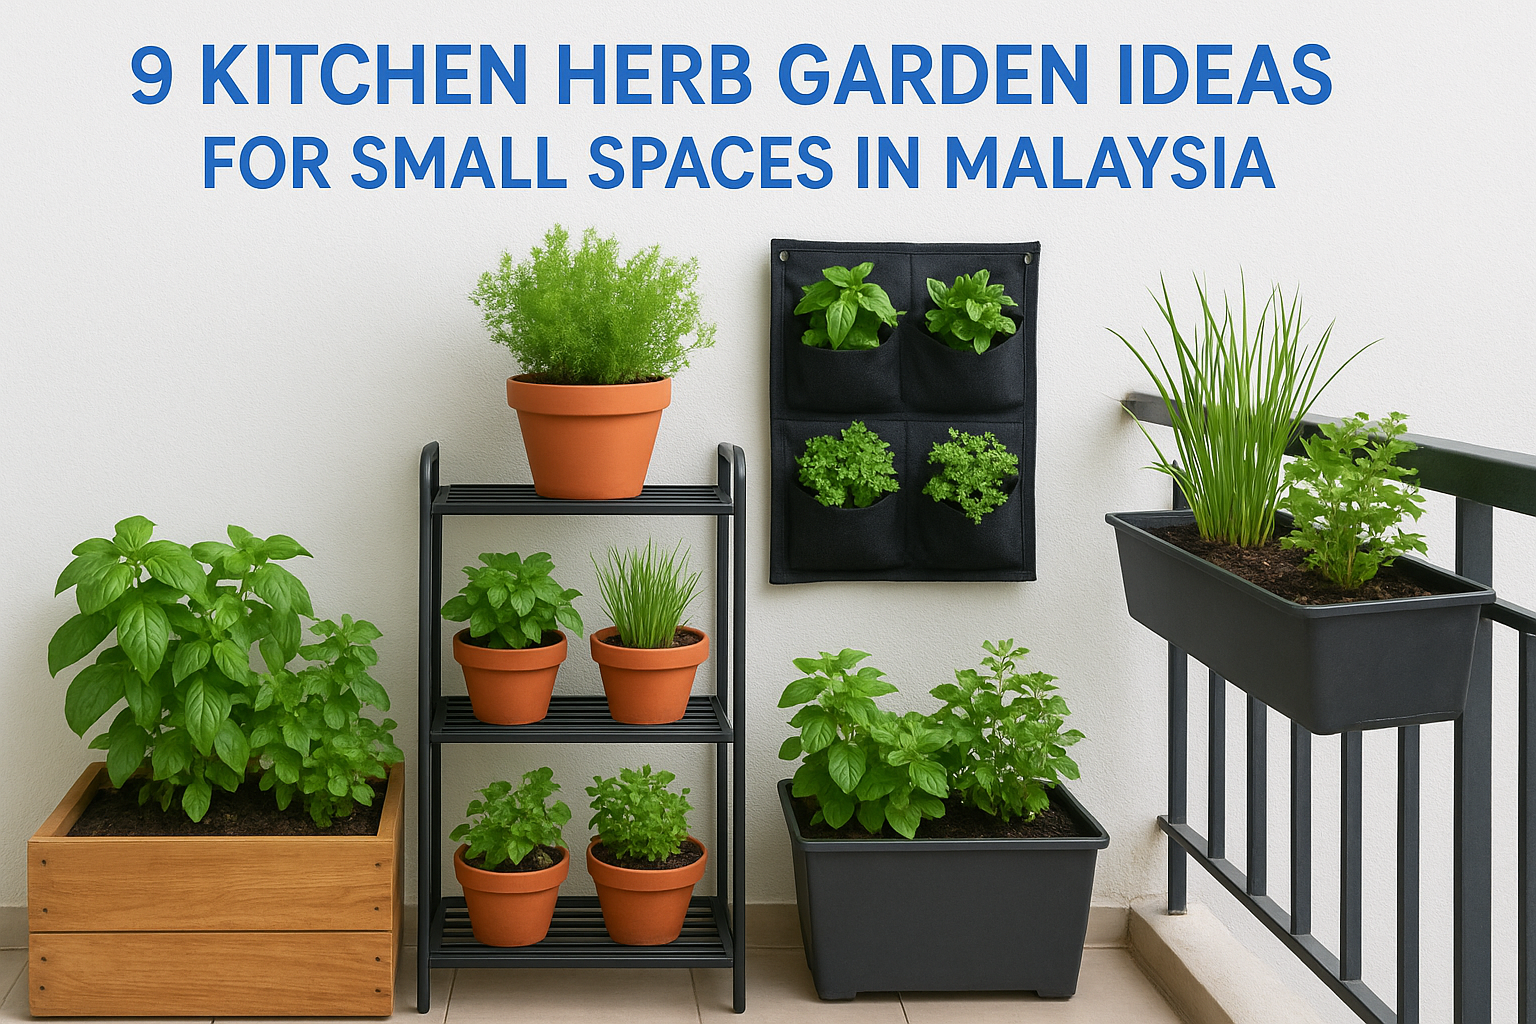
Most Malaysian homes also have covered balconies, rear utility corridors, or shaded back areas that receive filtered light for several hours a day. These spots are ideal starting points for low-light crops like kangkung, bayam, and butterhead lettuce without any artificial lighting at all. The infrastructure you need is often already in place.
Who benefits most from a hydroponic setup
Hydroponics suits you well if you live in a condo, terrace house, or apartment where garden beds are simply not an option. It also works for anyone who has tried container gardening and found the soil too heavy, too messy, or too prone to problems like fungus gnats and root rot. You do not need prior gardening experience to get started.
A hydroponic system does reward attention and consistency, though. You check pH levels, top up water, and monitor nutrient strength on a regular schedule. If your lifestyle is unpredictable or you travel often, start small with a single two-bucket deep water culture setup before scaling up. Keeping the system compact in the early weeks gives you time to build good habits without feeling overwhelmed by the workload.
Step 1. Choose a beginner system for Malaysia
The system you pick at the start sets your entire experience with hydroponics. For hydroponic gardening for beginners in Malaysia, two passive or near-passive designs stand out: the Kratky method and the deep water culture (DWC) system. Both require minimal equipment, cost under RM 150 to set up, and handle the tropical heat better than complex recirculating setups that need chillers or multiple timers to run reliably in our climate.
Kratky vs. Deep Water Culture
The Kratky method is the simplest option you can build. You fill a container with nutrient solution, sit a net pot through a hole in the lid, and let the plant roots hang down into the liquid. As the plant drinks the solution down, a small air gap forms naturally between the water surface and the net pot, providing oxygen to the roots without any mechanical help. No pump, no timer, and no electricity is required at all. This makes Kratky ideal for a shaded balcony or kitchen shelf where power access is limited.
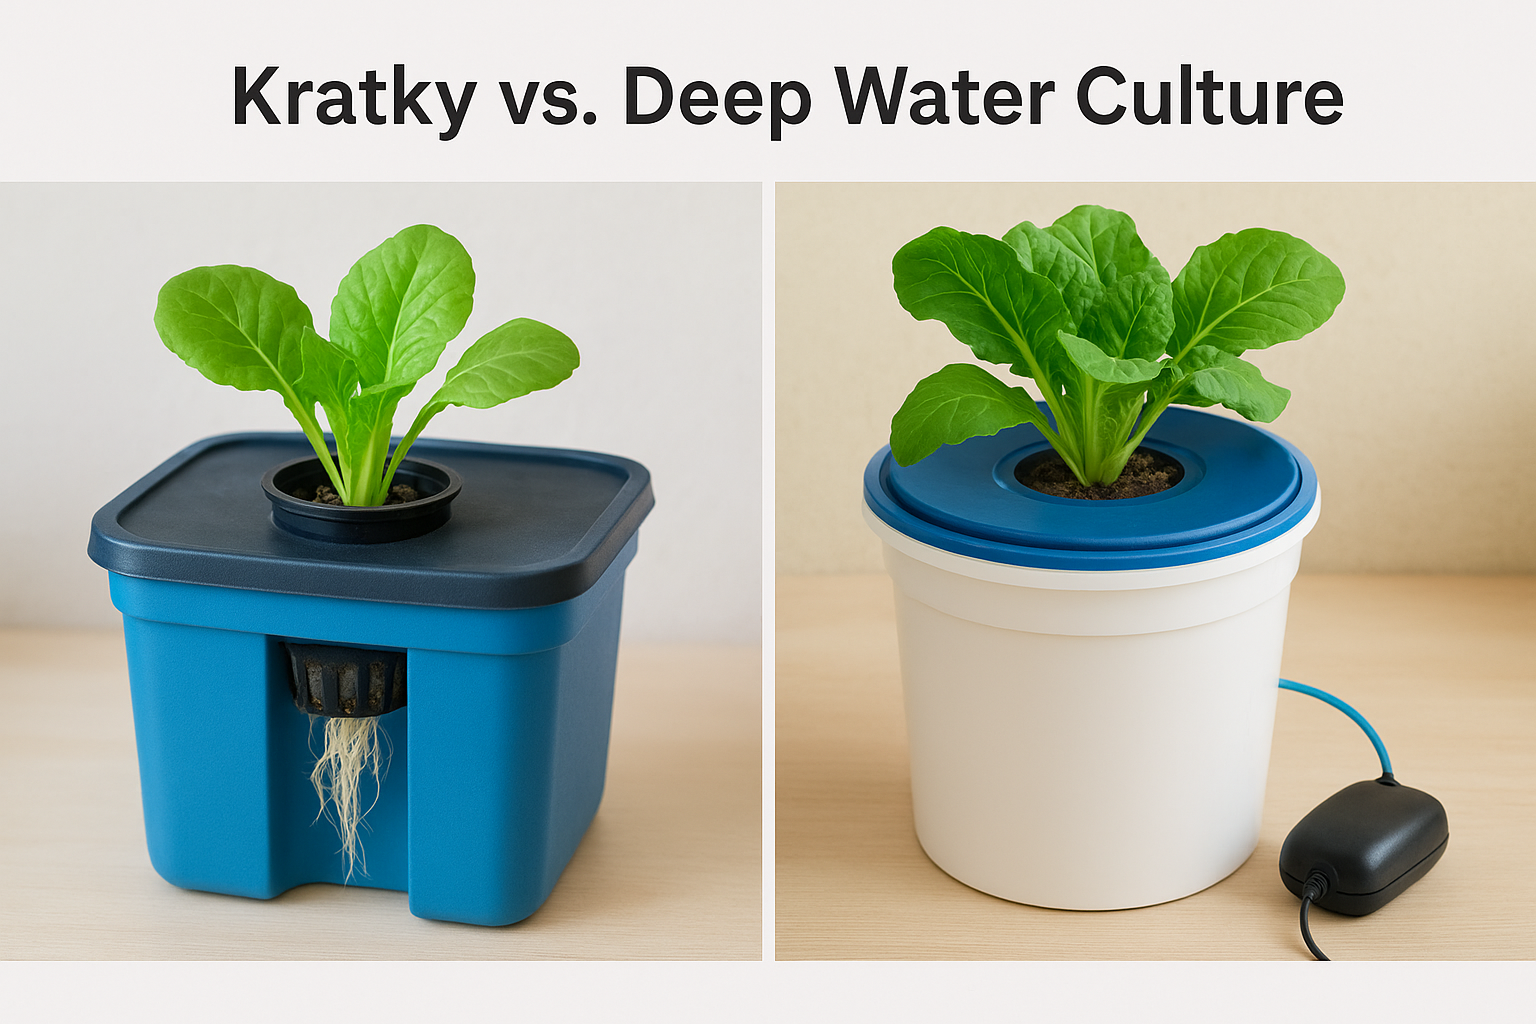
Deep water culture works on the same principle but adds a small aquarium air pump and air stone to oxygenate the solution continuously, which noticeably speeds up growth compared to a passive Kratky setup.
DWC is the better long-term choice if you want faster harvests and plan to run your system year-round. A basic single-bucket DWC unit costs roughly RM 80 to RM 120 to assemble using parts available at most hardware stores or local online marketplaces.
A quick comparison to guide your choice
Match the right system to your situation before you purchase anything. This table covers the three setups a beginner in Malaysia is most likely to consider:
| System | Cost (RM) | Power needed | Best for | Growth speed |
|---|---|---|---|---|
| Kratky | 40-70 | No | Herbs, lettuce | Moderate |
| Deep Water Culture | 80-120 | Yes (small air pump) | Leafy greens, kangkung | Fast |
| Wick system | 30-50 | No | Small herbs only | Slow |
Avoid NFT, aeroponics, or drip systems for your first build. They introduce more components, more failure points, and more troubleshooting time than you need in your first few months of growing. Start with one bucket or one container, master the basics, then scale when you feel ready.
Step 2. Pick the right spot and control heat
Location determines roughly half of your system's success. In Malaysia, heat is the single biggest environmental threat to a hydroponic setup, because water temperatures above 26°C reduce dissolved oxygen, promote root rot, and encourage algae growth inside your reservoir. Picking the right spot from day one saves you from chasing problems after your plants are already struggling.
Best indoor spots in a Malaysian home
Your covered balcony or utility corridor is usually the first place worth checking. These areas often receive three to five hours of filtered or indirect light daily, which is sufficient for leafy greens and herbs without any supplemental lighting. A spot that faces northeast or east works best since it catches morning sun but stays shaded through the hottest afternoon hours when temperatures peak.
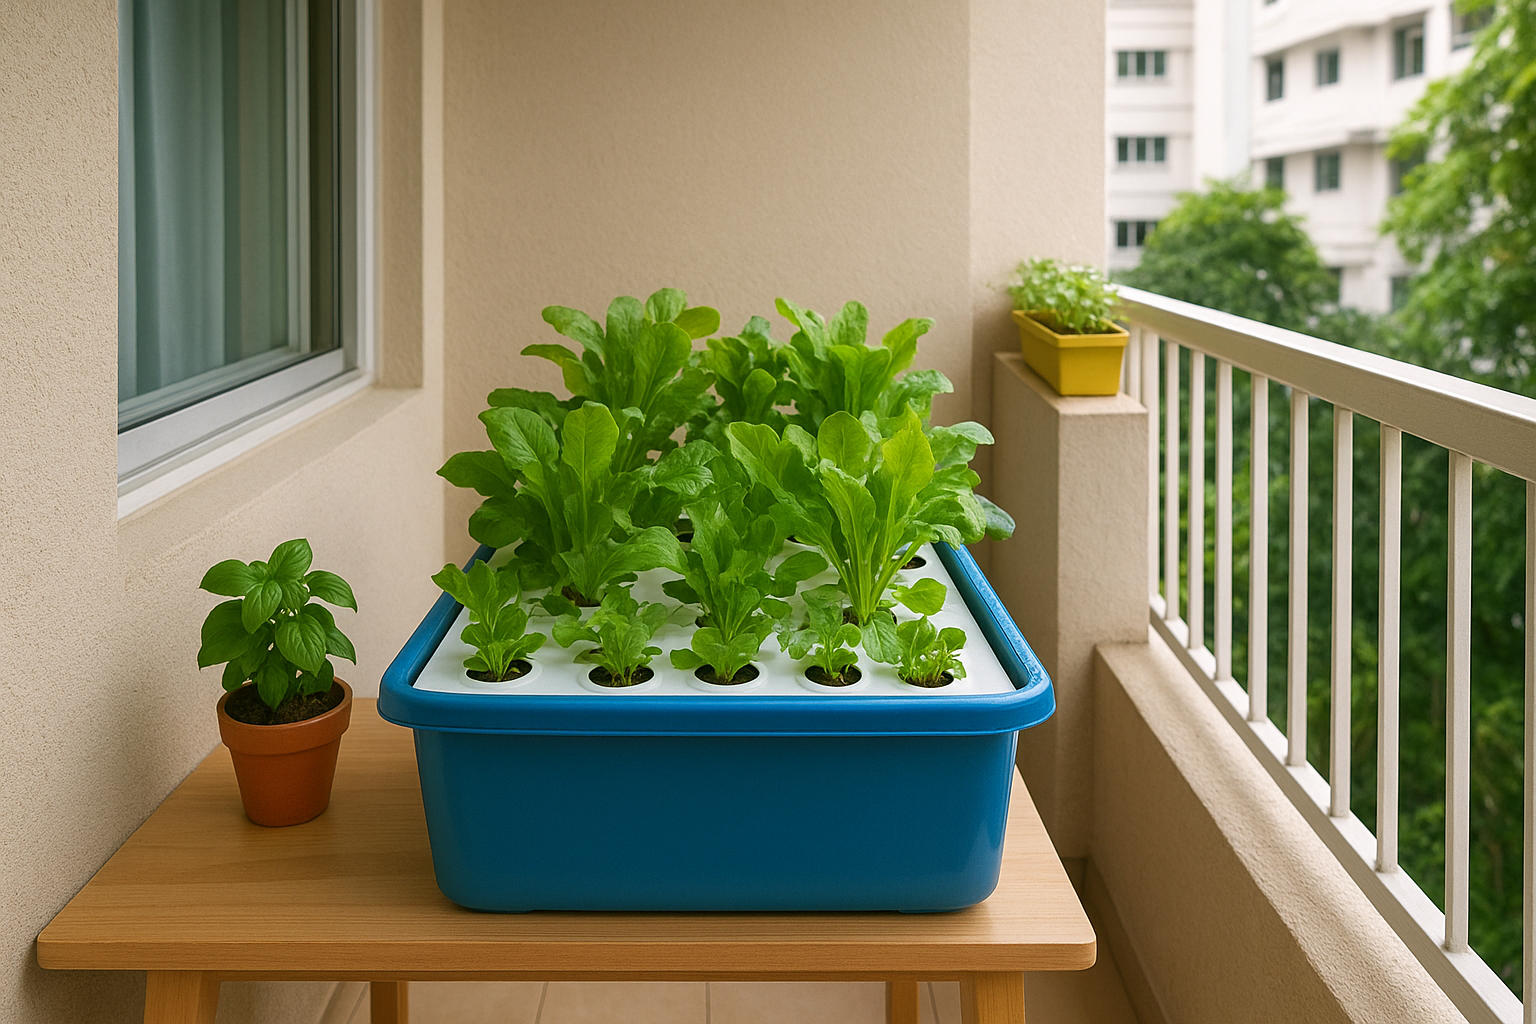
If balcony space is limited, a [kitchen countertop near a window](https://konzeptgarden.com/blogs/garden-tips/how-to-grow-more-in-less-space) works well for a single Kratky container growing herbs like Thai basil or mint. Keep the container away from direct air conditioning vents, since rapid temperature swings stress plants more than steady warmth does. Consistency matters far more than hitting a perfect number every hour.
The ideal ambient air temperature range for most beginner crops like lettuce, bayam, and kangkung is between 22°C and 28°C, so aim to keep your growing space within that band as consistently as possible.
Managing reservoir temperature in the tropics
Wrap your reservoir or bucket in reflective silver bubble wrap to block radiant heat from warming the water inside. This single, low-cost step can keep solution temperatures 3°C to 5°C cooler than an uncovered container sitting in the same spot. Reflective insulation material is available at most hardware stores in Malaysia for under RM 15 per roll.
If your water temperature still climbs above 26°C, place a reusable frozen water bottle inside the reservoir each morning. Two 600 ml bottles stabilize a standard 10-liter DWC bucket through most of the day without any extra equipment. For anyone serious about hydroponic gardening for beginners who plans to scale into a larger system, a small aquarium water chiller becomes a worthwhile upgrade once your first build is producing reliably.
Step 3. Gather a complete setup checklist
Before you assemble anything, gather every item in a single shopping run so you avoid delays mid-build. For hydroponic gardening for beginners in Malaysia, most of what you need is available at hardware chains like Mr. DIY, ACE Hardware, or local aquarium supply shops, often for less than RM 200 in total. Having everything on hand means you build once, correctly, rather than patching gaps with makeshift substitutes.
Core equipment for a single DWC or Kratky unit
Your physical setup components are straightforward. Every beginner build in Malaysia uses roughly the same equipment list regardless of which system you chose in Step 1.
| Item | Spec to look for | Where to find in Malaysia |
|---|---|---|
| Food-safe opaque bucket or container | 10-20 liters, dark color | Hardware store or MR DIY |
| Net pots | 5 cm or 7.5 cm diameter | Aquarium or garden shop |
| Air pump and air stone (DWC only) | 2-4 watt, adjustable flow | Aquarium shop |
| Silicone air tubing (DWC only) | 4 mm internal diameter | Aquarium shop |
| Hole saw or drill bit | Matches your net pot diameter | Hardware store |
| pH meter or test kit | Digital meter preferred | Online marketplaces |
| EC/TDS meter | Any budget digital model | Online marketplaces |
A dark or opaque container is non-negotiable. Clear or translucent containers let in light, which triggers algae growth inside your nutrient solution within days.
Nutrients and growing media
Your two-part or three-part liquid hydroponic nutrient concentrate is the most important purchase on this list. Look for a product labeled A and B, where you mix both into your water at the ratio printed on the label. Brands marketed specifically for leafy greens or "grow" stage formulas work well for the first-time grower. Avoid using soil fertilizers as a substitute since they lack the full mineral profile that roots need in a soilless system.
Growing media fills the net pot and anchors your seedling while allowing roots to grow down freely. Clay pebbles, also called LECA, are the most forgiving option for beginners because they are reusable, easy to rinse, and widely available at aquarium shops across Malaysia for under RM 15 per kilogram.
Step 4. Build the system and block all light leaks
Assembly takes about 30 minutes for a single DWC or Kratky bucket, and most of that time is just waiting for drill dust to settle. Before you add any water or nutrients, your only job is to create a clean, light-proof vessel that holds solution securely and supports your net pot without shifting. Getting the build right the first time eliminates most of the problems that stall hydroponic gardening for beginners before it even begins.
Assemble the bucket in five steps
Start with a clean, dry container before you touch any tools. Rinse the bucket once with plain water, then let it dry fully so drill debris does not stick to moisture on the inner walls during cutting.
Follow these steps in order:
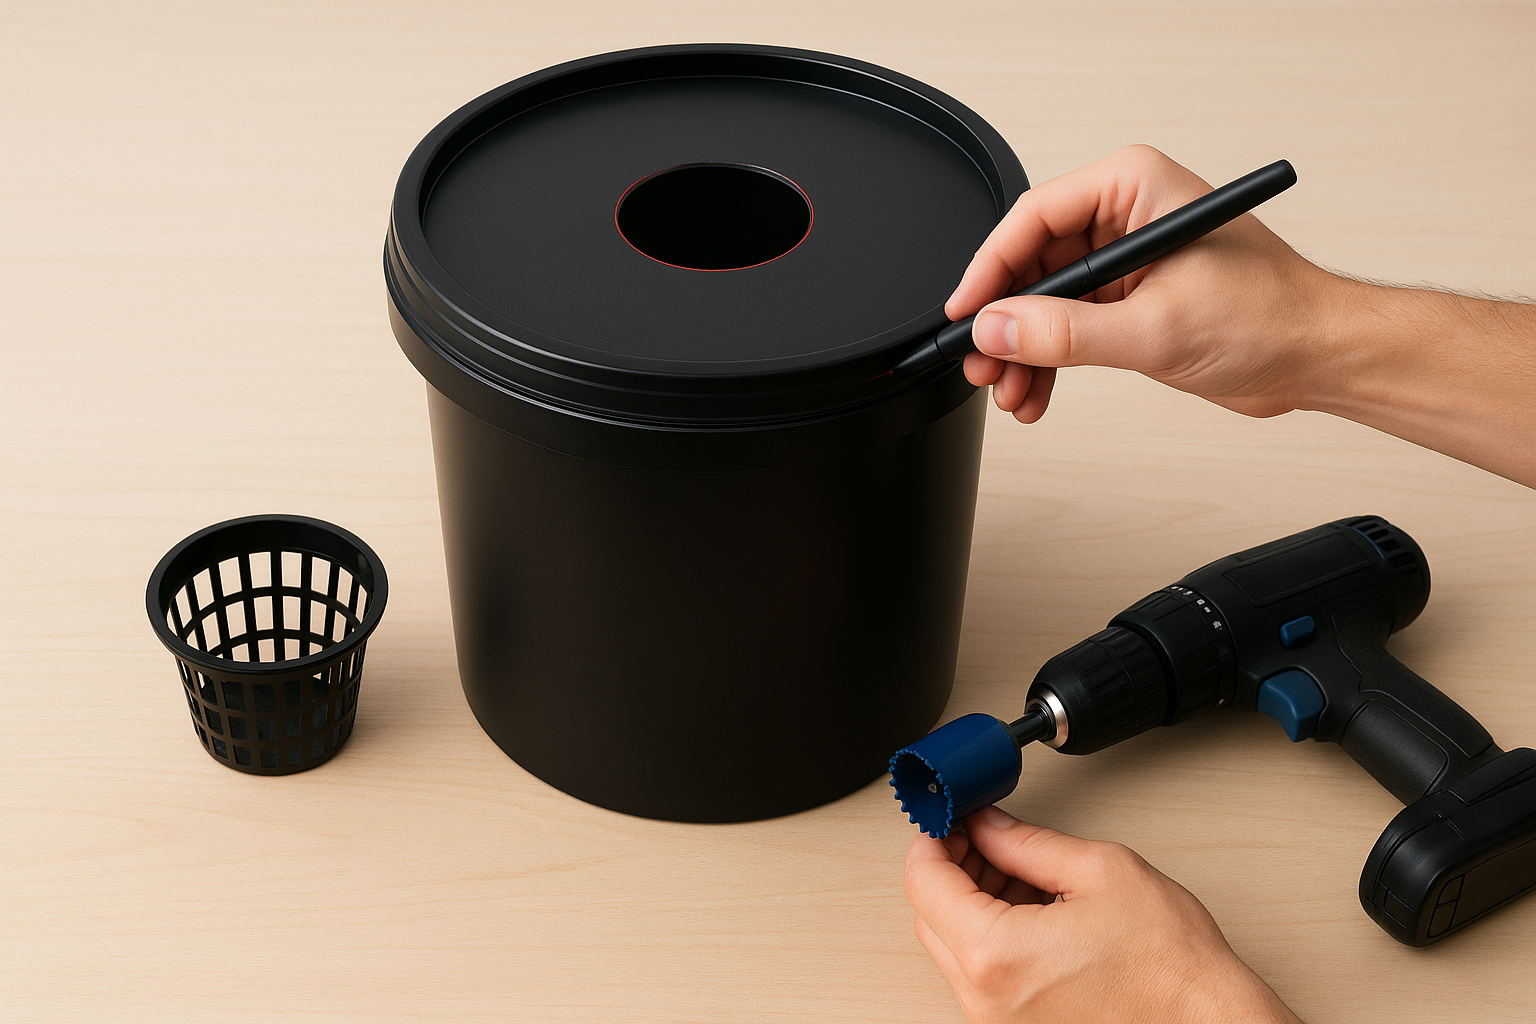
- Mark the net pot hole on the lid by placing the net pot face-down at the center and tracing around the inner lip with a marker.
- Drill the hole with your hole saw, cutting just inside the traced line so the net pot rim sits flush on the lid rather than falling through.
- Cut a small notch at the lid edge (DWC only) for the air tubing to exit without cracking the seal when you close the lid.
- Thread the tubing through the notch, connect one end to the air stone, and drop the stone flat to the bucket floor.
- Connect the other end of the tubing to the air pump and run a brief dry test before adding any solution.
Test the pump before you add nutrients. A disconnected air stone sitting in expensive nutrient solution wastes your resources and takes 15 minutes to fix, whereas a dry test catches the problem in seconds.
Seal every light leak before you fill
Light entering your reservoir triggers algae growth within days, and once algae establishes inside the bucket, it competes with your plants for nutrients and clogs the air stone fast. Wrap the outside of the entire bucket with black electrical tape or black self-adhesive shelf liner, paying close attention to the joint between the bucket body and the lid.
Hold the assembled unit up to a bright lamp or sunlight and look for any pinpoints of light coming through the plastic. Mark each spot with tape immediately. A fully light-proofed container from day one keeps your nutrient solution clean through the entire growing cycle without any extra treatment needed.
Step 5. Start seeds and prep seedlings for transfer
Starting seeds correctly gives your plants the strongest possible foundation before they ever touch nutrient solution. For hydroponic gardening for beginners, skipping proper germination or rushing the transfer is the most common reason seedlings fail in the first week. Give each seedling time to develop a visible root tail of at least 2 cm before you move it into your system.
Germinate seeds in rockwool cubes or sponge plugs
Rockwool cubes and sponge plugs are the two most accessible germination media in Malaysia, available at most aquarium shops and garden centers for under RM 10 per pack. Soak your rockwool cube in pH-adjusted water at 5.5 for 30 minutes before use, since raw rockwool is alkaline and will slow germination if you skip this step. Push one seed into the pre-made hole at the top of each cube, cover the hole loosely with a small pinch of the medium, and place the cubes in a tray.
Keep your germination tray covered with a clear plastic dome or cling wrap for the first three to five days to trap humidity and speed up sprouting.
Move the covered tray somewhere warm and dark, like a kitchen cabinet, until the seed cracks. Most leafy greens and herbs common in Malaysian hydroponic setups, including kangkung, lettuce, and basil, sprout within two to four days at room temperature without any grow lights needed at this stage.
Transfer seedlings to net pots without stressing the roots
Once your seedling shows its first true leaves and roots are poking visibly from the bottom of the cube, it is ready to move. Place the rockwool cube or sponge plug directly into the net pot without pulling the seedling free from its medium, since bare handling damages tender root hairs that are critical for early nutrient uptake.
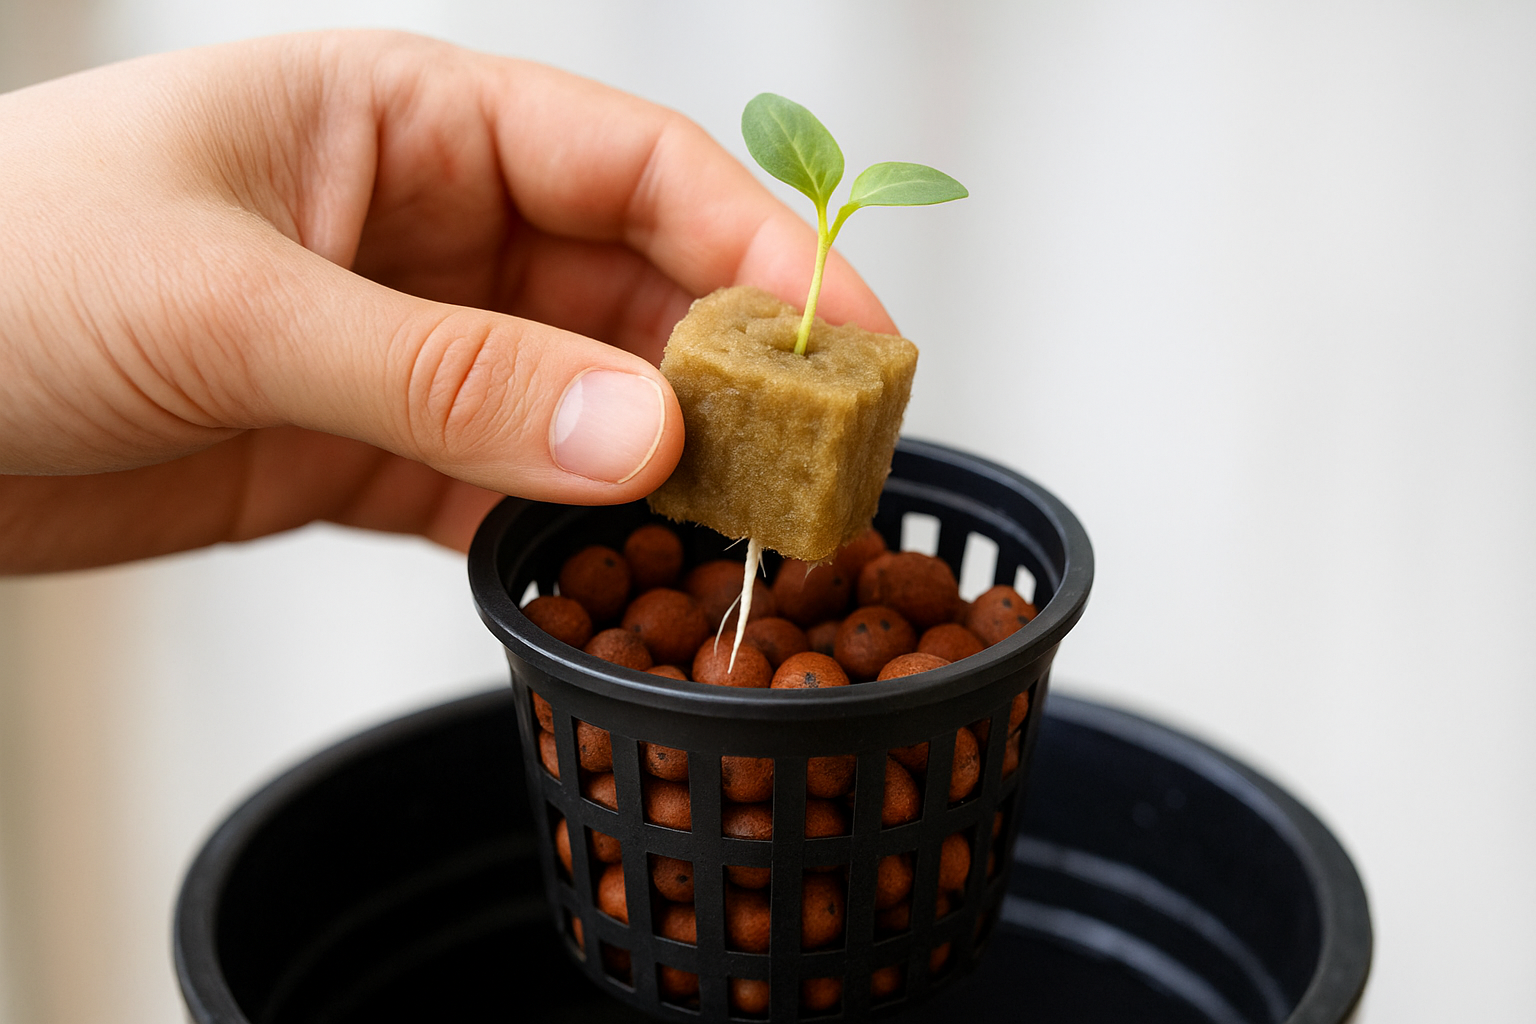
Pack rinsed clay pebbles firmly around the cube to hold it upright and stable inside the net pot. Position the bottom of the net pot just above the nutrient solution surface for a Kratky setup, or 1 to 2 cm above in a DWC bucket, so the roots grow down to find moisture without sitting fully submerged and oxygen-starved from day one.
Step 6. Mix nutrients and set pH and EC correctly
Getting your nutrient solution right is where hydroponic gardening for beginners either accelerates or stalls. Plants in a soilless system rely entirely on what you put into the water, so mixing nutrients at the wrong concentration or letting pH drift outside the safe range blocks nutrient uptake even when the solution looks perfectly clear.
Mix the nutrient solution in the right order
Start with plain tap water at room temperature in your bucket before you add anything else. Malaysian tap water typically registers a TDS reading between 50 and 150 ppm, which is a reasonable base for most beginner crops. Add Part A concentrate first, stir it fully into the water, and then add Part B. Never combine the concentrates directly in the bottle or your mixing cup, since contact between the two undiluted liquids causes the minerals to lock together and drop out of solution permanently.
Use the table below as a starting point for common beginner crops in Malaysia:
| Crop | Target EC (mS/cm) | Target pH |
|---|---|---|
| Lettuce / butterhead | 0.8 - 1.6 | 5.5 - 6.5 |
| Kangkung / bayam | 1.2 - 2.0 | 6.0 - 6.5 |
| Thai basil / mint | 1.0 - 1.6 | 5.5 - 6.5 |
| Cherry tomatoes | 2.0 - 3.5 | 5.8 - 6.3 |
Adjust pH after every mix
After you add nutrients, your pH will shift, usually climbing above 7.0 for Malaysian tap water. Use pH Down solution (phosphoric acid based) added one drop at a time to bring the reading into the 5.5 to 6.5 range. Stir after each drop, wait 30 seconds, and retest before adding more.
Overshooting your target pH and then correcting back upward stresses the solution chemistry, so always add pH Down in small increments rather than large pours.
Read EC correctly to avoid overfeeding
Your EC meter measures the total dissolved mineral strength in the solution. For leafy greens in Malaysia's heat, stay toward the lower end of the recommended EC range since warm water already puts roots under mild stress. Recheck EC every two to three days by dipping your meter directly into the reservoir. When EC climbs above your target, top up with plain pH-adjusted water to dilute the solution back down before adding fresh nutrient concentrate.
Step 7. Dial in lighting and day length indoors
Light is the variable that separates a fast-producing indoor system from one that barely keeps plants alive. For hydroponic gardening for beginners moving their setup fully indoors in Malaysia, the goal is to provide the right light intensity and duration so plants photosynthesize at full capacity without burning from heat generated by the fixture overhead.
Choose the right grow light for your space
Full-spectrum LED grow lights are the practical choice for most Malaysian home setups. They run cooler than fluorescent tubes, draw less electricity, and mount flat above a countertop or shelf without requiring bulky housing. Look for a light with a PAR (photosynthetically active radiation) output appropriate for the coverage area, since undersized lights are the most common reason indoor crops grow leggy and pale.
Use the table below to match fixture size to your growing footprint:
| Growing area | Recommended LED wattage | Hanging height above canopy |
|---|---|---|
| 30 x 30 cm (1-2 plants) | 15-25W | 20-30 cm |
| 60 x 60 cm (4-6 plants) | 45-65W | 25-40 cm |
| 90 x 90 cm (8-12 plants) | 100-150W | 35-50 cm |
Keep the back of your hand under the light at canopy height for 10 seconds. If you feel noticeable warmth, raise the fixture until the heat is no longer detectable on your skin.
Set the correct photoperiod for your crops
Most leafy greens and herbs perform best under 14 to 16 hours of light followed by 8 to 10 hours of uninterrupted darkness each day. Fruiting plants like cherry tomatoes need 16 to 18 hours during the vegetative stage and 12 hours once you want them to flower and set fruit. Running lights for more than 18 hours does not accelerate growth and wastes electricity.
Plug your grow light into a basic mechanical outlet timer rather than managing it manually. Set the on-time to begin at the same hour each morning so your plants receive a consistent cycle every day. Irregular light schedules confuse the plant's internal timing and slow growth noticeably, especially during the first three weeks after transplanting your seedlings into the system.
Step 8. Follow a simple maintenance routine
A hydroponic system rewards you when you check it consistently rather than reactively. For hydroponic gardening for beginners, the goal is to build a short daily habit and a slightly longer weekly routine so small problems never become plant-killing emergencies. The entire maintenance schedule takes under 15 minutes per day once you know what to look for.
Daily checks that take under five minutes
Every morning, spend two minutes at your system before you do anything else. Top up the reservoir with plain pH-adjusted water if the solution level has dropped more than 2 cm from your target mark, since exposed roots dry out within hours in Malaysia's heat. Check that your air pump is running and that bubbles are rising through the air stone visibly, then glance at the underside of the net pots for healthy white root growth versus brown or slimy root tips, which signal a problem starting.
Catching a pH drift or a failing air pump on day one of the problem takes five minutes to fix; catching it on day five means pulling sick plants and starting over.
Write your daily water top-up amount and any observations into a simple log. A notebook or a phone note works equally well. Tracking this data helps you spot patterns, like a plant drinking significantly more water than usual, which often indicates heat stress or root damage before visible symptoms appear on the leaves.
Weekly tasks to keep the system running cleanly
Once a week, run through the following maintenance steps in order:
| Task | What to do | Why it matters |
|---|---|---|
| Check EC and pH | Measure and adjust solution | Prevents nutrient lockout |
| Partial reservoir change | Replace 25-30% of solution with fresh mix | Prevents salt buildup |
| Inspect roots | Look for brown, slimy, or foul-smelling roots | Early detection of root rot |
| Clean air stone | Rinse in plain water, no soap | Maintains oxygen output |
| Wipe reservoir lid | Remove algae or moisture buildup around the net pot | Blocks new algae entry points |
Running this weekly checklist consistently keeps your nutrient solution balanced and your plants healthy through the full growing cycle without any chemical treatments needed.
Step 9. Harvest, replant, and keep a steady supply
Harvesting at the wrong time is one of the most common mistakes in hydroponic gardening for beginners. Cut too early and you leave yield on the table; wait too long and leafy greens bolt, turning bitter and tough overnight in Malaysia's heat. Getting the timing right takes one growing cycle to learn, and after that, you will recognize the visual cues without checking any reference.
Harvest at the right time for the best yield
Most leafy greens and herbs are ready when the outer leaves reach 10 to 15 cm in height and the plant looks full without the center stalk stretching upward. That upward stretch signals the plant is shifting energy toward seed production rather than leaf growth, and flavor drops sharply once it starts. For crops like kangkung and bayam, cut the stem 5 cm above the base rather than pulling the entire plant, since the root system stays active and pushes new growth within seven to ten days.
Harvesting outer leaves progressively from a lettuce or herb plant rather than cutting the whole plant at once extends your productive window by two to three weeks per container.
Use these timing benchmarks as a starting guide:
| Crop | Days to first harvest | Harvest method |
|---|---|---|
| Butterhead lettuce | 30-40 days | Cut outer leaves first |
| Kangkung | 25-35 days | Cut stems 5 cm above base |
| Thai basil | 30-45 days | Pinch above a leaf node |
| Bayam | 25-35 days | Cut stems, leave the base |
Replant immediately to keep production continuous
After you harvest a full plant, rinse the net pot and rinse the clay pebbles with plain water, then drop a new seedling in within 24 hours. Leaving the system running with empty slots wastes your nutrient solution and disrupts the root zone environment that the remaining plants have already stabilized around.
Running two to three containers on a staggered two-week planting schedule is the most practical way to maintain a steady supply. Start a new container every two weeks so one system is always in the seedling stage, another is mid-growth, and a third is ready to harvest. This rotation gives you fresh produce consistently without managing a large or complicated setup.
Step 10. Fix common hydroponic problems fast
Problems in a hydroponic system escalate faster than in soil because every plant shares the same nutrient solution. A pH crash that would damage one pot in a container garden can affect your entire crop within 24 hours in a shared reservoir. For anyone navigating hydroponic gardening for beginners, recognizing symptoms early and knowing exactly what to do in response is the skill that separates a productive system from a frustrating one.
Identify symptoms before they spread
Your plants tell you what is wrong before the situation becomes unrecoverable. Yellow lower leaves usually point to a nitrogen deficiency or a pH that has drifted too high, blocking nutrient uptake. Pale, washed-out new growth typically signals iron or manganese lockout, again driven by pH sitting outside the 5.5 to 6.5 range. Check pH first whenever you see unusual leaf color, since correcting it solves roughly 70 percent of nutrient-related problems without any other changes.
Most visual symptoms in hydroponics trace back to pH drift, so test your solution before you buy additional supplements or change your nutrient formula.
Use this quick-reference table when your plants show visible stress:
| Symptom | Most likely cause | Fix |
|---|---|---|
| Yellow lower leaves | Nitrogen deficiency or high pH | Adjust pH to 5.5-6.5, check EC |
| Brown leaf edges | Nutrient burn from high EC | Top up with plain water to dilute |
| Wilting despite full reservoir | Root rot or blocked air stone | Check roots, clean or replace air stone |
| Slow, leggy growth | Insufficient light or low EC | Raise light intensity or increase nutrient strength |
| White crust on net pots | Salt buildup | Rinse net pots with plain water weekly |
Root rot and algae: the two most common crises
Root rot appears as brown, slimy roots with a foul smell, and it spreads to healthy roots within two days if left unaddressed. Remove the affected plant immediately, rinse all roots under plain water, then add beneficial bacteria solution (look for products containing Bacillus subtilis at aquarium or hydroponic suppliers) to your reservoir to suppress further spread. Drop your reservoir temperature below 24°C since root rot pathogens thrive in warm water above that threshold.
Algae growth shows up as green or brown film on your reservoir walls and net pots, and it competes directly with your plants for nutrients. Drain the reservoir completely, scrub all surfaces with a diluted hydrogen peroxide solution at 3 percent, rinse thoroughly with plain water, and refill with fresh nutrient solution. Recheck every light leak on the container lid and reseal any gaps with black tape before refilling.
Next steps
You now have everything you need to run your first hydroponic gardening for beginners setup from seed to harvest. Start with a single Kratky or DWC bucket, grow one batch of lettuce or kangkung, and get comfortable with the pH and EC checks before you add more containers. One system done well teaches you more than five systems managed poorly.
From there, scale at your own pace. Add a second container on a staggered schedule, try a faster-growing crop, or move your setup to a larger covered space as your confidence builds. The skills you develop in the first two growing cycles carry directly into every system you run after that.
If you want to take your outdoor space further beyond hydroponics, whether that means a full garden design, a custom water feature, or professional planting advice, the Konzept Garden team is ready to help. Get in touch with our landscape design team and tell us what you have in mind.