

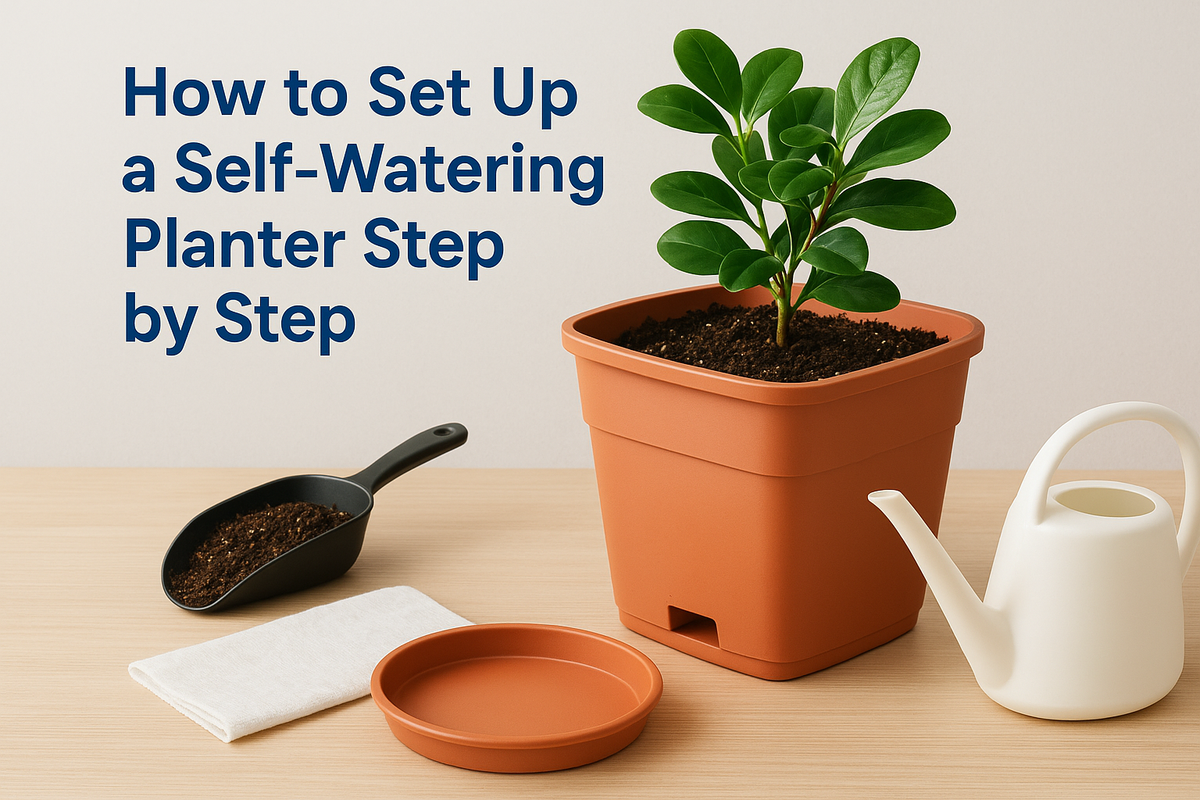
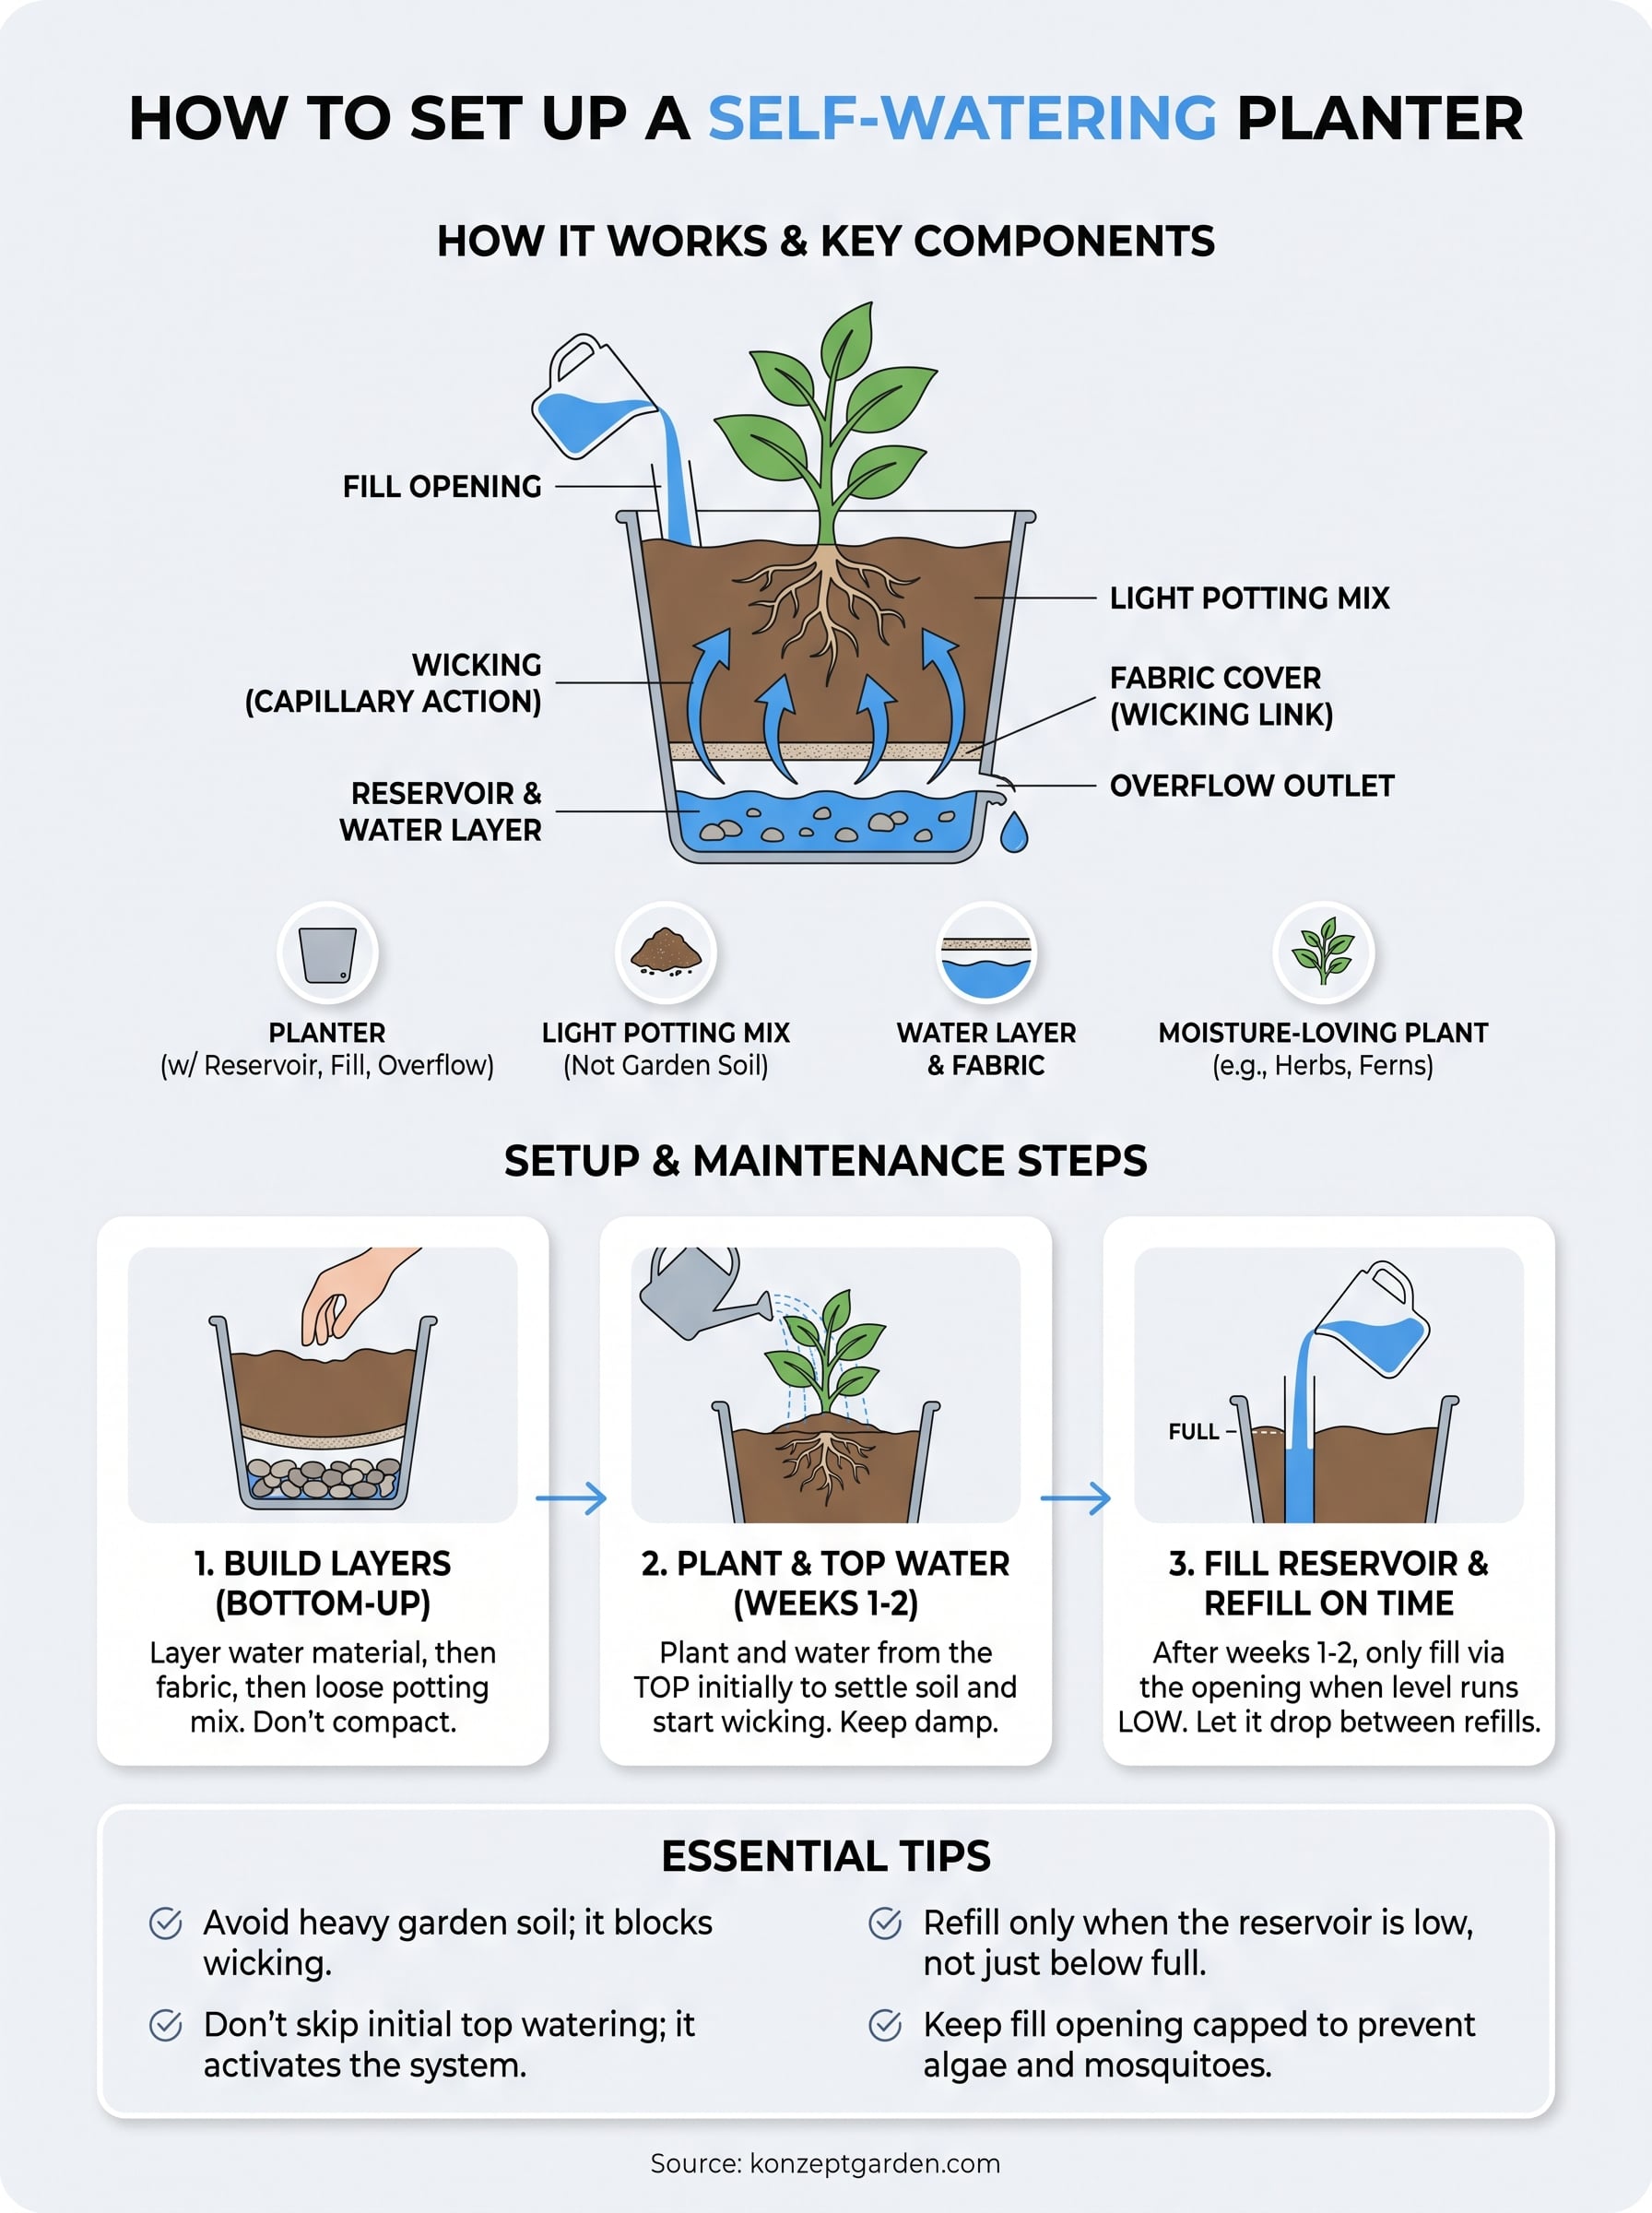
To set up a self-watering planter, build the layers from the bottom up: a water layer, a fabric cover, then a light potting mix. Plant, water from the top for the first one to two weeks, then fill the reservoir and refill only when the level runs low. After that, the planter handles the daily watering.
Most failures come from treating it like an ordinary pot. If you keep pouring water on the soil, use heavy garden soil, or skip the first top watering, the wicking never starts properly. In Malaysia the stakes are higher. Heat dries a normal pot within a day or two, and a weekend away can leave your plants limp. Heavy afternoon rain, on the other hand, can drown a planter that has no overflow outlet.
This guide covers how the system works, three setup steps, and how to build a simple version yourself. At Konzept Garden we sell the Ziant Hydro Planter, so we use it as the working example. The steps apply to any planter with a built-in reservoir.
How a self-watering planter works and what you need
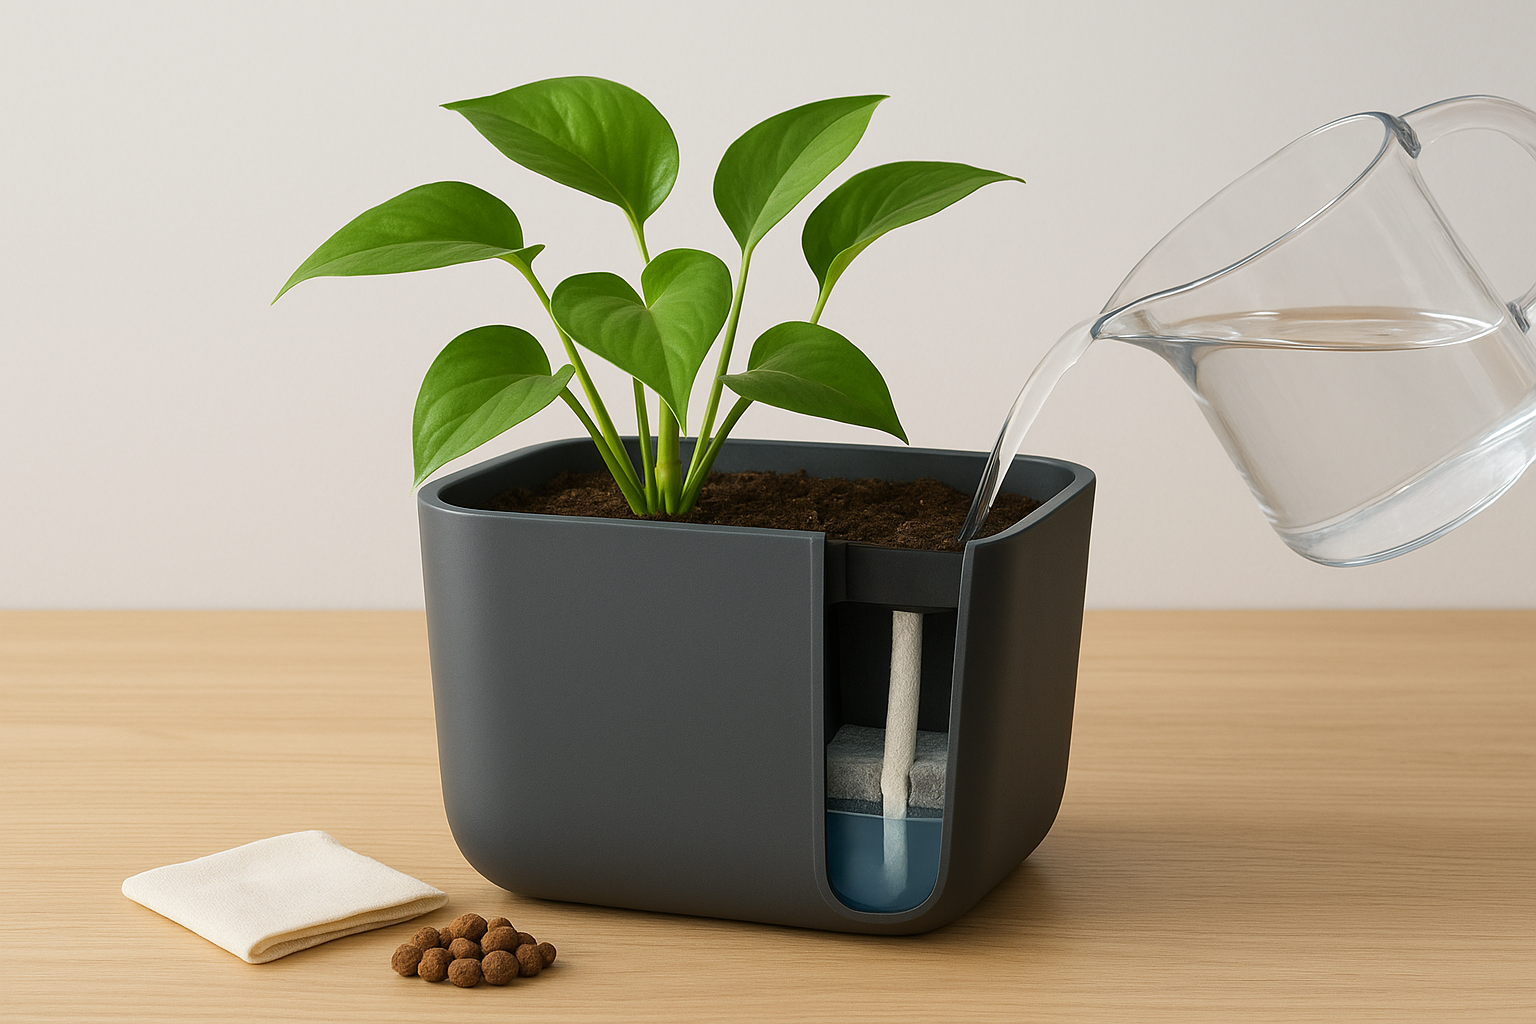
A self-watering planter stores water in a hidden reservoir under the soil, and the soil draws that water up to the roots as the plant needs it. You set it up once, then you fill the reservoir instead of watering the soil.
How the reservoir waters the soil
Every self-watering planter has three working parts. The soil chamber holds the potting mix and the plant. The reservoir is the water tank underneath. The wick, or wicking zone, links the two and pulls water upward by capillary action, the same way a paper towel soaks up a spill.
Most planters also have an overflow outlet that sets the maximum water level. Without it, the roots would sit in water and rot. The plant controls how much it drinks, so a hot day uses more water than a cool one without you changing anything.
The plant sets the pace, so your job is to keep the reservoir filled and stop guessing how much to pour.
What to gather before you start
You need very little. Check this list before you begin:
- A planter with a reservoir, a fill opening and an overflow outlet
- A lightweight potting mix, such as a peat or coir blend with perlite
- A water layer material and a fabric cover, unless the planter ships with them
- A plant that likes steady moisture
- A jug or watering can with a narrow spout
The Ziant Hydro Planter ZP001 range includes Nutrisoil, Hydrostone and geotextile fabric with every purchase, so you do not need to source anything else. These are the three sizes:
| Model | Size (W x D x H) | Price |
|---|---|---|
| ZP001 XS | 32 x 32 x 36 cm | RM115 |
| ZP001 S | 36 x 36 x 36 cm | RM145 |
| ZP001 M | 38 x 38 x 66 cm | RM215 |
A worked example: a ZP001 S costs RM145 and arrives with the soil, stone layer and fabric already in the box. For a single desk plant, the Ziant Hydro Planter XXS set at RM48.90 comes with a live Sansevieria as well.
Step 1. Build the layers in the planter
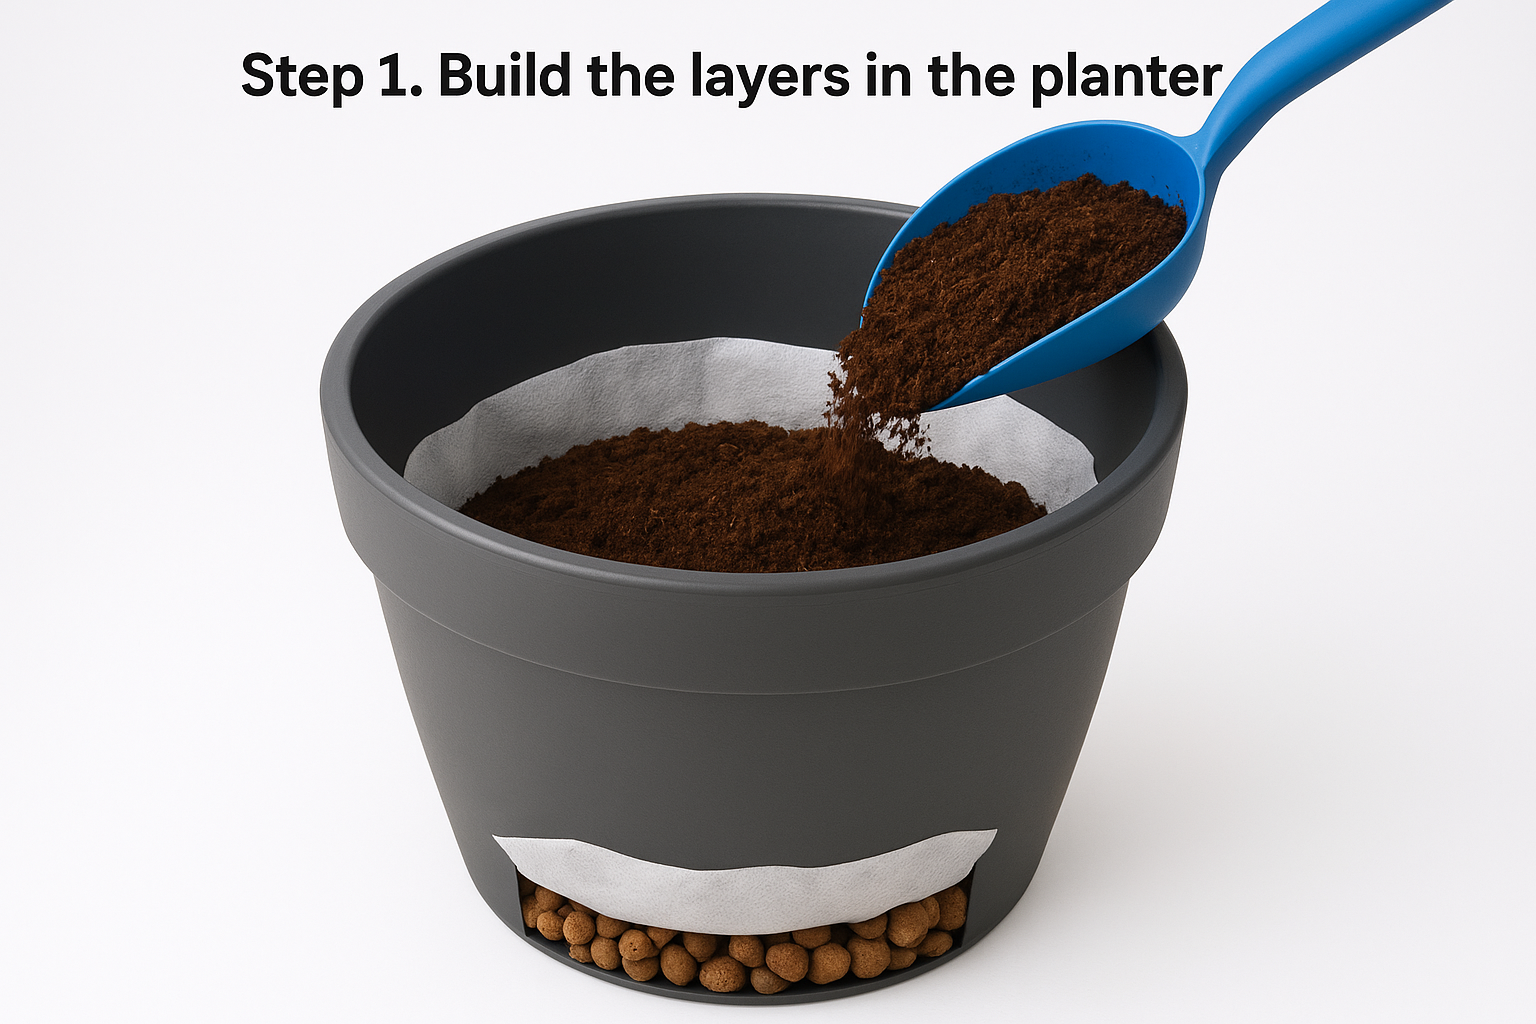
Layer from the bottom up: the water layer to the overflow height, fabric over it, then potting mix on top. Get this order right and the soil can wick water from the reservoir. Get it wrong and the soil either floods or stays dry.
Check the planter and place it first
Look for the fill opening, the overflow outlet and the wicking zone. Rinse out any dust from storage. Then move the planter to its final position before you add anything. A filled 36 cm planter is heavy, and tipping it later spills the reservoir.
Keep it level, so the water sits evenly. Outdoors, make sure the overflow outlet is not blocked by a wall, a saucer or a paving edge.
Add the water layer, fabric and soil
Work through these steps in order. If your planter comes with its own instructions, follow its layer heights.
- Pour the water layer material in until it reaches the overflow height. In a Ziant kit, this is the Hydrostone.
- Lay the fabric over it, a few centimeters wider than the opening, and tuck the edges down the sides. This stops soil washing into the reservoir.
- Fill with potting mix so the wicking zone is fully covered.
- Keep the mix loose. Do not press it down.
- Stop a few centimeters below the rim so water does not spill when you first water from above.
Use a potting mix, never garden soil. Garden soil compacts and blocks the upward movement of water. If you need extra for repotting later, NutriSoil Supreme Organic Planting Compost comes in a 5 kg (10 litre) bag at RM13.90.
Garden soil compacts and blocks the wicking, so a light potting mix is the first thing to get right.
Step 2. Plant and water from the top
Plant as you would in any pot, then water from the top until the soil feels evenly damp and spongy, not soggy. Keep top watering for the first one to two weeks, so the roots grow down toward the moisture.
Pick plants that like steady moisture
A self-watering planter suits plants that want even moisture. Herbs such as basil and mint work well. So do tomatoes, peppers, ferns, pothos and peace lilies.
Skip cacti and most succulents. They prefer to dry out fully between drinks and do better in a conventional pot. If you do grow a drought-tolerant plant here, expect to fill the reservoir much less often.
Plant and give the first top watering
Set the plant in the mix and fill around the root ball. Firm the soil gently, but do not pack it. Compacted soil restricts both water movement and air to the roots.
Now water slowly from above. This settles the soil, removes air pockets that can break the wicking chain, and links the soil to the reservoir. Some planters will drip from the overflow outlet. That tells you the soil is saturated enough.
You can test whether the wicking works. Fill the reservoir after the first top watering and check again the next day. A small drop in the water level means the soil is drawing from below. If the level has not moved, the soil is probably too dry or too compacted. Water from the top once more and recheck.
Top watering in the first one to two weeks is what switches the wicking on, so do not skip it.
Step 3. Fill the reservoir and refill on time
Pour water into the fill opening, not onto the soil, until the level reaches the overflow outlet or the gauge reads full. After the first one to two weeks, this is the only watering you do. It is also the whole answer to how to use a self-watering planter day to day.
Fill the reservoir correctly
Use a jug with a narrow spout and fill slowly. Stop when water appears at the overflow outlet. Do not push past that line, because water above it saturates the soil.
Ordinary tap water is fine for most plants. If your planter has no gauge, lift one edge. A noticeably light planter means the reservoir is nearly empty. A dry soil surface is normal. The moisture sits at root level, so a dry top does not mean a thirsty plant.
How often to refill
Refill when the reservoir runs low, not the moment it drops from full. A short dry-down between refills lets air reach the roots and keeps algae down. These are typical intervals:
| Situation | Typical refill interval |
|---|---|
| Indoors, moderate light | Every 7 to 14 days |
| Outdoors, full sun | Every 3 to 5 days |
| Herbs and leafy greens | Every 5 to 7 days |
| Larger reservoirs | Up to 2 to 4 weeks |
Check every two to three days for the first few weeks and note how fast the level drops. Then set a repeating phone reminder to match. Ziant states its Hydro Planter keeps plants hydrated for up to two weeks, which suits a holiday. Before you travel, fill the reservoir and move the planter out of direct sun.
Outdoors, a heavy downpour can top up the soil on its own. After rain, check that the overflow outlet is still clear.
Keep algae and mosquitoes out
Standing water invites trouble in a warm climate. Algae grows when water sits in light and heat, and standing water can attract mosquitoes. Prevent both:
- Keep the fill opening capped or covered when you are not refilling.
- Let the level drop before topping up.
- Flush the reservoir with fresh water once or twice a season.
If algae has already formed, empty the reservoir, wipe it with diluted vinegar, rinse well and refill.
Refill when the level runs low, and keep the fill opening capped.
Make your own self-watering planter at home
You can build a working planter from a plastic bin or bucket, a coarse filler, fabric and potting mix. The holes you drill set the height of the reservoir, so their position matters more than anything else.
Materials for a DIY planter
Gather these:
- A container with no drainage holes, such as a plastic bin or bucket. Plug any existing drain hole with silicone sealant.
- A drill, or a heated nail for plastic
- Coarse, light filler for the reservoir. Lava rock works well, and so do chunks of polystyrene or pool noodle.
- A piece of fabric, such as quilt batting or an old T-shirt
- Potting mix and a plant
Avoid heavy stone. It adds weight, and a cheap container may not survive being moved.
Build it in five steps
- Drill three or four holes of about 6 mm, around 7 cm up from the base. In a tall container, drill them higher. These holes mark the top of your reservoir.
- Add the filler until it sits just above the holes. It will settle a little over time.
- Cover the filler with fabric, a few centimeters wider than the opening, and tuck it down the sides.
- Add potting mix and plant.
- Water from the top until water runs out of the side holes. That means the reservoir is full.
Refill the same way each time. Because the overflow drains out of the side, this design suits outdoor use. Indoors, sit it on a deep saucer or use the ready-made version instead.
The height of the drilled holes decides the reservoir, so measure twice before you drill.
Set it up once and let it work
A self-watering planter works when you follow the order. Layer the water material, fabric and light potting mix. Plant, then top water for the first one to two weeks. After that, fill the reservoir slowly, refill when it runs low, and keep the fill opening capped. Choose plants that like steady moisture, and give a bin-and-drill version a try if you want a cheap start.
If you would rather skip the sourcing, the Ziant Hydro Planter comes with the soil, Hydrostone and fabric in the box. Not sure which size suits your balcony, desk or garden wall? Talk to the Konzept Garden team and tell us where it will sit.


