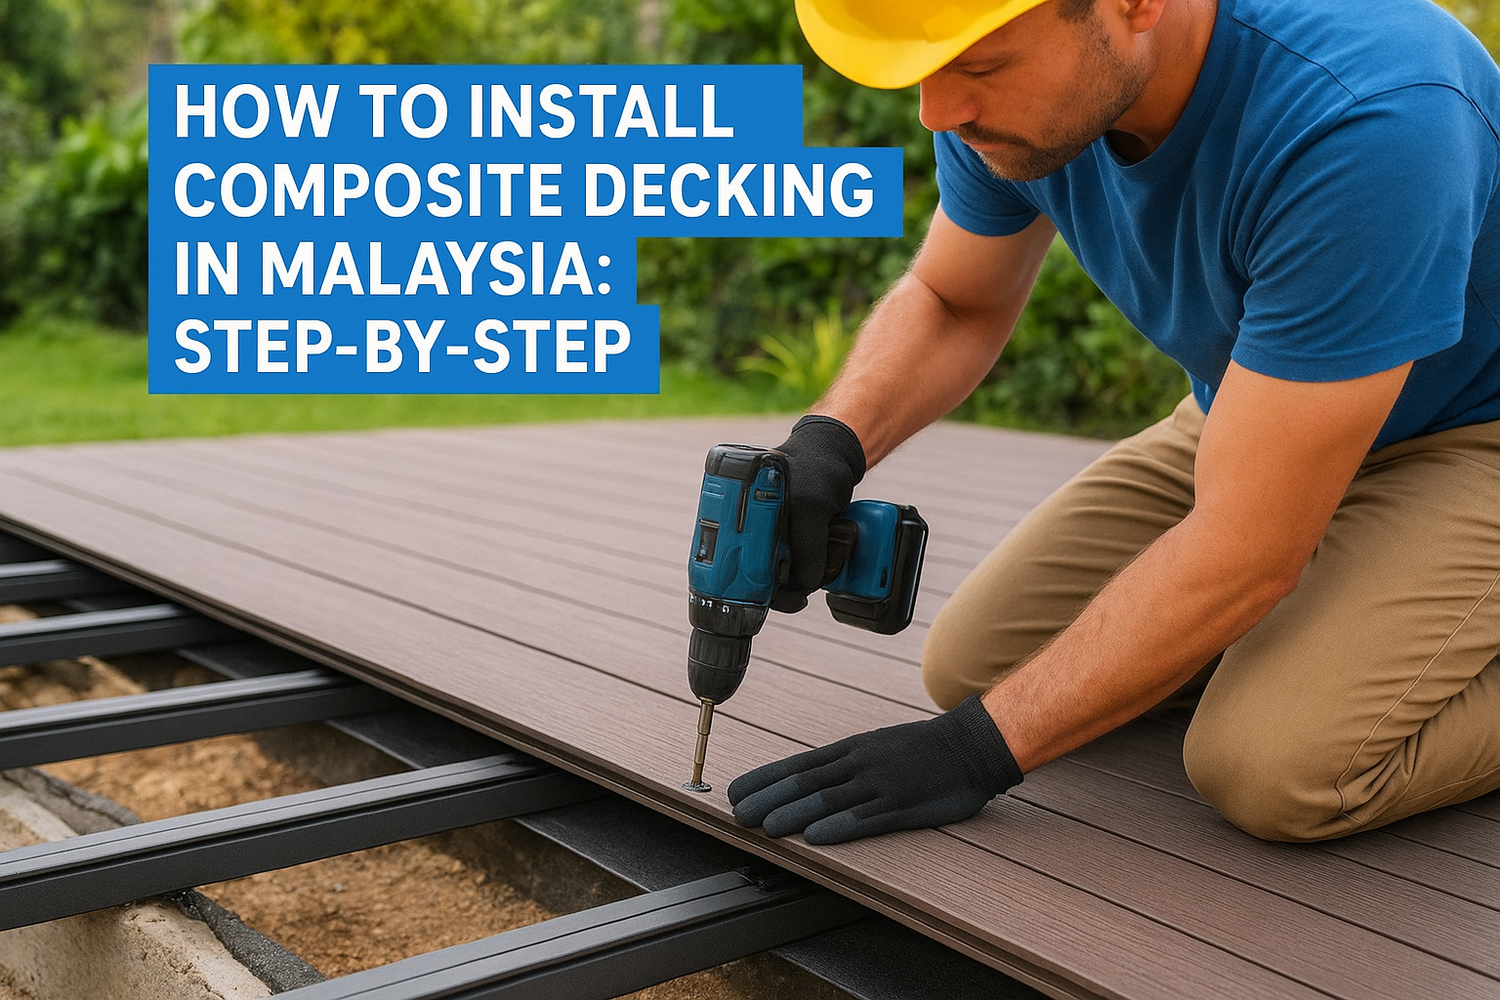
Composite decking has become a go-to choice for Malaysian homeowners who want a durable, low-maintenance outdoor surface that holds up against our tropical climate. But knowing how to install composite decking the right way makes all the difference between a deck that lasts decades and one that warps, buckles, or gaps within a year. If you're planning a DIY installation, or simply want to understand the process before hiring a professional, this guide covers every step from subframe construction to the final finishing touches.
At Konzept Garden, we design and build outdoor spaces across Malaysia, and composite decking is one of the materials we work with regularly in our landscape design and implementation projects. We've seen firsthand what happens when boards are installed without proper spacing, ventilation, or structural support, especially in our heat and humidity. That hands-on experience is exactly what shaped this step-by-step guide.
Below, you'll find detailed instructions on planning your layout, preparing the substructure, choosing the right fasteners, and laying composite boards correctly for Malaysian conditions. Whether you're decking out a backyard, a poolside area, or a rooftop terrace, this walkthrough will help you get the job done right the first time.
Before you start: rules, tools, and materials
Before you learn how to install composite decking properly, you need to cover the groundwork. In Malaysia, composite decking projects are often part of larger renovation or landscaping works, and skipping the pre-installation phase is one of the most common reasons jobs run over budget or fail inspection. Taking time now to confirm local requirements, gather the correct materials, and assemble your tools will save you significant rework later.
Check local building rules and permits
Outdoor decking structures in Malaysia typically fall under the jurisdiction of your local authority (Pihak Berkuasa Tempatan, or PBT). If your deck is attached to the house, elevated above a certain height, or exceeds a set area, you may need to submit plans and obtain a permit before construction begins. Freestanding decks at ground level are generally lower risk from a compliance standpoint, but you should still verify the rules with your local council before breaking ground.
Always confirm permit requirements with your PBT before you start work. Unpermitted structures can be ordered for demolition at your own cost.
For condominiums and gated communities, check with your Joint Management Body (JMB) or Management Corporation (MC) as well. Many have specific rules about materials, colors, and structural changes to common or semi-common areas. Getting written approval from them protects you if disputes arise later.
Tools you'll need on site
Having the right tools on hand before you start keeps the job moving and reduces costly errors. Missing a single tool mid-installation can throw off your spacing, fastener placement, or cutting accuracy. Below is the standard toolkit for a composite deck installation:

- Circular saw or miter saw (with a fine-tooth blade rated for composite materials)
- Drill/driver with torque control
- Rubber mallet
- Tape measure and chalk line
- Spirit level (at least 1.2 m long)
- Speed square and pencil
- Safety glasses, gloves, and ear protection
- String line and pegs for layout
- Jigsaw (for cutouts around posts or obstacles)
If you're installing hidden fasteners, which most composite systems in Malaysia use, make sure your drill bit matches the manufacturer's specification exactly. Using the wrong bit size leads to cracked boards or loose clips that shift over time, and neither problem is easy to fix once the deck is fully laid.
Materials and hardware checklist
Beyond the boards themselves, a composite decking installation involves several supporting components. Getting the full materials list right before you order prevents frustrating mid-project delays. Use this checklist as your starting point:
| Item | Notes |
|---|---|
| Composite deck boards | Order 10% extra for cuts and waste |
| Aluminum or galvanized steel joists | Recommended over timber in Malaysian humidity |
| Hidden clip fasteners | Match to your board brand's specification |
| Stainless steel screws | Use marine-grade for poolside or coastal areas |
| Post anchors or concrete footings | Depends on your subframe design |
| Fascia boards | For a clean edge finish |
| Joist tape | Protects the top of joists from moisture buildup |
| End caps | Closes board ends for a finished look |
| Composite-specific adhesive | For stair nosing and edge trims |
Aluminum joists are strongly preferred over timber in Malaysia because they resist moisture, pests, and warping far better in our climate. Timber joists can work with proper treatment, but they demand more ongoing maintenance and are more likely to fail prematurely in high-humidity or waterlogged conditions. For poolside or rooftop decks, the case for aluminum substructure is even stronger.
Step 1. Plan the layout and calculate quantities
Before you cut a single board or drive a single screw, you need a clear layout plan on paper. Poor planning is the leading cause of material waste and avoidable rework in composite decking projects, and it costs far more to correct mid-installation than to solve upfront. Knowing how to install composite decking starts here, not on site.
Decide on board direction and deck shape
Board direction affects both the look and the structural requirements of your deck. Running boards parallel to the longest wall of your house is the most common approach and gives a clean, proportional appearance. Diagonal installations are possible and look striking, but they require shorter joist spacing and generate significantly more offcut waste, so factor in at least 15% extra material rather than the standard 10%.
Diagonal board runs require joist spacing reduced by roughly 30% compared to a straight lay, which increases your subframe material cost.
Sketch your deck shape to scale on grid paper or use a free digital floor planner. Mark any fixed obstacles like drainpipes, tree roots, or existing structures. This sketch becomes your cutting guide and stops you from making expensive measurement errors on the day of installation.
Calculate how many boards and joists you need
Accurate quantity calculations prevent both shortages and expensive over-ordering. Use the formula below as your starting template:
Board quantity formula:
| Variable | How to calculate |
|---|---|
| Deck area (m²) | Length × Width |
| Board coverage per piece | Board width minus gap allowance (typically 5 mm) |
| Number of boards (base) | Deck area ÷ coverage per board per linear meter |
| Waste factor | Multiply base count by 1.10 (straight lay) or 1.15 (diagonal) |
For joists, divide your deck length by your chosen joist spacing (typically 400 mm centers for standard composite boards in Malaysia) and add one for the starting joist. Most board manufacturers publish a load-span table in their technical data sheet, and you should always cross-check your spacing against that document before ordering.
Write your final materials list before placing any order. Include board count, joist lengths, fastener packs, and all hardware in one consolidated list so you can order everything in a single delivery and avoid project delays caused by waiting on missing components.
Step 2. Prep the site for drainage and a solid base
Good site preparation determines whether your deck stays flat and dry five years from now, or starts showing problems after the first monsoon season. Malaysia's heavy rainfall means drainage is not an optional consideration; it is the foundation of the entire substructure's long-term stability. Before you learn how to install composite decking over any surface, the ground underneath needs to be cleared, leveled, and set up to shed water effectively.
Clear, level, and compact the ground
Start by removing all vegetation, roots, and debris from the deck footprint. Grass and plant material left under a deck will decompose, attract pests, and create uneven ground that shifts your footings over time. Use a spade to clear the area, then firm up the soil surface with a plate compactor or hand tamper, particularly in spots where the ground is soft or recently disturbed.
Once the area is cleared, check for level across the full footprint using a long spirit level or a laser level. A slope of 1 to 2 degrees away from your house is acceptable and actually beneficial because it encourages water runoff. Anything steeper needs to be addressed by adjusting footing heights rather than trying to compensate later in the subframe.
Never correct a severely uneven ground surface by shimming joists at irregular heights. That approach creates weak points in the subframe that fail under load.
After compacting, lay a geotextile weed barrier across the entire cleared area. This fabric suppresses weed growth without blocking drainage, which is exactly what you need under a deck in Malaysian conditions. Overlap each strip by at least 150 mm and fold the edges up slightly at the perimeter to prevent soil migration underneath.
Manage drainage before you build
Standing water under a deck is the single fastest way to compromise your substructure, even if you are using aluminum joists. Check where water pools during and after heavy rain by observing the site directly or reviewing any existing drainage patterns on the property before you commit to a footing layout.
If your site has poor natural drainage, install a simple perimeter drain or channel before you build. Slotted agricultural pipe laid in a shallow trench filled with gravel around the deck footprint redirects water efficiently and costs very little compared to the damage water accumulation causes over time. This step takes an afternoon but adds years to the life of your deck.
Step 3. Build a stiff subframe with correct joist spacing
The subframe is what every board rests on, so getting it right is not optional. A weak or poorly spaced subframe causes boards to flex underfoot, fasteners to work loose, and clips to crack over time. Before you lay a single board, your subframe needs to be rigid, level, and spaced to match your board manufacturer's load-span specification.
Set your footings and bearers first
Your footings anchor the entire structure to the ground, and their placement determines whether your deck stays level across its full lifespan. For ground-level decks in Malaysia, use concrete footings poured into tube forms or proprietary post anchors set into compacted base material. Space footings at no more than 1,200 mm centers along each bearer run, and confirm they are all at the same height using a string line and spirit level before the concrete cures.
Allow concrete footings to cure for a minimum of 24 hours before loading them with structural weight.
Once footings are set, fix your aluminum or galvanized steel bearers on top using appropriate post saddles or anchor brackets. Bearers should run perpendicular to the final board direction, and their top surfaces all need to sit at exactly the same height. Even a 5 mm height difference between bearers creates a visible hump or hollow in the finished deck surface that you cannot correct after installation.
Space and secure the joists
Joists run perpendicular to the bearers and directly support the boards. Joist spacing for composite decking in Malaysia should follow your board manufacturer's published load-span table, but 400 mm centers is the standard for most boards in a straight lay. Reduce that to 300 mm centers for diagonal installations, rooftop decks with higher traffic loads, or any area where heavy furniture will be concentrated.
Use this reference table to confirm the correct spacing for your project type:
| Installation type | Recommended joist spacing |
|---|---|
| Straight lay, residential ground level | 400 mm centers |
| Diagonal lay | 300 mm centers |
| Rooftop or elevated deck | 300 mm centers |
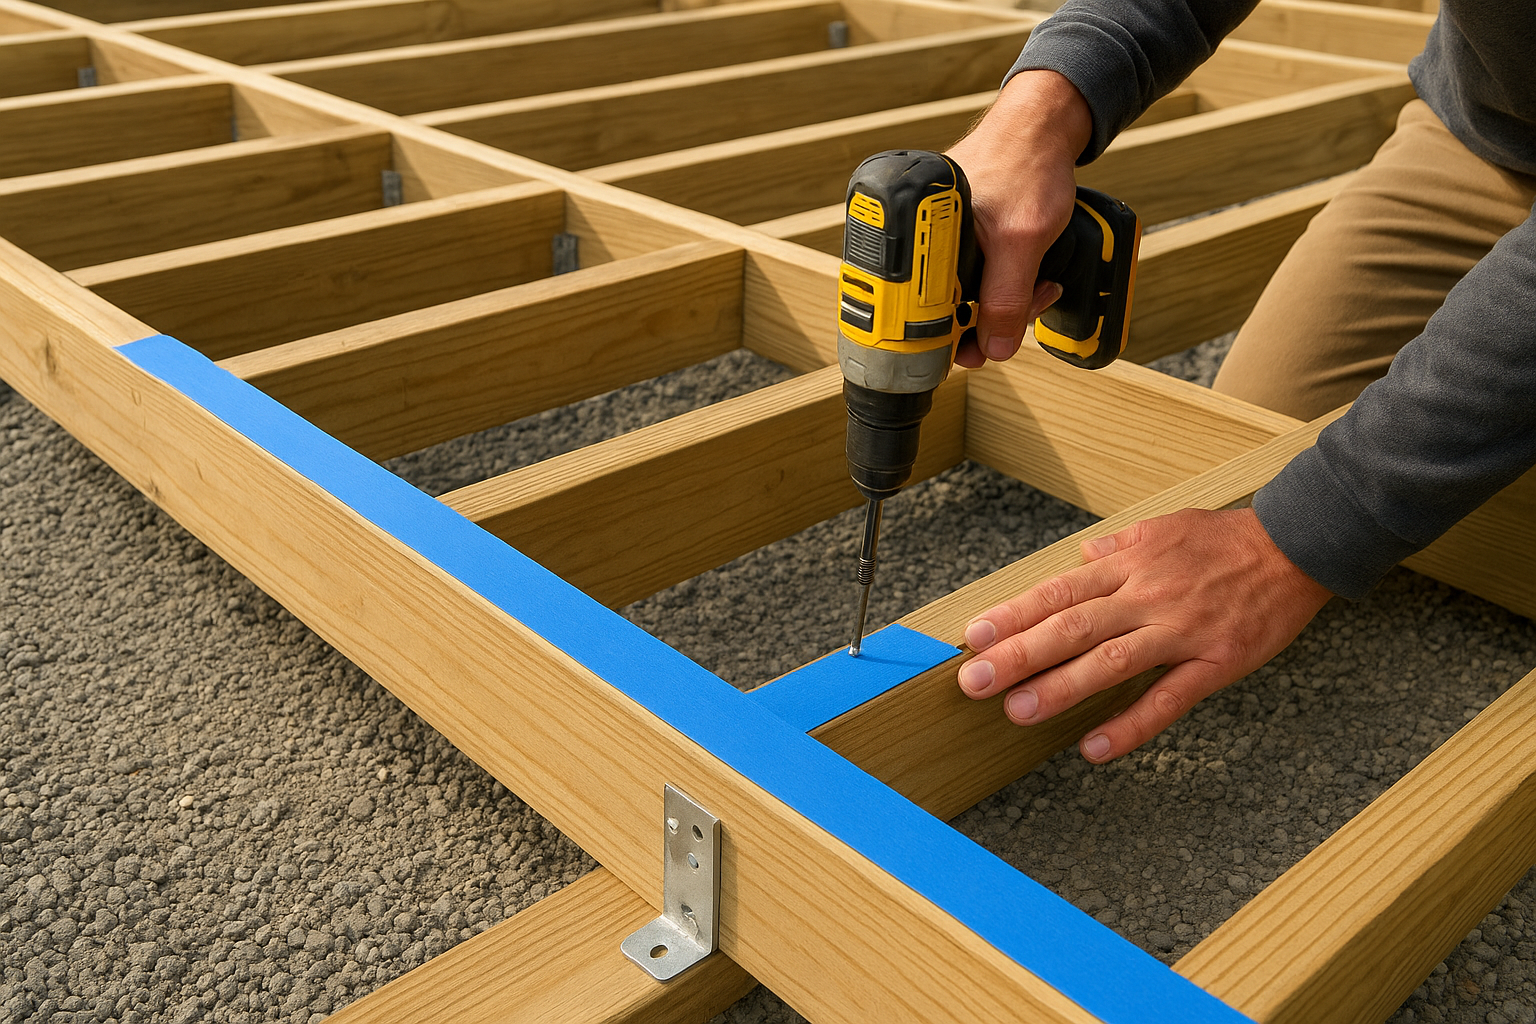
| High-traffic commercial area | 300 mm or less per manufacturer spec |
Fix each joist to the bearers using joist hangers or direct-fix screws, and apply joist tape along the top face of every joist before the boards go down. This tape creates a moisture barrier between the joist surface and the board underside, which significantly extends subframe life in Malaysia's humid conditions. Understanding how to install composite decking correctly means treating this step with the same care as any visible element of the finished deck.
Step 4. Lay boards with the right gaps and fasteners
With your subframe complete, you are ready to start laying boards. How you install composite decking at this stage directly affects the finished appearance, structural integrity, and long-term performance of the surface. Rushing through board placement or ignoring gap requirements is one of the most common mistakes DIYers make, and it produces a deck that looks unprofessional and performs poorly over time.
Start from a fixed reference edge
Begin laying boards from the edge furthest from the house and work toward the building, or start from the house wall if you want full boards visible from the main viewing angle. Snap a chalk line parallel to your starting edge across the full joist run before placing a single board. This line is your alignment reference throughout the installation, and deviating from it even slightly causes a visible drift that becomes impossible to correct without pulling boards up.
Fix your first board by pre-drilling and face-screwing through the outer edge into the first joist below. This starter board sets the direction for every clip that follows, so take the time to confirm it is perfectly straight and square to the deck frame before moving on.
Maintain consistent gaps with hidden clip fasteners
Expansion gaps are not optional in Malaysia's climate. Composite boards expand and contract with temperature and humidity changes, and insufficient spacing causes boards to buckle, bow, or push fasteners out of alignment. Follow this reference guide for standard gap requirements:
| Gap location | Recommended gap |
|---|---|
| Between board sides (lateral gap) | 5 to 6 mm |
| Between board ends (end-to-end gap) | 8 to 10 mm |
| Gap at fixed structures (walls, posts) | Minimum 10 mm |
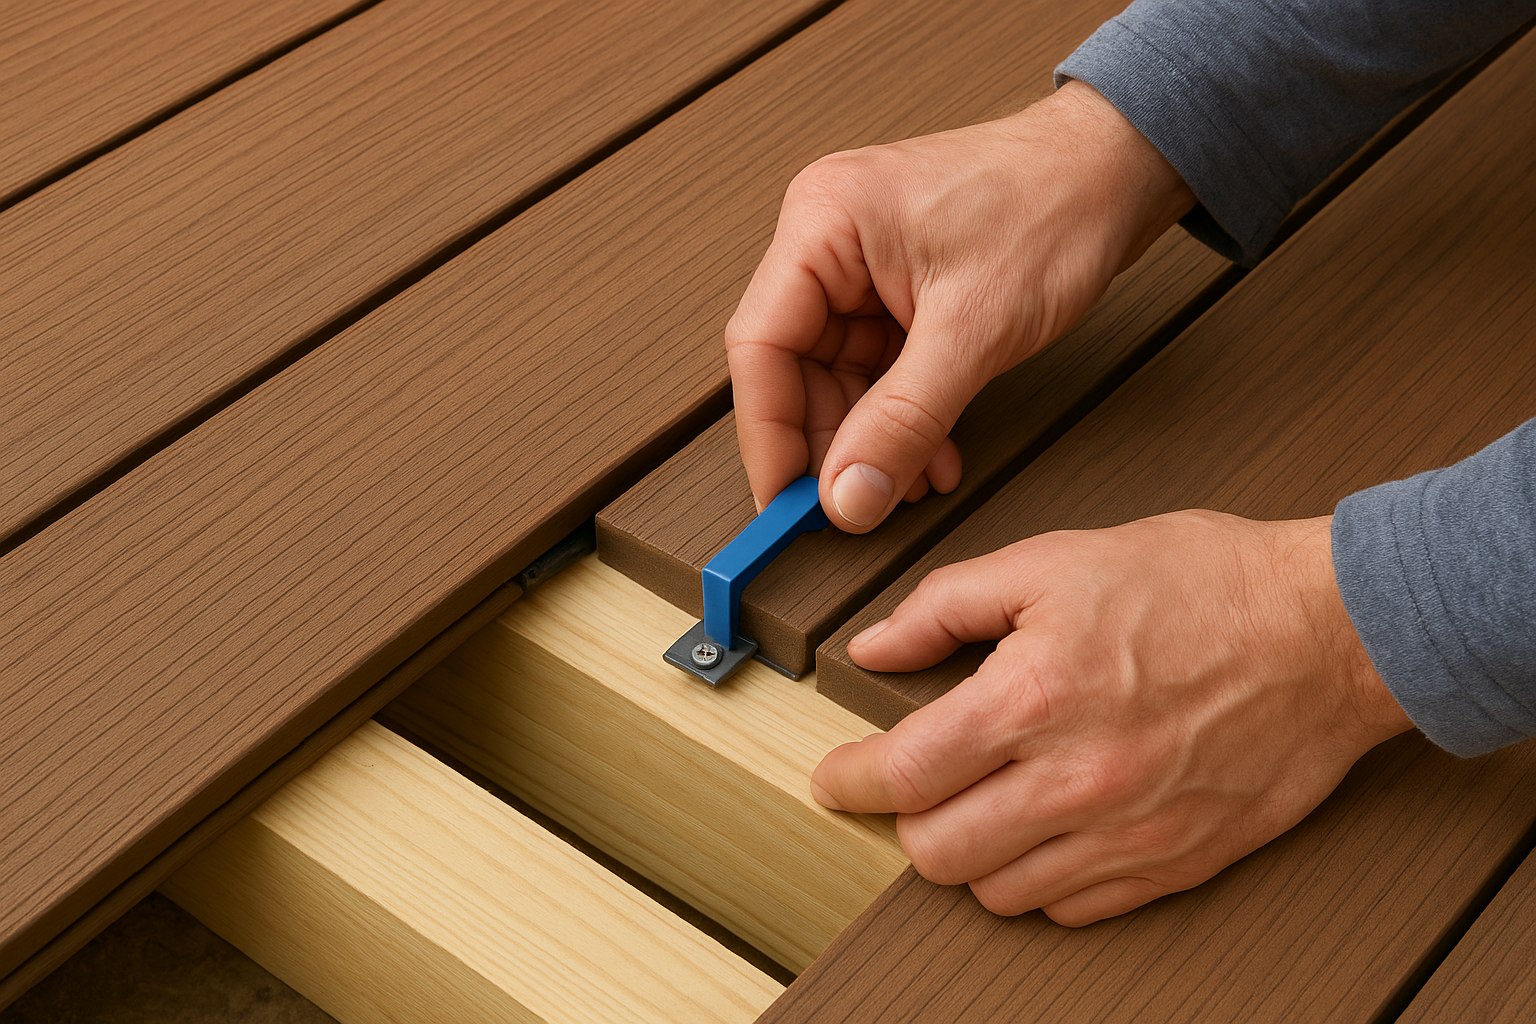
Insert your manufacturer-specified hidden clips into the groove on each board's edge, then position the next board against the clip. A spacer tool cut from scrap material at exactly 5 mm width keeps your gaps perfectly consistent across the full deck run. Tap each board into place with a rubber mallet rather than forcing it by hand, which risks cracking the groove.
Check that every clip seats fully into both board grooves before driving the fastener screw. A partially seated clip will allow the board to shift laterally over time.
Secure each clip to the joist below using a stainless steel screw driven at the angle the clip manufacturer specifies, usually 45 degrees. Check alignment against your chalk line every five to six boards to catch any drift early before it compounds across the full deck width.
Step 5. Finish edges, fascia, and stairs cleanly
The edge work is what separates a deck that looks professionally built from one that looks like a weekend project. Raw board ends and exposed subframe members are visually distracting and also collect moisture and debris over time. Knowing how to install composite decking all the way through to the finishing stage means treating the perimeter and any stair connections with the same precision you applied to the field boards.
Attach fascia boards to the perimeter frame
Fascia boards cover the exposed sides of your deck frame and give the structure a finished, intentional appearance. Cut each fascia board to length using a miter saw with a fine-tooth composite blade, and aim for clean, square cuts at every corner. For outside corners, a 45-degree miter joint looks far cleaner than a butt joint, and it also reduces the visible end-grain area that absorbs moisture.
Always use composite-specific adhesive behind each fascia board in addition to mechanical fasteners. Adhesive alone is not enough in Malaysian heat cycles, and fasteners alone leave the board prone to rattling as the material expands and contracts.
Fix fascia boards to the outer joist or rim beam using stainless steel screws driven at evenly spaced intervals, typically every 400 mm. Pre-drill each screw hole to prevent the board face from splitting, and keep all screws aligned at a consistent height across the full board length. Fit composite end caps onto any exposed board ends that remain visible above the fascia line to seal them completely.
Cut and fix stair treads correctly
Stairs add complexity to any deck build, but the installation logic follows the same principles as the field boards. Each stair tread needs to overhang the front of the stringer by 25 to 30 mm to create a nose that deflects rainwater away from the riser below. Use composite stair nosing trim where your board manufacturer supplies it, bonded with composite-rated adhesive and secured with screws countersunk flush to the surface.
Follow this reference guide for stair tread installation:
| Stair element | Specification |
|---|---|
| Tread overhang (nose) | 25 to 30 mm beyond stringer face |
| Gap between treads | 5 to 6 mm (same as field boards) |
| Fastener type | Stainless steel screws, countersunk |
| Adhesive application | Full bead along stringer contact face |
| Anti-slip treatment | Grooved board profile or applied grip strip |
Anti-slip performance matters significantly in Malaysia because wet treads during rain are a genuine safety risk. Choose boards with a deeply grooved surface profile for stair use, or apply an adhesive grip strip if your boards have a smooth face.
Step 6. Clean up, inspect, and fix common issues
The final stage of learning how to install composite decking is one that most guides skip over, but it directly affects how long your deck performs and how it looks from day one. Once the last board and fascia trim are fixed in place, you need to shift from builder to inspector and deal with any remaining debris, fastener issues, or alignment problems before you call the job complete.
Clear debris and wash the surface
Start by sweeping the entire deck surface with a stiff-bristle broom to remove all sawdust, offcuts, and loose fasteners left from the installation. Pay particular attention to the gaps between boards because sawdust trapped in the channels traps moisture against the board edges, which is exactly the condition you built the whole deck to avoid. Blow out any packed debris from gaps using compressed air or a garden hose set to a focused stream.
Once the surface is clear, wash the boards down with clean water and a soft deck brush. Avoid pressure washers at this stage because the jet can force water into any partially seated clip or pre-drilled fastener hole and introduce moisture directly to the subframe. A standard hose-down with a scrubbing brush removes installation residue without risking water ingress.
Let the deck dry fully before placing any furniture or covering the surface, particularly if you applied composite adhesive to fascia boards or stair nosing within the past 24 hours.
Inspect the deck systematically
Walk every board run and check each one against this post-installation inspection checklist:
| Inspection point | What to look for | Corrective action |
|---|---|---|
| Board alignment | Gaps consistent, no lateral drift | Pull and re-clip drifted boards before they compress further |
| Clip seating | All clips fully engaged in both grooves | Re-drive any screws that are proud or at the wrong angle |
| End gaps | 8 to 10 mm at all board ends | Use a chisel to open under-spaced ends before boards lock in |
| Fascia fixings | Screws flush, adhesive cured | Add screws to any panel showing a gap at the subframe |
| Stair nosing | Firmly bonded, no movement underfoot | Apply additional adhesive and clamp overnight |
Fix the most common installation problems
Board creaking underfoot usually points to a clip that did not seat fully or a joist that has a slight height difference from its neighbor. Locate the creaking board by walking it slowly, then lift the board from the nearest end, re-seat the clip, and confirm both joists below are sitting at the same height before re-fixing. Fixing a creak now takes ten minutes; leaving it means the board groove will wear unevenly and crack within a season.
Visible screw heads on field boards indicate someone face-screwed a board rather than using the hidden clip system. You can cover these with manufacturer-matched composite color-fill plugs, which press into the countersunk hole and sand flush. They are not invisible, but they are far better than leaving raw screw heads exposed to Malaysia's UV and rain cycles.

Quick wrap-up
Knowing how to install composite decking correctly comes down to six repeatable steps: plan your layout, prepare the site for drainage, build a rigid subframe at the right joist spacing, lay boards with proper gaps and hidden fasteners, finish the edges and stairs cleanly, and inspect the finished surface before you put it to use. Each step builds on the one before it, which means skipping or rushing any phase creates problems that compound through the rest of the installation.
Malaysia's heat, humidity, and monsoon rain make proper ventilation, drainage, and material selection non-negotiable on every project. Aluminum subframes, joist tape, stainless steel fasteners, and consistent expansion gaps are not extras; they are what keeps your deck performing well for years, not just months. If you want professional guidance on your outdoor space before you commit to a build, talk to the Konzept Garden team and get a free consultation.

