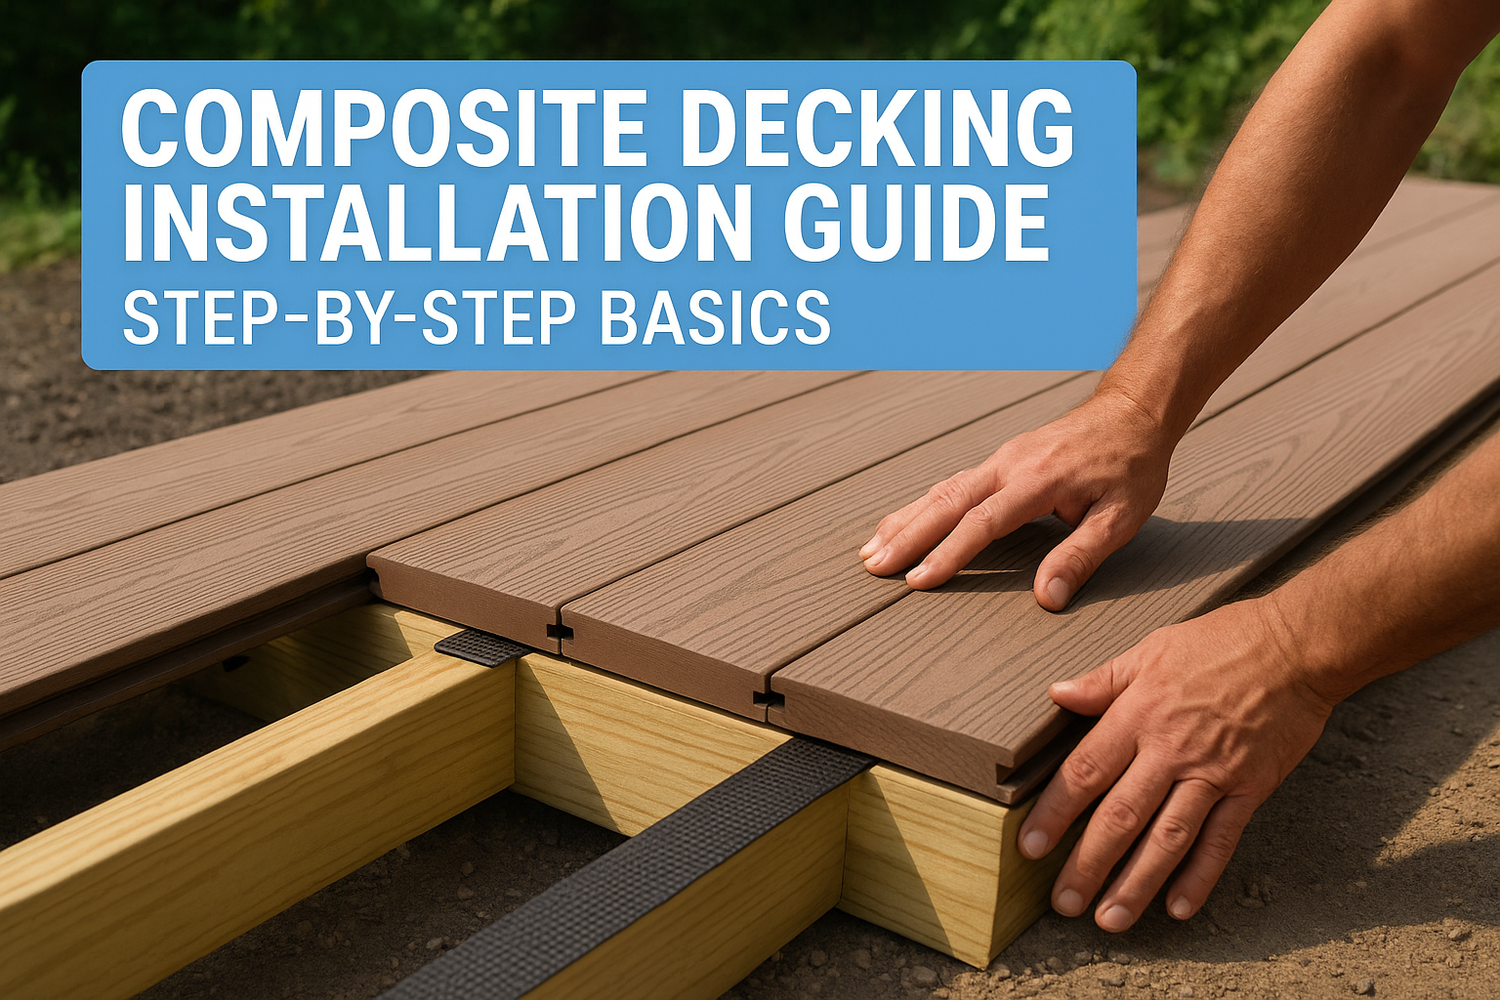
Composite decking looks great, lasts longer than timber, and handles Malaysia's heat and humidity without the constant upkeep. But even the best boards won't perform if they're installed incorrectly. A solid composite decking installation guide matters because the process differs from traditional hardwood in ways that trip up both DIYers and inexperienced contractors, from joist spacing requirements to expansion gaps that account for our tropical climate.
Get the substructure wrong, and you'll deal with warping, sagging, or boards that buckle within months. Get it right, and your deck becomes a low-maintenance outdoor space that holds up for years. The difference comes down to preparation, proper materials, and following each step in the correct order. That's exactly what this guide covers: ground preparation, framing, fastening systems, and every technical detail between unboxing your boards and walking across a finished deck you can trust.
At Konzept Garden, we design and build outdoor spaces across Malaysia, from full landscape transformations to specific features like decking, patios, and garden structures. We've installed composite decking on residential and commercial projects alike, and we've seen firsthand what happens when installation shortcuts are taken. This guide draws from that hands-on experience to walk you through the process step by step, whether you're planning to tackle it yourself or simply want to understand what proper installation looks like before hiring a professional.
What to know before you start
Before you pick up a single board, you need to understand what separates composite decking installation from standard timber work at a structural level. Composite boards expand and contract with temperature and moisture changes more than hardwood does, and in Malaysia's tropical climate, that thermal movement is more pronounced than in temperate regions. If you skip the pre-installation planning stages covered in this composite decking installation guide, you'll be dealing with buckled boards or cracked fascia before your first monsoon season is over. Getting these fundamentals right first is what separates a deck that holds up for 15 years from one that needs repairs within 18 months.
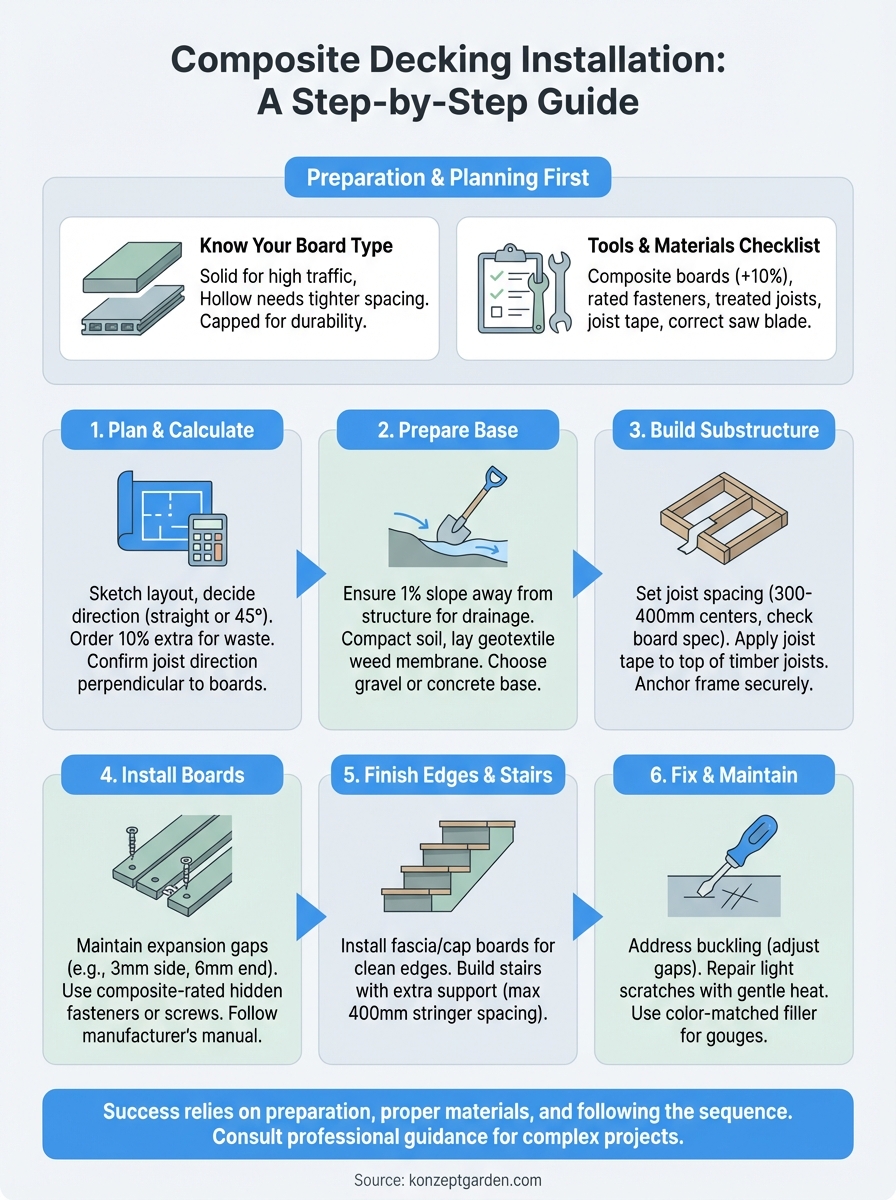
Know your composite board type
Not all composite decking is the same, and the correct installation method depends on which type you're working with. The two main categories are solid core boards and hollow core boards. Solid boards are heavier and more resistant to surface indentation, making them better suited for high-traffic areas like commercial terraces or pool surrounds. Hollow boards are lighter and easier to handle on site, but they require tighter joist spacing to prevent flex underfoot. Your board choice also determines which fastener system you can use, so confirm the board type with your supplier before you buy any subframe materials.
There is also a meaningful difference between capped and uncapped composite. Capped boards have a protective polymer shell on all sides or at minimum the top and edges, which significantly improves resistance to moisture absorption, UV fading, and surface staining. Uncapped boards cost less upfront but show wear faster in outdoor conditions. For Malaysia's year-round heat and high humidity, capped composite gives you better long-term performance and makes cleaning far more straightforward.
Tools and materials checklist
Having the right tools on site before you start prevents costly delays and installation errors mid-build. Running out of the correct fasteners or using the wrong blade type for cutting composite can ruin boards and throw off your entire schedule.

Here is what you need ready before installation begins:
- Composite decking boards (order 10% more than your measured area to account for cuts and waste)
- Composite-rated hidden fasteners or screws (always check the manufacturer's approved fastener list)
- Pressure-treated timber or aluminum joists rated for ground-contact or near-ground conditions
- Post bases and concrete anchors to secure the subframe to the slab or ground
- Joist tape or butyl tape to protect the top face of timber joists from trapped moisture
- Circular saw or miter saw fitted with a fine-tooth carbide blade rated for composite materials
- Drill and impact driver with the correct bit type for your chosen fastener system
- Chalk line and tape measure for accurate layout lines across the frame
- Rubber mallet for seating boards without marking the surface
- Safety glasses and hearing protection for cutting and driving
Never substitute standard wood screws for composite-rated fasteners. Wood screws cause surface mushrooming around the head and will void your board manufacturer's warranty.
Read your manufacturer's specifications first
Every composite brand publishes its own technical installation manual, and those specifications override any general advice, including what you read here. Joist spacing, expansion gap sizes, and approved fastener types vary between brands and board profiles. Some manufacturers permit 400 mm joist centers for straight-run decking but require 300 mm centers when boards are laid at a 45-degree angle. Exceeding those spans puts bending stress on the board and causes visible sag over time.
Download the full installation guide for your specific board brand before you buy a single piece of subframe material. Read the sections on subframe requirements, thermal expansion allowances, and fastener specifications in detail. If the manual is not available on the manufacturer's website, contact your supplier and request a copy before work begins.
Step 1. Plan the layout and calculate materials
Planning before you touch a single board saves you from ordering short, making incorrect cuts, or discovering mid-installation that your layout creates awkward narrow strips along one edge. Start by standing in the space and deciding how the deck connects to your home, garden, or surrounding structures. Your layout direction directly determines joist direction, since the subframe always runs perpendicular to the boards. Sketch a dimensioned plan before you buy anything, because material quantities depend entirely on the layout you choose.
Decide on board direction and layout pattern
Most decks run boards parallel to the longest wall of the house, which creates a clean, proportional look and keeps cutting waste low. Running boards at a 45-degree angle is also common for visual variation, but it increases material waste by roughly 15% and requires closer joist spacing, typically 300 mm centers instead of 400 mm. Factor this into your planning early so you're ordering the correct volume of both boards and subframe components before work begins.
Picture-frame border layouts also affect how you plan fascia boards and edge treatments. A picture-frame border requires full-length perimeter boards set perpendicular to the field boards, which means you need to account for that border width in your overall deck dimensions before you finalize the joist layout beneath it.
Confirm your chosen layout direction against the board manufacturer's specifications, since some board profiles only permit certain installation angles without voiding the warranty.
Calculate your material quantities
Accurate quantity calculations prevent costly over-ordering and frustrating mid-project shortages. Use the template below as your baseline starting point, then adjust for any angles, borders, or step areas in your specific design.
| Item | Formula | Example (5m x 4m deck) |
|---|---|---|
| Deck area | Length x Width | 20 m² |
| Boards with waste buffer | Area x 1.10 | 22 m² effective order |
| Joists at 400 mm centers | Deck width / 0.4 + 1 | 11 joists per 4 m span |
| Hidden fasteners | 1 clip per 300-400 mm run | Per manufacturer spec |
| Joist tape | Total joist length | 1 roll per 10 linear meters |
For a standard 5m x 4m deck, plan to order around 22 m² of boards once you include the 10% waste buffer. Always cross-reference your joist spacing quantities against your specific board manufacturer's requirements, which you identified in the pre-installation stage of this composite decking installation guide.
Step 2. Prepare the base for drainage and stability
The base beneath your deck determines how well water drains away and how stable the entire structure feels underfoot. Malaysia's heavy rainfall means poor drainage is the number one cause of premature composite deck failure, not the boards themselves. Before you set a single joist, you need to prepare the ground so water moves away from the structure rather than pooling underneath it.
Assess and grade your ground surface
Walk the area after rain and note where water collects. Your finished base needs a minimum slope of 1% away from the house, which equals a 10 mm drop for every 1 meter of horizontal run. If the ground currently slopes toward your building, you need to regrade it before any other work begins. Skipping this step traps water under the subframe and accelerates timber rot, corrosion on metal fixings, and mold growth on the underside of your boards.

Clear the area of all vegetation, roots, and organic material down to firm subsoil. Loose or soft soil must be compacted, since uneven settling under your post bases will cause the deck to rack and creak over time. If you're building over bare earth, lay a geotextile weed membrane across the entire footprint after grading to block plant regrowth without blocking drainage.
Choose the right base material for your site
Your base material choice depends on the ground conditions and the deck height. Use the table below to match your site to the right approach before you start ordering materials.
| Site condition | Recommended base | Key requirement |
|---|---|---|
| Firm, well-drained soil | Compacted gravel, 75-100 mm deep | Grade away from structure at 1% minimum |
| Soft or clay-heavy soil | Concrete pad, 100 mm thick | Reinforced with mesh for spans over 3 m |
| Existing concrete slab | Clean and seal existing surface | Check for standing water and re-slope if needed |
| Rooftop or elevated deck | Structural slab with drainage outlets | Confirm load ratings with a structural engineer |
For most residential garden decks in Malaysia, a well-compacted gravel base with a geotextile membrane underneath performs reliably and costs less than a full concrete pour. Use 20 mm clean crushed aggregate, not builder's sand, since sand compacts poorly and shifts with water movement.
If you're building directly over concrete, confirm that drainage outlets exist at the lowest point of the slab before your subframe goes down, since trapped water under a sealed deck surface accelerates metal corrosion and board staining faster than bare soil conditions.
Step 3. Build a strong substructure and set joist spacing
The substructure carries every load your deck experiences, from foot traffic to outdoor furniture, and it directly controls how your boards perform over time. Weak or incorrectly spaced joists cause boards to flex, creak, and eventually crack at mid-span. In Malaysia's climate, moisture also works constantly against untreated timber frames, so your material choices here are as important as the structural layout. Follow this step carefully, because the subframe is the one part of your deck you won't be able to fix without pulling every board off.
Set joist spacing based on your board type
Your joist spacing determines the structural support interval beneath each board, and the correct measurement varies depending on your board profile and installation angle. Use the reference table below to confirm the right spacing before you cut a single joist.
| Board type | Straight run spacing | 45-degree angle spacing |
|---|---|---|
| Hollow core composite | 300-400 mm centers | 300 mm centers maximum |
| Solid core composite | 400 mm centers | 300 mm centers maximum |
| Boards over 140 mm wide | Check manufacturer spec | Reduce by at least 50 mm |
Mark your joist positions with a chalk line across the bearer or rim joist before fixing anything. Once you fix the first and last joists, string a line between them and use it to keep every intermediate joist perfectly aligned. Misaligned joists create uneven board surfaces that are both visually obvious and a tripping hazard.
Always apply joist tape along the top face of every timber joist before you lay boards, since trapped moisture between the joist and board underside is the leading cause of premature composite board warping.
Anchor the frame securely to the ground
Post bases and concrete anchors keep your subframe from shifting during heavy rain or after soil movement. Set your posts into appropriate post bases rather than directly into soil, which accelerates timber decay even with pressure-treated lumber. Space posts at a maximum of 1,800 mm apart along each bearer to prevent mid-span deflection under load.
Check every corner for square using the 3-4-5 triangle method: measure 3 m along one side, 4 m along the adjacent side, and confirm the diagonal reads exactly 5 m. A square frame ensures your boards run parallel to each other across the full deck, which is a critical detail any reliable composite decking installation guide reinforces from the framing stage onward.
Step 4. Install boards with correct gaps and fasteners
With your subframe complete and squared, you can start laying boards. The most common mistake at this stage is treating composite installation like timber board installation and ignoring expansion gaps. Composite boards expand laterally and longitudinally with temperature changes, and in Malaysia's climate, that movement is significant. Skipping or undersizing gaps causes boards to push against each other and buckle along the surface, which is both a visual and structural problem that no post-installation repair will correct permanently.
Set expansion gaps at every board end and side
Gap sizing controls how your board surface looks and performs across temperature swings, and the correct measurements depend on your specific board brand and the ambient temperature during installation. As a baseline, most manufacturers specify a 3 mm side gap between adjacent boards and a 6 mm end gap wherever a board end meets a fixed structure, fascia, or another board end. If you're installing during the hottest part of the day in direct sun, reduce those gaps slightly, since the boards are already near peak expansion. Installing on a cooler morning means holding to the full gap size.
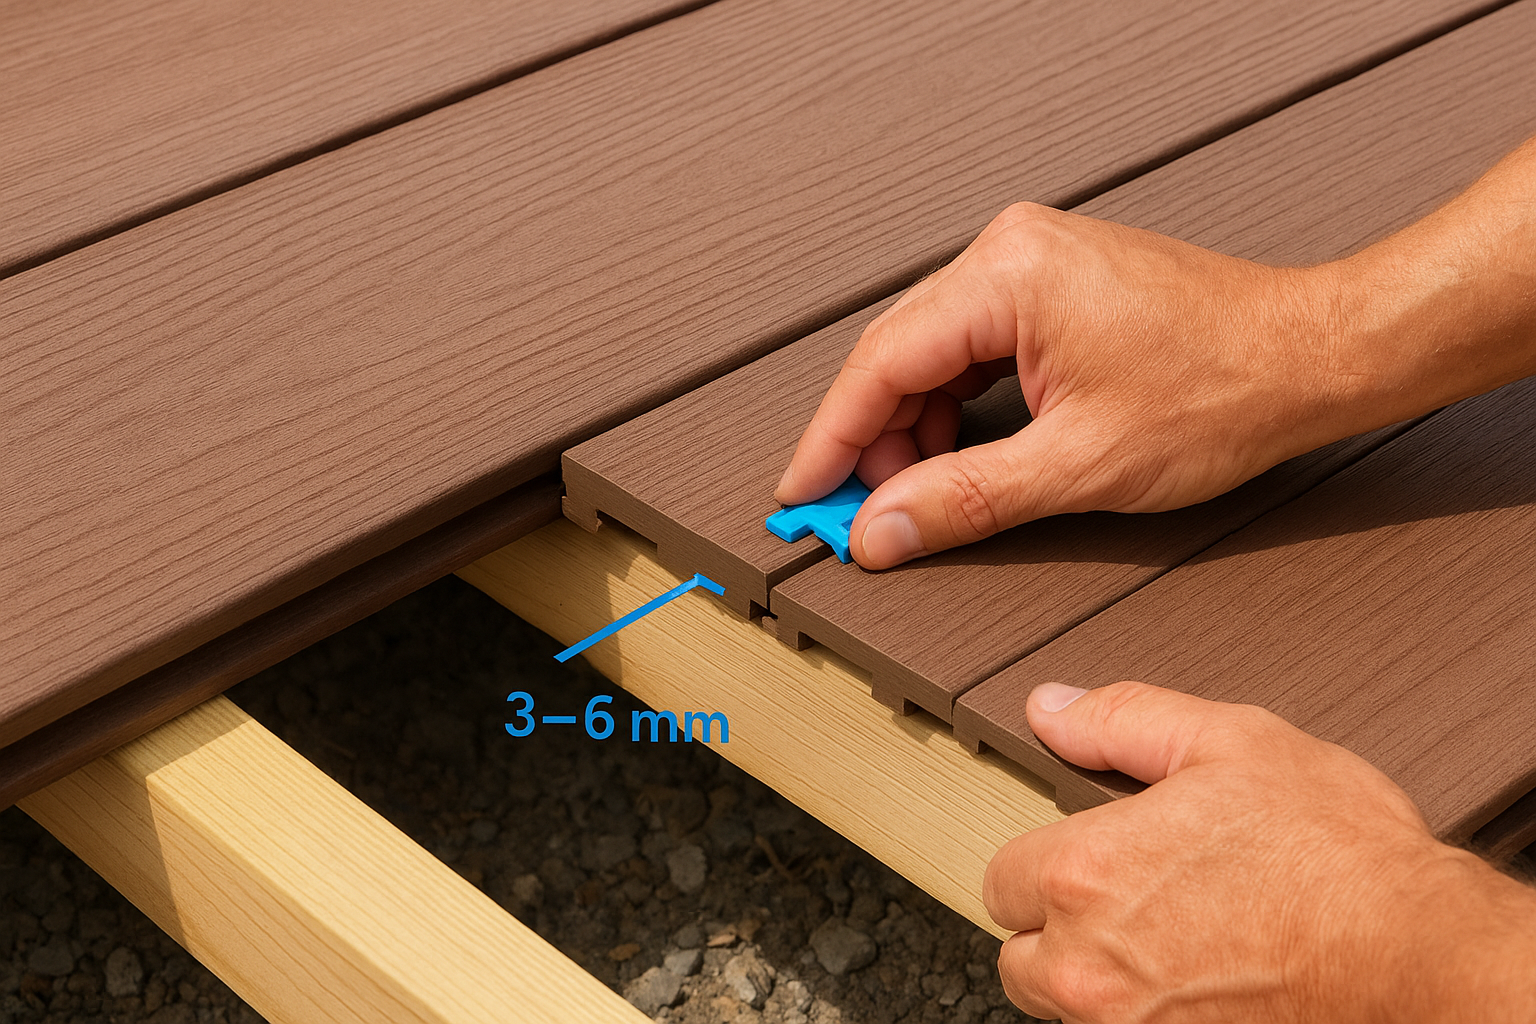
Use spacer clips or manufacturer-supplied gap tools to maintain consistent spacing across every run. Never eyeball the gap, because inconsistent spacing becomes immediately visible once the deck is finished and light hits the surface at an angle.
| Installation condition | Recommended side gap | Recommended end gap |
|---|---|---|
| Cool morning install (under 28°C) | 3 mm | 6 mm |
| Hot afternoon install (over 32°C) | 2-2.5 mm | 5 mm |
| Board surface hot to touch in direct sun | 2 mm | 4-5 mm |
Always confirm your specific gap measurements against your board manufacturer's technical manual before you begin laying, since overriding these figures without that confirmation can void your warranty.
Choose and install the right fastener type
Hidden clip fasteners give you a clean surface finish with no visible screw heads, and most composite board manufacturers include a compatible clip system with their boards or sell one separately. These clips sit in the groove along each board edge and lock onto the joist below, holding the board flat while still allowing controlled thermal movement. Surface screw installation is also valid for some solid-core boards, but you must use composite-rated screws that countersink flush without mushrooming the surface material around the hole.
Drive fasteners at every joist crossing without exception. Skipping a joist point weakens the board hold and allows that section to lift slightly under foot pressure, creating a noticeable bounce that worsens over time. Following every fastener placement step in this composite decking installation guide and your board manufacturer's documentation keeps the deck surface tight, flat, and visually consistent from the first board to the last.
Step 5. Finish edges, stairs, and board ends neatly
The finishing stage determines how professional your deck looks from every angle, not just the top surface. Exposed board ends, rough fascia lines, and poorly connected stair sections make an otherwise well-built deck look unfinished and reduce its overall durability. Take the same care here that you applied to your subframe and fastening work, because visible edges and transitions face constant sun and rain exposure in Malaysia's climate and will show deterioration faster than the main deck field if you cut corners.
Install fascia and cap boards for clean edges
Fascia boards cover the exposed ends and sides of your subframe, creating a finished perimeter that hides your joists, post bases, and board ends from view. Cut each fascia board to length with a fine-tooth carbide blade, since rough cuts on composite material fray the edges and look unfinished even after installation. Use composite-rated screws to fix fascia boards directly into the rim joists, placing fasteners every 400 mm along the run to hold the board flat against the frame without bowing.
Always pre-drill your fascia screw holes at least 25 mm from each board end to prevent the material from splitting under fastener pressure.
If you installed a picture-frame border layout, the perimeter boards sit on top of the main field boards and form a continuous frame around the deck. Miter the corners at 45 degrees for a clean joint, and apply a manufacturer-approved composite end-cap or color-matched sealant to any exposed cut ends to block moisture ingress at the board's most vulnerable point.
Build composite stairs with structural support
Composite decking boards work well for stair treads, but stairs require additional structural support beneath each tread that a standard joist layout does not provide. Cut your stringers from pressure-treated timber or steel, and space them at a maximum of 400 mm apart to eliminate any flex underfoot on the tread surface. Each tread should overhang the riser face by 25 mm for a clean profile and to channel rainwater clear of the riser board below.
Apply the same expansion gap and fastener rules from this composite decking installation guide to every stair tread, since boards on stairs experience identical thermal movement to those on the main deck field. Fix tread boards with hidden clips where the board profile allows, or use surface screws countersunk flush for solid-core tread boards where clip access is restricted by the stringer geometry.
Step 6. Avoid common mistakes and fix issues fast
Even careful installers run into problems once the deck is finished and in use. The good news is that most composite decking failures trace back to a small set of repeated errors, and knowing what to watch for helps you catch issues early before they spread across your entire deck surface. This final step in this composite decking installation guide covers the mistakes that show up most often on Malaysian residential decks and explains how to address each one without tearing out your entire subframe.
Spot and fix the most common installation errors
Board buckling and surface rippling are the clearest signs that expansion gaps were undersized or skipped entirely. If you see boards pushing against each other and lifting in the middle, remove the affected section, re-cut the board ends to restore the correct end gap, and reinstall with proper spacing. You cannot solve gap problems by forcing boards back into position with additional fasteners, since that only transfers the stress to the fastener points and causes cracking.
Uneven board surfaces usually point to joists that shifted before the boards were fixed down, or to joist tape that was skipped on timber framing. Check the subframe beneath the problem area with a straight edge. If the joist has twisted or settled, sister a new joist alongside the original and refasten the boards to the corrected surface.
Squeaking and creaking boards almost always indicate a fastener that missed the joist center or a board that was not fully seated into its clip before the adjacent board was installed.
Here is a quick reference for the most frequent problems and their direct fixes:
| Problem | Likely cause | Fix |
|---|---|---|
| Boards buckling upward | Undersized expansion gaps | Remove boards, re-cut ends, reinstall with correct gaps |
| Visible surface screws lifting | Wrong screw type or length | Replace with composite-rated screws at correct depth |
| Boards creaking underfoot | Fastener missed joist or board unseated | Drive additional fasteners through surface at joist center |
| Water pooling on deck surface | Insufficient base slope | Regrade base, check drainage outlets under subframe |
Repair surface damage without replacing full boards
Light surface scratches on capped composite boards are easier to repair than most people expect. Apply gentle heat from a heat gun to the affected area at low setting, then buff the surface with a soft cloth in the direction of the board grain while the material is warm. This technique works specifically on capped boards because the polymer shell responds to controlled heat.
Deeper gouges that reach the core material require a color-matched composite filler from your board manufacturer. Clean the damaged area, apply the filler in thin layers, allow full cure time between coats, and finish flush with a fine-grit sanding block. Always test filler color on a scrap offcut before applying it to a visible board surface.
Final takeaway
A successful composite deck comes down to preparation and sequence, not just the quality of the boards you buy. Every step in this composite decking installation guide builds on the one before it: a properly graded base supports a level subframe, correct joist spacing prevents board flex, and consistent expansion gaps stop buckling before it starts. Skip any of these stages and you'll spend more time and money correcting problems than you would have spent doing the job right the first time.
If your project involves more than a straightforward flat deck, including changes in level, integrated planters, or a larger outdoor space transformation, getting professional input early saves you significant rework. The Konzept Garden team works on outdoor projects across Malaysia and can help you plan a deck that fits both your site conditions and your long-term maintenance goals. Talk to our team about your outdoor space before you commit to a layout or materials list.
