Watering plants by hand wastes time. Sprinklers waste water. That's why Rain Bird drip irrigation has become a go-to solution for homeowners and professionals who want efficient, targeted watering without the guesswork.
At Konzept Garden, we design landscapes that thrive with minimal maintenance, and choosing the right irrigation system is a big part of that equation. Whether you're setting up a small herb garden or planning irrigation for an entire property, understanding how drip systems work helps you make smarter purchasing decisions and avoid costly mistakes.
This guide covers how Rain Bird drip irrigation works, which components you actually need, and what to look for when buying kits or individual parts for your project.
What Rain Bird drip irrigation is
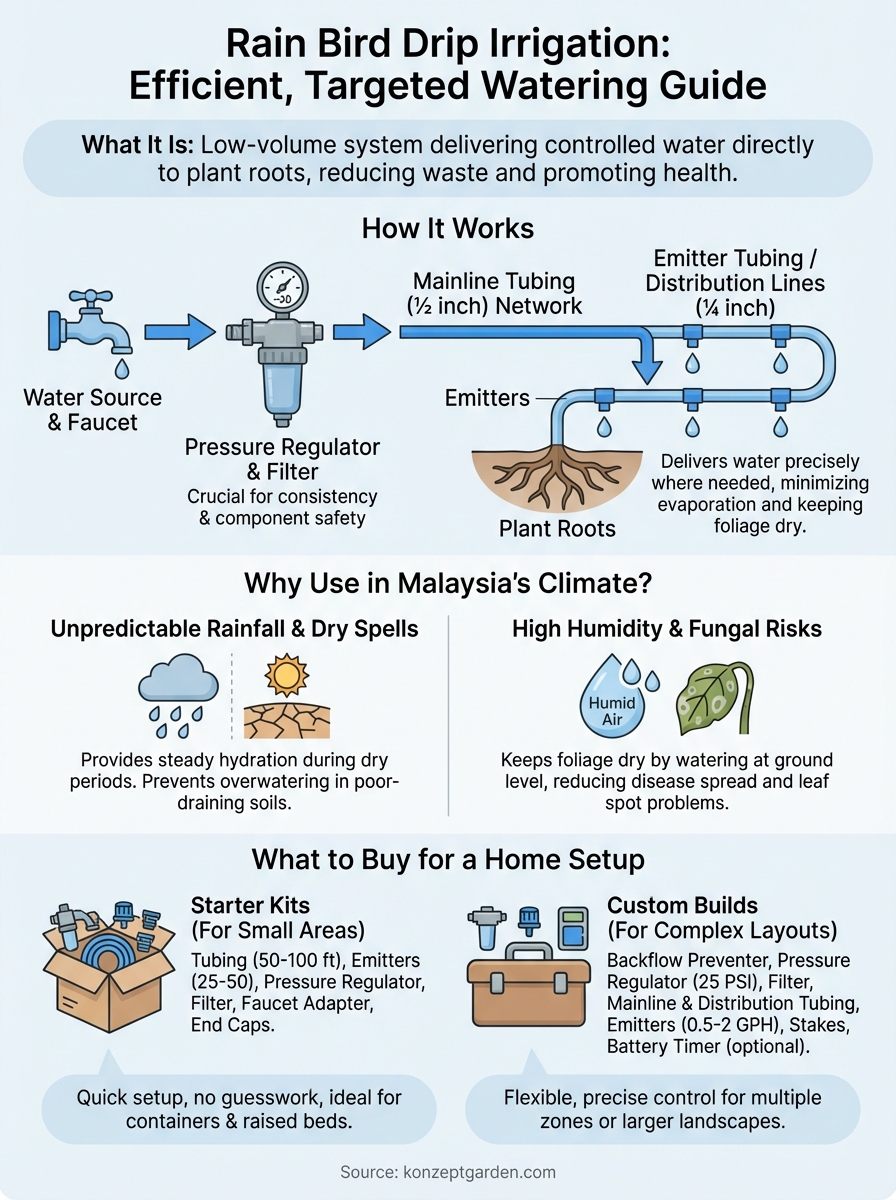
Rain Bird drip irrigation refers to low-volume watering systems manufactured by Rain Bird Corporation, a company that has specialized in irrigation technology since 1933. These systems deliver water directly to plant roots through a network of tubing, emitters, and distribution devices. Instead of spraying water into the air, drip systems release controlled amounts of water precisely where plants need it.
The basic concept
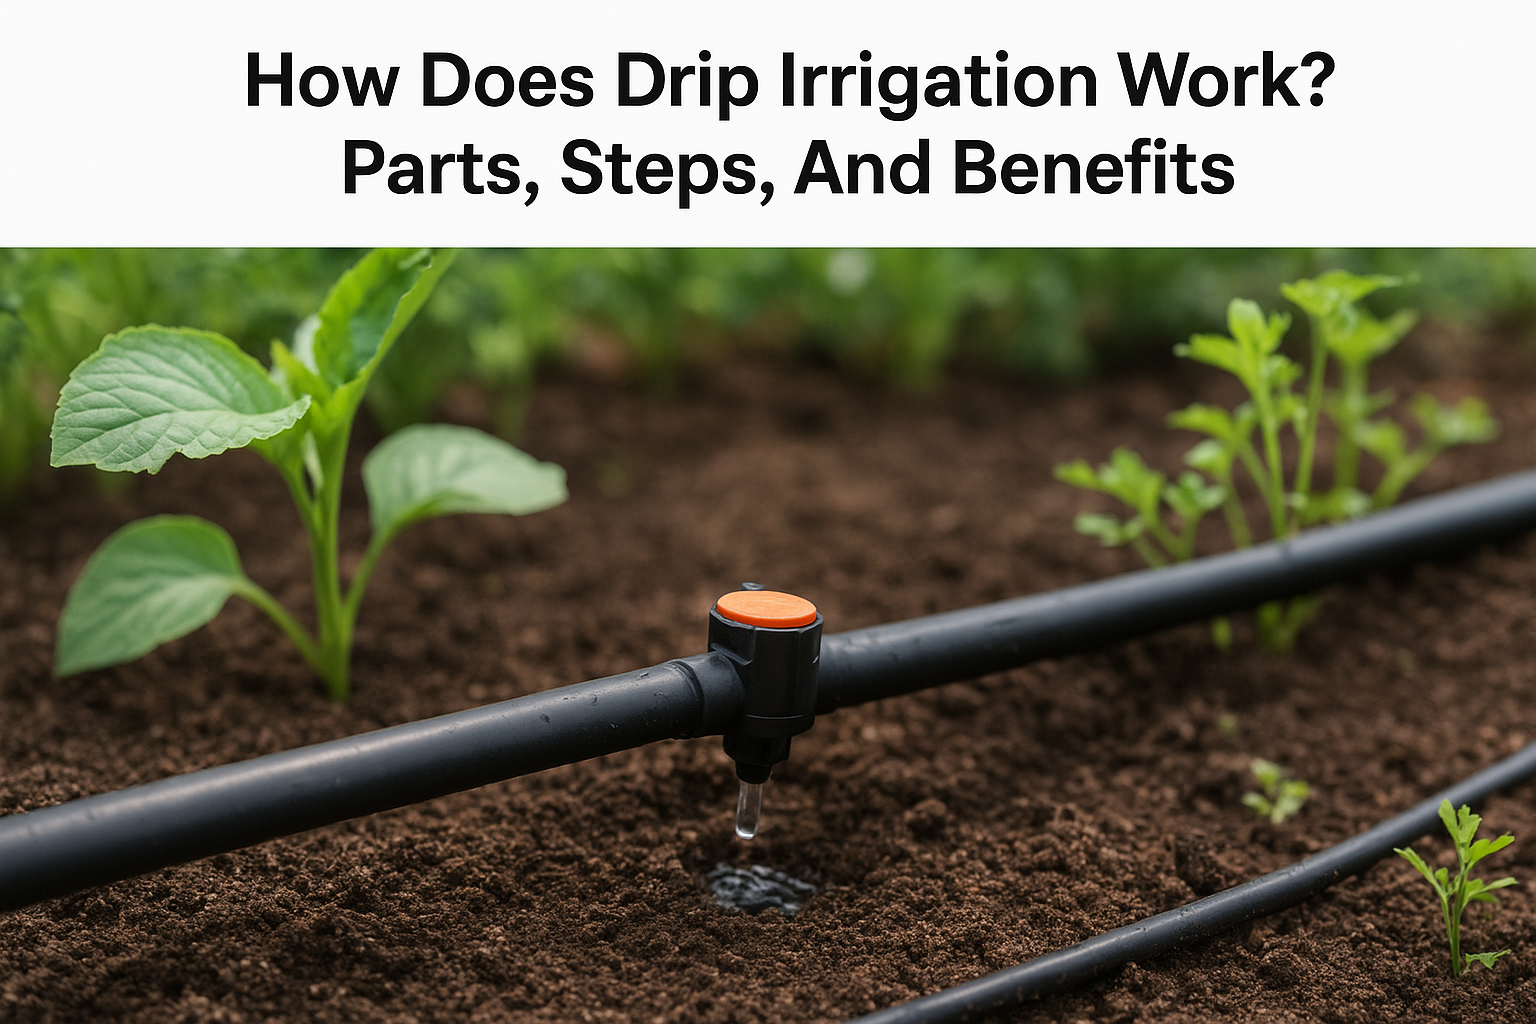
You install flexible tubing along planting beds or around individual plants, and water drips slowly from emitters spaced along the line. This method reduces evaporation, prevents runoff, and keeps foliage dry. Rain Bird designs these systems for residential gardens, commercial landscapes, and agricultural applications where water efficiency matters.
Drip irrigation can use 30 to 50 percent less water than conventional sprinkler systems while improving plant health.
Core components you'll encounter
A typical rain bird drip irrigation setup includes mainline tubing (usually ½-inch diameter), emitter tubing or individual drip emitters, pressure regulators, filters, and valves. Rain Bird also produces micro-sprinklers and bubblers for areas that need wider coverage. You connect these components to your existing outdoor water source, and they work together to create zones that you can control manually or with timers. The brand offers both basic kits for beginners and individual parts for custom designs, giving you flexibility whether you're watering a small patio garden or irrigating multiple landscape zones across your property.
Why drip irrigation makes sense in Malaysia
Malaysia's tropical climate creates unique challenges for gardeners. You face intense rainfall during monsoon seasons, but you also deal with unexpected dry spells that stress plants quickly. Hand-watering becomes a daily chore, and traditional sprinklers struggle to balance the water needs of different plants across your landscape. Rain bird drip irrigation solves these problems by delivering consistent moisture regardless of weather patterns.
Managing Malaysia's unpredictable rainfall
Your plants need steady hydration even when natural rainfall stops for weeks. Drip systems let you maintain proper soil moisture levels without overwatering, which matters because many Malaysian soils drain poorly. You also reduce water bills by targeting roots instead of saturating entire areas, and you avoid creating puddles that attract mosquitoes.
Targeted watering reduces mosquito breeding sites while keeping your plants healthy during dry periods.
Keeping foliage dry in humid conditions
Malaysia's high humidity already encourages fungal diseases and leaf spot problems. When you water plants with overhead sprinklers, you add more moisture to leaves and create ideal conditions for plant diseases to spread. Drip irrigation keeps water at ground level, which means foliage stays drier and your plants face fewer health issues in an already challenging climate.
How Rain Bird drip irrigation works
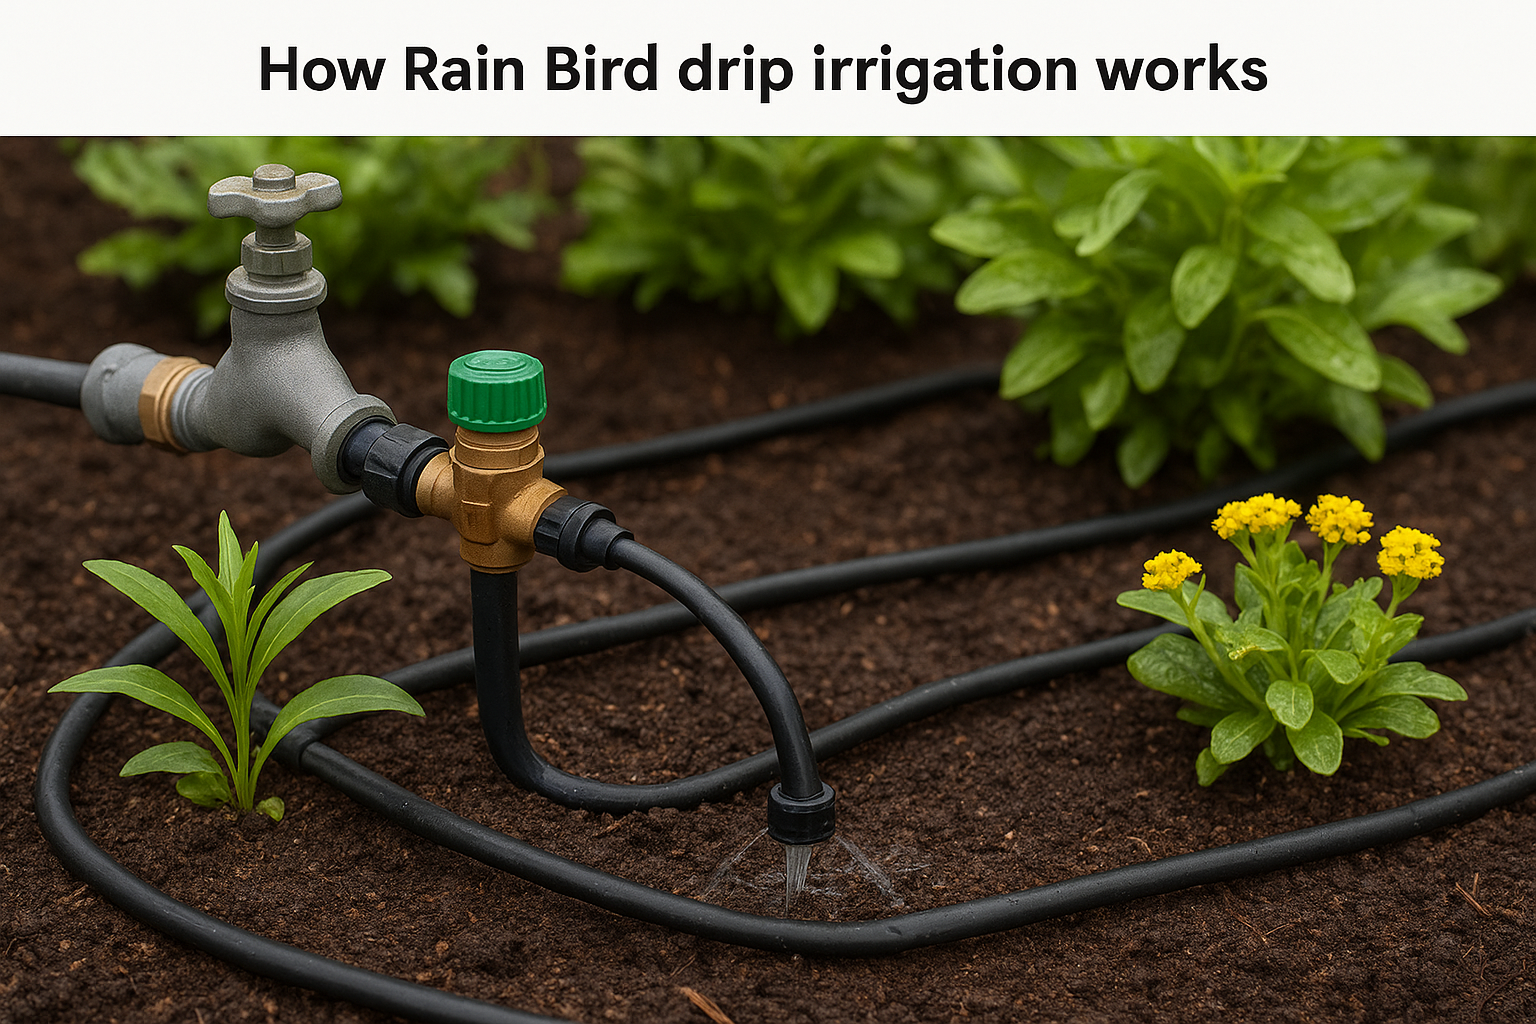
Your rain bird drip irrigation system connects to an outdoor faucet or mainline water supply and uses a series of components to deliver water where plants need it. Water flows from the source through a pressure regulator that reduces pressure to optimal levels (usually 15 to 30 PSI), then passes through a filter that removes debris. From there, the water travels through mainline tubing and reaches individual emitters or emitter lines positioned near plant roots.
Pressure regulation and distribution
The pressure regulator plays a critical role because standard household water pressure (40 to 80 PSI) would damage drip components and create uneven watering. Rain Bird regulators bring pressure down to the correct range for consistent drip rates. You then set up distribution lines that branch from the mainline, creating zones for different plant types or areas.
Proper pressure regulation ensures each emitter delivers the exact amount of water your plants need without waste.
Emitter types and flow rates
You choose between inline emitters (built into the tubing) or individual point-source emitters that you insert into blank tubing. Each emitter has a specific flow rate measured in gallons per hour (GPH), typically ranging from 0.5 to 2 GPH. This lets you customize watering for different plant sizes and water requirements across your landscape.
What to buy for a simple home setup
Your first rain bird drip irrigation setup doesn't require expensive equipment or complicated components. You need a basic starter kit or a selection of individual parts that connect to your outdoor faucet and cover a small to medium garden area. Rain Bird offers several pre-packaged kits designed for beginners, but you can also assemble a custom system by purchasing components separately based on your specific layout.
Starter kits versus custom builds
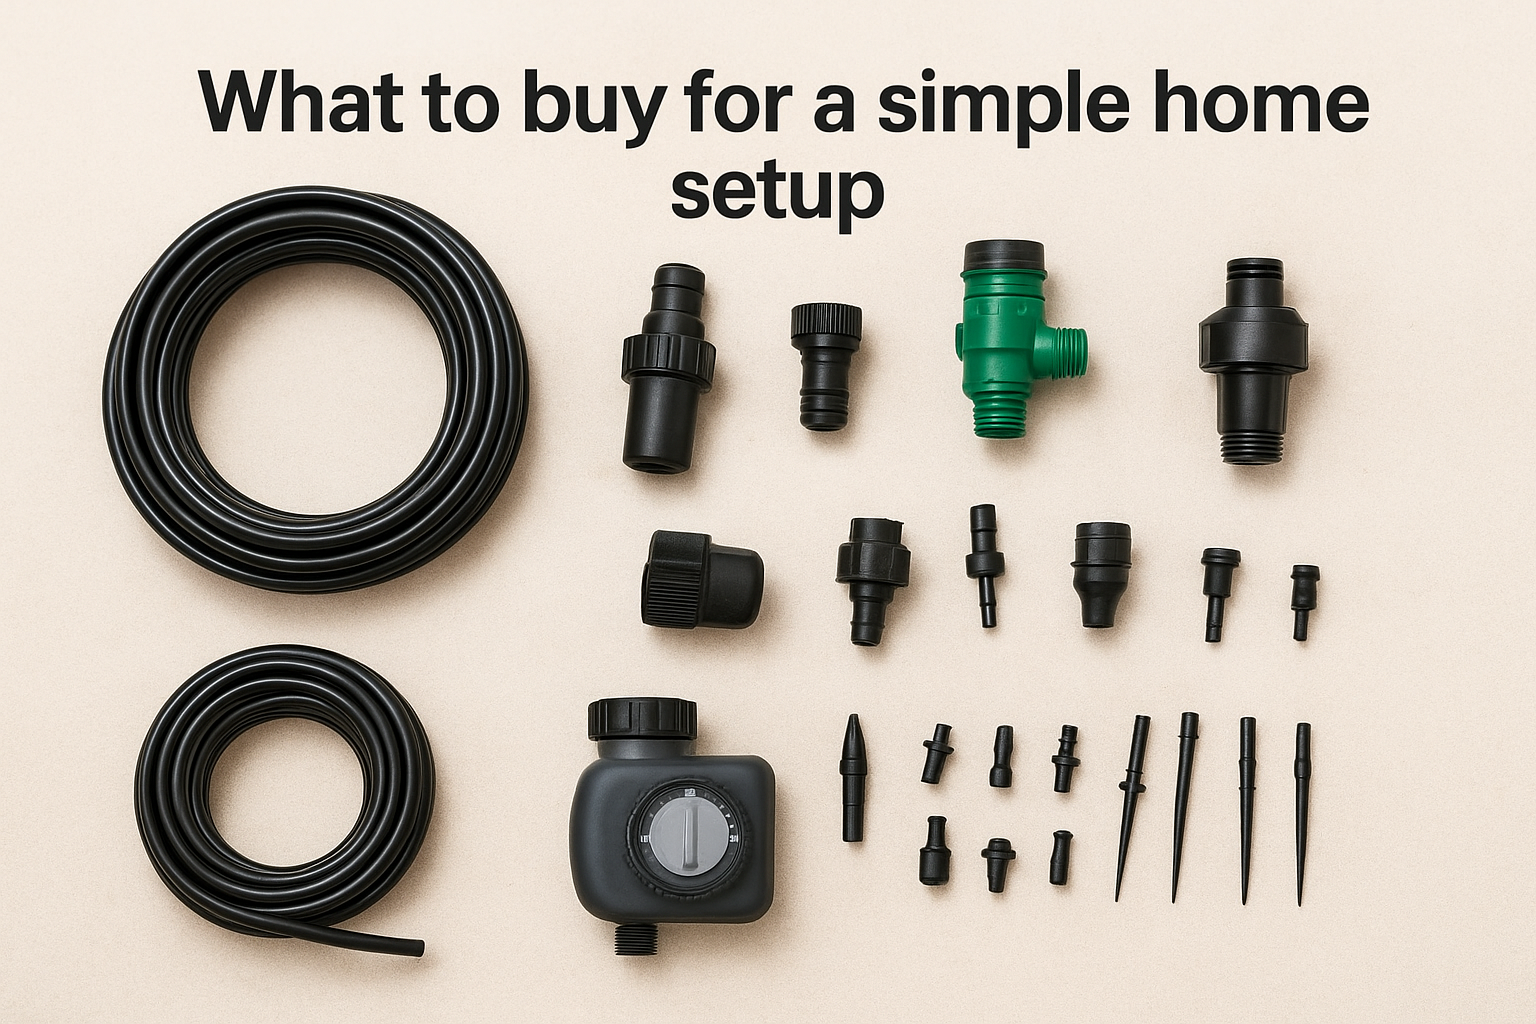
Rain Bird's patio drip kits typically include 50 to 100 feet of tubing, 25 to 50 emitters, a pressure regulator, filter, adapter for your faucet, and end caps. These kits work well for container gardens, raised beds, or small landscape areas where you want a quick setup. You simply connect the adapter to your faucet, lay out the tubing, insert emitters near plants, and turn on the water.
Starter kits eliminate guesswork by including properly matched components that work together from day one.
Must-have components if building custom
When you build your own system, you need a backflow preventer or vacuum breaker, pressure regulator (usually 25 PSI for drip systems), filter, mainline tubing (½-inch), ¼-inch distribution tubing, emitters (0.5 to 2 GPH), and stakes to secure lines. Add a battery-operated timer if you want automated watering without running electrical lines to your garden.
Installation, scheduling, and maintenance tips
Installing your rain bird drip irrigation system takes two to three hours for a basic setup, and you don't need professional plumbing skills. You lay out tubing, insert emitters near roots, connect everything to your water source, and test for leaks. The real work comes after installation when you need to schedule watering times and maintain components through Malaysia's weather.
Basic installation steps
Connect your backflow preventer and filter to the outdoor faucet, then attach the pressure regulator and mainline tubing. Lay tubing along planting areas and use ground stakes every few feet to secure lines. Insert emitters or punch holes for distribution lines near plant bases, ensuring water drips directly onto soil.
Setting watering schedules
Your plants need 30 to 45 minutes of drip irrigation two to three times per week during dry periods. Run your system early morning to reduce evaporation, and adjust timing based on rainfall patterns. Battery timers automate this process without manual work.
Early morning watering gives plants time to absorb moisture before afternoon heat arrives.
Simple maintenance tasks
Check your filter monthly and clean or replace it when debris accumulates. Inspect emitters for clogs or damage, and flush mainlines by removing end caps and running water through the system. Replace cracked tubing before leaks waste water.
A simple way to choose your next setup
Your rain bird drip irrigation choice depends on three factors: garden size, plant types, and automation needs. Start with a basic kit if you're watering containers, raised beds, or small landscape areas under 500 square feet. These kits give you everything needed without purchasing extra components or figuring out compatibility issues.
Build a custom system when you need multiple zones, different emitter types for varied plants, or complex layouts around structures and hardscaping. You'll spend more time planning connections and flow rates, but you gain precise control over water distribution across your property. Add automated timers for any setup that covers more than one zone or requires daily attention during your busiest work weeks.
Professional landscape irrigation design takes this further by integrating drip systems into comprehensive water management plans that account for drainage, plant selection, and maintenance access. If you're planning a major landscape project or need irrigation that works alongside features like water gardens, talk to Konzept Garden's design team about creating systems that deliver results without wasting resources.
