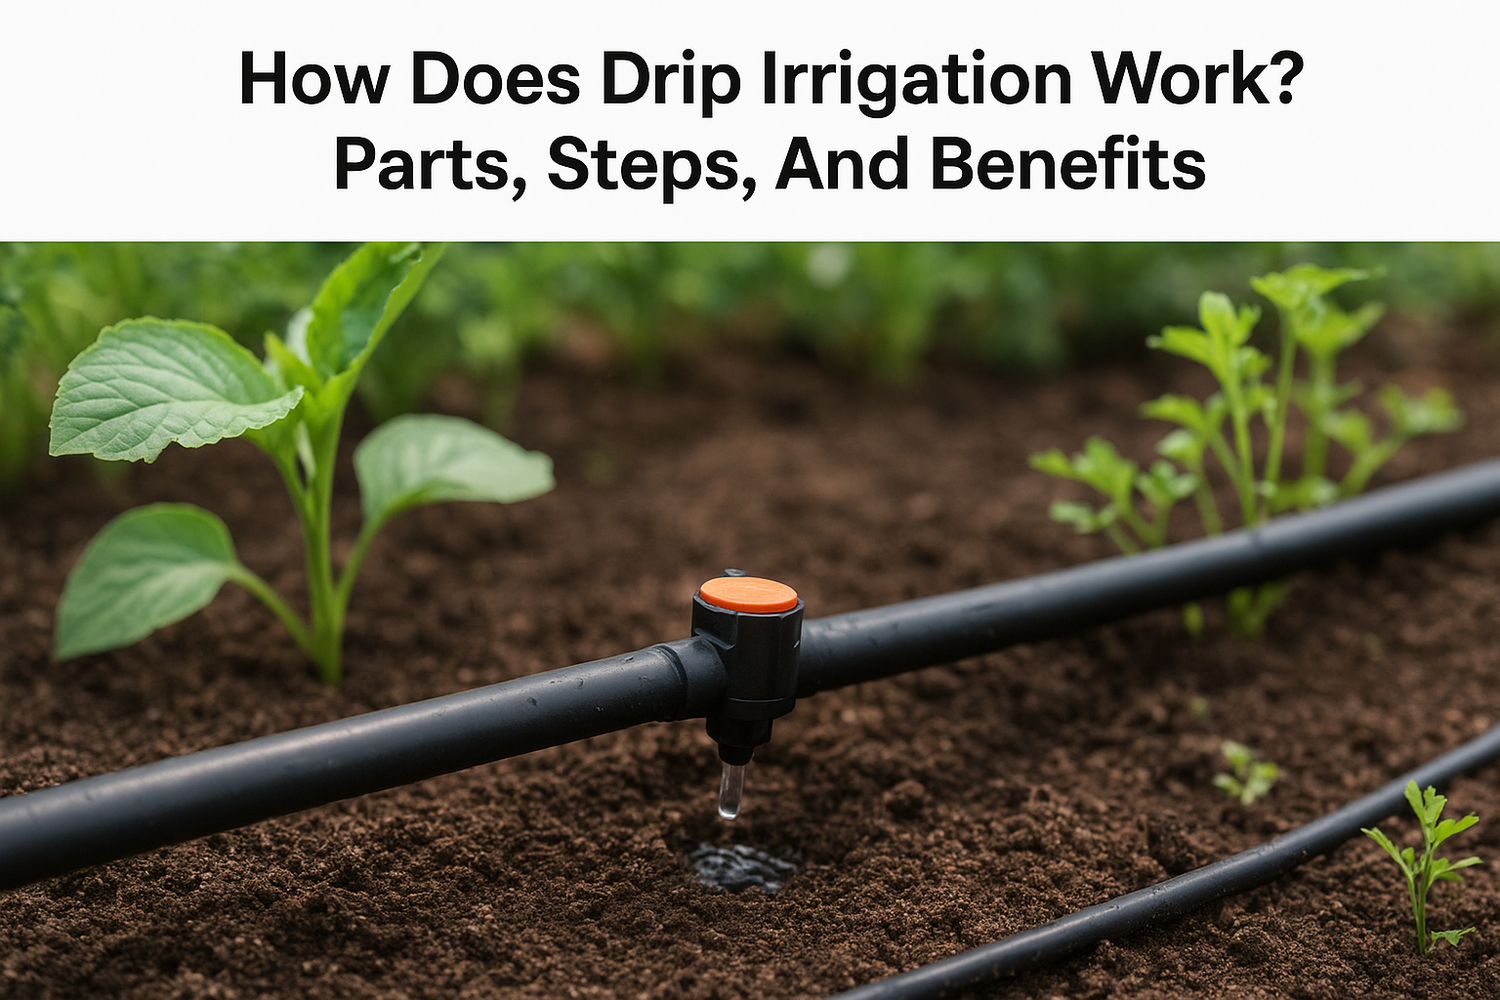
Water is precious, and your garden shouldn't waste a drop of it. Traditional sprinklers can lose up to 50% of water to evaporation and runoff, leaving your plants thirsty while your water bill climbs. If you've ever asked how does drip irrigation work, and why so many gardeners swear by it, you're asking the right question.
This system uses a network of tubes, emitters, and filters to deliver water directly to plant roots with precision. No spray arcing through the air, no puddles forming on the surface, just targeted moisture exactly where it's needed.
At Konzept Garden, we design and implement irrigation solutions as part of our comprehensive landscape services across Malaysia. We've seen firsthand how drip systems keep plants healthier while reducing water consumption dramatically. In this guide, we'll break down every component of a drip irrigation system, explain the step-by-step process of water delivery from source to roots, and outline the benefits that make this method a smart choice for your outdoor space.
What drip irrigation is and when to use it
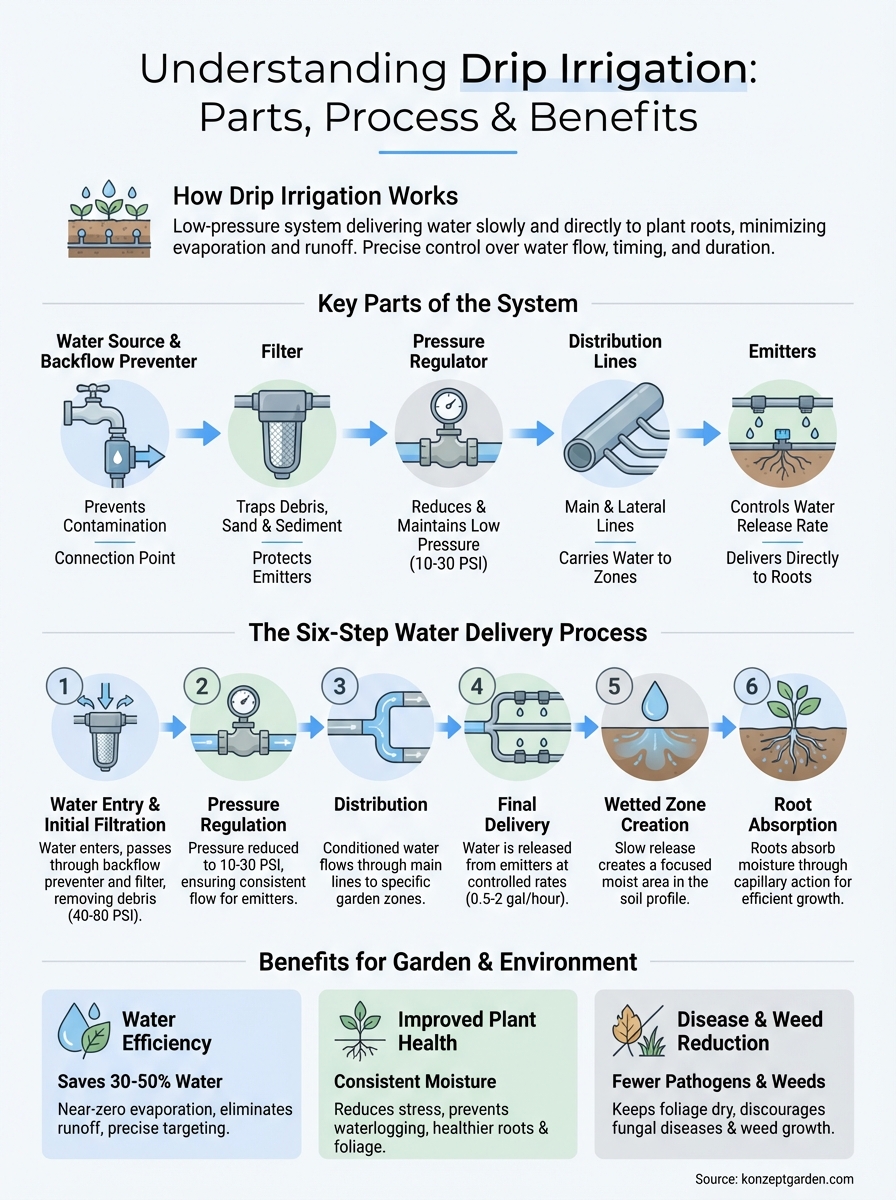
Drip irrigation is a low-pressure watering system that delivers water slowly and directly to the soil around your plants through a network of tubes, valves, and emitters. Instead of spraying water into the air where wind and heat can steal it away, this method places moisture exactly at the root zone where plants need it most. The system connects to your water source, runs through a main supply line, then branches into smaller tubes with emitters that release water drop by drop or in tiny streams. You control the flow rate, timing, and duration, which means you decide how much water each plant receives based on its specific needs.
Drip systems waste less water because they eliminate surface runoff and minimize evaporation, putting nearly every drop to productive use.
The beauty of understanding how does drip irrigation work lies in its simplicity. Water travels through the system under gentle pressure, typically 10 to 30 PSI, which is far lower than conventional sprinklers. Emitters along the lines regulate the release rate, measured in gallons per hour, ensuring consistent moisture delivery regardless of pressure fluctuations in your supply line. Some systems include timers and automated controllers, while basic setups require only manual operation. Either way, you get precise control over watering schedules that matches your garden's unique requirements.
When drip irrigation makes the most sense
You should consider drip irrigation when you need to water individual plants with different moisture requirements or when you're working with limited water resources. This system excels in vegetable gardens where tomatoes, peppers, and leafy greens sit side by side, each demanding different watering frequencies and volumes. Container gardens, raised beds, and foundation plantings also benefit enormously because you can target specific root zones without wetting sidewalks, walls, or other hardscapes.
Properties with sloped terrain or irregular layouts find drip systems particularly valuable. Traditional sprinklers struggle with slopes, causing water to rush downhill and pool at the bottom. Drip irrigation delivers water slowly enough for the soil to absorb it fully, preventing erosion and runoff. Your plants on hillsides get the same steady moisture as those on flat ground, and you avoid the frustration of overwatered low spots and parched high points.
Gardens and landscapes that benefit most
Ornamental beds featuring shrubs, perennials, and ground covers thrive under drip irrigation because you can adjust emitter placement as plants mature. Young shrubs need emitters close to the stem, but as roots spread outward, you simply move or add emitters to match the expanding root zone. This flexibility lets your irrigation system grow alongside your landscape, maintaining optimal moisture levels throughout each plant's life cycle.
Fruit trees, berry bushes, and productive food gardens see remarkable improvements with drip systems. Trees develop deeper, stronger root systems when water soaks down slowly rather than pooling on the surface. Berry plants produce better yields when their roots stay consistently moist without waterlogged conditions that invite root rot. Row crops in kitchen gardens benefit from targeted watering between rows, keeping foliage dry and reducing disease pressure while ensuring roots never experience drought stress.
Tropical and subtropical landscapes in Malaysia particularly benefit from drip irrigation during dry spells. Native plants adapted to monsoon patterns often suffer during extended periods without rain, but drip systems provide steady moisture that mimics natural rainfall patterns. Your palms, heliconias, and ornamental gingers maintain their lush appearance year-round when drip lines deliver consistent hydration directly to their root zones.
Why drip irrigation saves water and improves plant health
Understanding how does drip irrigation work reveals why this system cuts water consumption by 30 to 50% compared to traditional sprinklers. Water flows directly to root zones through controlled emitters, which means almost zero evaporation loss during application. You don't send water arcing through hot air where sun and wind steal moisture before it reaches the ground. Instead, every drop travels through protected tubes and releases at soil level, where plants can actually use it. This targeted delivery eliminates the waste you see with broadcast spraying, where sidewalks, driveways, and non-planted areas receive the same water as your garden beds.
Drip irrigation applies water so slowly that soil absorbs it completely, preventing runoff and ensuring deep root penetration.
Your water bill reflects this efficiency immediately. Most landscapes in Malaysia lose 40 to 60% of sprinkler water to evaporation and overspray, but drip systems keep nearly all moisture in the soil profile. The system maintains constant low pressure, which reduces water volume flowing through pipes while still delivering adequate hydration to plants. You also avoid watering during peak heat hours because drip systems can run anytime without evaporation concerns, giving you scheduling flexibility that maximizes efficiency.
Plant health benefits from consistent moisture
Plants thrive when their root zones receive steady, reliable moisture rather than the feast-or-famine cycle of heavy watering followed by dry periods. Drip irrigation delivers this consistency automatically, keeping soil at optimal moisture levels that support vigorous growth without waterlogged conditions. Your vegetables produce higher yields, ornamental plants develop fuller foliage, and trees establish deeper root systems that make them more drought-resistant over time.
Root diseases decrease dramatically when you keep water off plant foliage and stems. Fungal pathogens need wet leaves and humid conditions to spread, but drip systems leave above-ground plant parts completely dry. Your tomatoes avoid blight, your roses resist black spot, and your tropical plants stay free of leaf spot diseases that plague sprinkler-watered gardens. The soil surface also stays relatively dry, which discourages weed germination while your desirable plants flourish with underground moisture.
Nutrient uptake improves because consistent soil moisture allows roots to actively absorb minerals dissolved in water. When soil alternates between saturated and bone-dry, roots experience stress that limits their ability to take up nutrients even when fertilizer is present. Drip irrigation maintains the steady conditions roots need for optimal nutrient absorption, resulting in stronger stems, greener leaves, and more productive plants throughout the growing season.
Parts of a drip irrigation system and what each does
Every drip system relies on specific components working together to control water flow from your source to plant roots. When you understand how does drip irrigation work at the component level, you can design, install, and maintain your system with confidence. Each part serves a distinct function in the water delivery chain, and knowing what these pieces do helps you troubleshoot problems quickly and expand your system as your garden grows. The basic setup includes water source connections, filtration and pressure control devices, distribution lines, and emitters that release water at precise rates.
Water source and control components
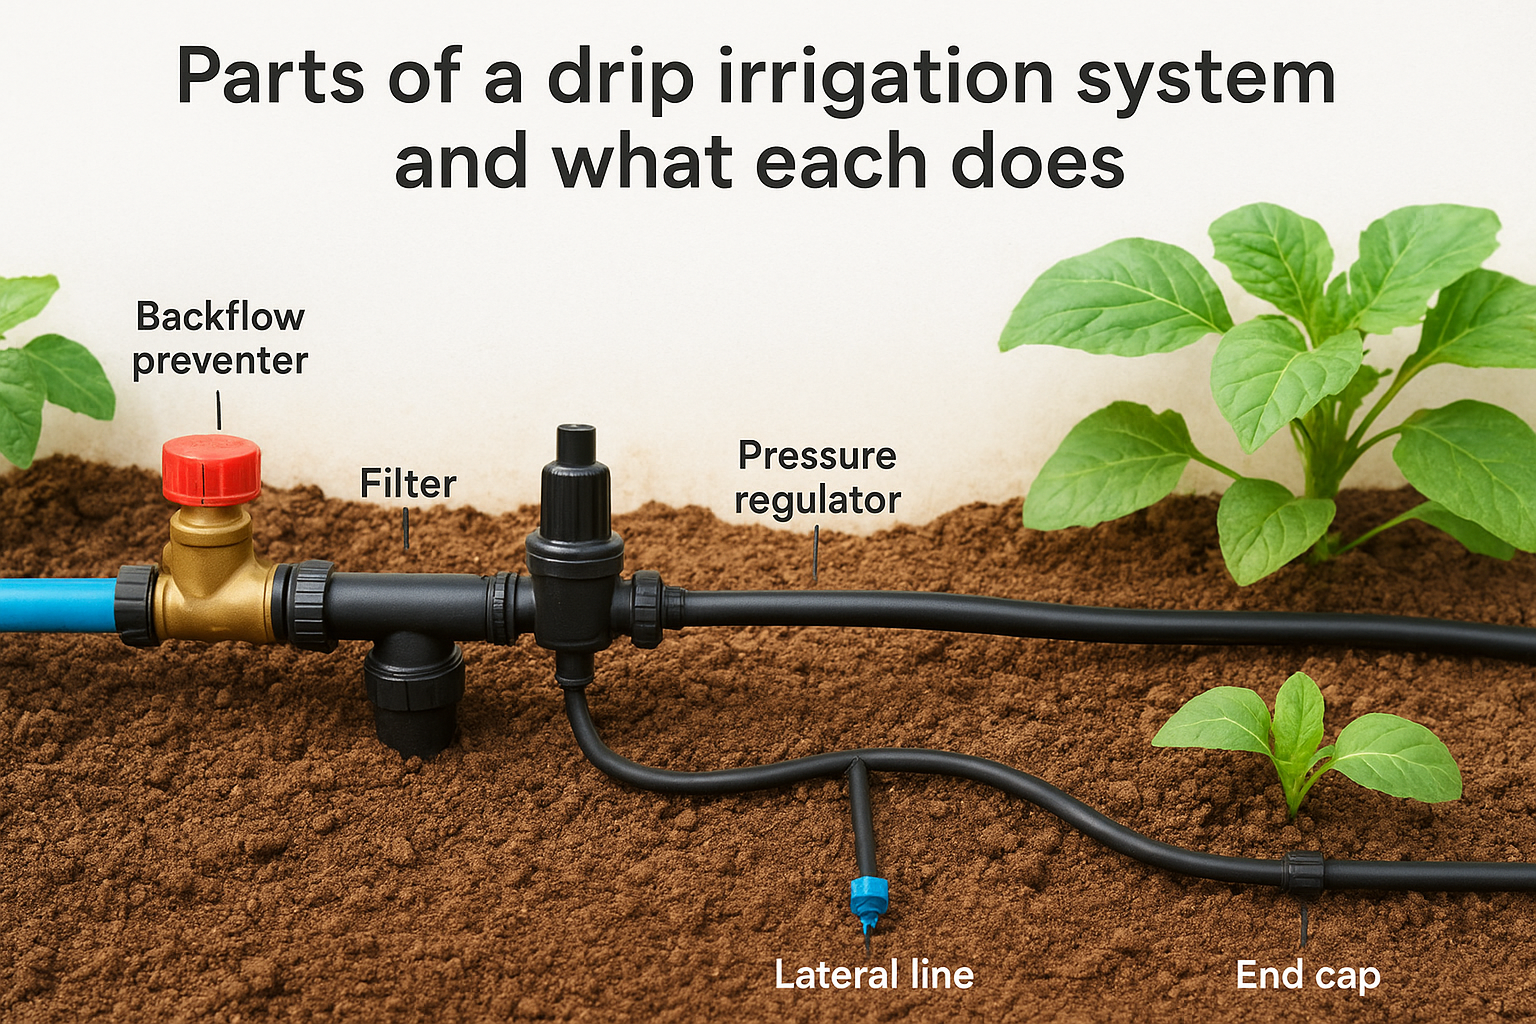
Your backflow preventer sits at the connection point between your water supply and irrigation system. This device prevents contaminated irrigation water from flowing backward into your household or municipal water supply, protecting drinking water from potential contaminants. Most local regulations require backflow preventers on all irrigation systems, and they work automatically through spring-loaded check valves that allow water to flow in only one direction.
The filter traps sediment, sand, and debris before they reach emitters and clog narrow openings. Screen filters handle most residential applications, capturing particles larger than 150 mesh (about 100 microns) while allowing clean water to pass through. You'll see pressure drop when the filter needs cleaning, which happens more frequently with well water or water sources that carry high sediment loads. Regular filter maintenance keeps your emitters flowing freely and extends system life significantly.
Pressure regulators reduce water pressure from household levels down to the 10 to 30 PSI range that drip systems require. High pressure damages emitters and causes uneven water distribution, while the regulator maintains consistent output regardless of fluctuations in your supply line. This component installs after the filter and delivers steady pressure to all parts of your system simultaneously.
Without proper pressure regulation, your emitters will flood some areas while starving others, defeating the entire purpose of precision irrigation.
Distribution lines and emitters
Main supply lines carry water from your control components to different irrigation zones in your landscape. These larger diameter tubes (typically 1/2 to 3/4 inch) handle higher flow volumes and connect to multiple lateral lines that branch off to individual planting areas. You can run main lines above ground or bury them under mulch, depending on your aesthetic preferences and garden layout.
Lateral lines extend from main lines directly to plants, using smaller diameter tubing (usually 1/4 inch) that weaves between stems and root zones. These flexible tubes allow precise placement around mature plants and easy repositioning as your garden evolves. Emitters attach to lateral lines at intervals you determine based on plant spacing and water needs.
Emitters control the final water release rate, typically delivering 0.5 to 2 gallons per hour directly to the soil surface. Drip emitters release water in slow drops, while micro-sprayers create small patterns for broader coverage under shrubs or in tight spaces. Pressure-compensating emitters maintain consistent flow rates even when installed on sloped terrain or at varying distances from the water source.
End caps seal the terminal points of main and lateral lines, preventing water loss and maintaining system pressure. These simple components twist or snap onto tube ends and remove easily when you need to flush debris from your lines during maintenance.
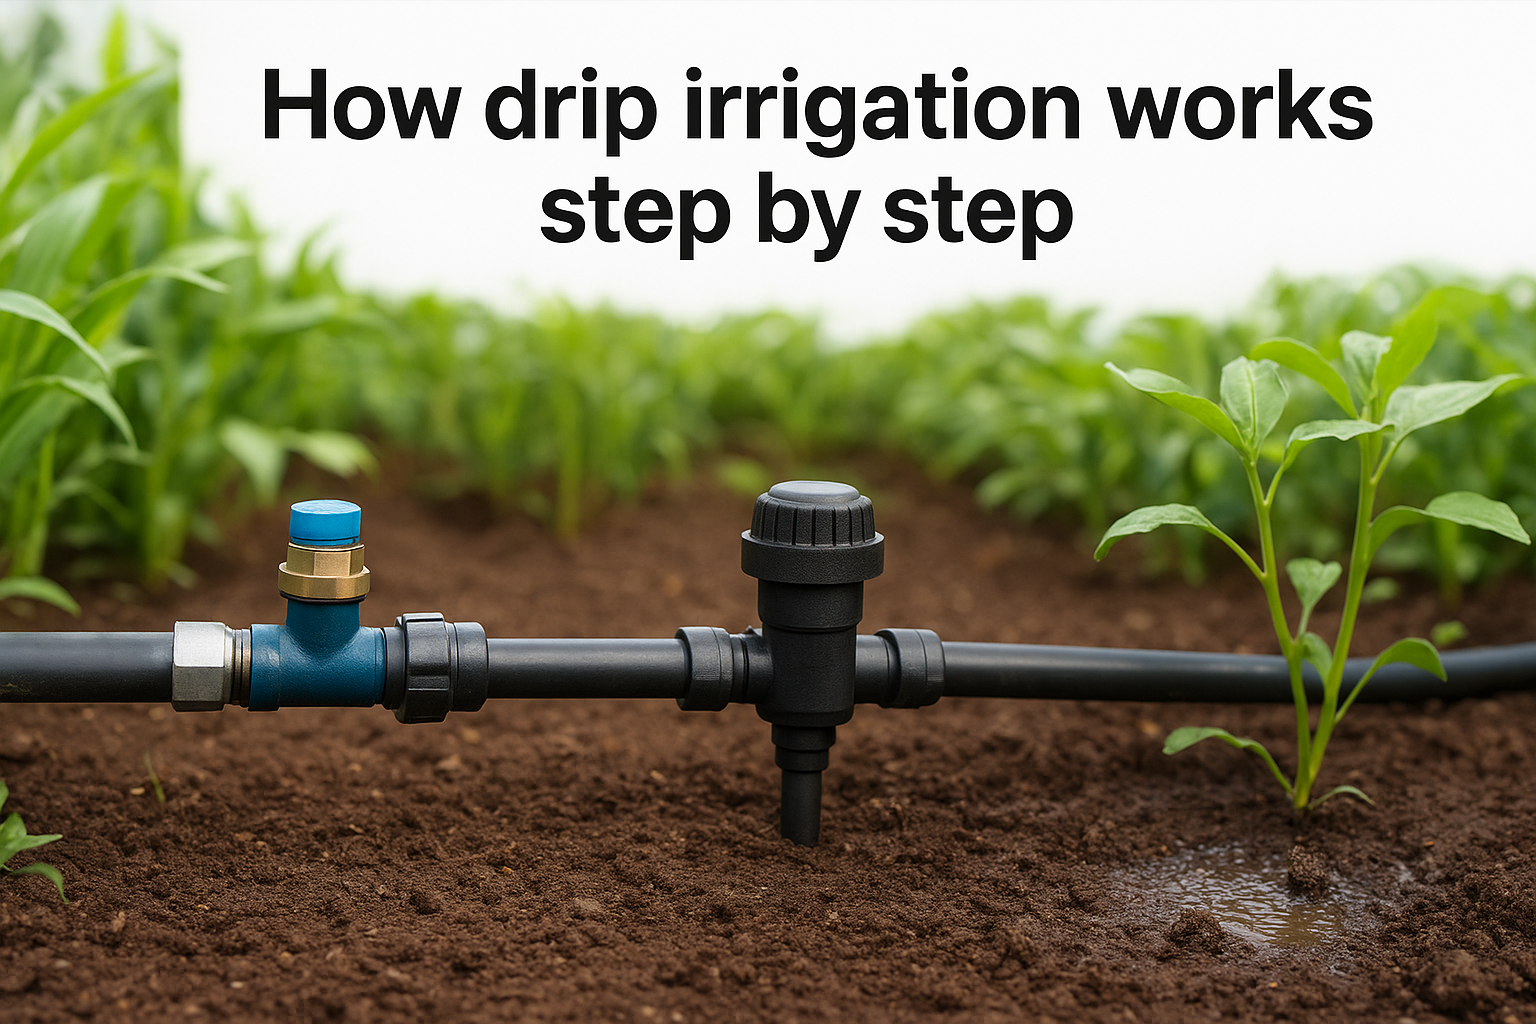
How drip irrigation works step by step
The complete water delivery process in a drip system follows six distinct stages that transform pressurized supply water into gentle, targeted moisture at plant roots. Understanding how does drip irrigation work through these sequential steps reveals why the method achieves such remarkable efficiency compared to conventional watering. Water enters the system at household pressure, passes through safety and conditioning components, travels along distribution networks, and finally releases at controlled rates directly into the soil profile where roots can absorb it immediately.
Water entry and initial filtration
Your water supply enters the system through a backflow preventer that protects your household water from contamination. Pressure at this entry point typically ranges from 40 to 80 PSI, which is far too high for drip emitters to handle safely. The water then flows into a filter that removes sediment and debris before particles can clog downstream components. Screen filters trap sand, rust, and organic material while allowing clean water to pass through unrestricted. This filtration stage protects your entire investment in tubing and emitters from premature failure caused by clogged openings.
Clean water entering your system means emitters will deliver consistent flow rates for years without constant maintenance or replacement.
Pressure regulation and distribution
After filtration, water encounters the pressure regulator that drops incoming pressure down to the 10 to 30 PSI range required for proper drip operation. This regulated pressure stays constant even when other household fixtures turn on and off, ensuring your garden receives uniform water distribution regardless of demand fluctuations elsewhere. The conditioned water then enters main supply lines that carry it to different zones throughout your landscape, branching into smaller lateral lines that weave directly through planting areas.
Final delivery to plant roots
Water reaches emitters attached along lateral lines at intervals you've determined based on plant spacing. Each emitter releases water at its rated flow, typically between 0.5 and 2 gallons per hour, creating a wetted zone around the emitter that expands outward and downward as water soaks into the soil. Roots sense this moisture and grow toward the wetted area, establishing robust networks that access water reliably. The slow release rate allows complete soil absorption without runoff, moving moisture deep into the root zone where plants draw it up through capillary action to support growth, flowering, and fruit production.
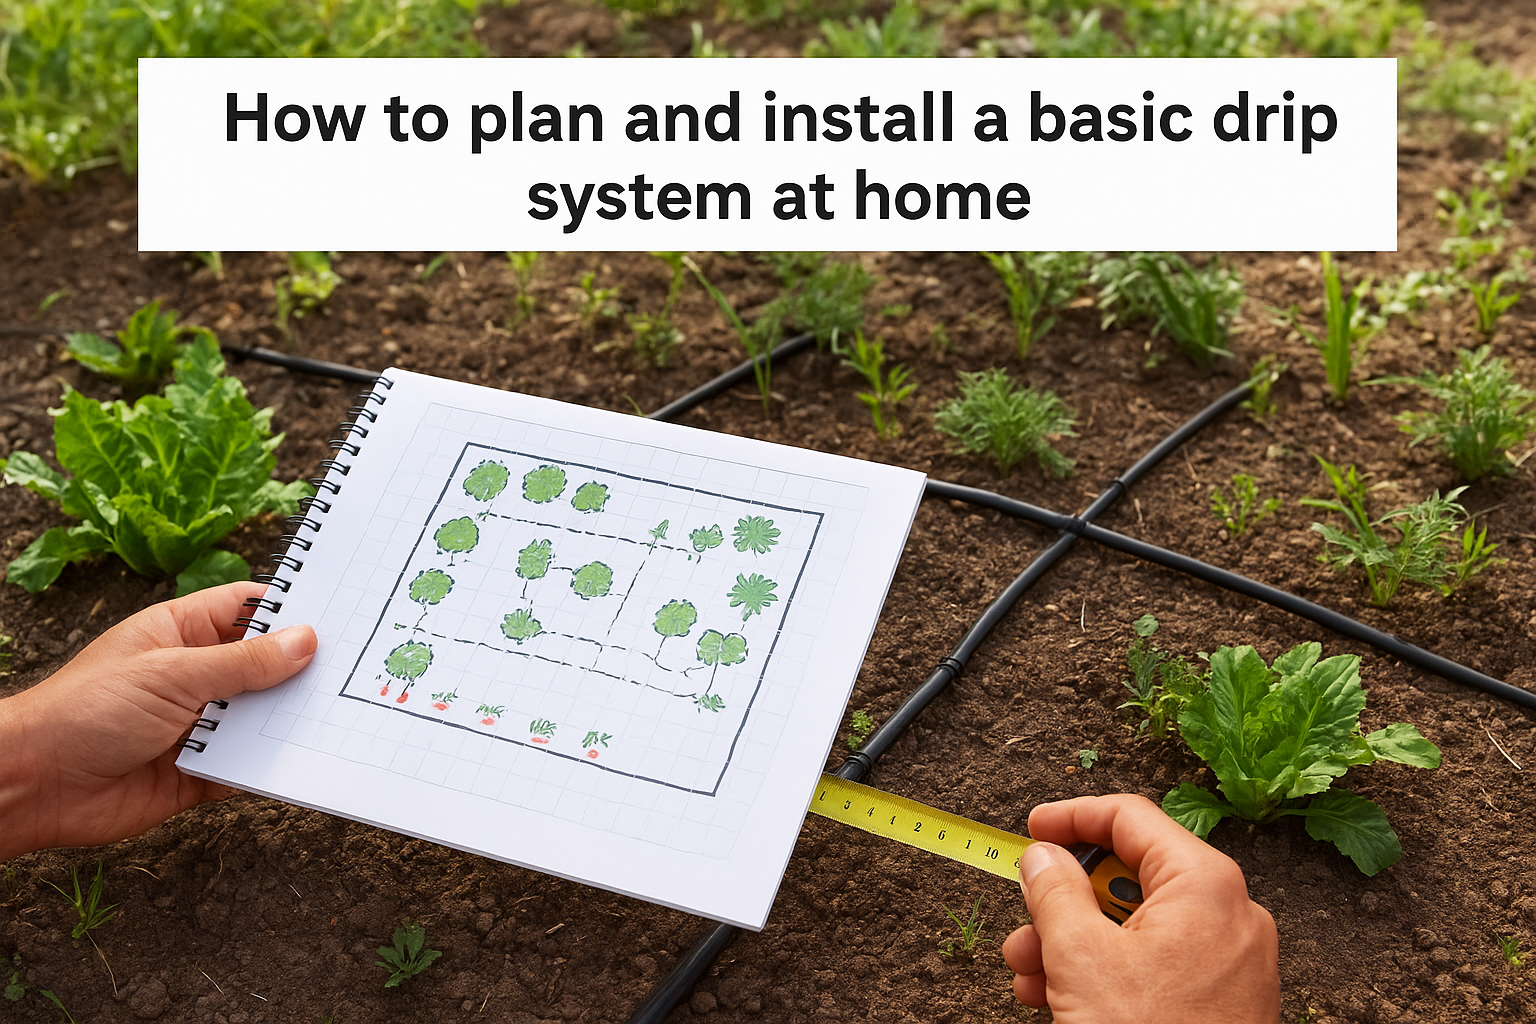
How to plan and install a basic drip system at home
Planning your drip system starts with mapping your garden on paper or digitally, marking every plant that needs irrigation and noting their individual water requirements. You'll measure the distance from your water source to the farthest plant, calculate how many emitters you need based on plant spacing, and determine whether your layout requires multiple zones with separate control valves. This upfront planning prevents the frustration of running short on tubing mid-installation or discovering that your water pressure can't support the entire system running simultaneously.
Planning your layout and measuring zones
Walk through your garden with a measuring tape and sketch the locations of all plants that need regular watering. Group plants with similar water needs into zones, keeping thirsty vegetables separate from drought-tolerant ornamentals so you can water each group appropriately. Calculate the total length of main line tubing by measuring the path from your water source to each zone, then add 20% extra for curves, mistakes, and future expansion.
Count the number of emitters by placing one at each plant location, spacing them 12 to 18 inches apart for closely planted vegetables or positioning multiple emitters around larger shrubs and trees. Write down your total emitter count because this determines whether you need pressure-compensating models or if standard emitters will work. Your water source's flow rate, measured in gallons per minute, must exceed the combined output of all emitters running in a single zone.
Gathering components and making connections
Purchase a starter kit that includes a backflow preventer, filter, pressure regulator, and main line tubing, or buy components separately if you prefer specific brands or features. You'll need lateral tubing, emitters matching your flow rate requirements, stakes to secure lines, and end caps to seal tube terminals. Most home installations work well with 1/2-inch main lines and 1/4-inch lateral lines that branch to individual plants.
Installing your system requires no special skills beyond the ability to cut tubing and punch holes for emitter insertion.
Connect the backflow preventer to your outdoor faucet, then attach the filter and pressure regulator in sequence. Run your main line along the perimeter or backbone of your planting area, securing it with stakes every three to four feet to prevent movement. Punch holes in the main line where lateral tubes will branch off, insert barbed connectors, and run lateral lines to plant locations. Press emitters into the lateral tubing at marked spots, turn on your water to flush debris from the lines, then install end caps and test the entire system. Adjust emitter placement as needed until each plant receives adequate moisture in its root zone.
Maintenance and troubleshooting for common drip issues
Your drip system requires minimal maintenance compared to traditional irrigation, but regular attention keeps it running efficiently year after year. Most problems stem from clogged emitters, damaged tubing, or pressure irregularities that develop gradually rather than appearing suddenly. Understanding how does drip irrigation work helps you identify issues quickly and fix them before plants suffer from inadequate watering or system components fail completely. A monthly inspection during the growing season and seasonal deep maintenance catch problems early when solutions are simple and inexpensive.
Regular maintenance tasks that prevent problems
Flush your system monthly by removing end caps and running water through the lines for two to three minutes. This process pushes out accumulated sediment, algae, and mineral deposits before they clog emitters or reduce flow rates. You'll see dirty water exit the lines initially, then clear water indicates the flush is complete. After flushing, reinstall end caps and check several emitters in different zones to confirm they're delivering water at expected rates.
Clean your filter every month or more frequently if you notice reduced system pressure. Unscrew the filter housing, remove the screen, and rinse it under running water while brushing away trapped debris with an old toothbrush. Filters with heavy sediment buildup need soaking in a vinegar solution for 30 minutes before scrubbing. Replace screens that show tears or permanent staining because damaged filters can't protect your emitters from clogging particles.
Regular filter cleaning takes five minutes and prevents hours of frustration unclogging dozens of individual emitters throughout your garden.
Inspect tubing for cracks, splits, or damage from garden tools, animals, or UV exposure. Replace damaged sections immediately because even small leaks waste water and drop system pressure below optimal levels. Check connections at main line branches and emitter insertion points, tightening any loose fittings that seep water when the system runs.
Common problems and their solutions
Clogged emitters reduce water flow or stop it completely, leaving plants stressed while adjacent areas receive full irrigation. Remove the emitter, soak it in white vinegar overnight, then flush it with water to dissolve mineral deposits. Severely clogged emitters cost less to replace than the time spent cleaning them, so keep spare emitters on hand for quick swaps during your monthly inspections.
Uneven water distribution across zones indicates pressure problems or elevation differences affecting flow rates. Install pressure-compensating emitters that maintain consistent output regardless of pressure variations, or add a second pressure regulator if one zone sits significantly higher or lower than others. Low overall pressure suggests filter clogging or a kinked main line restricting water flow.
Key takeaways and next steps
You now understand how does drip irrigation work, from the initial water filtration through pressure regulation to the final delivery at plant roots. This system reduces water consumption by 30 to 50% while improving plant health through consistent moisture delivery and reduced disease pressure. Your investment in drip irrigation pays dividends through lower water bills, healthier plants, and dramatically reduced maintenance compared to traditional sprinklers.
Start with a small test zone in your vegetable garden or around foundation plantings where you'll see immediate results. As your confidence grows, expand the system to additional areas using the same basic components and installation techniques. Professional landscape designers can help you integrate drip irrigation into comprehensive garden plans that optimize water efficiency across your entire property. Contact our team at Konzept Garden to discuss how drip irrigation fits into your landscape design and implementation needs.