
Getting a green roof right involves much more than picking plants and hoping for the best. From structural load calculations to waterproofing membranes and drainage layers, every decision you make during the planning stage directly affects how the system performs over the next 20, 30, or even 50 years. That's exactly why understanding green roof design guidelines, including recognized standards like the German FLL and the UK's GRO Code, matters before a single substrate tray hits your rooftop.
At Konzept Garden, our landscape design work across Malaysia regularly brings us into conversations about rooftop greening for residential and commercial projects. We've seen firsthand how proper specifications separate a thriving green roof from one that leaks, overloads, or dies within a season. Structural integrity and plant selection aren't separate concerns, they're deeply connected.
This guide breaks down the technical specs, load requirements, maintenance practices, and code compliance you need to plan a green roof that actually works. Whether you're an architect drafting plans, a developer evaluating feasibility, or a homeowner exploring options, you'll find actionable standards and best practices to guide your project from concept through long-term care.
What goes into a compliant green roof design
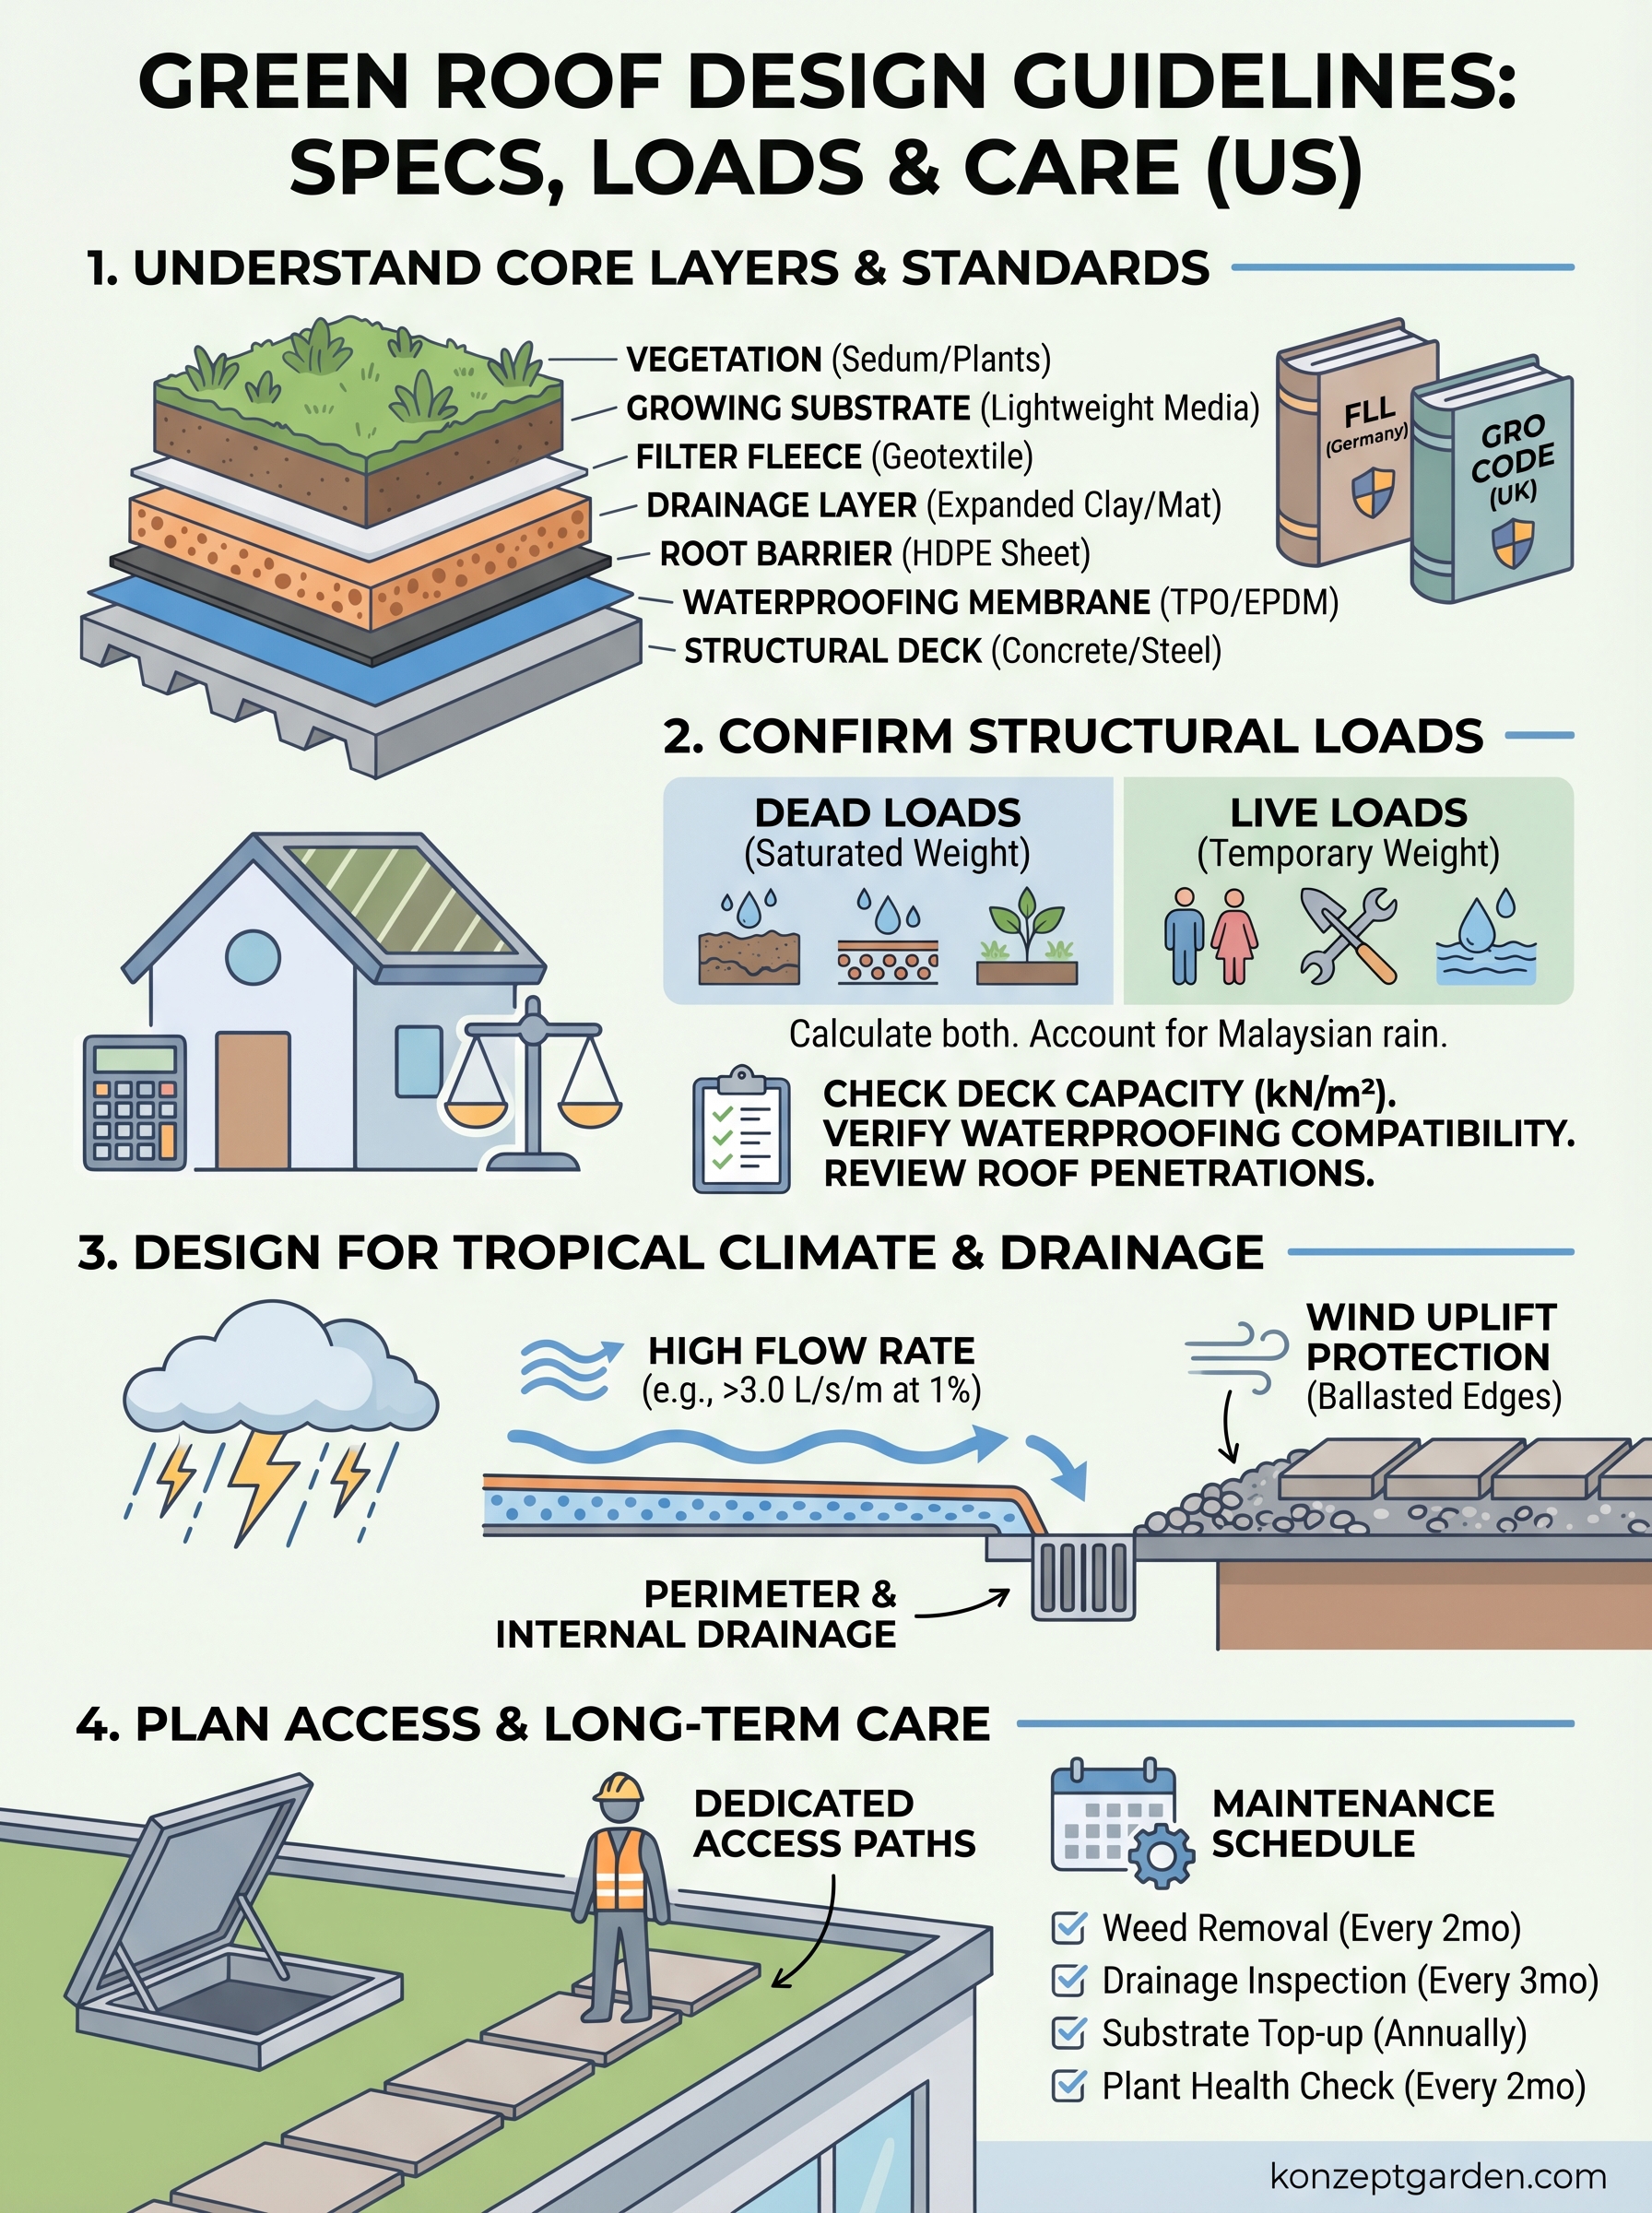
A compliant green roof is a multi-layer system, and each layer performs a specific function that keeps the whole assembly working together. Following green roof design guidelines from recognized bodies like the FLL or the GRO Code means specifying each component in sequence, verifying load compatibility, and documenting everything in a format that contractors, engineers, and building inspectors can all reference. Skipping this step is how projects end up with waterproofing failures, root damage, or drainage bottlenecks that are expensive to fix after installation.
The core layer assembly
Every green roof, whether extensive or intensive, is built on the same fundamental layer stack. Getting the order and specification of each layer right is non-negotiable, because each component depends on the one below it to perform correctly.
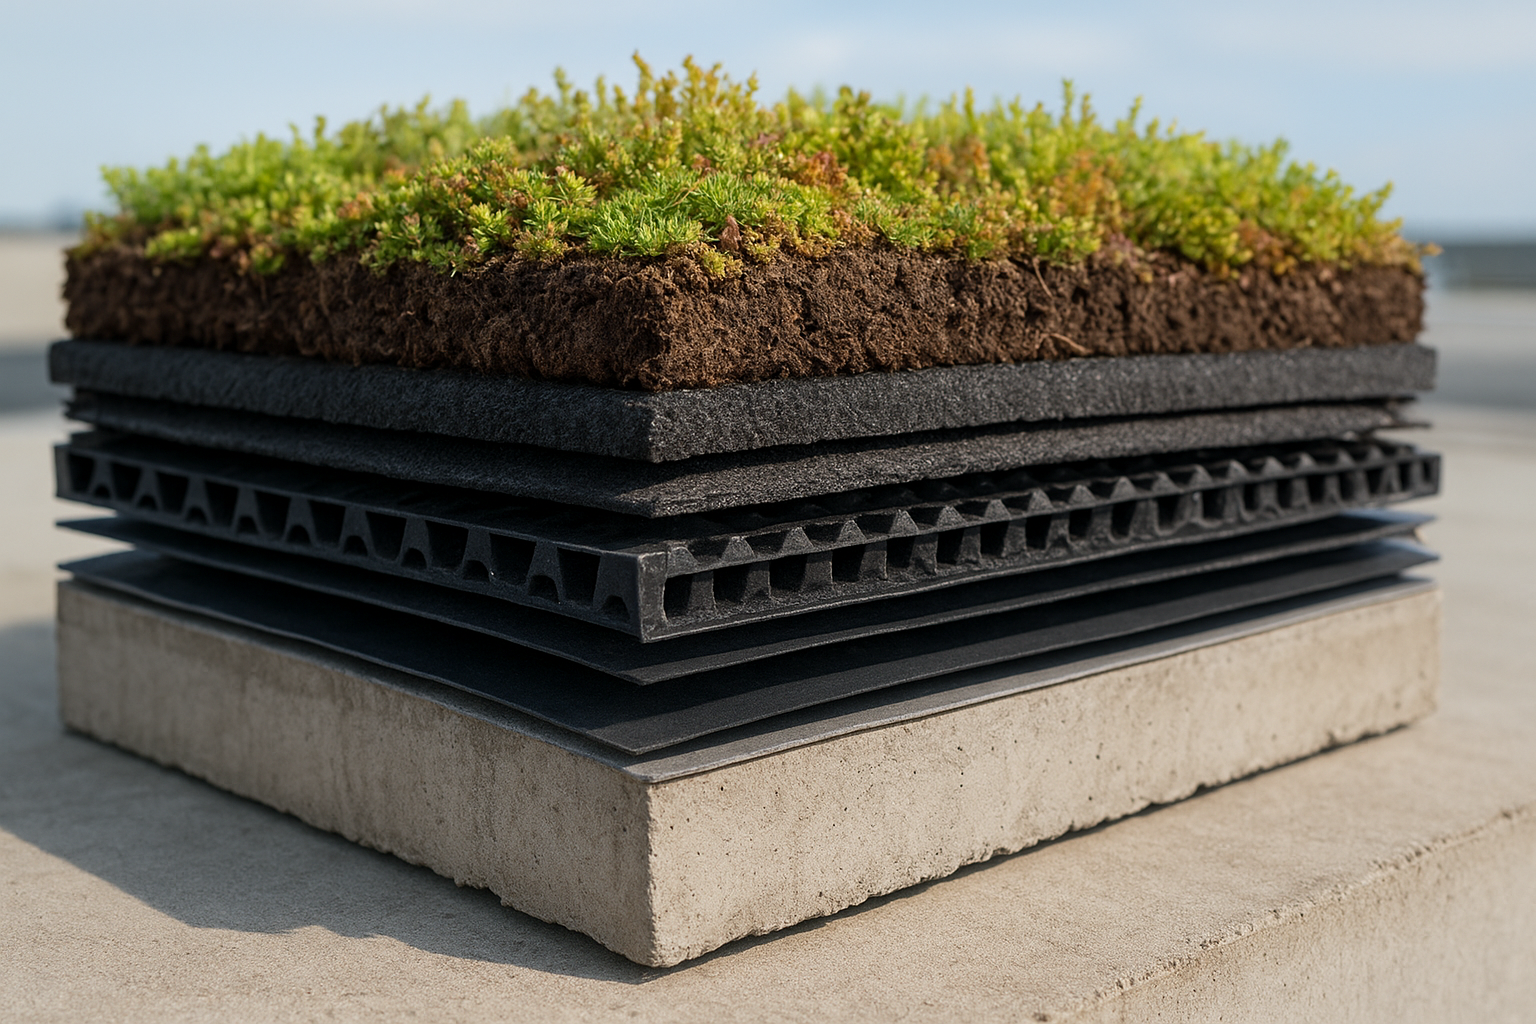
Here is the standard build-up from structural deck to vegetation:
| Layer | Function | Typical Material |
|---|---|---|
| Structural deck | Carries all dead and live loads | Concrete, steel, or timber |
| Waterproofing membrane | Prevents water ingress into the building | TPO, EPDM, or modified bitumen |
| Root barrier | Stops root penetration into the membrane | HDPE sheet or integrated root-resistant membrane |
| Drainage layer | Removes excess water from the substrate | Expanded clay, plastic drainage mat |
| Filter fleece | Keeps substrate from clogging drainage | Geotextile fabric |
| Growing substrate | Supports plant root systems | Lightweight mineral-based growing media |
| Vegetation | Provides the green cover and ecosystem benefits | Sedum, grasses, or planted species |
Each layer directly affects the performance of adjacent layers, so a change in substrate depth changes drainage capacity and dead load simultaneously. Your specification document needs to treat the assembly as one integrated system, not a list of separate items.
Applicable standards you should reference
The two most widely cited references in professional green roof work are the FLL guidelines (Forschungsgesellschaft Landschaftsentwicklung Landschaftsbau, Germany) and the GRO Green Roof Code (UK). Both documents cover design, construction, and maintenance requirements in structured detail. For projects in Malaysia, these international standards serve as the practical baseline, since no dedicated national green roof code currently exists in the country.
Treat FLL and GRO Code documents as your design floor, not your ceiling. Malaysia's tropical rainfall intensity and heat load often demand specifications that exceed what either standard assumes by default.
Your structural engineer, waterproofing consultant, and landscape designer all need to work from the same version of these standards to avoid conflicting specifications on your drawings.
Step 1. Confirm feasibility and structural loads
Before you draw a single substrate layer, confirm structural load data with a qualified engineer. Every green roof adds weight, and that weight varies significantly by system type. An extensive green roof (60-150mm substrate) typically adds 60-150 kg/m², while an intensive system can exceed 500 kg/m². Never assume load capacity without a formal structural assessment.
Calculate dead loads and live loads separately
Your engineer needs to assess two distinct load categories. Dead loads represent the static weight of the saturated system at full capacity: substrate, drainage layers, plants, and all fixed components. Live loads cover maintenance personnel, equipment, and any temporary ponding water during heavy rainfall. In Malaysia's climate, where a single storm event can deliver over 200mm of rain, ponding load needs specific attention.
Use this template as a starting checklist for your load calculations:
| Component | Dry weight (kg/m²) | Saturated weight (kg/m²) |
|---|---|---|
| Substrate (100mm) | 45-65 | 90-130 |
| Drainage layer | 5-15 | 10-25 |
| Filter fleece | 0.5 | 1 |
| Vegetation (extensive) | 5-15 | 8-20 |
Always base structural calculations on saturated weight figures. Dry weight can underestimate actual load by 30-50% during a worst-case rainfall event.
Review your existing roof structure
Following green roof design guidelines means confirming your deck material, beam spans, and column capacity against the calculated load before procurement begins. Concrete decks generally offer more flexibility than steel or timber, but even concrete slabs carry design limits. Ask your engineer for written load certification, and bring these specific questions to that conversation:
- What is the current allowable load capacity of the roof deck (kN/m²)?
- Are existing waterproofing details compatible with a green roof overlay?
- Do any roof penetrations require reinforcing before installation?
Step 2. Write the layer-by-layer roof specification
Once your structural load is confirmed, write a specification document that defines every layer by material type, thickness, and performance requirement. This document keeps your contractor, engineer, and landscape designer aligned on a single reference. Following green roof design guidelines from FLL or GRO means your spec covers each layer in order, from the waterproofing membrane up to the vegetation layer, with no component left undefined.
Specify waterproofing and root barrier first
Your waterproofing membrane selection is the most critical decision in the entire assembly. For Malaysian projects, choose a membrane with a minimum 20-year manufacturer warranty and confirmed root-resistant classification. EPDM and TPO both perform well in high-heat, high-UV tropical conditions. If your membrane is not root-resistant on its own, specify a separate HDPE root barrier of at least 0.5mm thickness installed directly above it.
A membrane failure found after substrate installation costs 3-5 times more to repair than the original waterproofing specification would have.
Define substrate depth and composition
Substrate depth and composition must be specified by thickness range, dry bulk density, and particle size distribution, not just by product name. Specify a lightweight mineral-based medium with a maximum dry bulk density of 1.0 g/cm³ for extensive systems or up to 1.4 g/cm³ for intensive builds. For Malaysia's high rainfall, target a substrate with air-filled porosity above 10% to prevent waterlogging at the root zone.
Use this template when documenting your substrate specification:
| Parameter | Extensive | Intensive |
|---|---|---|
| Depth range | 60-150mm | 150-400mm |
| Dry bulk density | 0.6-1.0 g/cm³ | 0.8-1.4 g/cm³ |
| Air-filled porosity | >10% | >10% |
| Organic content | <65 g/L | <65 g/L |
Step 3. Design for drainage, wind, and Malaysia's climate
Malaysia's combination of intense monsoon rainfall and year-round heat creates site conditions that go beyond what most international green roof design guidelines assume. You need to address drainage capacity, wind uplift, and thermal performance as specific design parameters, not afterthoughts, before your contractor breaks ground.
Size your drainage layer for tropical rainfall
Standard drainage mats rated for European rainfall rates will underperform in Malaysia. Your drainage layer must handle peak flow rates corresponding to at least 200mm per hour, which is a realistic figure during a Klang Valley storm event. Specify a drainage mat or expanded clay layer with a flow rate of at least 3.0 L/s per meter width at design slope. If your roof slope is less than 2%, add a secondary internal drainage channel around the perimeter to prevent substrate saturation.
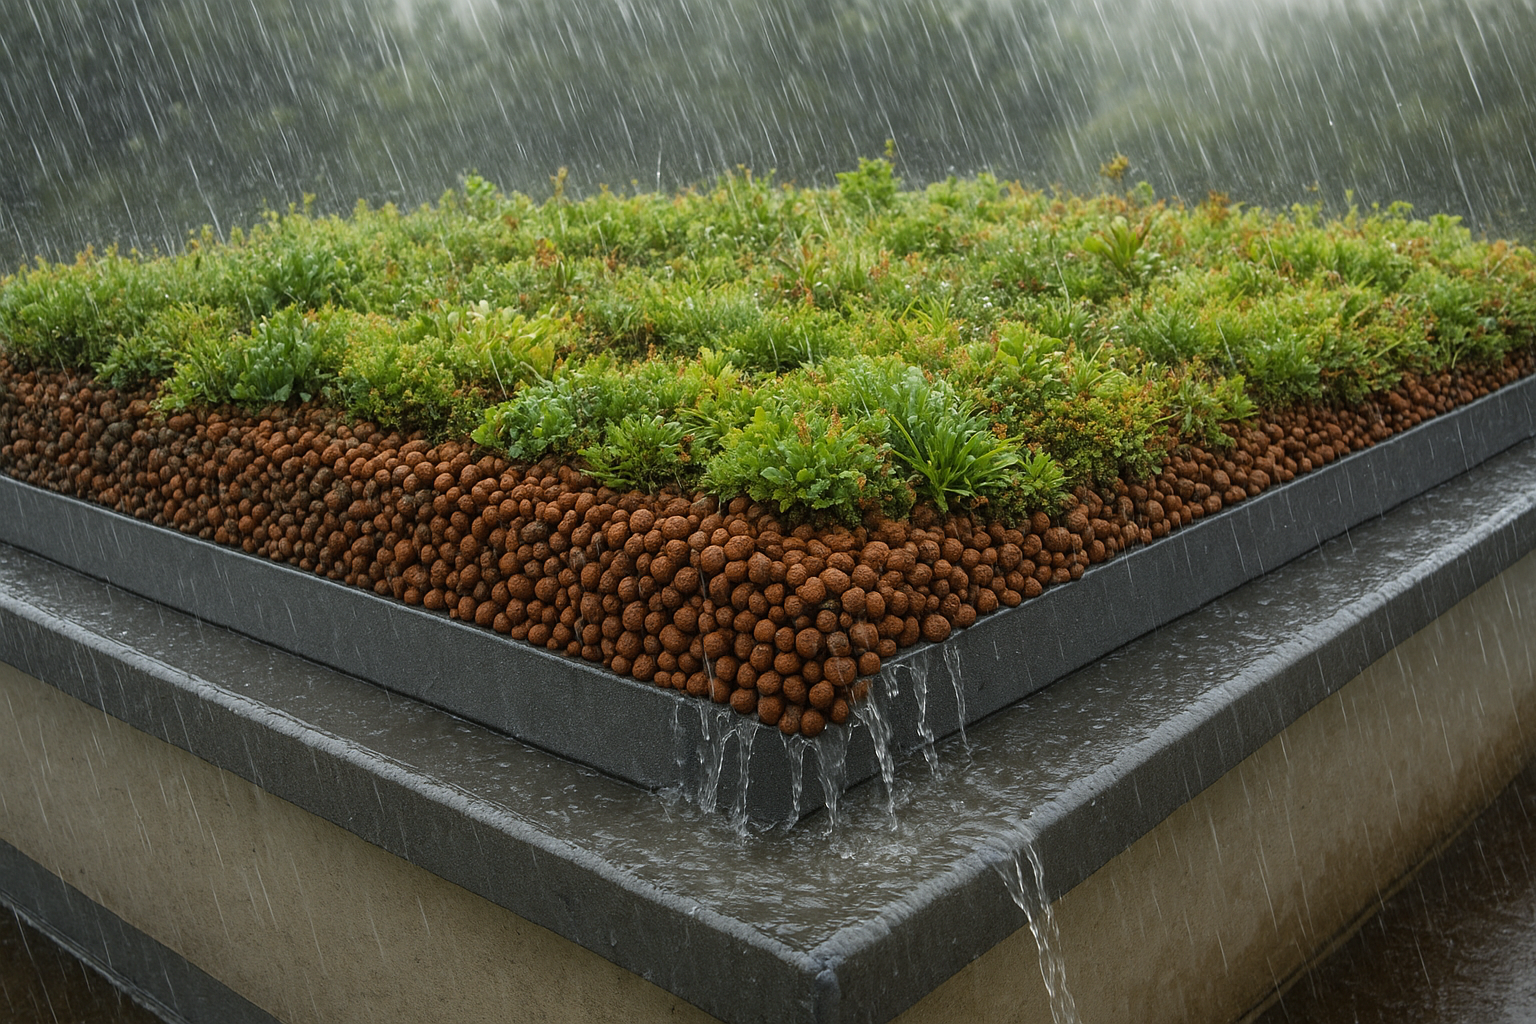
Undersized drainage is the leading cause of green roof failure in tropical climates. Size it for the worst storm on record, not the average monthly rainfall.
Use this drainage specification checklist before finalizing your drawings:
- Minimum drainage mat flow rate: 3.0 L/s/m at 1% slope
- Perimeter drain outlet diameter: 100mm minimum
- Inspection chamber access at each downpipe connection
- Filter fleece overlap at all drainage mat joints: 150mm minimum
Plan for wind uplift at roof edges
Wind uplift forces concentrate at roof edges and corners, which is where green roof assemblies are most vulnerable to displacement. Specify a ballasted perimeter band of gravel or paving units at least 500mm wide around the entire roof edge. Your structural engineer should verify that edge fixing details meet local wind load requirements for your building height and location.
Step 4. Plan access, maintenance, and long-term care
A green roof you cannot safely reach is a green roof you cannot maintain. Access planning and long-term care schedules must be built into your design documents from day one, not added as an afterthought once the substrate is already down. Most green roof design guidelines treat maintenance as a specification requirement, not an optional checklist item, and that approach will save you from costly intervention later.
Build safe access routes into the design
Your roof layout needs dedicated access paths made from paving slabs or raised walkway units running to every maintenance zone. Space paths no more than 1.5 meters apart across the planted area so maintenance staff can reach all vegetation without stepping directly on substrate. Roof hatches or external stairways serving the roof must meet local building safety requirements, and you should specify them in the same drawing set as your green roof layers.
Paths also protect the waterproofing membrane from accidental foot traffic damage during routine inspections.
Set a maintenance schedule before installation
Maintenance frequency directly affects plant survival and drainage performance over the system's lifespan. Write a schedule into your project handover documents so whoever manages the building knows exactly what to do and when.
Use this template as your baseline annual schedule:
| Task | Frequency |
|---|---|
| Weed removal | Every 2 months |
| Drainage outlet inspection | Every 3 months |
| Substrate top-up assessment | Annually |
| Membrane and root barrier inspection | Annually |
| Plant health assessment | Every 2 months |
A simple way to wrap this up
Green roofs work when every decision, from structural load confirmation to drainage sizing, follows a logical sequence grounded in solid specifications. This guide has walked you through the layer assembly, load calculations, tropical climate considerations, and maintenance planning that green roof design guidelines like FLL and GRO Code require. Apply each step in order, document every decision, and make sure your engineer, waterproofing consultant, and landscape designer all reference the same specification set.
Your next move is to get a professional assessment of your site before you commit to any product or substrate. Skipping the feasibility stage is where most projects go wrong, and fixing errors after installation costs far more than getting expert input upfront. If you want a team that understands both the technical and horticultural side of rooftop greening in Malaysia, talk to the Konzept Garden team and get your project started on the right foundation.

