
Every great garden starts with great soil, and the easiest way to get there is learning how to start a compost pile at home. Composting turns your kitchen scraps and yard waste into rich, dark organic matter that feeds your plants better than most store-bought fertilizers. It's free, it reduces waste heading to Malaysian landfills, and it gives your garden a serious nutrient boost without any synthetic chemicals.
At Konzept Garden, we've seen firsthand how healthy soil transforms outdoor spaces. Whether we're designing a residential garden in Kuala Lumpur or planning a commercial landscape project, compost is one of the first things we recommend to clients who want their plants to actually thrive. It's the foundation that award-winning gardens are built on, literally.
This guide walks you through the entire process from scratch: choosing a spot, layering your materials correctly, maintaining the pile, and avoiding the mistakes that slow everything down. No prior experience needed. By the end, you'll have a clear, actionable plan to build your first compost pile this weekend.
What composting is and what you need to start
Composting is the process of breaking down organic materials into a stable, nutrient-rich soil amendment called humus. Microorganisms, worms, and insects do most of the work, consuming your kitchen scraps and yard waste and converting them into dark, crumbly material that plants actively absorb. When you learn how to start a compost pile, you're essentially setting up the right conditions for these organisms to thrive and work quickly. Think of it as managed decay rather than random rot, and you're already thinking like a composter.
How composting actually works
The decomposition process depends on four core ingredients working together: carbon-rich materials (called "browns"), nitrogen-rich materials (called "greens"), moisture, and oxygen. Browns include dry leaves, shredded cardboard, and wood chips. Greens include vegetable scraps, fresh grass clippings, and coffee grounds. Keeping the right balance between these two groups feeds your microbial workforce and prevents the pile from turning into a soggy, smelly mess. A rough target is two to three parts browns for every one part greens by volume.
Getting your carbon-to-nitrogen ratio right from the start is the single biggest factor in how fast your pile breaks down.
Your pile heats up as microbial populations grow and digest organic matter. A healthy, active pile can reach internal temperatures between 130°F and 160°F (54°C to 71°C), which accelerates decomposition and kills most weed seeds and harmful pathogens. If your pile stays cold and inactive, it usually signals not enough nitrogen, too little moisture, or insufficient airflow. Fixing any one of those three issues typically gets things moving again within a few days.
What you'll need before you begin
You don't need expensive equipment to get started. Most of what you need is already sitting in your home or yard. Here's a clear checklist of materials to gather before building your first pile:
| Item | Purpose |
|---|---|
| Browns (dry leaves, cardboard) | Supply carbon for microbes |
| Greens (food scraps, grass clippings) | Supply nitrogen for microbial activity |
| Water source (hose or watering can) | Keep the pile at the right moisture level |
| Garden fork or pitchfork | Turn and aerate the pile regularly |
| Compost bin or open ground space | Contain and organize your pile |
A garden fork is the most practical tool you can own because regular turning is how you introduce oxygen and keep decomposition moving at pace. You can skip a bin entirely and build a free-standing pile directly on bare soil, which works well in a Malaysian backyard with enough space. Either way, aim for a pile that reaches at least 3 feet wide and 3 feet tall so it retains enough internal heat to break down material efficiently rather than just sitting there.
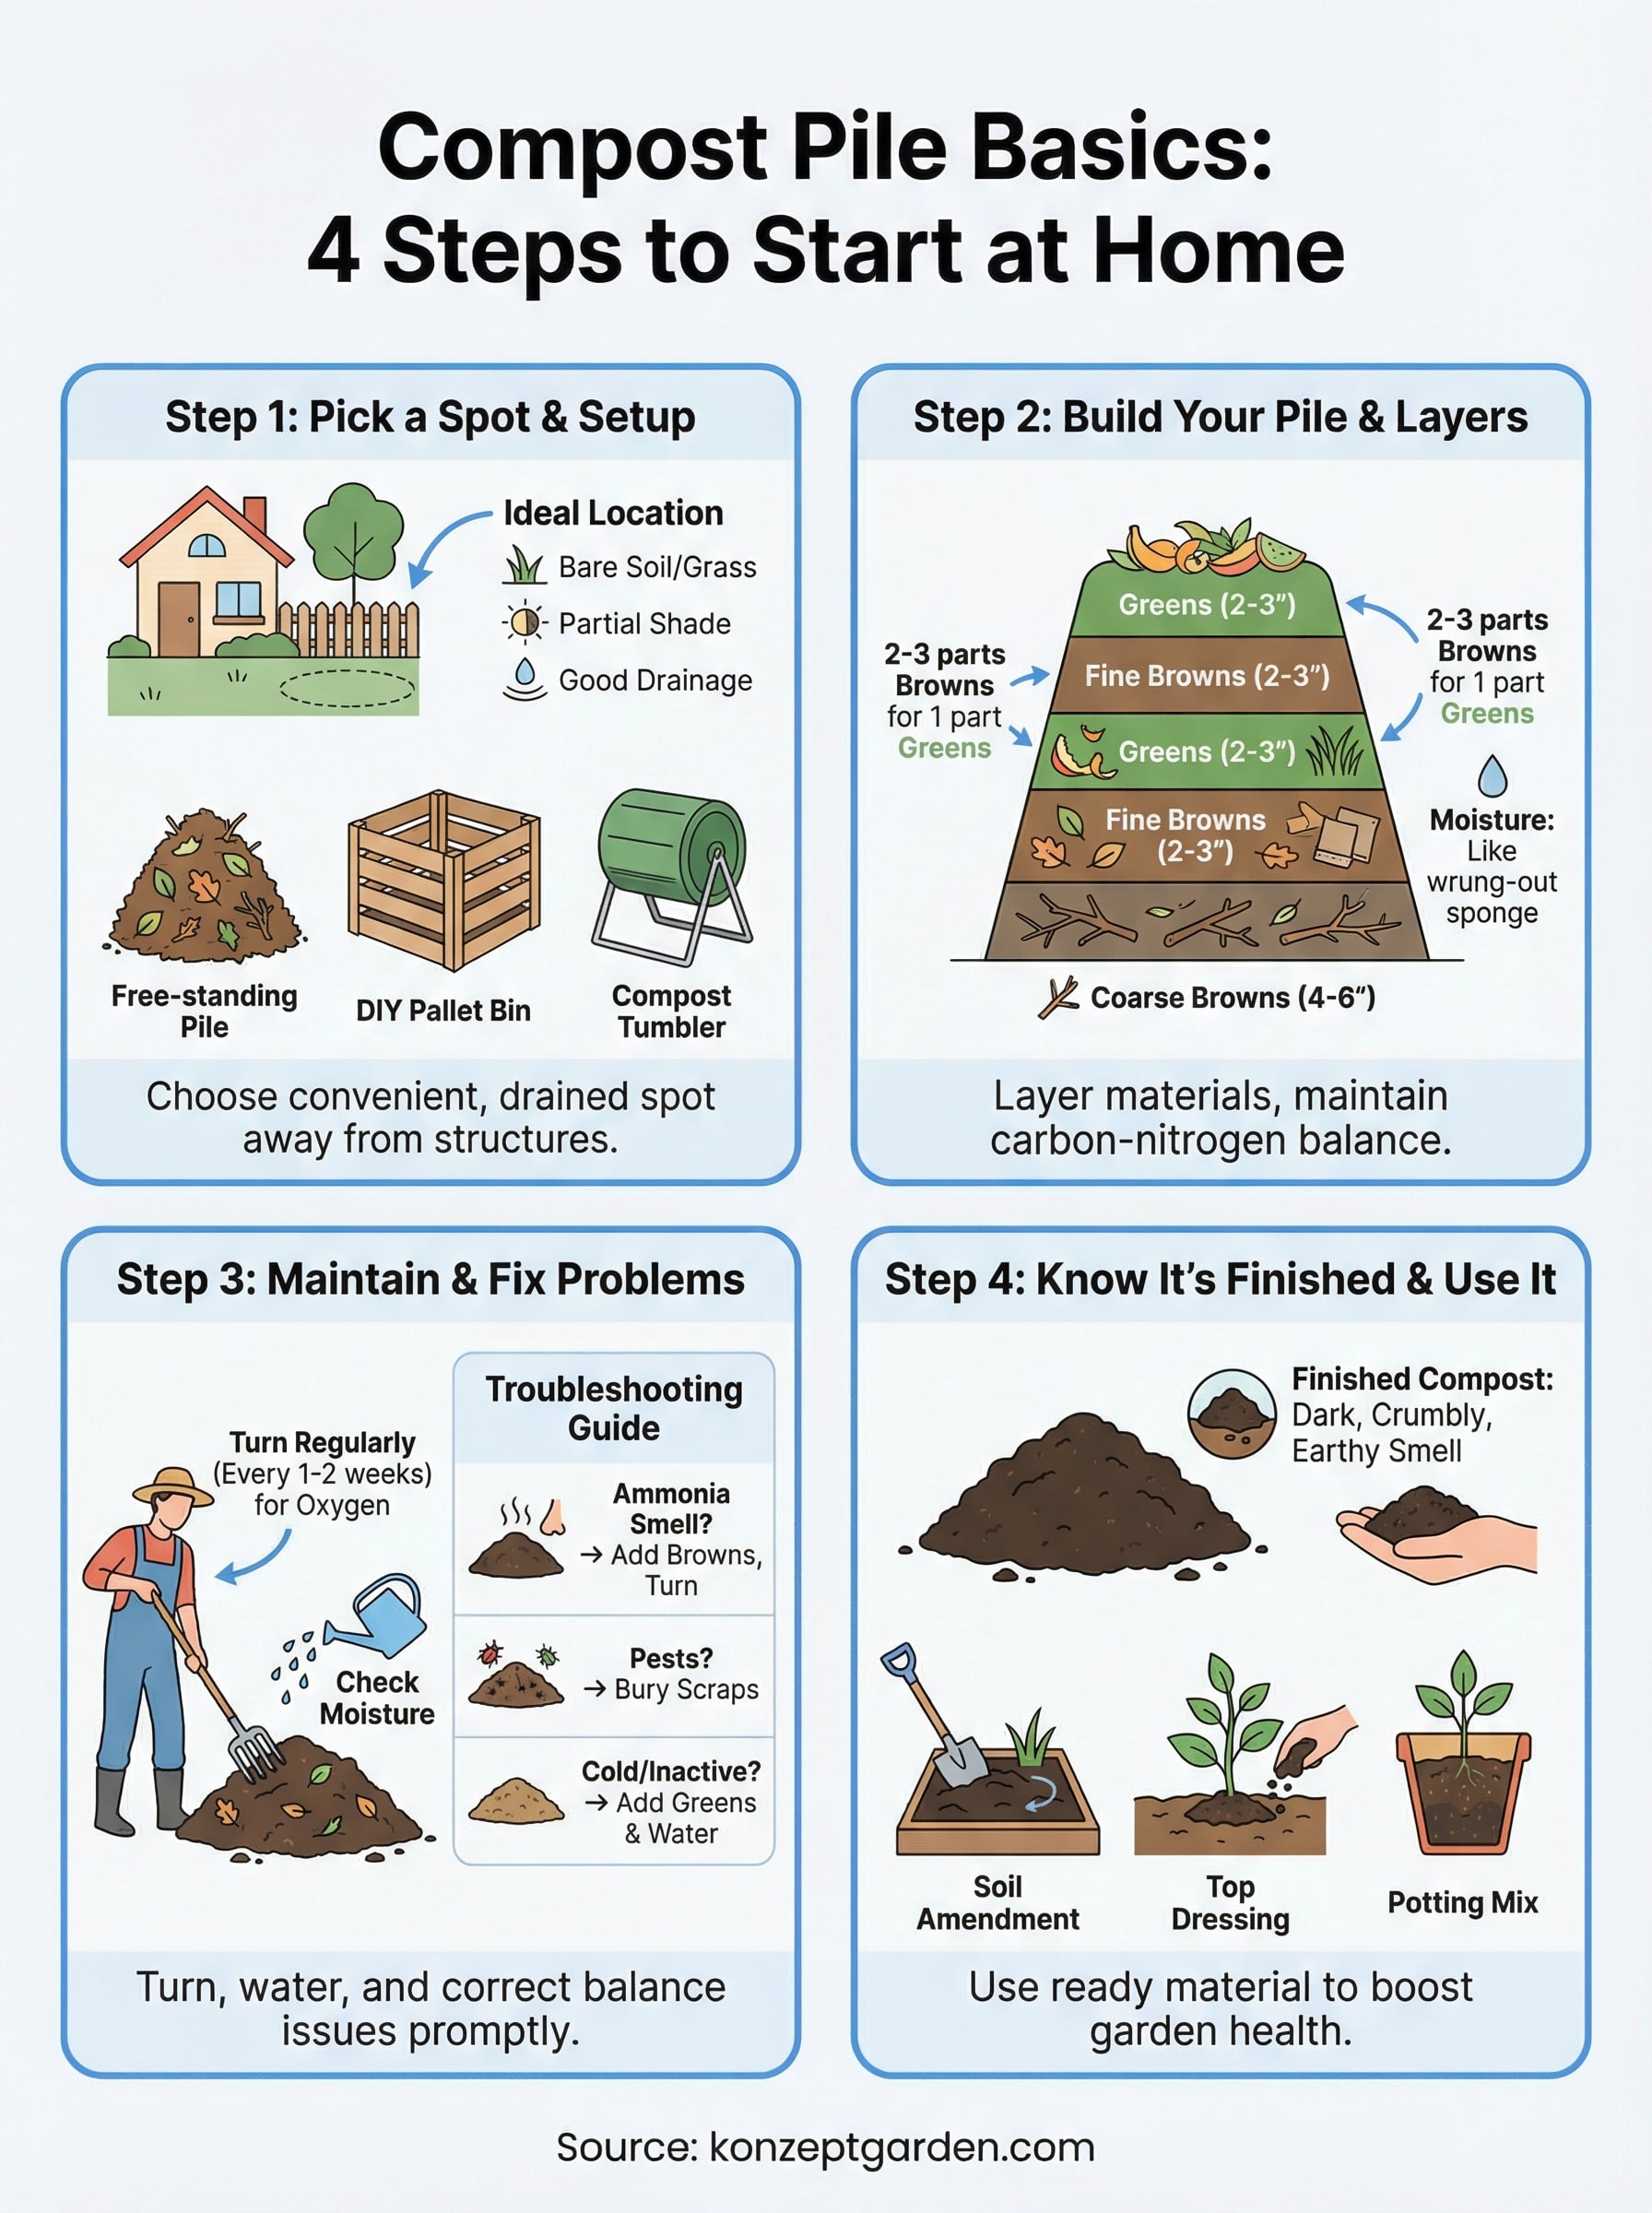
Step 1. Pick a spot and choose a compost setup
Before you build anything, the location you choose will determine how easy your composting routine becomes over the next several months. A poor location adds friction to your daily habits, and friction is what causes most people to abandon the project. Pick a spot that's convenient to your kitchen, sits on bare soil or grass (never a concrete slab), and gets partial shade in Malaysia's intense tropical sun to prevent the pile from drying out too fast.
Finding the right location
Your compost pile needs a few basic conditions to function well. Choose a spot that has good drainage so water doesn't pool underneath and turn the pile anaerobic. The site should be at least 3 feet away from fences, walls, and wooden structures since a hot, active pile generates moisture that can cause long-term damage to adjacent surfaces.
Place your pile where you can reach it with a garden hose easily, since moisture management is a task you'll do every week.
Here's a quick checklist to evaluate any potential spot in your yard:
- Bare soil or grass underneath (allows drainage and worm access)
- Partial shade, especially during afternoon hours
- Easy access from your kitchen or back door
- Away from property boundaries and wooden structures
- Flat or gently sloped ground to prevent runoff
Choosing your compost setup
Once you have your location, you need to decide on a physical setup that matches your space and the volume of organic material you generate weekly. The three most practical options when you're learning how to start a compost pile are an open free-standing pile, a DIY wooden bin made from pallets, or a plastic compost tumbler for smaller yards.
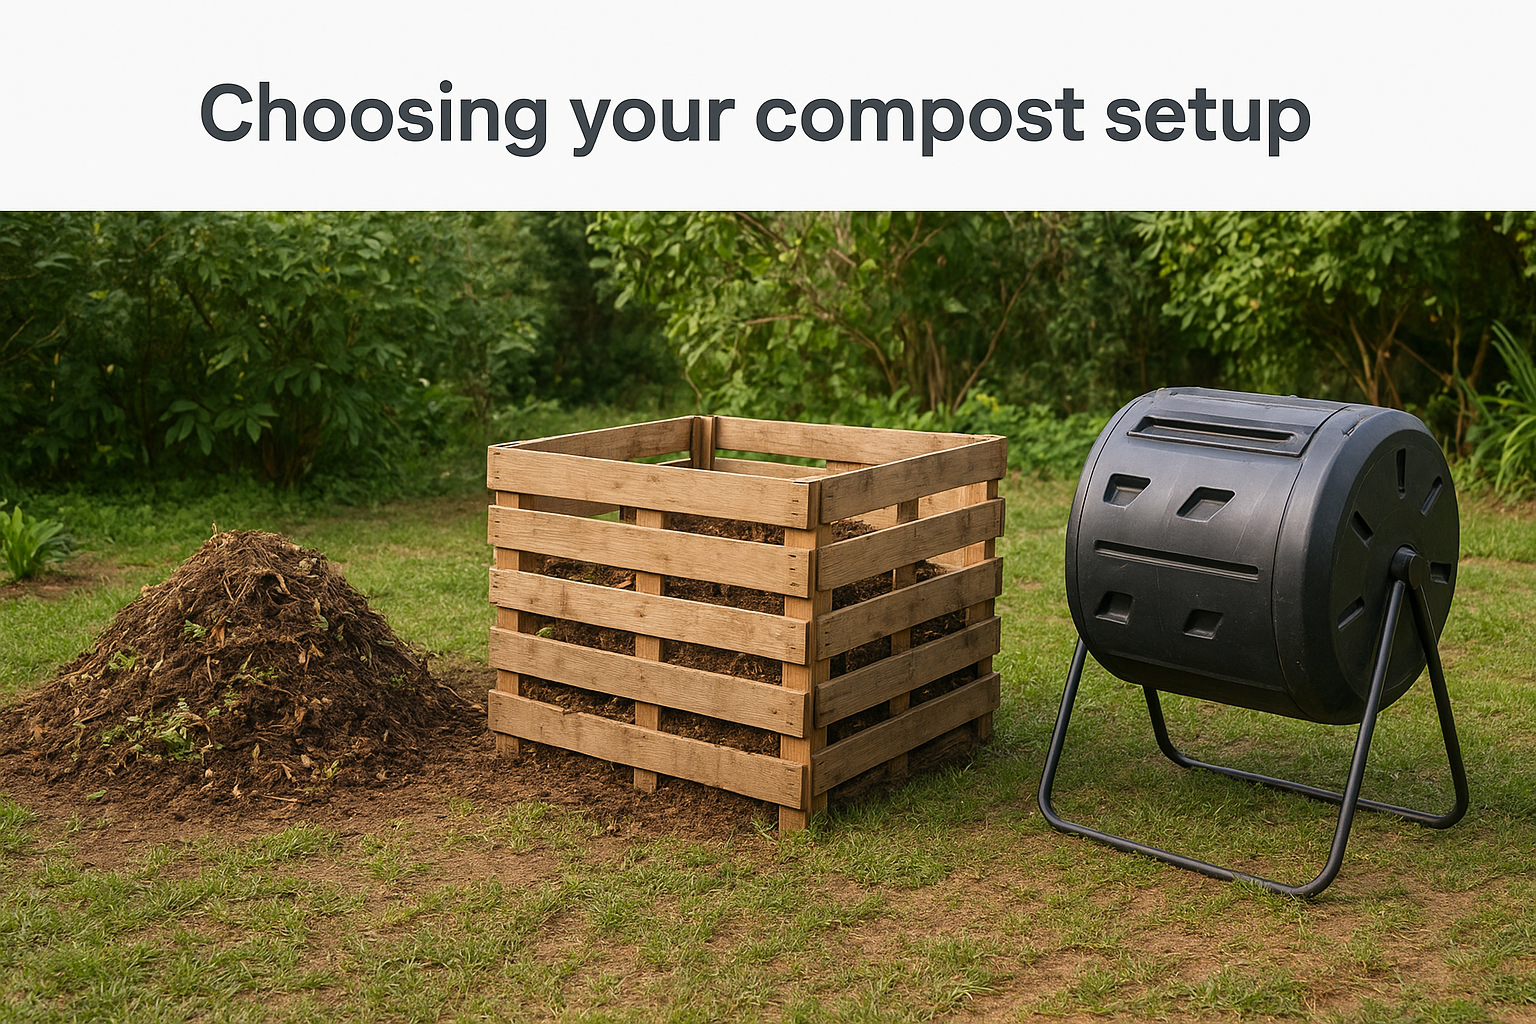
A free-standing pile works best if you have a larger garden and plenty of dry leaves available. A pallet bin costs almost nothing to build and handles high volumes of kitchen and yard waste efficiently. A tumbler suits compact spaces and speeds up decomposition because turning requires less physical effort.
Step 2. Build your pile with the right mix and layers
Now that your spot and setup are ready, building the pile correctly from the start determines how fast and evenly your compost breaks down. The layering process is straightforward: you alternate browns and greens in a specific sequence that feeds your microbial community consistently from the base to the top. Think of it like building a lasagna, where each distinct layer has a clear job to do.
Layer your pile from the ground up
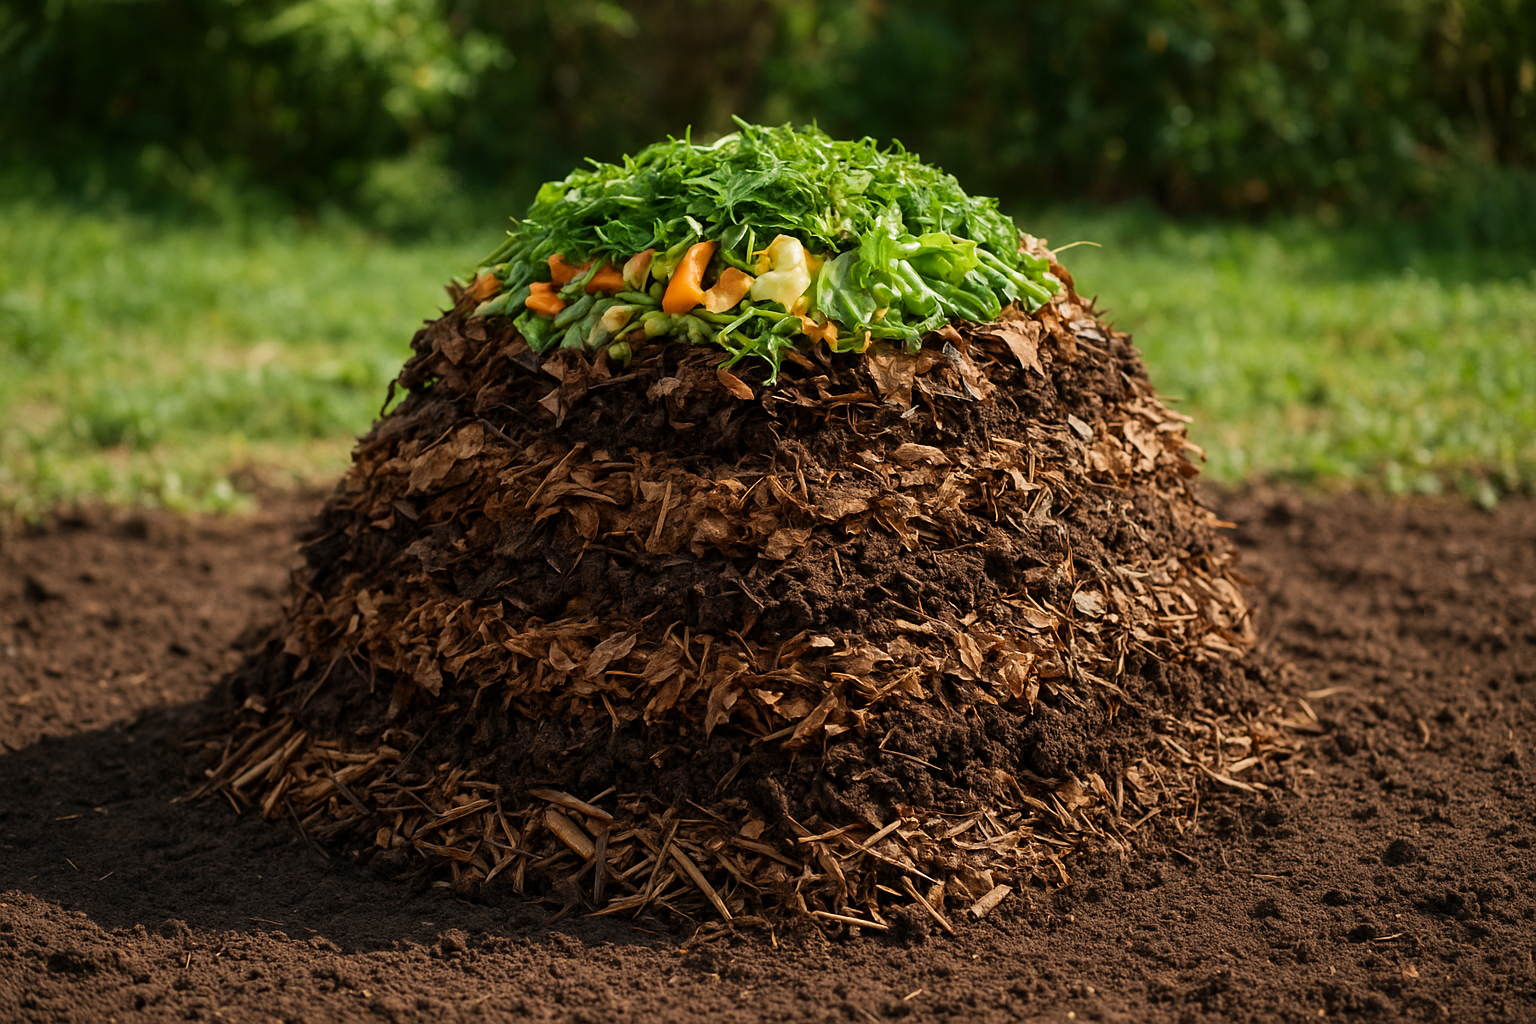
Start by placing a 4 to 6 inch base layer of coarse browns, such as wood chips or small twigs, directly on bare soil. This base layer promotes airflow from underneath and prevents the pile from compressing into a dense, oxygen-starved mass. Add a 2 to 3 inch layer of greens on top, then cover that with another thick layer of browns. Repeat this sequence until your pile reaches at least 3 feet tall.
Here's the layering sequence to follow each time you add new material:
- Coarse browns (wood chips, twigs) - 4 to 6 inches
- Fine browns (dry leaves, shredded cardboard) - 2 to 3 inches
- Greens (food scraps, fresh grass clippings) - 2 to 3 inches
- Thin layer of finished compost or garden soil (optional, but activates microbes faster)
- Repeat from step 2
Balance your browns and greens correctly
When you're learning how to start a compost pile, the browns-to-greens ratio is where most beginners go wrong. Keep two to three parts browns for every one part greens by volume, not by weight. If your pile smells like ammonia, you've added too many greens. Add more browns immediately and turn the pile to restore balance.
A pile that smells earthy and damp is working correctly; a pile that smells rotten or sour needs immediate adjustments to its brown-to-green ratio.
Moisture matters as much as your material ratio. Your pile should feel like a wrung-out sponge, damp throughout but never dripping wet. In Malaysia's humid climate, check moisture levels weekly and add dry browns if the pile feels saturated after heavy rainfall.
Step 3. Maintain the pile and fix common problems
Building the pile correctly gets you started, but regular maintenance is what separates compost that finishes in two to three months from a pile that sits unchanged for a year. Once your pile is built, your job is to monitor three things consistently: moisture, airflow, and the balance between your browns and greens. Staying on top of these three factors turns maintenance from a chore into a quick weekly task.
Turn the pile regularly
Turning your pile introduces fresh oxygen to the center, where microbial activity is highest and oxygen gets consumed the fastest. Use a garden fork to pull material from the outer edges into the middle and push the hot center material outward. Aim to turn your pile every one to two weeks for fast decomposition, or every three to four weeks if you prefer a lower-maintenance approach.
The more frequently you turn your pile, the faster your finished compost will be ready to use in your garden.
In Malaysia's tropical climate, heat and heavy rainfall can both disrupt your pile's moisture balance quickly. After turning, check that the pile feels like a damp sponge throughout. Cover the pile loosely with a tarp during extended periods of rain to prevent waterlogging.
Fix the most common problems
When you're learning how to start a compost pile, problems will come up. Most issues have simple, fast fixes once you identify what's causing the imbalance. Use this table to diagnose and correct the most frequent composting problems:
| Problem | Likely Cause | Fix |
|---|---|---|
| Pile smells like ammonia | Too many greens | Add browns and turn immediately |
| Pile smells rotten or sour | Too wet, not enough air | Turn the pile and add dry browns |
| Pile is dry and not breaking down | Too little moisture | Water thoroughly and turn |
| Pile is cold and inactive | Too little nitrogen or too small | Add greens and build up pile size |
| Pests appearing near the pile | Food scraps exposed on the surface | Bury food scraps under a layer of browns |
Step 4. Know when compost is finished and use it well
Knowing when your compost is actually ready is just as important as knowing how to start a compost pile in the first place. Many beginners pull material too early, spread half-finished compost, and end up with nitrogen tie-up in their soil that starves plants rather than feeding them. Finished compost looks, smells, and feels completely different from the raw material you started with, and checking for those three signals takes less than a minute.
How to tell your compost is ready
Finished compost is dark brown, crumbly, and smells like fresh forest soil, not like rotting food or grass clippings. You should no longer be able to identify any of the original materials you added. If you still see recognizable food scraps or leaf shapes, give the pile another two to four weeks before checking again.
Rub a small handful of compost between your fingers. If it feels gritty and uniform rather than slimy or chunky, it's ready to use.
Look for these signs before spreading your compost:
- Color is consistently dark brown or near black throughout
- Texture is loose and crumbly, not sticky or matted
- Temperature at the center has dropped to match the surrounding air
- No recognizable food scraps, grass, or leaf fragments visible
How to use finished compost in your garden
Your finished compost works in three practical ways: as a soil amendment mixed into planting beds, as a top dressing spread around existing plants, and as a potting mix ingredient blended with native soil for container gardens. For planting beds, mix 2 to 4 inches of finished compost into the top 6 to 8 inches of soil before planting. For established plants, spread a 1-inch layer around the base without touching the stem directly.
Apply compost in the early morning before watering so it settles evenly into the root zone and your plants can begin absorbing nutrients right away.
A simple wrap-up
Now you have everything you need to know about how to start a compost pile at home. Pick your spot, layer your browns and greens in the right sequence, keep the pile damp and well-aerated, and check it every week. Finished compost typically takes two to four months to produce in Malaysia's warm climate, so starting now means you'll have rich, free soil amendment ready before your next planting season gets underway.
Composting is one of the simplest investments you can make in your garden's long-term health and productivity. If you want to take your outdoor space even further, professional landscape design transforms the way your garden looks and functions for years to come. The team at Konzept Garden has helped homeowners across Malaysia build outdoor spaces they're genuinely proud of, from productive planted beds to custom water features. Talk to our design team and start planning your garden transformation today.

