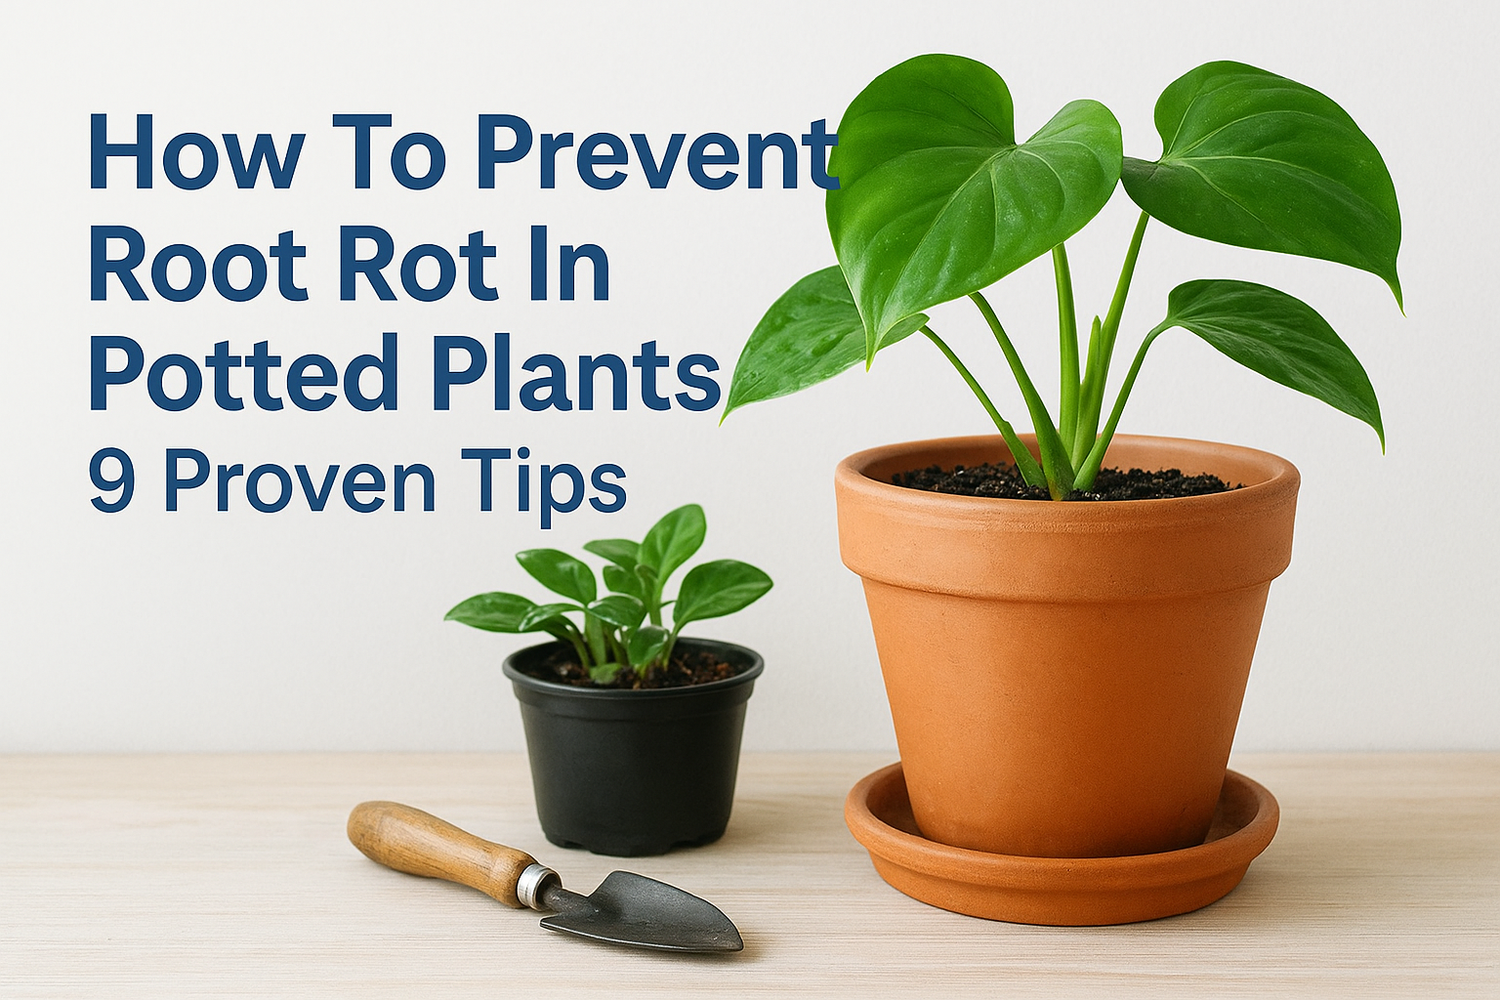
You chose the right pot, picked a healthy plant, and even placed it in the perfect spot, then watched it slowly wilt and die. If the roots turned brown and mushy when you pulled it out, you already know the culprit. Knowing how to prevent root rot in potted plants is one of the most essential skills any container gardener can build, yet it's a problem that catches people off guard again and again. The frustrating part? Root rot often starts long before you notice anything wrong above the soil line.
At Konzept Garden, we've seen this issue firsthand across hundreds of residential and commercial planting projects here in Malaysia. Our tropical climate, with its heavy rainfall and persistent humidity, creates ideal conditions for fungal pathogens that attack waterlogged roots. Through years of hands-on garden design and botanist-led consultations, we've learned exactly which habits, soil mixes, and container choices keep root systems healthy in this environment.
This guide breaks down nine proven tips to stop root rot before it starts. You'll learn how to pick the right soil, water with intention, choose containers that actually drain, and spot early warning signs while there's still time to act. Whether you're growing herbs on a balcony or filling planters across a new landscape project, these techniques apply to every potted plant in your care.
What root rot is and why pots trigger it
Root rot is a condition where plant roots decay due to prolonged exposure to waterlogged soil. It's not a single disease but rather the result of oxygen-starved roots becoming vulnerable to soil-borne pathogens, most commonly Phytophthora, Pythium, and Fusarium species. These fungi thrive in wet, anaerobic environments and spread rapidly once a root system is compromised. By the time you notice yellowing leaves, a soft stem base, or persistent wilting, the damage underground is already extensive and often irreversible.
How root rot develops at the root level
Healthy roots need both water and oxygen to function properly. When soil stays saturated for too long, the air pockets between soil particles fill with water and cut off the oxygen supply entirely. Without oxygen, root cells begin to die within 24 to 48 hours. That dead tissue becomes a direct entry point for fungal pathogens, which accelerate the breakdown and spread further into the root system. The plant loses its ability to regulate water and nutrient uptake at exactly the moment the soil holds the most moisture.
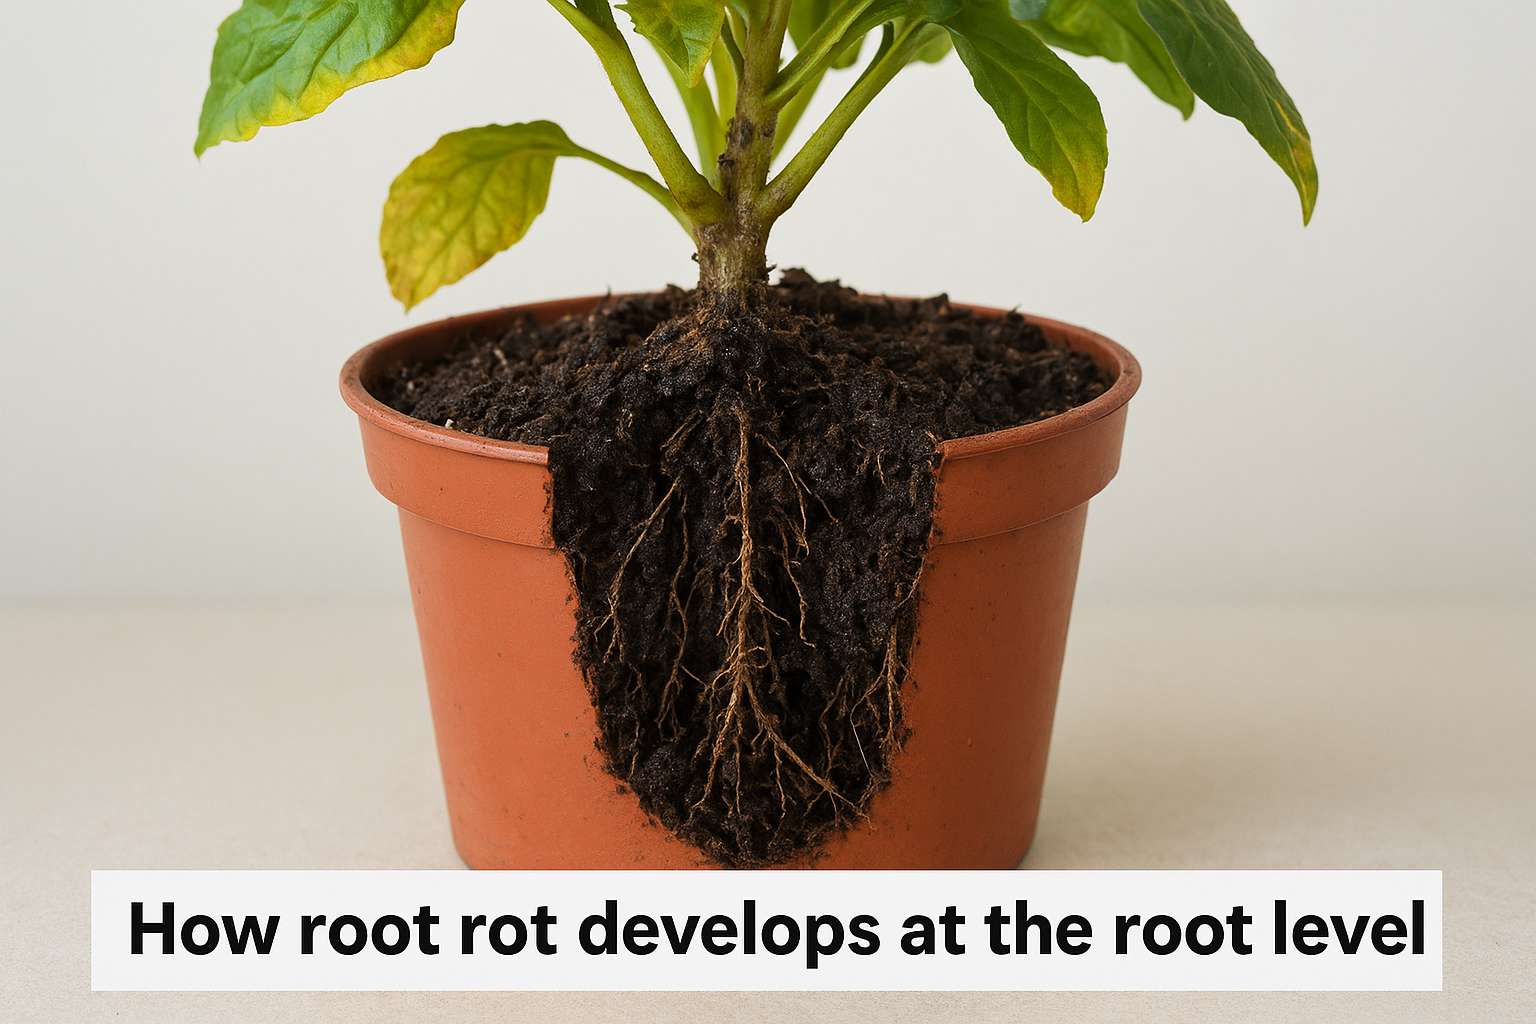
Once fungal pathogens establish in waterlogged soil, they can spread to healthy roots within days, making early prevention far more effective than any late-stage treatment.
The rot progresses from the fine feeder roots inward, moving steadily toward the crown of the plant. Feeder roots handle the absorption of water and nutrients, so as they die off, the plant begins showing deficiency symptoms even when the soil remains wet. This creates a misleading picture: the plant looks thirsty, but adding more water accelerates the decline. Many growers unknowingly deepen the problem by watering in response to wilting, which is exactly the wrong move when root rot has already taken hold.
Why containers make the problem worse
Open ground allows excess water to drain laterally through the surrounding soil profile. A pot gives water nowhere to go except straight down, and if the drainage hole is blocked, silted up, or absent, water pools at the base and creates a permanently saturated zone. In Malaysia's tropical climate, where heavy rainfall and high humidity are constant, evaporation from pot surfaces slows considerably, meaning wet soil stays wet far longer than it would in a drier or more temperate environment. That combination turns even minor overwatering into a serious threat.
Container size also plays a significant role in root rot risk. A plant placed in an oversized pot sits surrounded by a large volume of soil it cannot draw moisture from quickly enough. The root zone stays relatively dry while the outer soil remains saturated for days. Understanding this dynamic is central to knowing how to prevent root rot in potted plants, because the mismatch between root mass and soil volume is one of the most overlooked reasons container plants fail even when the gardener believes their watering habits are sound. Choosing the right container from the start closes this gap before it becomes a problem.
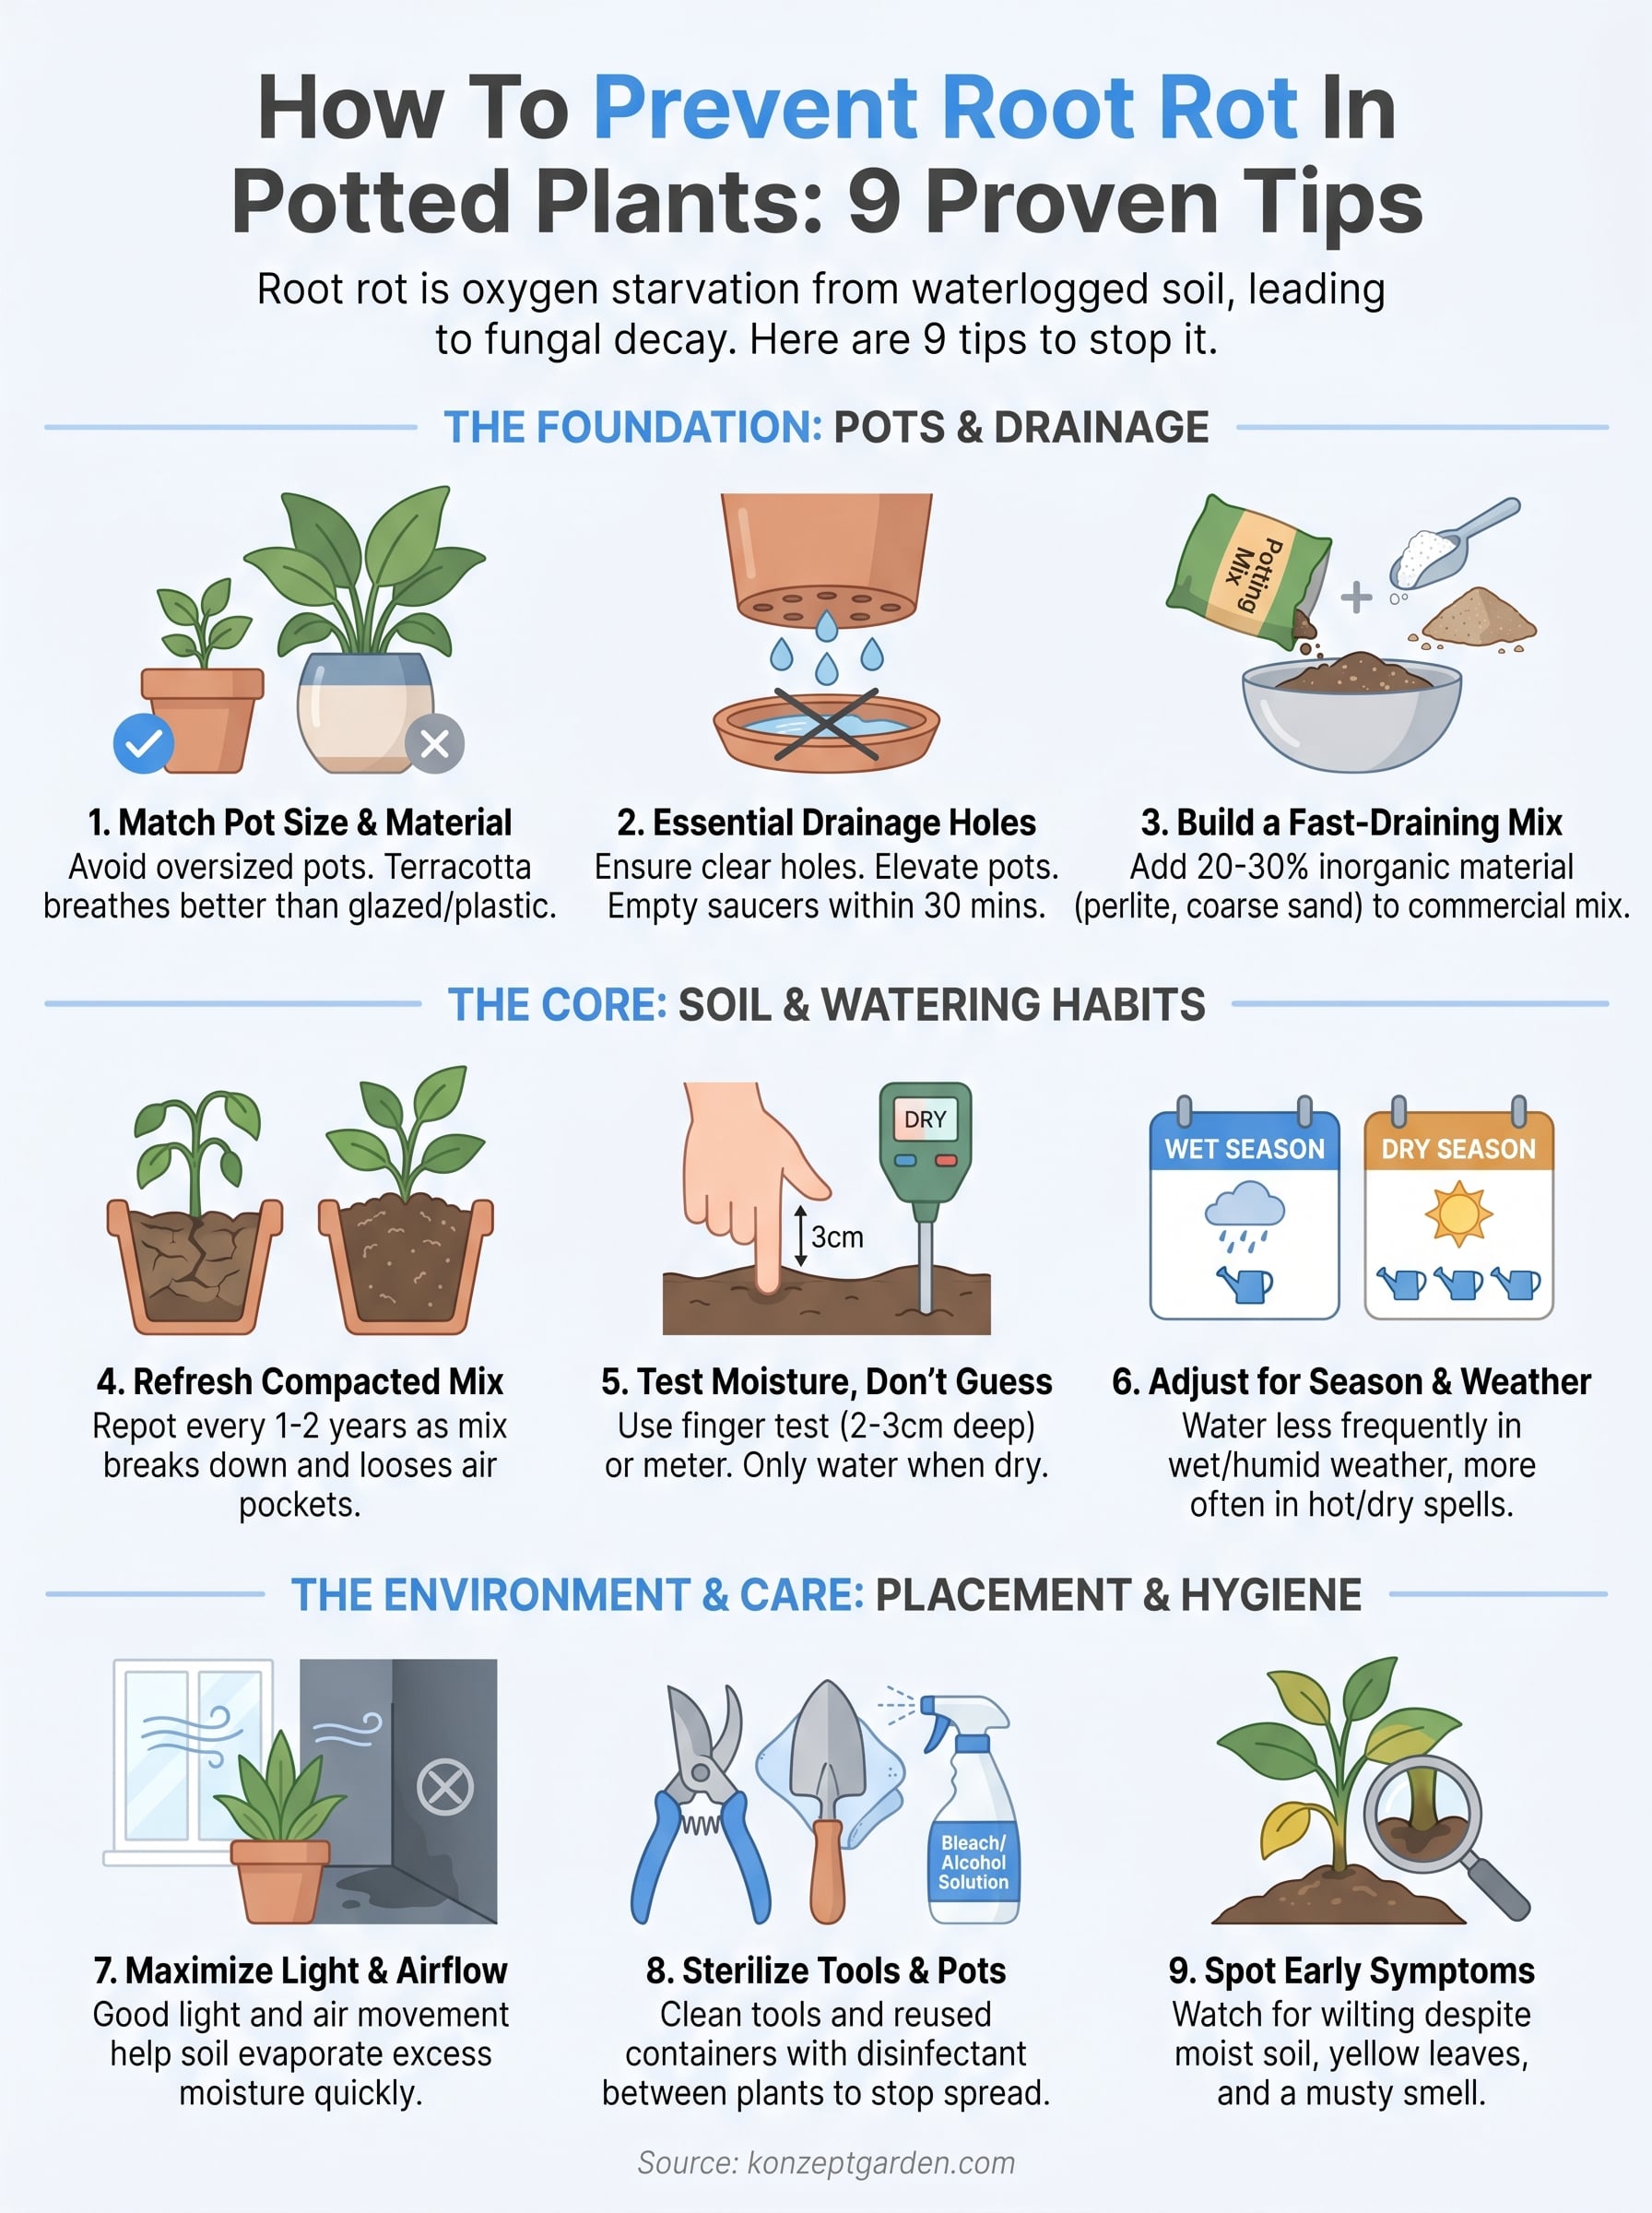
Tip 1 to 2: Pick the right pot and drainage
The container you choose sets the conditions for everything that follows. Before you adjust your watering habits or rethink your soil mix, the physical design of your pot determines how quickly excess water escapes and how much oxygen your roots can access between waterings. Getting this right is one of the most direct ways to address how to prevent root rot in potted plants, because no watering technique compensates for a pot that holds water longer than your plant can tolerate.
Tip 1: Match pot size and material to your plant
Resist the temptation to plant small specimens in large containers. When your plant's root system is small, the surrounding soil absorbs water but receives no help drying out from nearby roots. That outer soil stays wet for days, creating the anaerobic conditions that fungal pathogens need to establish. Choose a pot that gives roots 2 to 5 centimeters of clearance beyond the current root ball, then size up gradually as the plant grows.
Material also matters significantly. Terracotta and unglazed ceramic pots allow moisture to evaporate through the pot walls, which gives roots faster access to oxygen between waterings. Plastic and glazed ceramic pots retain moisture longer, which works for drought-tolerant plants but raises rot risk for most tropical foliage and flowering plants in Malaysia's humid climate.
Tip 2: Treat drainage holes as non-negotiable
Every pot you use needs at least one drainage hole at the base. A single small hole in a large container often clogs with roots or compacted soil over time, so aim for multiple openings or a wider one. Elevate your pots slightly using pot feet or small risers so that water flows freely away from the base without pooling and being reabsorbed.
Placing a saucer under your pot is fine for protecting surfaces, but empty it within 30 minutes of watering. Sitting water reabsorbs into the potting mix faster than most growers expect.
Avoid adding a gravel layer at the pot base. Research consistently shows this creates a perched water table that raises the saturation zone rather than lowering it, leaving your roots at greater risk than if you had skipped the gravel entirely.
Tip 3 to 4: Build a fast-draining potting mix
Your container and drainage setup create the structure, but what goes inside the pot determines how long roots sit in moisture after each watering. Standard potting soil sold at most nurseries is often too dense for container growing, especially in Malaysia's humid climate where soil takes much longer to dry between waterings than it would in a cooler or drier region. Building the right mix is a straightforward and inexpensive step that directly addresses how to prevent root rot in potted plants at the root level.
Tip 3: Start with a coarse, open base
Never use garden soil or heavy compost alone in a container. Both compact over time, block drainage, and cut off oxygen to the root zone within a few weeks of regular watering. Instead, start with a quality commercial potting mix labeled for containers, then improve it with at least 20 to 30 percent inorganic material before you plant anything.
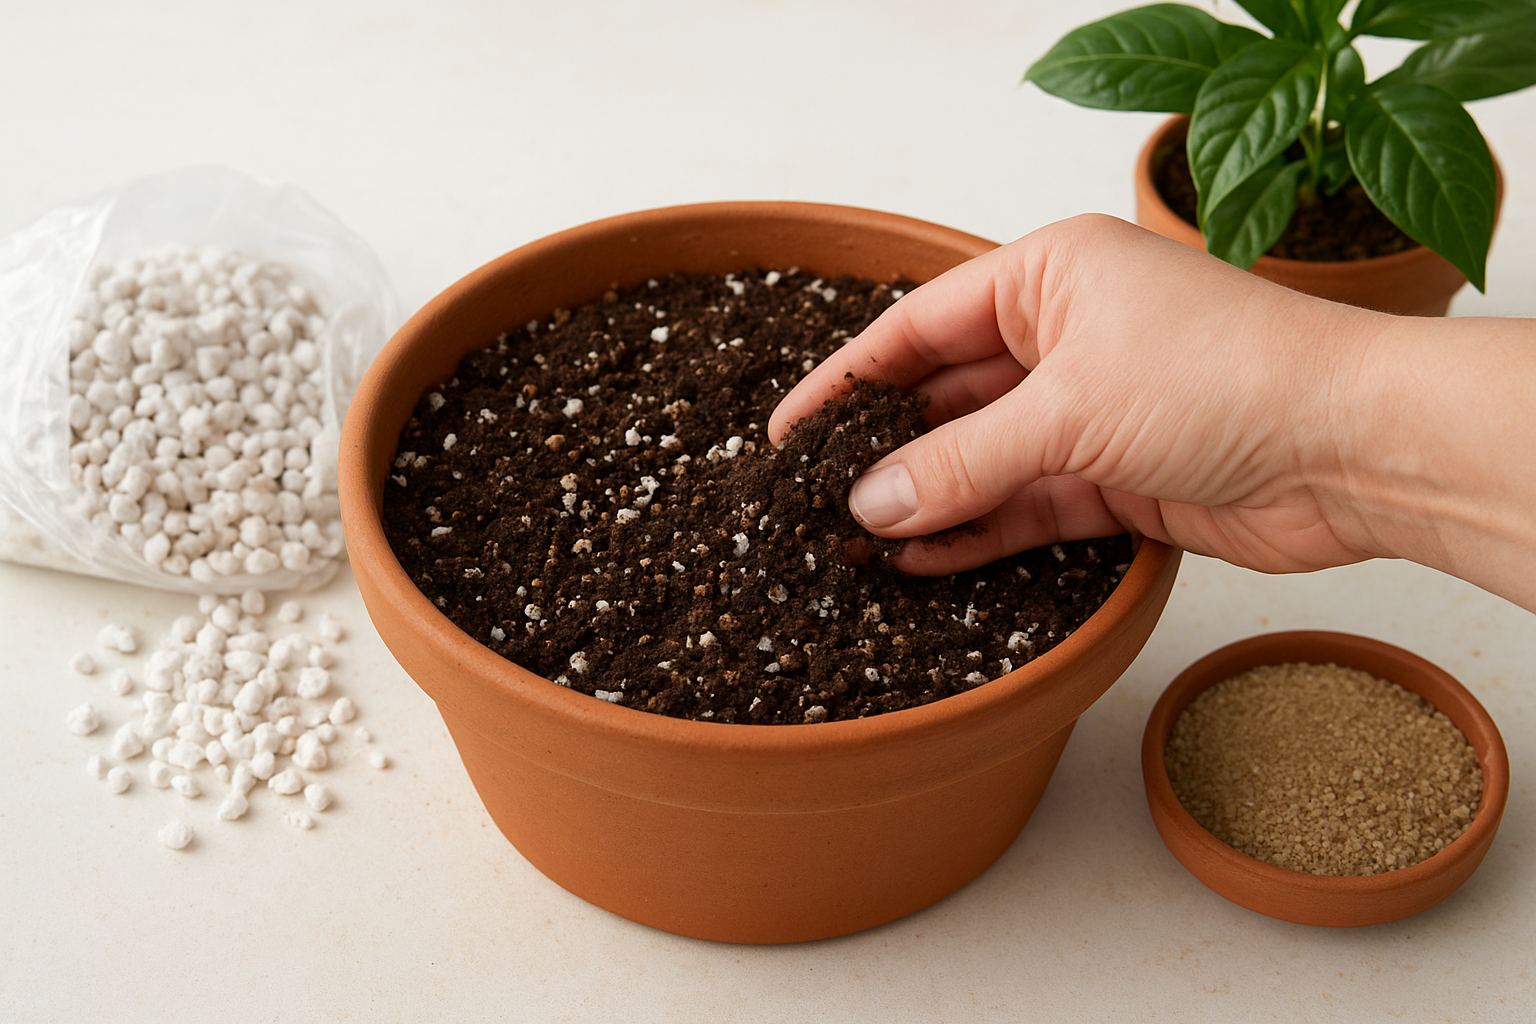
The single most effective change most container gardeners can make is replacing 25 percent of their potting mix with perlite or coarse sand before planting.
Good base amendments to mix in include:
- Perlite (white volcanic glass pellets): improves aeration and drainage without retaining excess moisture
- Coarse river sand: adds drainage weight and opens soil structure
- Pumice: similar to perlite but denser, works well for heavy or large containers
- Orchid bark: adds air pockets and breaks down slowly, ideal for tropical foliage plants
Tip 4: Refresh compacted mix before it causes problems
Potting mix breaks down and compacts gradually over 12 to 18 months of regular watering, reducing the air pockets that protect roots from saturation. When you notice water pooling on the surface or running straight through without absorbing evenly, treat that as a signal to refresh or replace the mix entirely rather than adjusting your watering schedule.
Repot your plant into fresh amended mix every one to two years. Shake off as much of the old, compacted soil from the roots as possible, inspect for early signs of rot, and trim any soft or discolored roots cleanly with sterilized scissors before replanting.
Tip 5 to 6: Water on a schedule the soil sets
Overwatering is the most common cause of root rot in container gardens, and it usually comes from good intentions rather than neglect. Most people water on a fixed routine, every Monday and Friday regardless of what the soil actually needs. In Malaysia's climate, where a wet monsoon week followed by intense dry heat can completely change how fast your potting mix dries out, a calendar-based approach leaves roots sitting in excess moisture far more often than necessary.
Tip 5: Test moisture before you water, not by the calendar
The most reliable way to know when to water is to check the soil directly rather than guessing based on how long it has been since the last watering. Push your finger 2 to 3 centimeters into the potting mix. If it feels moist at that depth, wait another day and check again. If it feels dry, water thoroughly until the excess drains freely from the drainage hole, then stop.
The finger test takes five seconds and eliminates the guesswork that leads most container gardeners to overwater consistently.
For larger or deeper containers where the finger test doesn't reach the root zone, use a wooden chopstick or a basic soil moisture meter. Insert it 5 to 7 centimeters deep into the mix. A damp chopstick or a meter reading above 50 percent moisture means the roots still have access to water and do not need more yet.
Tip 6: Adjust your watering routine by season and weather
Knowing how to prevent root rot in potted plants means treating your watering schedule as something the plant and soil define, not the calendar. During Malaysia's wetter monsoon months, your potting mix may stay moist for five to seven days between waterings. During hotter, drier stretches, that same mix might need water every two days depending on pot size, plant type, and sun exposure.
Track a simple log for each plant over a few weeks, noting the day you watered and the day the soil reached dryness at the root zone. Within a month, you'll identify a reliable interval specific to each pot and position, and you can shift that baseline whenever the season or placement changes.
Tip 7: Match light, airflow, and heat to drying time
Environmental conditions around your pot affect how quickly the potting mix dries between waterings just as much as the mix itself. Knowing how to prevent root rot in potted plants means looking at the full picture: the soil, the container, and the physical environment where that container sits. A pot placed in a dark, sheltered corner with poor ventilation holds moisture far longer than the same pot positioned in a bright, breezy spot, even with identical soil and watering practices.
Position your pots where air and light reach the soil
Direct sunlight and good air movement accelerate evaporation from the soil surface and the pot walls. If you keep potted plants indoors or under solid shade structures, the potting mix loses moisture slowly, which narrows your margin for error considerably when watering. Move plants to locations where they receive appropriate light for their species and where natural airflow can reach the pot freely.
Outdoors in Malaysia, avoid placing pots directly against walls or tight against each other in clusters. Crowded pots trap humid, stagnant air at the soil level, which slows surface drying and encourages fungal activity around the root zone. Space your containers at least 15 to 20 centimeters apart so that air circulates around each one individually.
Improving airflow around your pots is one of the most overlooked changes you can make, and it costs nothing.
Adjust pot placement when the weather changes
Malaysia's weather shifts considerably between the monsoon and dry seasons, and your pot placements should shift with it. During prolonged wet stretches, move sensitive plants under partial shelter to reduce how much additional moisture the soil absorbs from rainfall. During hot, dry weeks, bring pots back into open positions where evaporation rates are higher and the soil dries within a healthy window.
Pay attention to how long your potting mix takes to reach dryness after each watering in different spots across your space. A plant that dries out in three days in a sunny position may take seven or more days in a shaded or enclosed area, and treating both locations with the same watering interval will lead to consistently overwatered roots in the shadier spot.
Tip 8 to 9: Stop contamination and spot symptoms
Prevention covers more than soil and water. Fungal pathogens spread between containers through shared tools, reused soil, and infected plant material, so maintaining clean practices across your entire collection is a direct part of knowing how to prevent root rot in potted plants. Catching the earliest above-ground symptoms also gives you a narrow window to save a plant before the damage becomes irreversible.
Tip 8: Sterilize tools and reused containers before contact
Any tool that touches an infected root system carries fungal spores to the next plant you use it on. Clean your pruning scissors, trowels, and pot surfaces with a diluted bleach solution (one part bleach to nine parts water) or 70 percent isopropyl alcohol between uses. Let tools air dry completely before contact with fresh potting mix.
Reused pots are one of the most common hidden sources of reinfection, especially when the previous plant died from root rot.
Never reuse old potting mix from a plant that showed signs of decline. Discard it entirely and start fresh with a clean, amended mix. When you repot into a previously used container, scrub the inside walls with the bleach solution, rinse thoroughly, and let the pot dry fully before adding new soil. This step takes less than five minutes and eliminates the most common route of cross-contamination in container collections.
Tip 9: Catch symptoms early enough to act
Above-ground symptoms appear after root damage is already underway, but catching them at the earliest possible stage still gives you time to unpot the plant, remove affected roots, and treat the remainder with a diluted hydrogen peroxide rinse (three percent concentration) before repotting into fresh mix.
Watch for these warning signs and act immediately when you see more than one at the same time:
- Yellowing lower leaves that do not respond to feeding
- Wilting despite moist soil, which signals root failure rather than drought
- A soft or darkened stem base at the soil line
- Musty, sour odor coming from the potting mix
- Brown, mushy roots with no firm white tips when you unpot the plant
Wrap-up and next steps
Knowing how to prevent root rot in potted plants comes down to consistent habits applied before problems start, not emergency fixes after roots have already collapsed. Pick a pot that fits your plant, build a fast-draining mix, water only when the soil tells you it needs it, and keep your tools and containers clean between uses. Each of these nine tips works independently, but they deliver the most reliable results when you apply them together as a complete system.
Start with the two changes that make the biggest immediate difference: switch to a perlite-amended potting mix and commit to the finger test before every watering session. From there, work through the remaining tips as you repot, reposition, or expand your container collection.
If you want professional guidance on building a garden space that keeps your plants thriving long-term, talk to our team at Konzept Garden for a free consultation.