

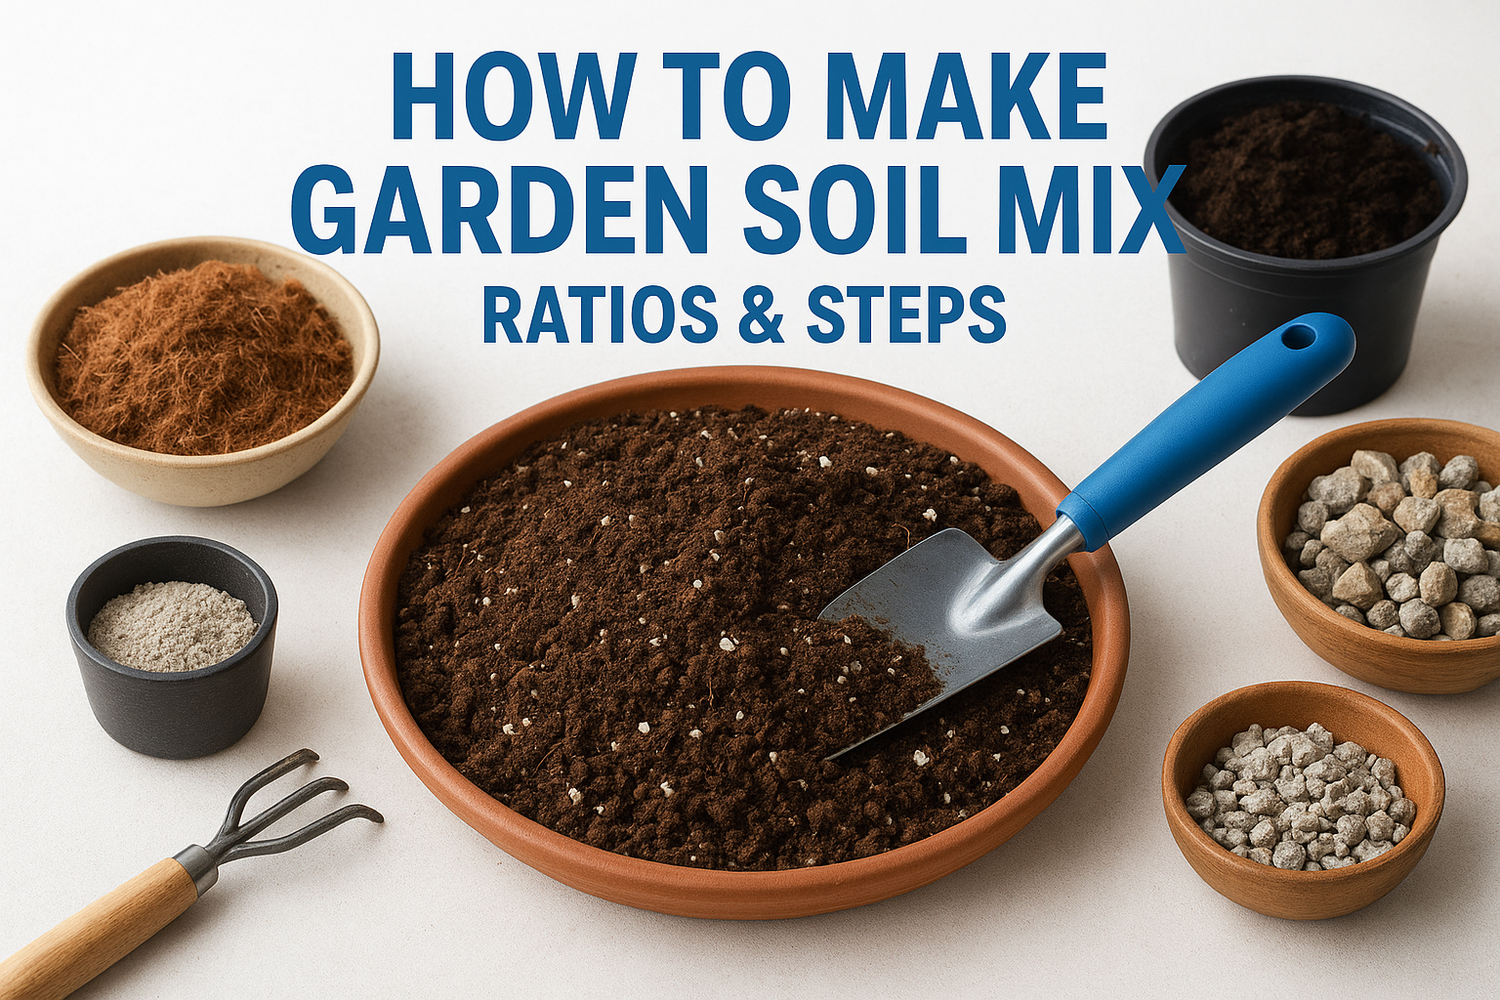
Bad soil kills more gardens than bad weather ever does. If your plants sit stunted, drain too slowly, or dry out within a day of watering, the mix under them is usually the culprit, not your green thumb. Learning how to make garden soil mix yourself means you control exactly what your plants sit in, instead of guessing with a bag off the shelf.
This guide gives you the actual ratios: how much compost, coco coir or peat moss, and perlite or vermiculite to combine for raised beds, containers, or in-ground planting in Malaysia's climate. You'll also get the mixing steps in order, so you don't end up with a lumpy, uneven batch that drains poorly in one corner and stays soggy in another.
We put together garden beds and planters for a living, and soil mix is where most DIY projects go wrong before a single seed goes in. Below, you'll find practical ratios by use case, a simple mixing method, and the adjustments to make if your local topsoil runs too sandy or too heavy with clay.
What is garden soil mix and what you'll need
Garden soil mix is a blend you build from scratch, combining mineral soil, organic matter, and drainage material in set proportions to match what you're planting and where. It's different from bagged "garden soil" or "potting soil" you buy off the shelf, which are pre-mixed for general use and rarely match your specific bed, pot, or ground conditions in Malaysia's heat and rainfall. Making your own mix gives you control over drainage, nutrient content, and structure, which matters more than most first-time gardeners realize until their tomatoes start yellowing or their herbs rot at the roots.
Garden soil mix vs. topsoil and potting soil
Topsoil alone, dug straight from your yard, is almost never good enough on its own. It might be too sandy and drain out nutrients within a week, or too clay-heavy and suffocate roots after one storm. Potting soil, on the other hand, is usually soilless, built from peat or coir, perlite, and compost, designed for containers rather than open ground. A proper garden soil mix sits between the two: it uses your existing soil as a base where useful, then corrects its weaknesses with organic matter and aeration material.
A good soil mix isn't one ingredient done well, it's four ingredients balanced against each other.
The four core components
Every workable soil mix, regardless of ratio, comes from combining the same four categories of material. Skipping one of these categories is usually what causes drainage problems, nutrient deficiencies, or compaction six months down the line.
| Component | Role | Common Options |
|---|---|---|
| Mineral base | Structure and mineral nutrients | Topsoil, garden soil, sandy loam |
| Organic matter | Nutrients, water retention, microbial life | Compost, aged manure, leaf mold |
| Aeration material | Drainage, prevents compaction | Perlite, vermiculite, coarse sand |
| Moisture retention | Holds water for roots between waterings | Coco coir, peat moss |
Most home gardeners in Malaysia lean on coco coir over peat moss since it's locally available, renewable, and holds up better in humid, tropical conditions without breaking down as fast.
Tools and materials checklist
Before you start mixing, gather everything in one spot. Running out of compost halfway through a batch means you're eyeballing ratios instead of measuring them, and that's exactly how mixes end up inconsistent from one bed to the next.
- A large tarp or mixing tub (a wheelbarrow works fine for smaller batches)
- A garden fork or shovel for turning and blending
- A bucket or scoop for consistent measuring, since ratios work by volume, not weight
- Compost, homemade or bagged, well-aged rather than fresh
- Coco coir or peat moss, pre-soaked if using coir blocks
- Perlite or vermiculite for aeration
- Your existing topsoil or garden soil, sieved if it's lumpy or full of debris
- Gloves and a mask, especially if you're working with dry, dusty amendments
- A soil pH testing kit, useful once your mix is blended and settled
Having your tools ready before you touch a single scoop of compost saves you from stopping mid-batch to hunt down a bucket or borrow a shovel. It also means you can measure ratios properly instead of guessing, which is the difference between a mix that performs consistently across every bed and one that only works in the spot where you happened to add more compost. Once your ingredients and tools are laid out, you're ready to look at what you're actually working with before you mix anything.
Step 1. Assess your existing soil type
Before you throw compost and coir into a bucket, dig into your existing ground and see what you're actually starting with. Malaysian soil varies wildly from one plot to the next, sandy and fast-draining in some coastal areas, dense clay in older housing estates, and everything in between if you're on reclaimed or filled land. Skipping this step is the fastest way to build a mix that fights your native soil instead of working with it, especially if you're planting directly into the ground rather than a raised bed or pot.
Run the jar test to identify soil texture
Grab a clear jar, fill it a third with soil dug from a few different spots in your yard, top it up with water, shake hard for a minute, then let it sit undisturbed for 24 hours. Sand settles first, within minutes, forming the bottom layer. Silt follows over the next hour or two, and clay stays suspended longest, settling as a fine top layer or leaving the water cloudy for a full day. Measure the thickness of each layer once it's settled to estimate your soil's makeup.
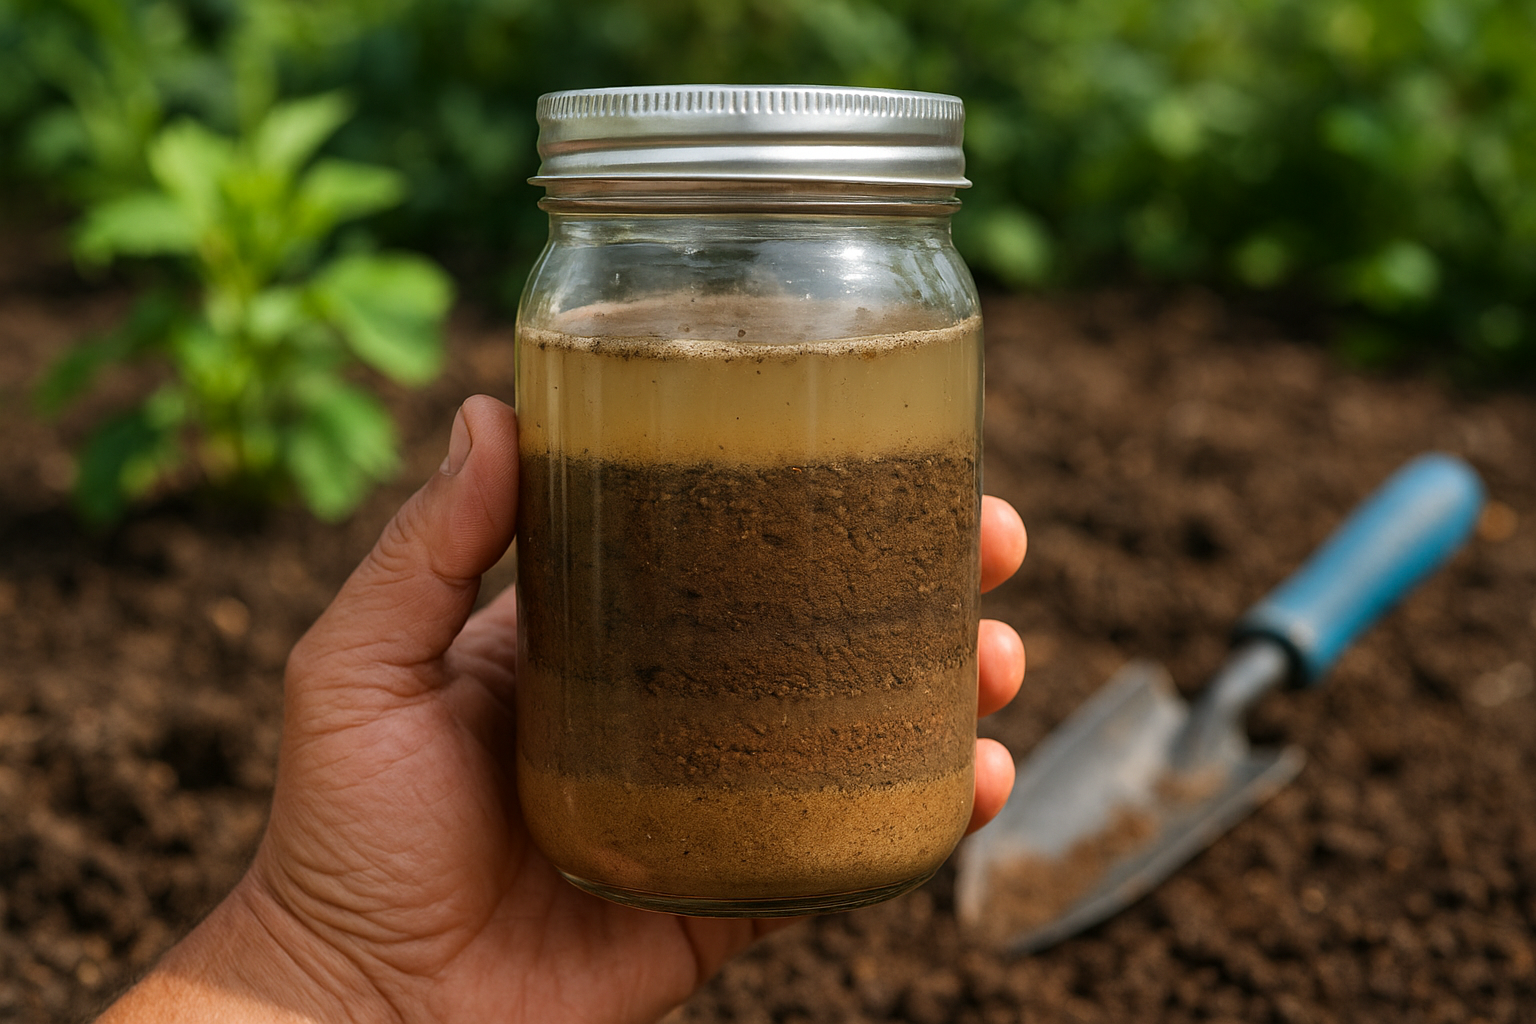
- Mostly sand (thick bottom layer, thin top): drains fast, holds little water or nutrients
- Mostly clay (thick top layer, cloudy water): drains slowly, compacts easily, holds nutrients well
- Balanced layers (roughly even sand, silt, clay): you've got loam, the easiest base to work with
You can't fix a mix's weaknesses if you don't know your native soil's weaknesses first.
Check drainage and compaction by hand
Dig a hole about 30cm deep, fill it with water, and time how long it takes to drain. Fast drainage, under 30 minutes, points to sandy soil that'll need more organic matter and coir to hold moisture. Slow drainage, over a few hours, signals clay that needs aeration material like perlite or coarse sand mixed in before you plant anything. Squeeze a handful of moist soil in your fist too: if it crumbles apart easily, you're working with reasonable structure, but if it holds a dense, sticky ball, you're dealing with heavy clay that compacts around roots.
Once you know whether you're correcting for sand, clay, or something closer to loam, you can pick a ratio that actually addresses your starting point rather than following a generic recipe that assumes ideal conditions you probably don't have.
Step 2. Choose the right soil mix ratio
With your native soil's texture in hand, you're ready to settle on numbers instead of guesswork. Soil mix ratios aren't one-size-fits-all: a container that dries out in the tropical sun needs more moisture retention than an in-ground bed that stays cooler and damper underneath. Think of the ratio as a starting recipe you'll tweak slightly once you see how it drains and holds together in your own garden.
Match the ratio to your planting method
Different planting setups lose water and nutrients at different rates, so the same blend rarely works everywhere in your yard. Raised beds sit above ground and drain faster, containers dry out fastest of all since air hits them from every side, and ground planting benefits most from working with what's already there.
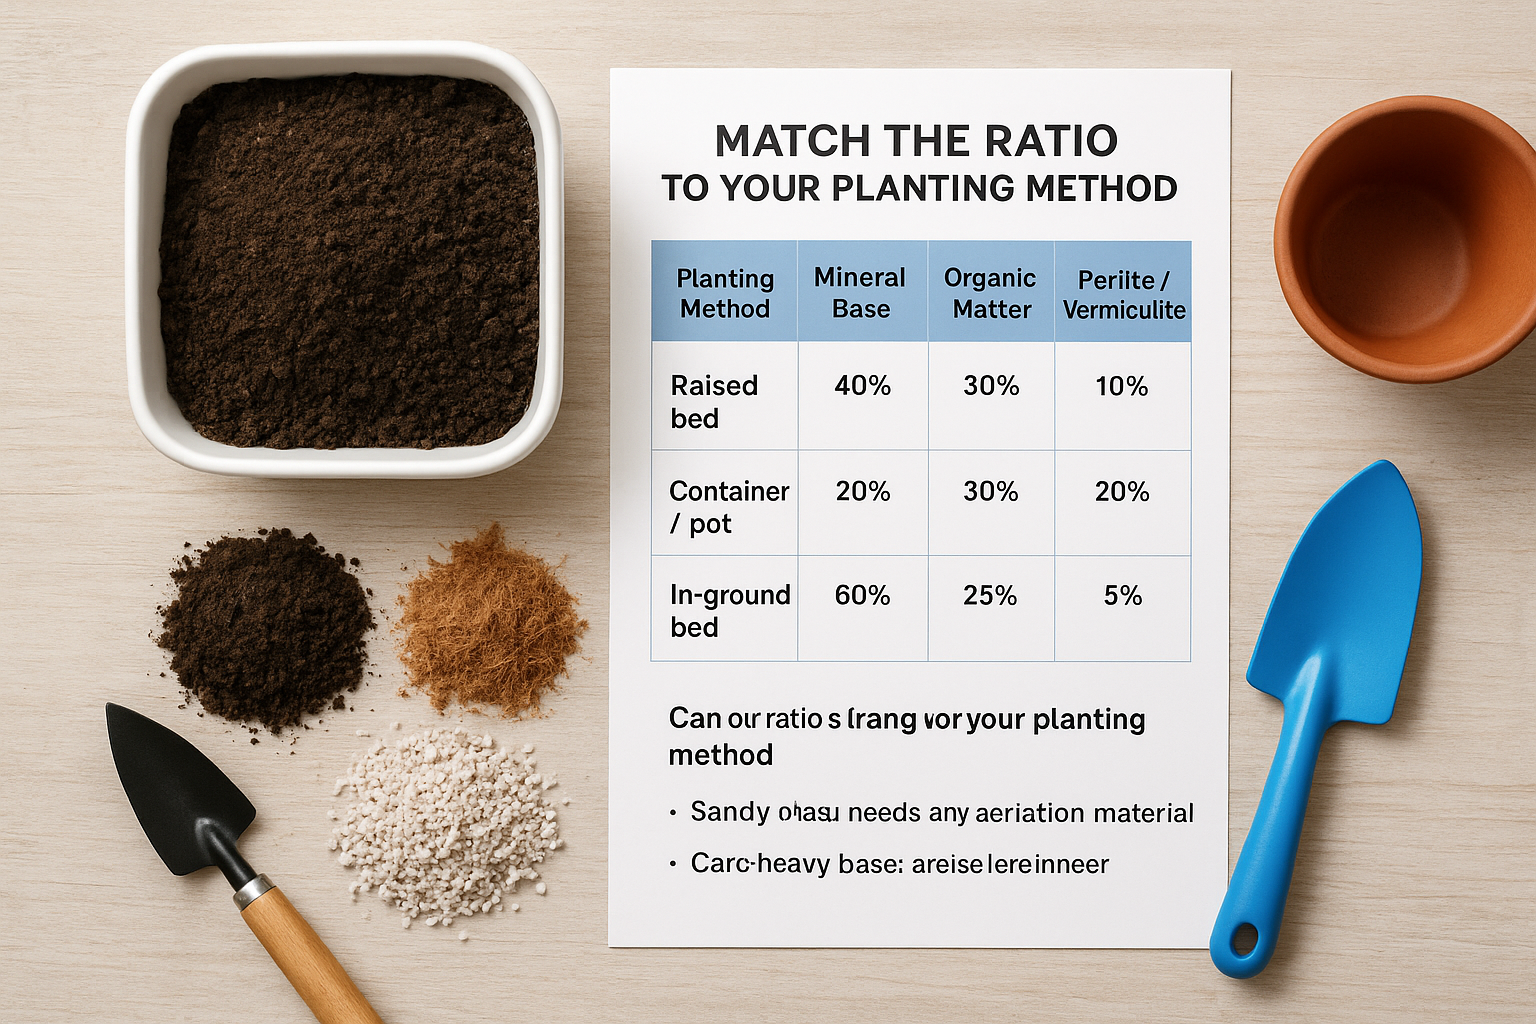
| Planting Method | Mineral Base | Organic Matter | Coco Coir / Peat | Perlite / Vermiculite |
|---|---|---|---|---|
| Raised bed | 40% | 30% | 20% | 10% |
| Container / pot | 20% | 30% | 30% | 20% |
| In-ground bed | 60% (your existing soil) | 25% | 10% | 5% |
Get the ratio wrong for your planting method, and even perfect ingredients won't save the mix.
Adjust for sand or clay before you commit
Every ratio above assumes a reasonably balanced starting soil, so if your jar test came back heavy on sand or clay, shift the numbers before you start scooping. Sandy soil needs less aeration material and more organic matter and coir to slow drainage down and hold onto nutrients longer. Clay-heavy soil needs the opposite: cut back on organic matter slightly and increase perlite or coarse sand so roots don't sit in waterlogged pockets after every downpour.
- Sandy base: drop perlite/vermiculite to 5%, raise organic matter and coir by 5% each
- Clay-heavy base: raise perlite/vermiculite to 15-20%, drop mineral base share by the same amount
- Loamy base: stick close to the table ratios above, minor tweaks only
Write your chosen ratio down before you mix, especially if you're filling multiple beds or pots in one session. Guessing proportions by eye across several batches is exactly how one bed ends up thriving while the next one, filled an hour later from the same pile of materials, struggles because the ratio quietly drifted. Once you've locked in the numbers for your specific setup, you can move on to pulling together everything you'll actually mix.
Step 3. Gather your ingredients and tools
Now that you've locked in a ratio, the next job is figuring out exactly how much of each ingredient to buy or dig up, and where to get it without driving to five different nurseries. Underestimating quantities is one of the most common mistakes we see: gardeners mix a small test batch, love the result, then run short of coco coir or compost halfway through filling a bed and end up diluting the ratio with whatever's left in the bag.
Calculate your total volume first
Before buying anything, work out how much total mix your bed, pot, or planting area actually needs. Measure the volume in liters or cubic feet, then multiply by your chosen percentages to get the exact amount of each ingredient.
Bed volume (L) = length (m) x width (m) x depth (m) x 1000
Example: 1.2m x 0.6m x 0.3m bed = 216 liters total mix needed

For a raised bed ratio (40/30/20/10):
- Mineral base: 216 x 0.40 = 86L
- Organic matter: 216 x 0.30 = 65L
- Coco coir: 216 x 0.20 = 43L
- Perlite: 216 x 0.10 = 22L
Measure the volume before you shop, or you'll either overbuy expensive amendments or run short mid-mix.
Source materials locally in Malaysia
Most of what you need is easy to find without traveling far. Coco coir is widely sold in compressed brick form at nurseries and hardware stores across Malaysia, cheap to buy and simple to expand with water on-site. Compost is worth sourcing from a nursery that turns over stock regularly rather than a shelf that's been sitting for months, since fresher compost still carries active microbial life your plants will benefit from.
- Nurseries and garden centers: compost, perlite, vermiculite, coco coir bricks
- Hardware stores: coarse sand, basic tools, tarps and tubs
- Poultry or livestock farms: aged manure, often sold cheaply in bulk
- Your own yard: existing topsoil, sieved and reused as your mineral base
Gathering everything before you mix, rather than sourcing as you go, keeps your ratios accurate from the first scoop to the last. Once your ingredients are measured out and sitting next to your mixing tub, you're ready to actually blend the base.
Step 4. Mix the base soil blend
With your ingredients measured out, it's time to actually combine them into a uniform blend rather than a pile with pockets of different material. Mixing thoroughly matters more than most people expect: a batch that looks blended on top can still hide a clump of dry coir or a pocket of pure compost underneath, and that unevenness shows up later as patchy growth across a single bed. Work in batches you can physically turn with a fork or shovel rather than piling everything into one giant heap you can't reach the middle of.
Layer, then turn, don't dump and stir
Spread your tarp or fill your mixing tub, then add your ingredients in layers rather than dumping them all in one spot. Layering first gives you a rough visual check that your ratios look right before you even start turning, and it's much easier to fold layers into each other evenly than to stir a chaotic pile from one side.
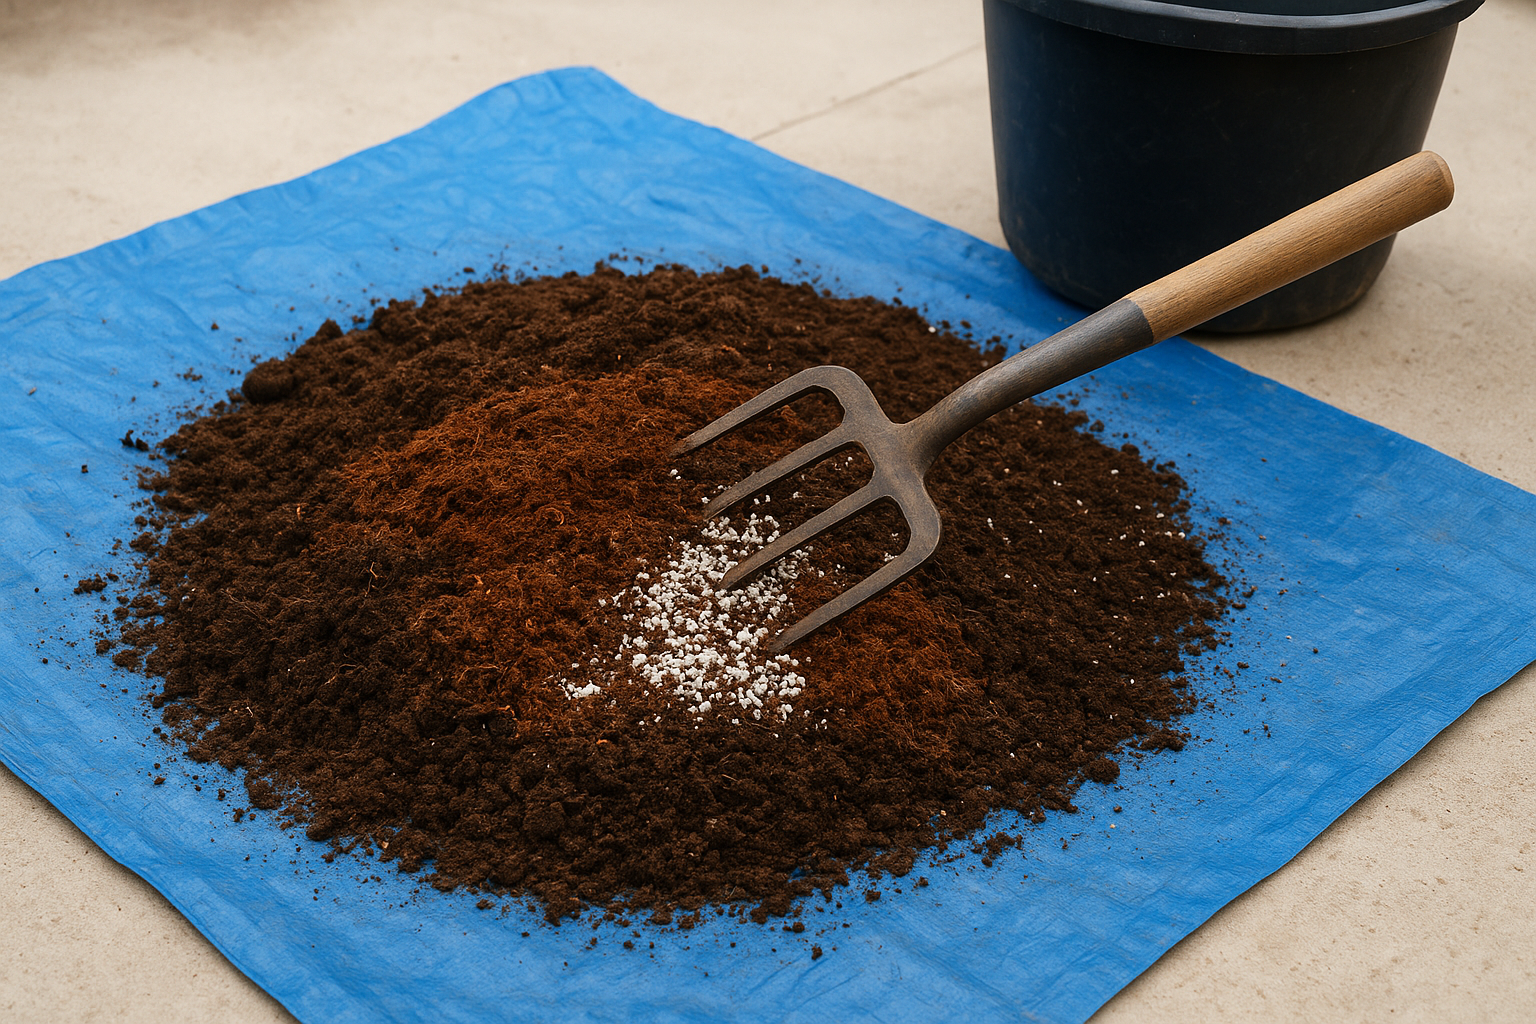
- Spread your mineral base (topsoil or existing garden soil) as the bottom layer
- Add compost or aged manure evenly across the top
- Layer pre-soaked coco coir or peat moss next
- Sprinkle perlite or vermiculite as the final layer
- Turn the whole pile from the outside edges into the center, working section by section
- Repeat the turning motion 4 to 6 times until you can't distinguish individual layers
A mix isn't ready when it looks combined at a glance, it's ready when a scoop from any spot in the pile looks the same as a scoop from anywhere else.
Check for moisture and consistency
Once turned, grab a handful from three or four different spots in the pile and compare them side by side. Consistent texture across every handful means your mix is genuinely blended, not just superficially mixed on the surface. If your coco coir was pre-soaked properly, the mix should feel lightly damp, never soggy, and it should crumble apart easily rather than clump into a dense ball when squeezed.
If you notice dry pockets or clumps of a single ingredient, that section didn't get folded in properly and needs another round of turning before you move on. It's worth taking the extra five minutes here rather than filling a bed with an inconsistent blend, since correcting a patchy mix after it's already packed into a raised bed or pot is far harder than fixing it while it's still loose on the tarp. Once your base blend feels even and evenly damp throughout, you're ready to work in the fertilizer and amendments that'll actually feed what you plant.
Step 5. Add fertilizer and amendments
Your base blend of mineral soil, compost, coir, and perlite gives plants structure and drainage, but it doesn't carry enough concentrated nutrition on its own to sustain heavy feeders through a full growing season. Fertilizer and amendments fill that gap, adding the specific nutrients your compost alone can't guarantee in consistent amounts. Skip this step and you'll likely see fine early growth followed by a stall a few weeks in, once whatever nutrients were already in the compost get used up.
Work in a balanced base fertilizer
A slow-release granular fertilizer, mixed evenly through the pile before planting, gives roots steady access to nutrients over weeks rather than a single sharp spike that burns tender roots and then fades. Slow-release formulas suit tropical growing conditions especially well, since heavy rain and frequent watering flush nutrients out of soil faster than in drier climates. Scatter the granules across the pile the same way you layered your core ingredients, then turn the whole batch again so no single scoop ends up overloaded while another gets none.
- General vegetable and flower beds: balanced NPK (10-10-10 or similar), roughly 100-150g per 100L of mix
- Leafy greens and herbs: slightly higher nitrogen ratio to push foliage growth
- Flowering and fruiting plants: higher phosphorus and potassium to support blooms and fruit set
- Container plants: use the lower end of any recommended dose, since pots concentrate fertilizer faster than open beds
Fertilizer feeds the season, but skip it and your compost alone runs out of nutrients faster than most gardeners expect.
Add targeted amendments for your soil's weak points
Beyond a general fertilizer, a few targeted amendments correct specific weaknesses your jar test and drainage check already revealed. Lime, worked in lightly, raises pH in soil that tested acidic, which matters since Malaysian rainfall gradually leaches alkalinity from soil over time. Bone meal or rock phosphate suits fruiting vegetables that need extra phosphorus, while a handful of worm castings per bed boosts microbial activity without risking the nutrient burn a strong chemical fertilizer can cause.
Test your mix's pH with a simple kit before adding lime or sulfur, since correcting a pH that's already fine can push it out of range in the opposite direction. Most vegetables and ornamentals grow best in the 6.0 to 7.0 range, so treat anything outside that as your signal to adjust, not a fixed rule to follow regardless of what your test shows. Once fertilizer and amendments are folded through evenly, your mix is nutritionally ready, and it's time to actually get it into the ground or containers where it'll do its job.
Step 6. Fill your beds, pots, or garden ground
With your mix blended and fed, the next job is getting it into place without undoing all that careful ratio work. Filling technique matters just as much as the mix itself, since dumping everything in at once tends to leave air pockets near the bottom and compacted zones near the top, both of which cause uneven root growth later. Work in layers here too, the same way you mixed, rather than tipping a wheelbarrow load in and calling it done.
Fill raised beds and containers in stages
Raised beds and pots both benefit from filling in stages rather than one continuous pour. Filling gradually lets you settle each layer lightly with your hands or a light tamp before adding the next, which avoids the sunken, uneven surface that shows up a week later once the first watering compacts loose soil down.
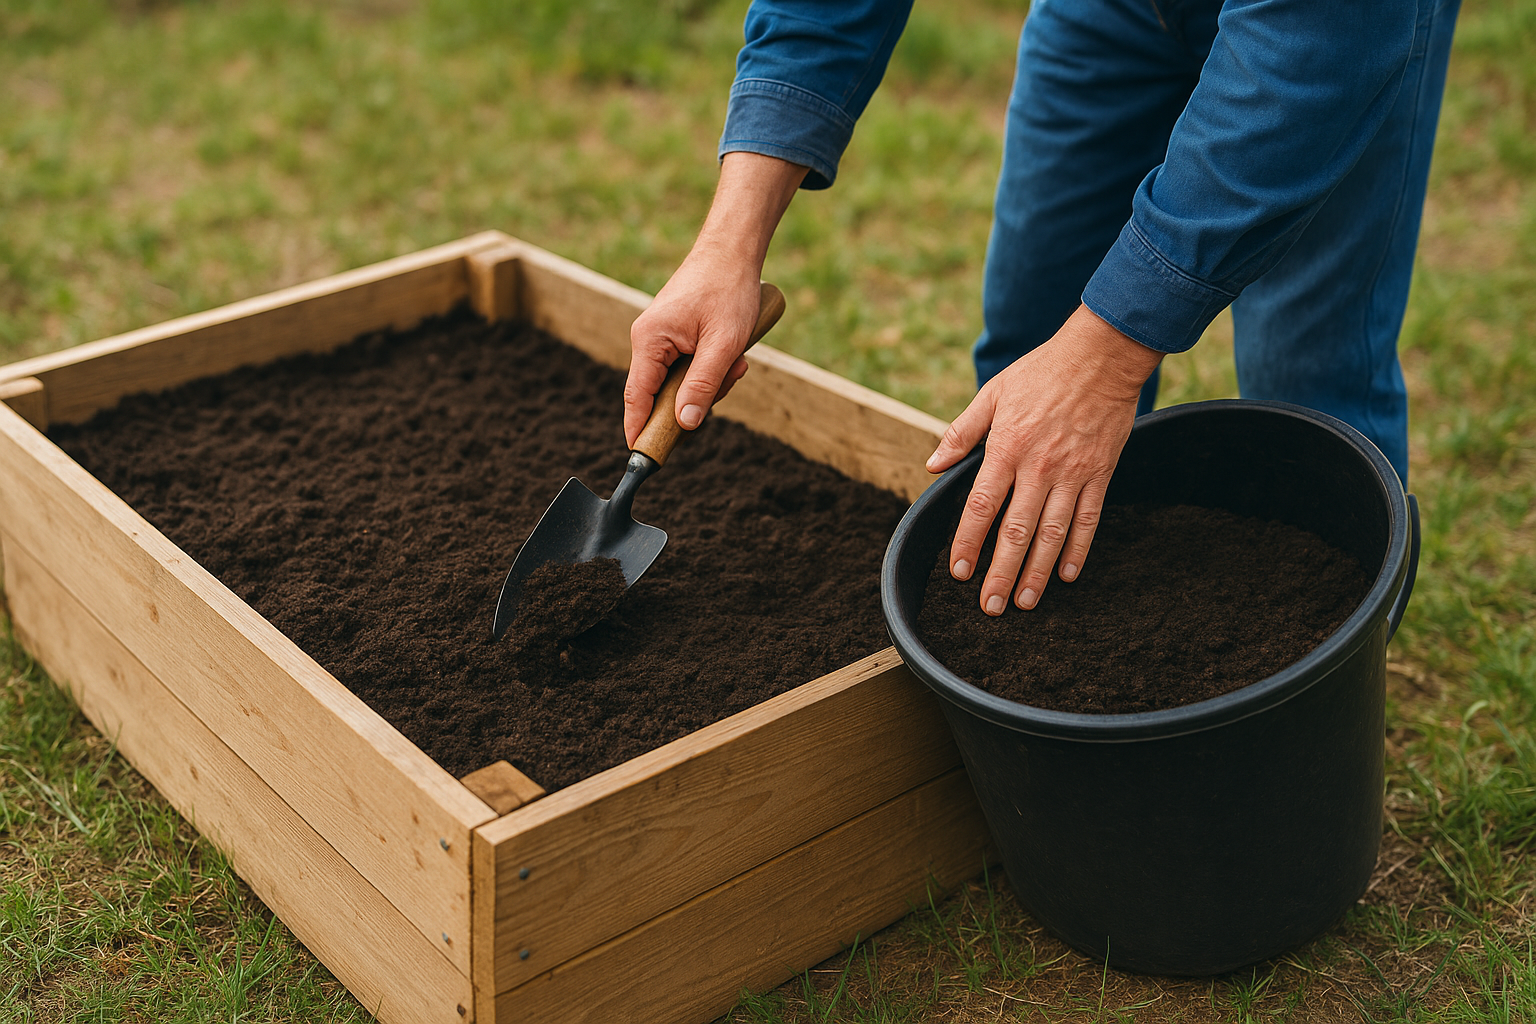
- Add mix in layers of roughly 10 to 15cm at a time
- Lightly firm each layer with your palms, not a heavy stomp, which would compact it too hard
- Leave 2 to 3cm of space below the rim in containers, and 5cm in raised beds, for mulch and watering room
- Check corners and edges specifically, since these spots often end up under-filled compared to the center
Fill in layers and firm gently, or you'll be topping up sunken soil within a week of your first watering.
Work mix into ground planting areas
Ground planting takes a different approach since you're blending your mix into existing soil rather than filling an empty container. Ground beds need the amended mix worked into the top 20 to 30cm of native soil, not just laid on top like a raised bed, otherwise roots hit a hard, unimproved layer the moment they grow past the surface.
- Dig out the planting area to about 25 to 30cm deep
- Break up the sides and bottom of the hole so roots aren't boxed in by compacted walls
- Blend your prepared mix with the loosened native soil at roughly a 1:1 ratio, unless your jar test showed severe sand or clay, in which case lean more heavily on your mix
- Backfill and firm lightly, leaving the surface slightly mounded since it'll settle with watering
Double-check that you haven't left any hard, compacted pockets along the sides of the planting hole, since roots tend to circle rather than push through them once they hit that resistance. Once your beds, pots, or ground areas are filled and firmed, you're one step away from actually planting, but that step, settling and testing the soil, is what tells you whether your mix is ready or needs one more adjustment.
Step 7. Water, settle, and test your soil
Your mix looks ready, but looks deceive until water actually runs through it. Watering thoroughly right after filling reveals air pockets, uneven compaction, and drainage problems that stayed invisible while the mix sat dry. Skip this step and you'll find those same problems the hard way, days later, when a plant wilts in one corner of a bed that seemed identical to the rest.
Soak deeply and watch how it settles
Run water over the entire bed, pot, or planting area until it's genuinely saturated, not just damp on the surface. Deep soaking forces air out of hidden pockets and lets loose material settle into its final position, which is exactly why you left that extra 2 to 5cm of space below the rim earlier. Watch where the surface drops as it settles, since uneven sinking points to a spot that didn't get filled or firmed properly during Step 6.
- Water slowly with a gentle spray, not a hard jet that displaces the mix
- Give it a full soak, then let it drain for 30 minutes before checking
- Top up any spots that sink more than 1 to 2cm below the rest of the surface
- Repeat the soak-and-check cycle once more before planting anything
A mix that hasn't been soaked and settled hasn't actually been tested yet, it's just been assembled.
Re-run your drainage and pH checks
Once the surface has settled and drained, repeat the same drainage test you ran on your native soil back in Step 1. Drainage speed in your finished mix should sit somewhere between the extremes of pure sand and heavy clay, water should disappear within 20 to 40 minutes, not pool on top for hours or vanish in seconds. If it's still draining too fast, work in a bit more compost or coir. If it's pooling, fold in extra perlite before you plant.
Test pH again too, since blending fertilizer, lime, or compost into the mix can shift it from wherever your raw ingredients started. Testing pH now, after everything's mixed and settled, gives you a far more accurate reading than testing individual ingredients beforehand ever could. Most vegetables and ornamentals want that 6.0 to 7.0 range mentioned earlier, and catching a mix that's drifted outside it now costs you a bag of lime or sulfur, not a season of stunted growth once roots are already in the ground.
Soil mix ratios for raised beds, pots, and ground planting
You've already seen the base ratios scattered through the steps above, but it helps to have them all in one place once you're standing in front of several beds, pots, and planting holes trying to remember which numbers go where. Quick-reference ratios save you from flipping back through a whole guide mid-project, especially if you're filling more than one type of planting area in the same afternoon. Bookmark this table and pull it up on your phone while you're mixing.
The full ratio comparison
Each planting method loses water and nutrients differently, which is exactly why raised beds, containers, and ground beds don't share a single recipe. Containers dry out fastest because air hits them from every side, raised beds sit somewhere in the middle, and ground planting benefits most from leaning on your existing native soil rather than replacing it entirely.
| Planting Method | Mineral Base | Organic Matter | Coco Coir / Peat | Perlite / Vermiculite | Notes |
|---|---|---|---|---|---|
| Raised bed | 40% | 30% | 20% | 10% | Increase coir to 25% in full-sun locations |
| Container / pot | 20% | 30% | 30% | 20% | Use lower end of fertilizer dosing here |
| In-ground bed | 60% (existing soil) | 25% | 10% | 5% | Blend into native soil, don't just layer on top |
| Sandy adjustment | Same base | +5% | +5% | -5% | Applies to any method above |
| Clay adjustment | -10 to -15% | Same | Same | +15 to 20% | Applies to any method above |
One ratio table, adjusted for your soil and your planting method, replaces guesswork with a repeatable recipe.
Scaling the ratios up or down
The percentages hold steady whether you're filling a single 20-liter pot or six full-sized raised beds, so scaling up just means multiplying your bucket counts rather than rethinking the recipe. Scaling correctly means using the same volume calculation from Step 3 for every new bed or pot, rather than eyeballing quantities because "it worked last time." A batch that drifts even 10% off ratio across several containers is usually why one pot thrives while its neighbor, filled from the same pile an hour later, struggles.
- Keep a written note of your chosen ratio and adjustment (sandy, clay, or standard) for each planting area
- Recalculate volume separately for every bed or pot size rather than assuming they match
- Batch mix enough for two or three containers at once if the sizes are similar, to save time without sacrificing accuracy
- Store leftover unmixed ingredients separately, not pre-blended, since a half-used mixed batch is hard to top up accurately later
Once you've got your ratio locked to your specific setup, whether that's a single herb pot on a balcony or a run of raised beds along a fence line, you're working from a formula you can repeat confidently every season, not a one-off batch you got lucky with.
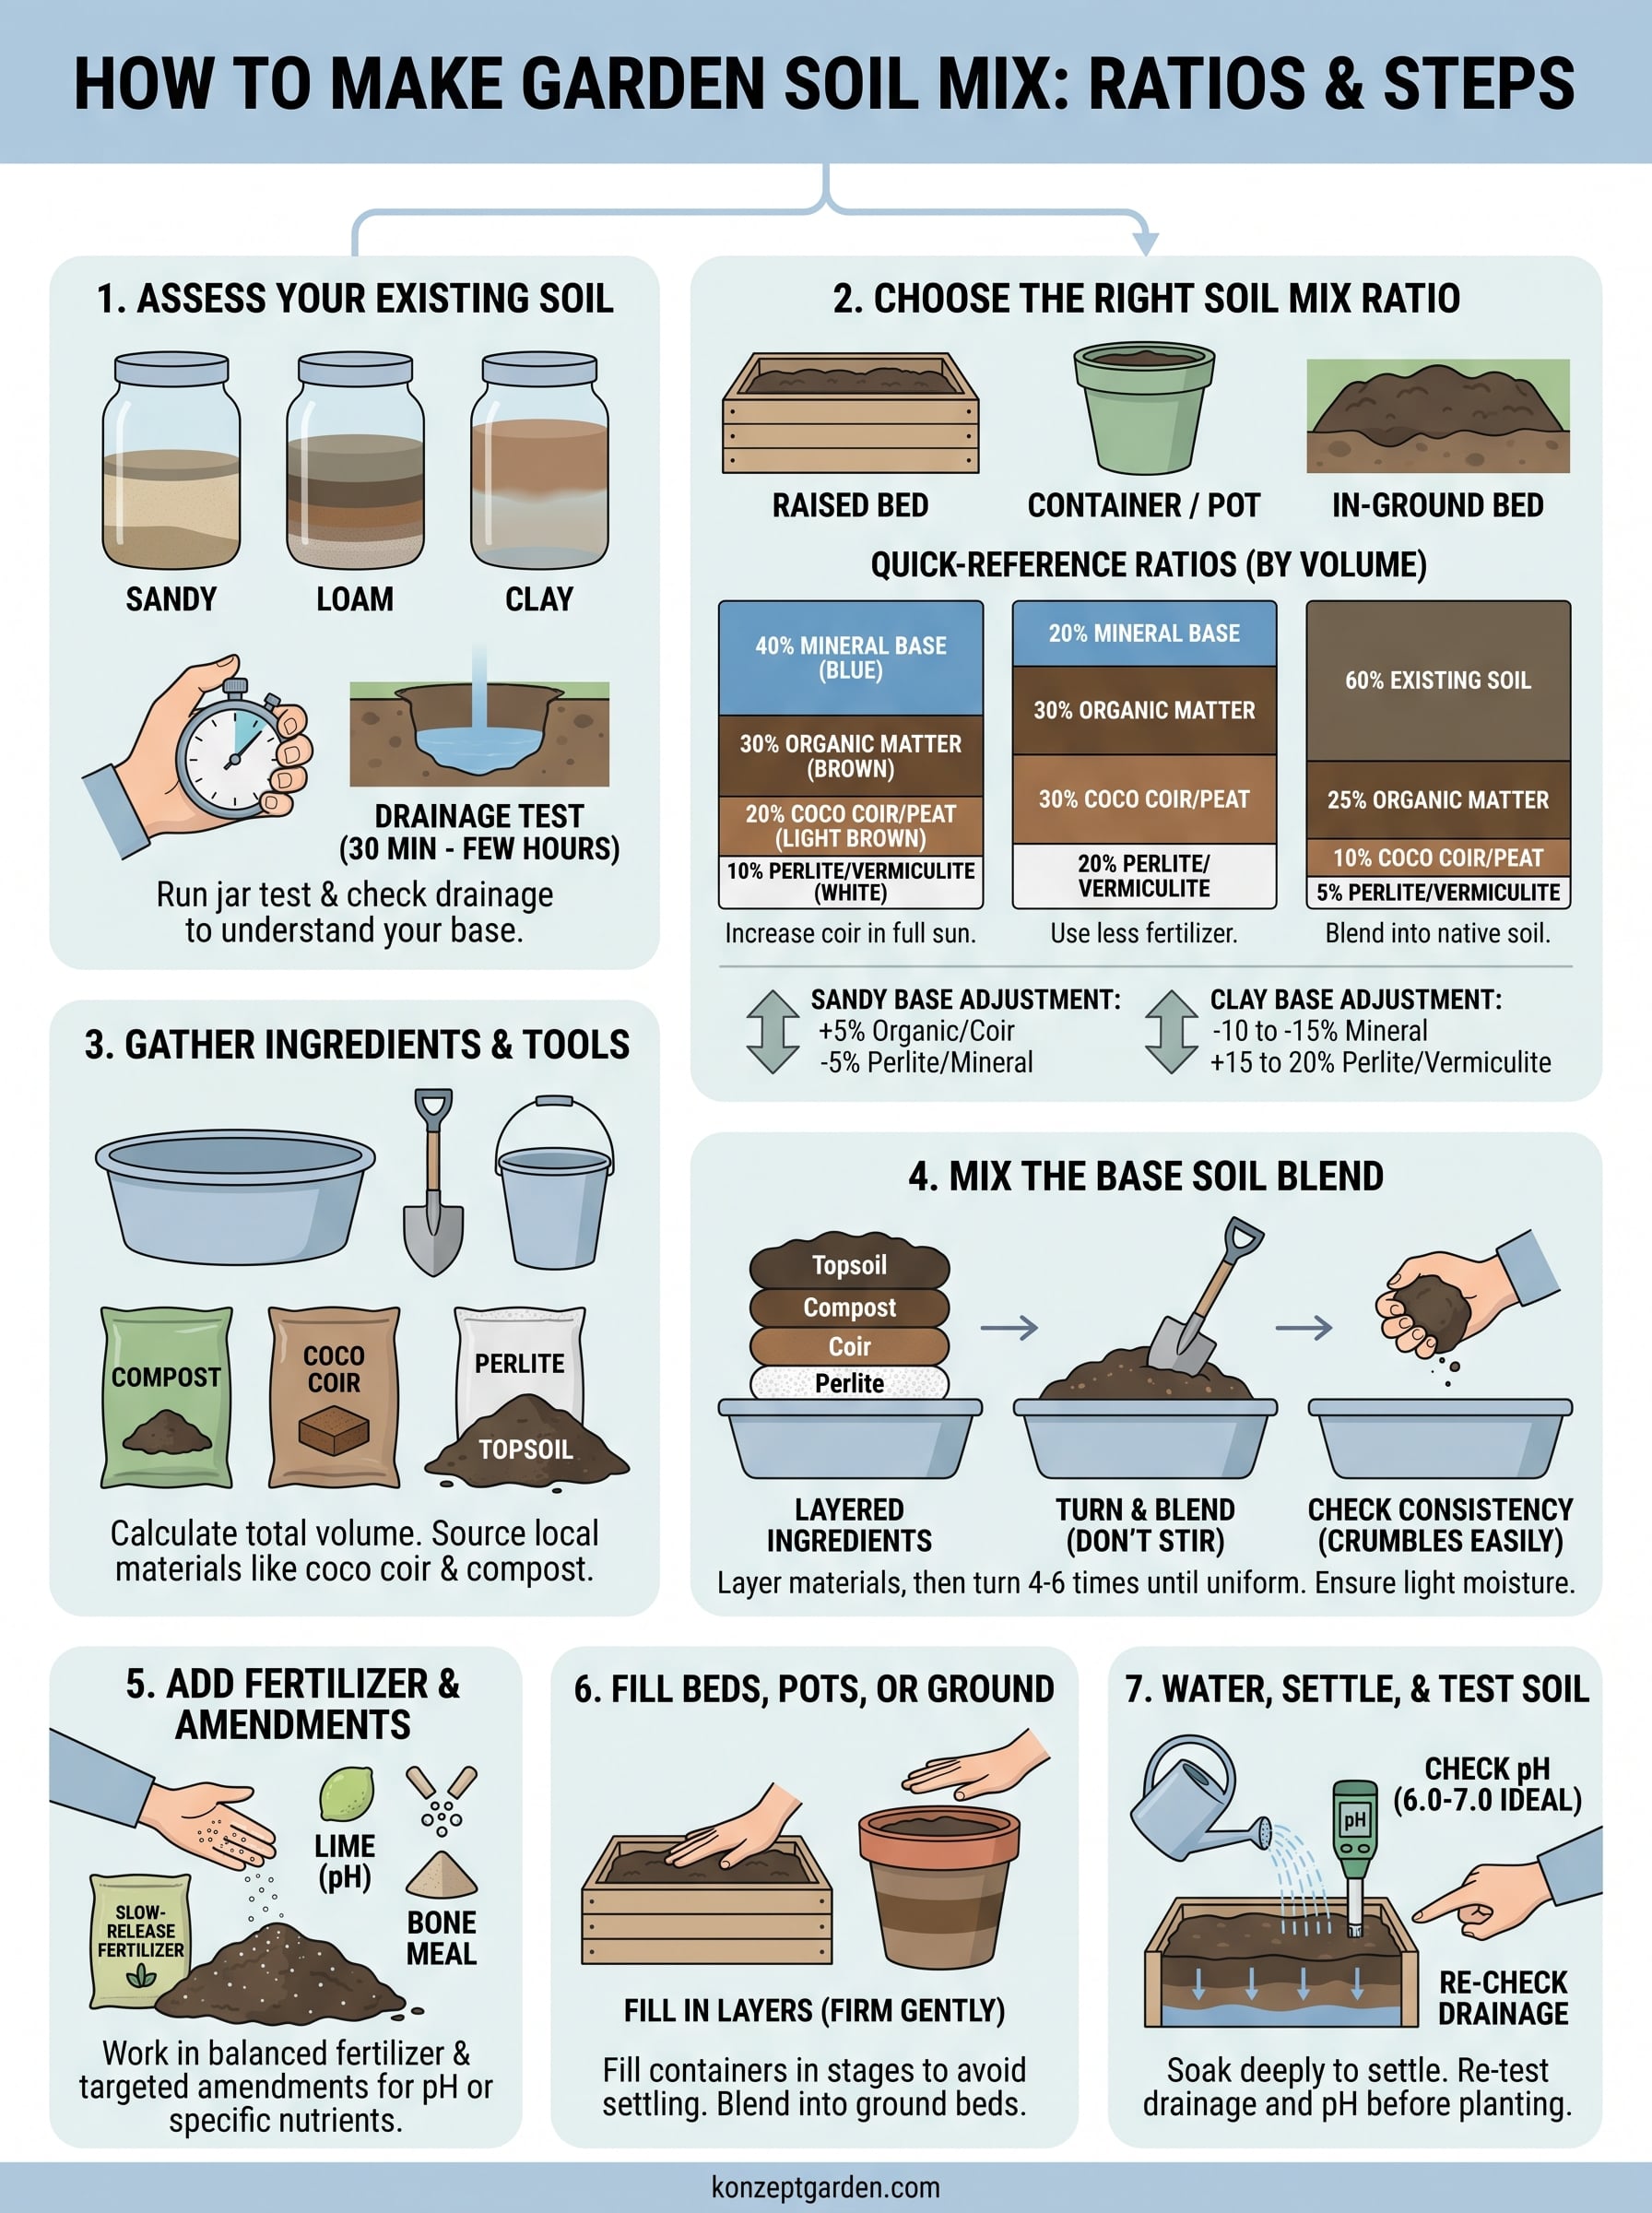
Your garden's foundation, ready to grow
Getting your soil mix ratio right matters more than anything else you'll do before planting. Test your native soil, pick a ratio that matches your raised bed, container, or ground planting setup, mix thoroughly, then water and settle before anything goes in. Follow those seven steps in order and you'll skip the stalled growth, root rot, and patchy beds that come from guessing at proportions.
Handling all this yourself takes time, and not every homeowner wants to spend a weekend testing drainage and hauling coco coir bricks. If you'd rather hand the soil work, bed building, and planting plan to people who do it daily, get in touch with our design team for a free quotation. We'll assess your ground, recommend the right mix for what you're planting, and build beds that hold up through Malaysia's rain and heat, without you lifting a single bucket.