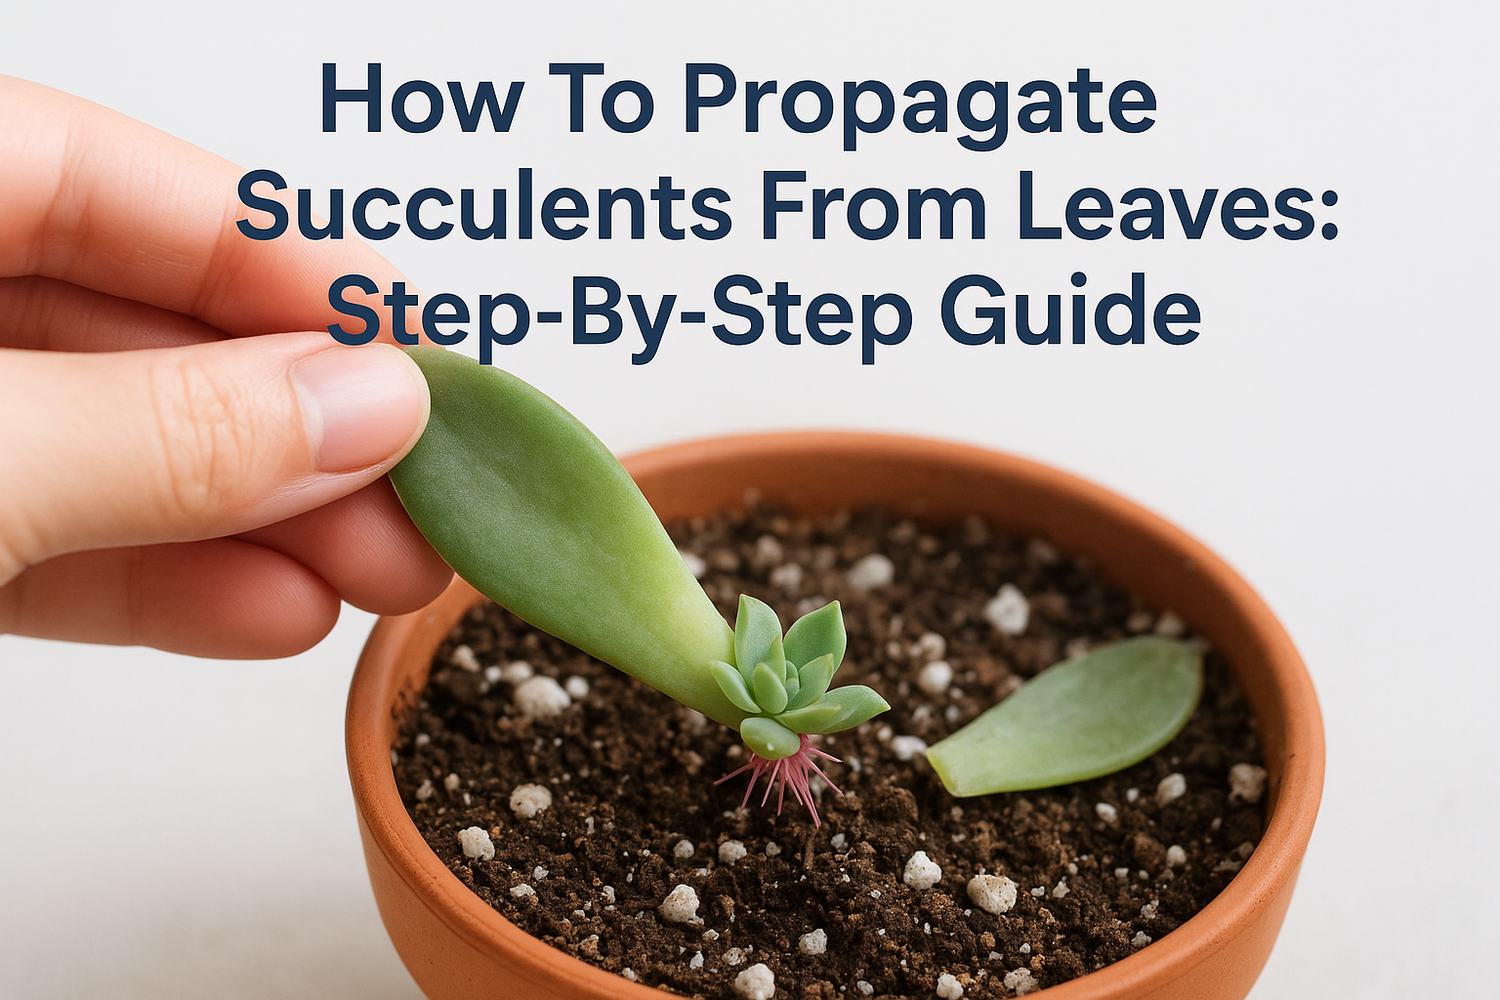
One healthy succulent can turn into dozens, if you know what you're doing. Learning how to propagate succulents from leaves is one of the simplest ways to multiply your plant collection without spending extra money. A single leaf, a bit of patience, and the right conditions are all it takes.
The process works because succulents store enough energy in their leaves to generate entirely new roots and rosettes. But there's a catch: small mistakes, like pulling a leaf incorrectly or watering too early, can kill the propagation before it starts. Getting the technique right from the beginning saves you time and a lot of frustration. At Konzept Garden, we work with plants and planting plans daily across our landscape design projects here in Malaysia, and succulents are a staple in many of the gardens we create for clients.
This guide walks you through every step, from choosing the right leaves to caring for your new baby succulents until they're ready to plant in soil or incorporate into a larger garden design. Whether you're filling out a planter box on your patio or starting a full succulent bed, you'll have everything you need below.
What you need and which succulents leaf-prop well
Before you touch a single leaf, gather everything you need so the process runs smoothly from start to finish. Learning how to propagate succulents from leaves is straightforward once your workspace is set up correctly, but missing even one key item can slow your results or cause early failures. The right materials reduce the chance of rot, mold, or stunted growth, which are the most common problems beginners run into during the first few weeks.
Tools and materials to gather first
You don't need expensive equipment, but a few specific items make a real difference in your success rate. Skip anything that traps excess moisture, such as heavy potting mix or sealed containers without drainage holes, because succulents are highly sensitive to sitting water at every stage of propagation, not just after they've been potted up.
Here's what to have ready before you start:
- Well-draining succulent or cactus mix (look for a sandy, gritty blend rather than standard potting soil)
- Shallow tray or flat container with drainage holes, wide enough to lay multiple leaves flat without them overlapping
- 70% isopropyl alcohol and cotton swabs to sanitize your tools before each use
- Clean, sharp scissors or pruning shears for precision cuts when scissors work better than twisting
- Small spray bottle filled with clean water for light misting once roots appear
- Bright, indirect light source or a spot near a window with filtered light and good airflow
- Perlite or coarse sand to blend into your soil if the drainage still feels too slow
Sanitizing your tools before removing leaves is one of the most overlooked steps, and skipping it introduces bacteria that kills propagations before they ever develop roots.
In Malaysia's humid climate, airflow matters more than it does in dryer regions. If your propagation tray sits in a still, warm corner with no air circulation, you'll likely see mold forming on the leaves within a week or two. A small fan set to low nearby, or a naturally breezy windowsill, can prevent that problem entirely.
Which succulent types propagate from leaves
Not every succulent can reproduce from a single leaf, so knowing which species work before you start saves you from wasting effort on varieties that simply won't respond. Succulents that store most of their water in flat, fleshy leaves rather than in stems or trunks are the ones that leaf-prop most reliably and produce new rosettes at a consistent rate.
The table below shows common succulent types and how well they respond to leaf propagation:
| Succulent Type | Leaf Propagation Success | Notes |
|---|---|---|
| Echeveria | Excellent | Most varieties root and pup quickly |
| Sedum | Excellent | Hardy and fast to develop new growth |
| Graptopetalum | Excellent | Very forgiving for beginners |
| Pachyphytum | Good | Slower but reliable with patience |
| Haworthia | Poor | Propagates better from offsets |
| Aloe | Poor | Best propagated from pups, not leaves |
| Aeonium | Poor | Leaves rarely develop roots on their own |
Start with Echeveria, Sedum, or Graptopetalum if you're new to this. These three handle the process well even in Malaysia's humid conditions, where ambient moisture levels can either help or work against you depending on how you manage airflow. Once you get confident with the method, you can try less cooperative varieties and adjust your approach based on what you've already learned.
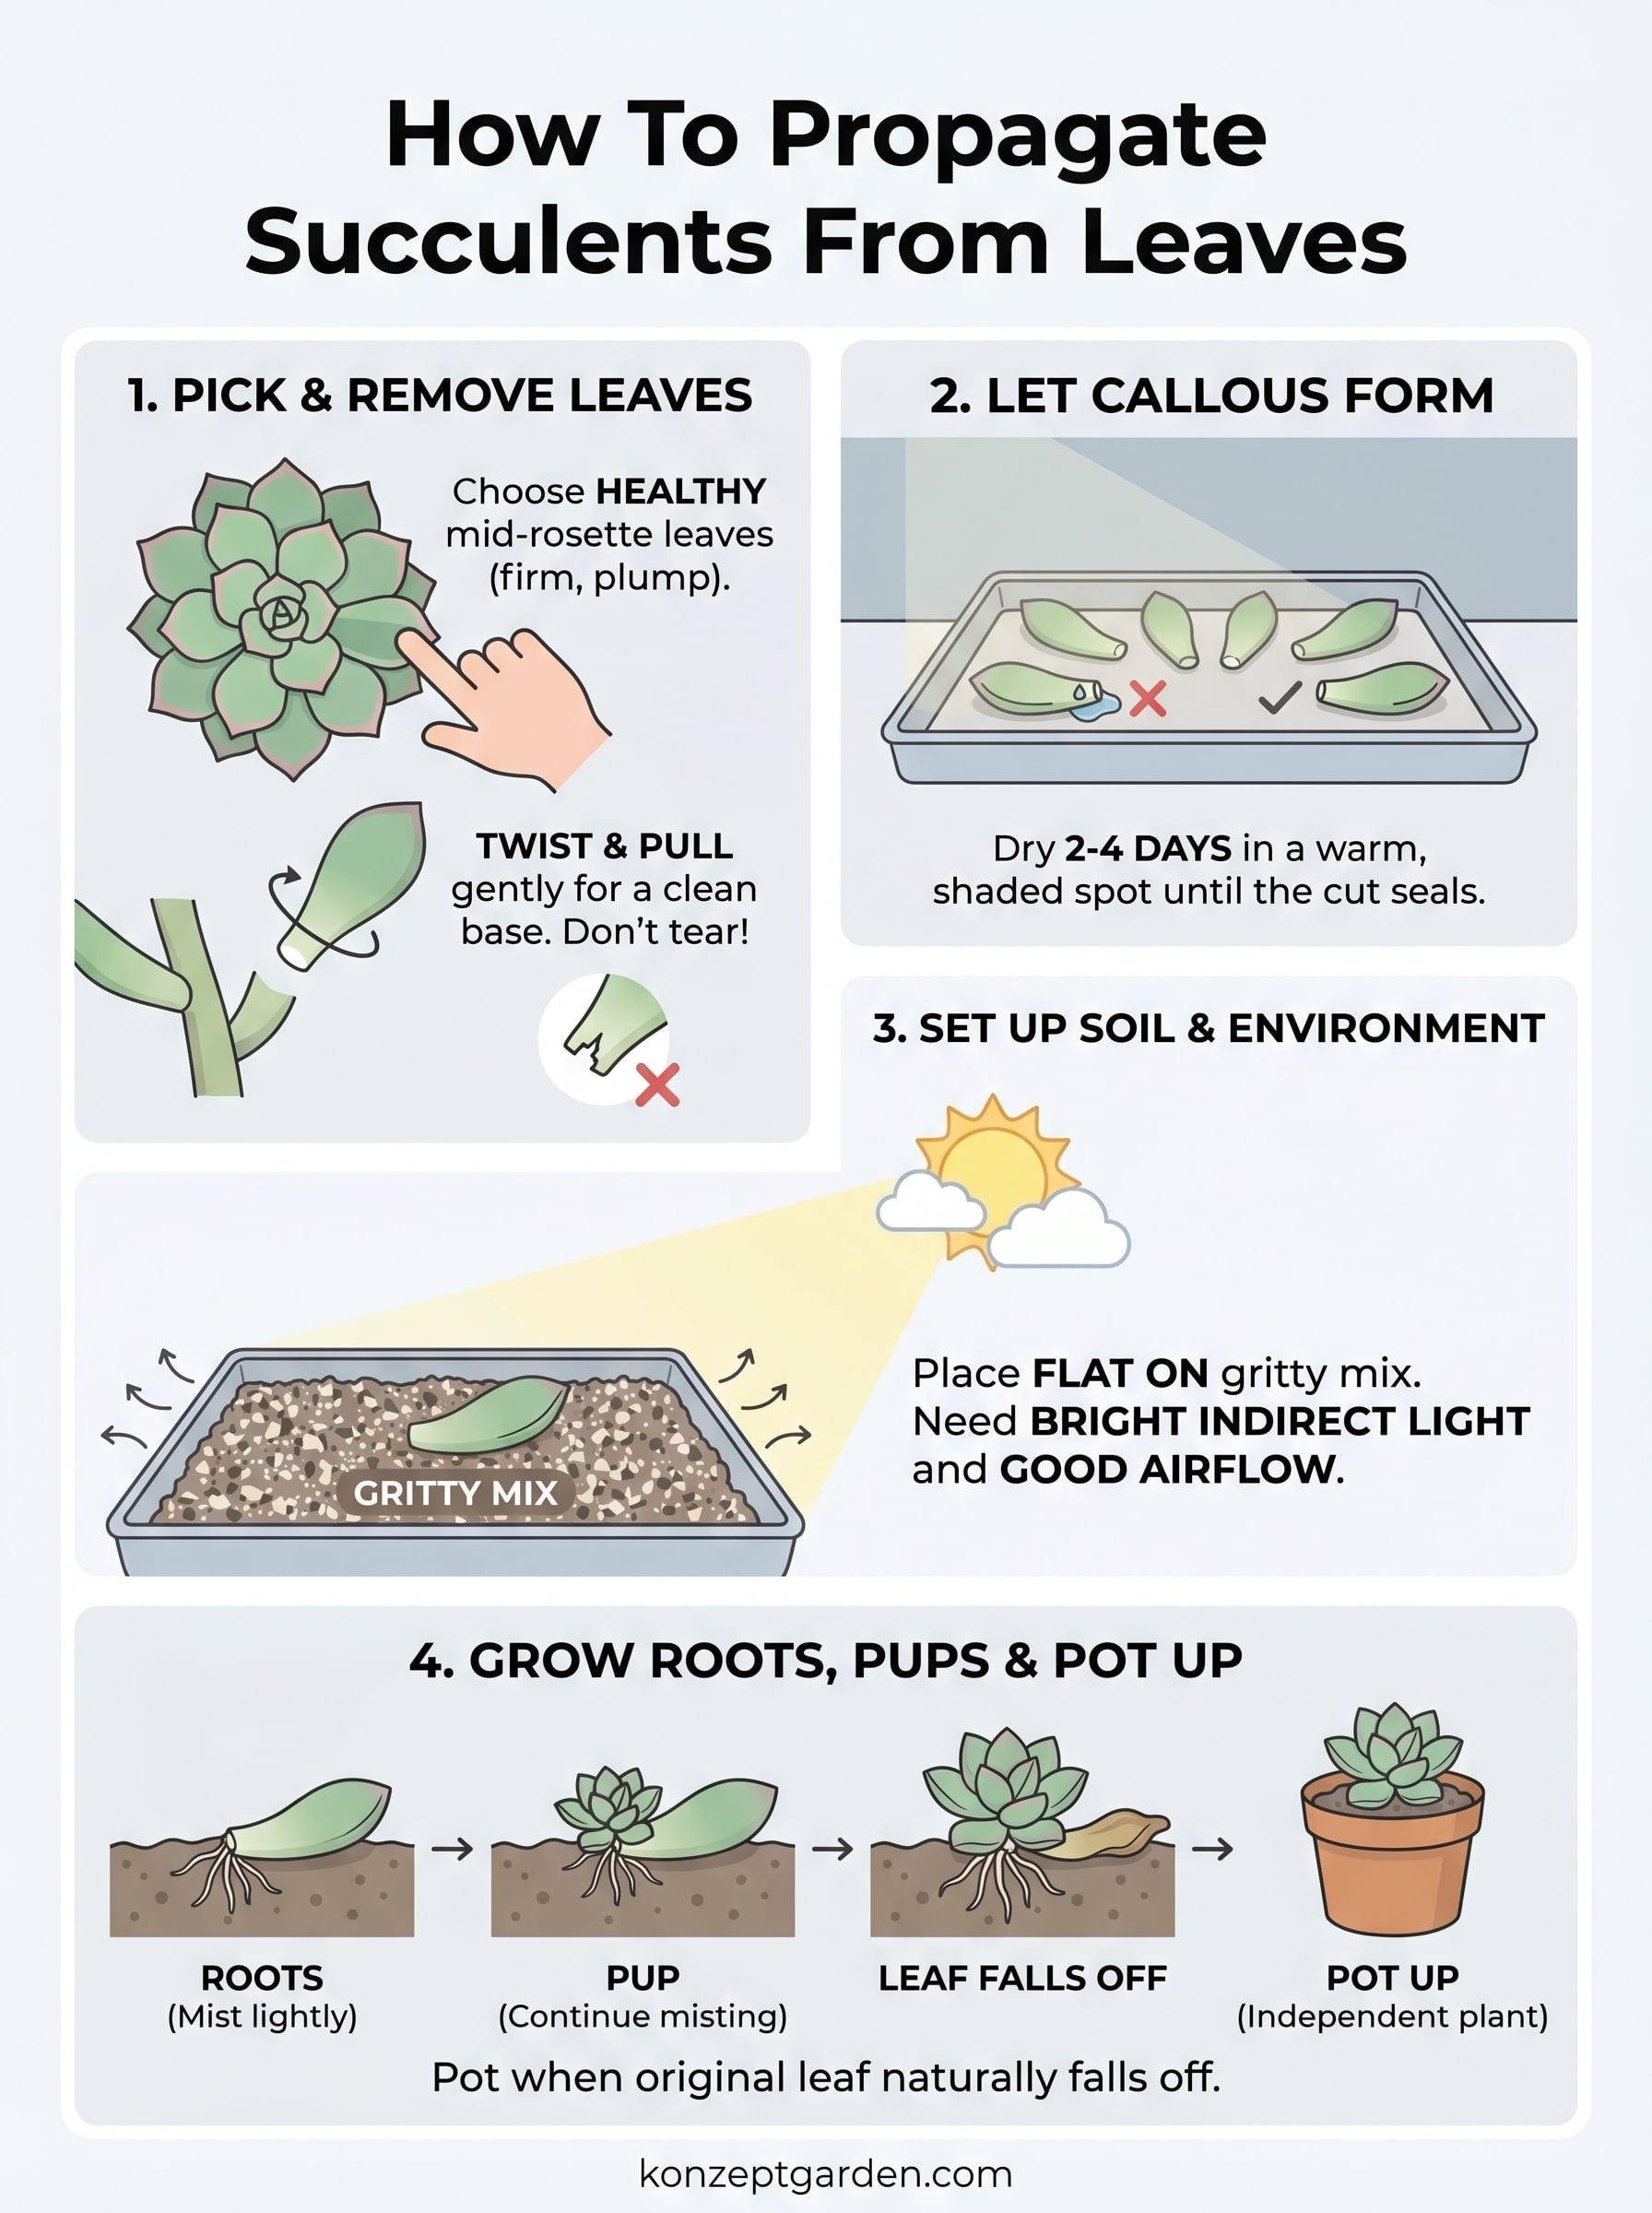
Step 1. Pick and remove healthy leaves
The leaf you choose determines whether your propagation succeeds or fails before it even gets a chance to grow. Healthy, mature leaves from the middle section of a rosette give you the best starting point because they carry the most stored energy and are large enough to generate new roots and a baby plant. Avoid leaves from the very top of the plant, those are too young and lack sufficient reserves, and skip any that look shriveled, discolored, or damaged along the edges.
How to spot a leaf worth using
A good propagation leaf is firm, plump, and completely intact at its base. That base, the pale white section where the leaf attaches to the stem, must separate cleanly with the leaf when you remove it. If the base stays behind on the plant, that leaf will not produce roots. Focus on leaves in the lower third of the rosette, where they tend to be older, fuller, and easier to remove without tearing.
Use this checklist before removing any leaf:
- Firm and fleshy with no soft, mushy, or wrinkled sections
- Full base attached with no visible tears at the connection point
- Free from pest damage, black spots, or yellowing along the edges
- Roughly at least half the size of the largest leaves on the plant
The right way to remove a leaf without damaging it
Grip the leaf close to the stem and gently twist it from side to side while pulling downward at a slight angle. You should feel a soft snap when it releases. Don't pull straight outward, as that motion tears the base and leaves part of it attached to the stem, making the leaf useless for propagation.
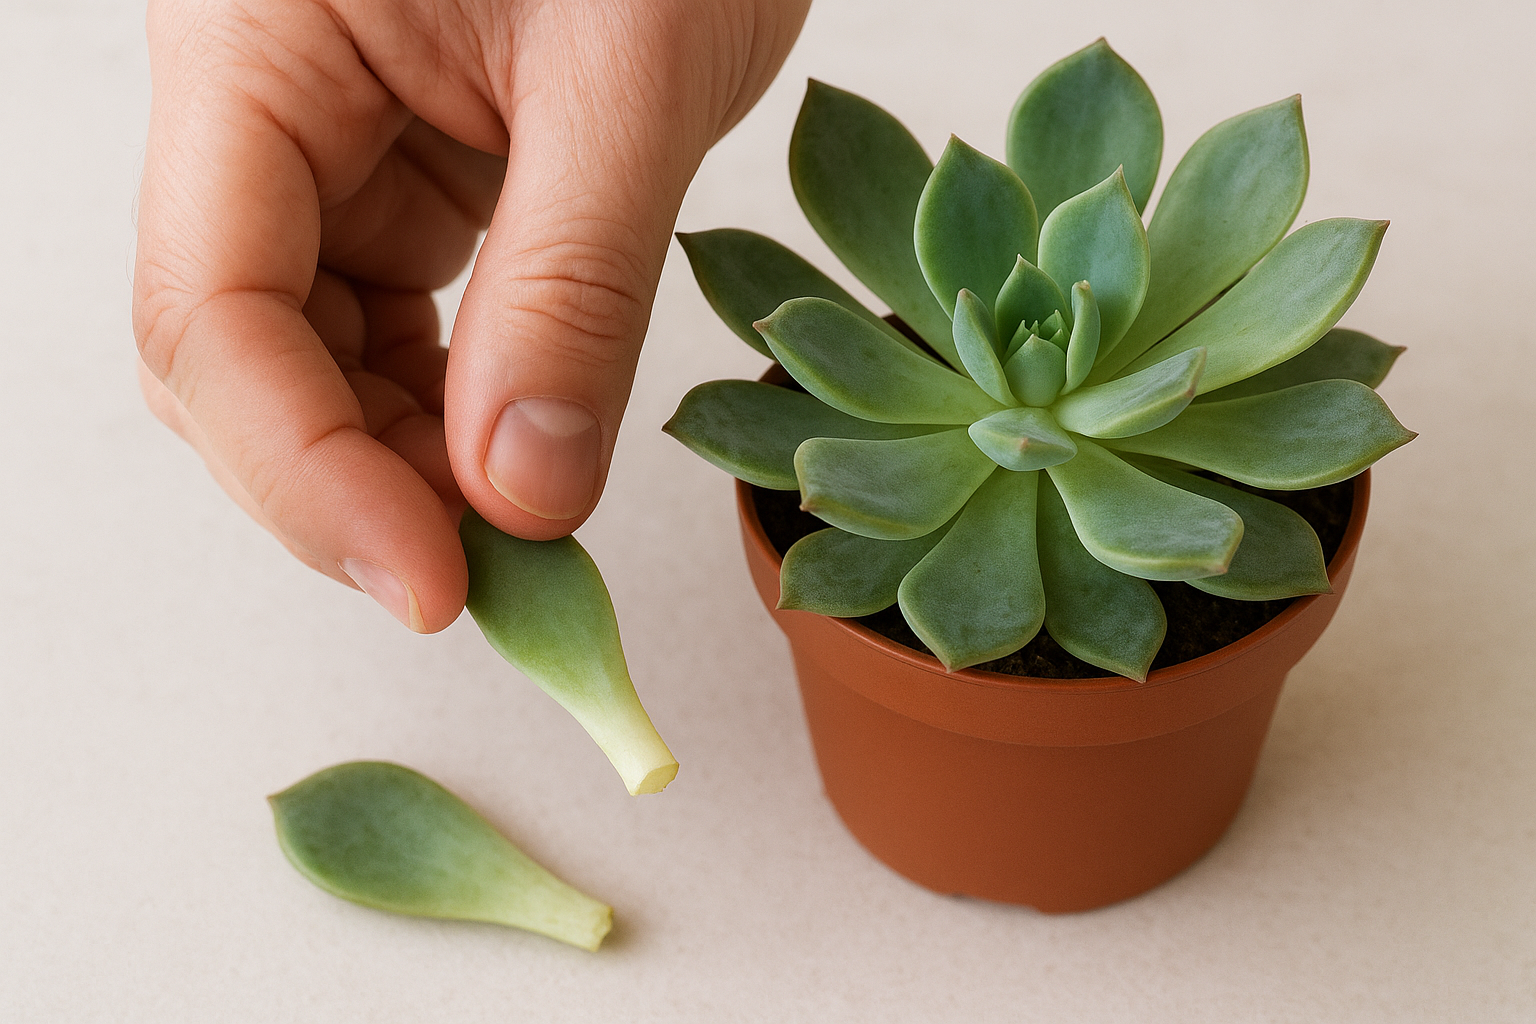
If the base doesn't come away clean and white, discard that leaf entirely. A torn or partial base almost never produces viable roots, regardless of how well you manage everything else.
Collect between five and ten leaves per session so you work with a solid batch from the start. Even with perfect technique, not every leaf will successfully root, so giving yourself more to work with increases your overall success rate when learning how to propagate succulents from leaves.
Step 2. Let the leaves callous the right way
After removing your leaves, do not place them on soil right away. The cut end, where the leaf separated from the stem, is an open wound, and putting it in contact with even slightly moist soil before it seals over almost always causes rot to set in at the base. This single step is where a large share of beginners go wrong when learning how to propagate succulents from leaves, and the fix is simply waiting.
Why the callous protects your propagation
A callous forms when the exposed tissue at the leaf's base dries out and hardens into a thin, protective layer. That layer blocks moisture and bacteria from entering the leaf while it transitions from a removed cutting to an active propagation. Without it, water from the soil wicks directly into the open wound, and the leaf collapses before it ever sends out a root.
Skipping the callousing step is the single most common reason leaf propagations fail in the first week, especially in humid climates like Malaysia where ambient moisture is always present.
How long to wait and what to look for
Lay your leaves on a dry surface in a single layer, cut end facing upward or resting at a slight angle so air reaches the base. A clean tray, a piece of cardboard, or a mesh rack all work well. Keep them in a warm spot with good airflow but out of direct sun, which can dry out the leaf too quickly and cause it to shrivel before roots appear.
Use this quick reference for callousing time based on conditions:
| Environment | Callous Time |
|---|---|
| Dry indoor room with good airflow | 24 to 48 hours |
| Humid climate (Malaysia conditions) | 48 to 72 hours |
| Cool, still indoor space | Up to 96 hours |
Check the base of each leaf before moving to the next step. A properly calloused base looks dry, slightly wrinkled around the edge, and firm to the touch with no wet or tacky feel remaining.
Step 3. Set up soil, airflow, and bright light
Once your leaves have calloused, the next job is setting up the right environment before you place them down. The conditions you create at this stage directly affect how quickly your leaves develop roots and how many survive through to full plants. Getting soil composition, light levels, and airflow right at the same time gives your propagations the best possible foundation, and it's one of the parts of how to propagate succulents from leaves that most guides rush through too quickly.
Build a soil mix that drains fast
Standard potting mix holds far too much moisture for succulent propagations. You want a gritty, fast-draining blend that stays barely damp rather than wet when you mist it. A reliable mix is 50% commercial cactus or succulent soil and 50% perlite or coarse sand. Fill your shallow propagation tray with this blend to a depth of about two centimeters, which is enough to support the leaves without burying them.
The goal is soil that dries out within 24 hours of a light misting, not soil that stays moist for days at a time.
Lay each calloused leaf cut-end down or flat on the soil surface with the base just barely touching the mix. Do not press the leaves into the soil or bury the base, because roots need to find their own way down, and burying the base often causes rot before the leaf ever anchors properly.
Position your tray for light and airflow
Bright, indirect light is what your propagation tray needs, not harsh direct sun. In Malaysia, morning sun near an east-facing window works well because it provides gentle warmth without scorching the leaves during the hotter afternoon hours. Aim for four to six hours of filtered or indirect light each day.
Airflow keeps mold from forming on both the leaves and the soil surface. Place a small fan nearby on its lowest setting, or position the tray near a naturally ventilated window that stays open during the cooler parts of the day.
Step 4. Grow roots, pups, and pot up new plants
After your leaves are resting on the soil surface in bright indirect light, your job becomes mostly patience and observation. You don't water yet, and you don't disturb the leaves. Within one to three weeks, depending on the variety and your conditions, tiny pink or white roots will begin threading out from the base of each leaf and pressing into the soil on their own.
What to watch for during the first few weeks
Roots come first, then a small rosette called a pup emerges from the same base point shortly after. Once you see both, you can start very light misting every two to three days, directing the mist toward the soil near the roots rather than onto the leaf itself. This is the stage where knowing how to propagate succulents from leaves pays off visually because watching a full rosette develop from a single leaf is one of the most satisfying parts of the process.
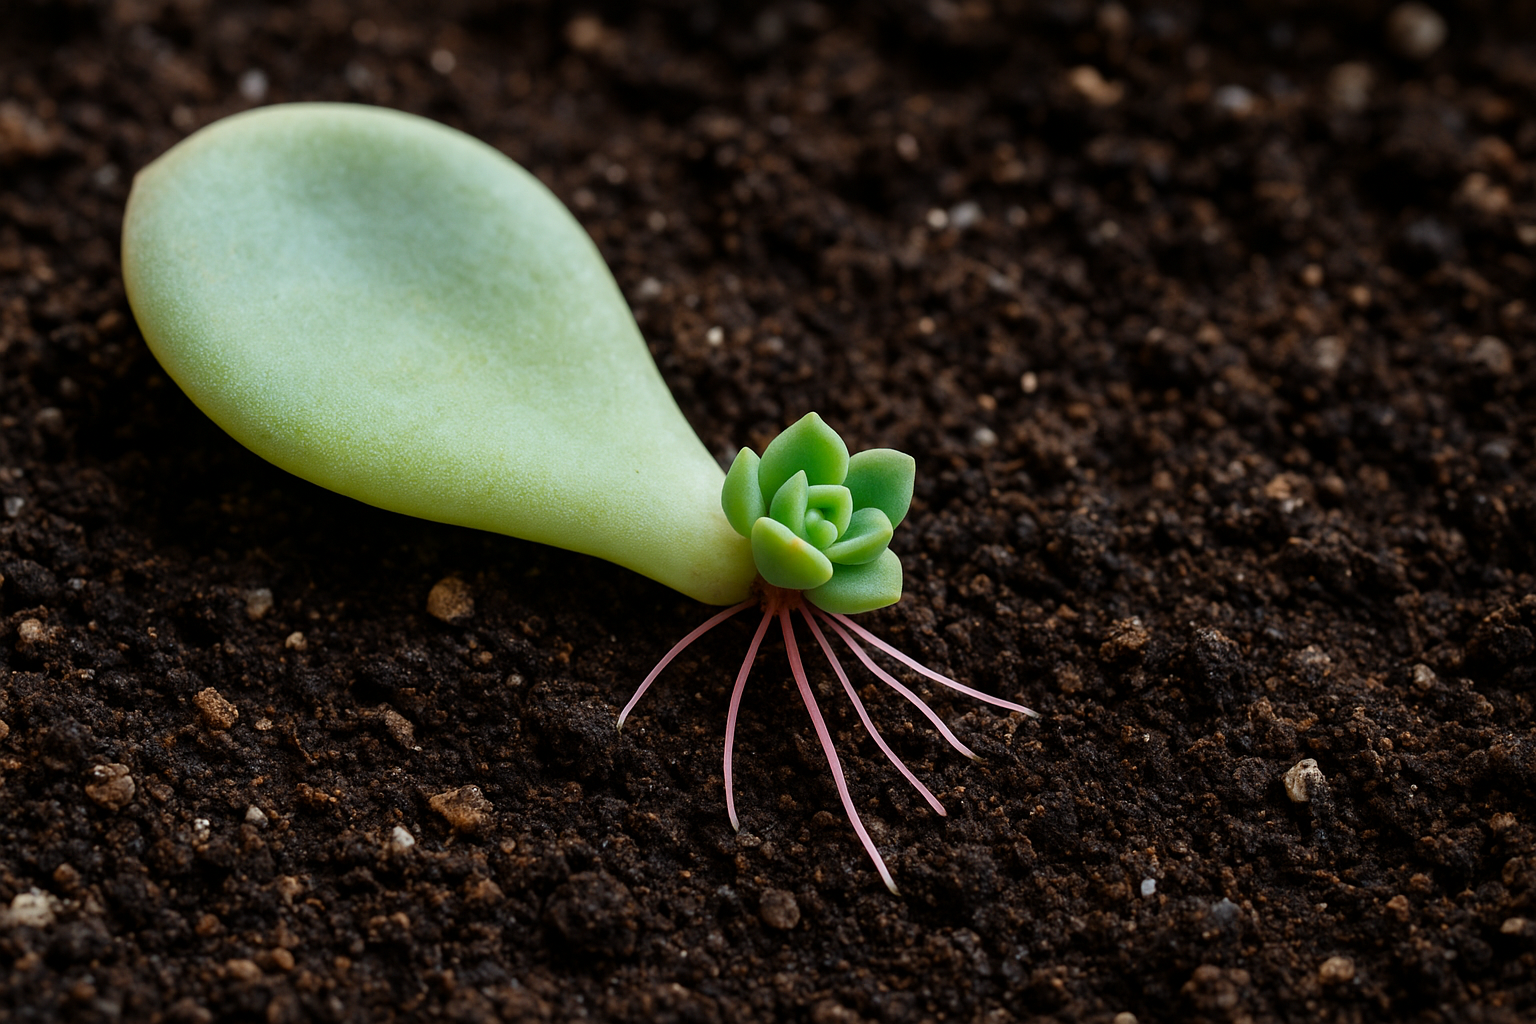
Never pull a leaf off once roots have appeared, even if the original leaf starts to look dry and shriveled, because the pup draws remaining nutrients from it until the leaf naturally detaches on its own.
Use this timeline as a general guide for what to expect:
| Week | What You Should See |
|---|---|
| 1 to 2 | Roots emerging from the base |
| 2 to 4 | Small pup appearing at the base |
| 4 to 6 | Pup growing its own set of leaves |
| 6 to 8 | Original leaf dries up and falls away naturally |
When and how to pot up your new plants
Once the original leaf has dried and detached on its own, your new plant is fully independent and ready to move into its own container. Choose a small pot with drainage holes and fill it with the same gritty succulent mix you used for propagation. Plant the pup so the roots sit just below the surface, then water lightly and place it back in bright indirect light. From here, care for it the same way you would any mature succulent.
A simple wrap-up
Now you have the full picture of how to propagate succulents from leaves, from selecting the right leaf and removing it cleanly, to callousing, setting up the right soil and light, and potting up your new plants once they're ready. Each step builds on the last, and skipping any one of them increases the chance of losing your propagations before they get a chance to establish.
The process takes a few weeks, but the actual hands-on time is minimal. Patience and correct technique carry most of the work, and once you've done it successfully once, you'll have a repeatable method you can use to grow your collection indefinitely.
Succulents fit naturally into a wide range of garden styles, from container arrangements on a small balcony to larger planted beds in a full landscape design. If you want help incorporating them into a professionally designed outdoor space here in Malaysia, talk to our team at Konzept Garden to get started.
