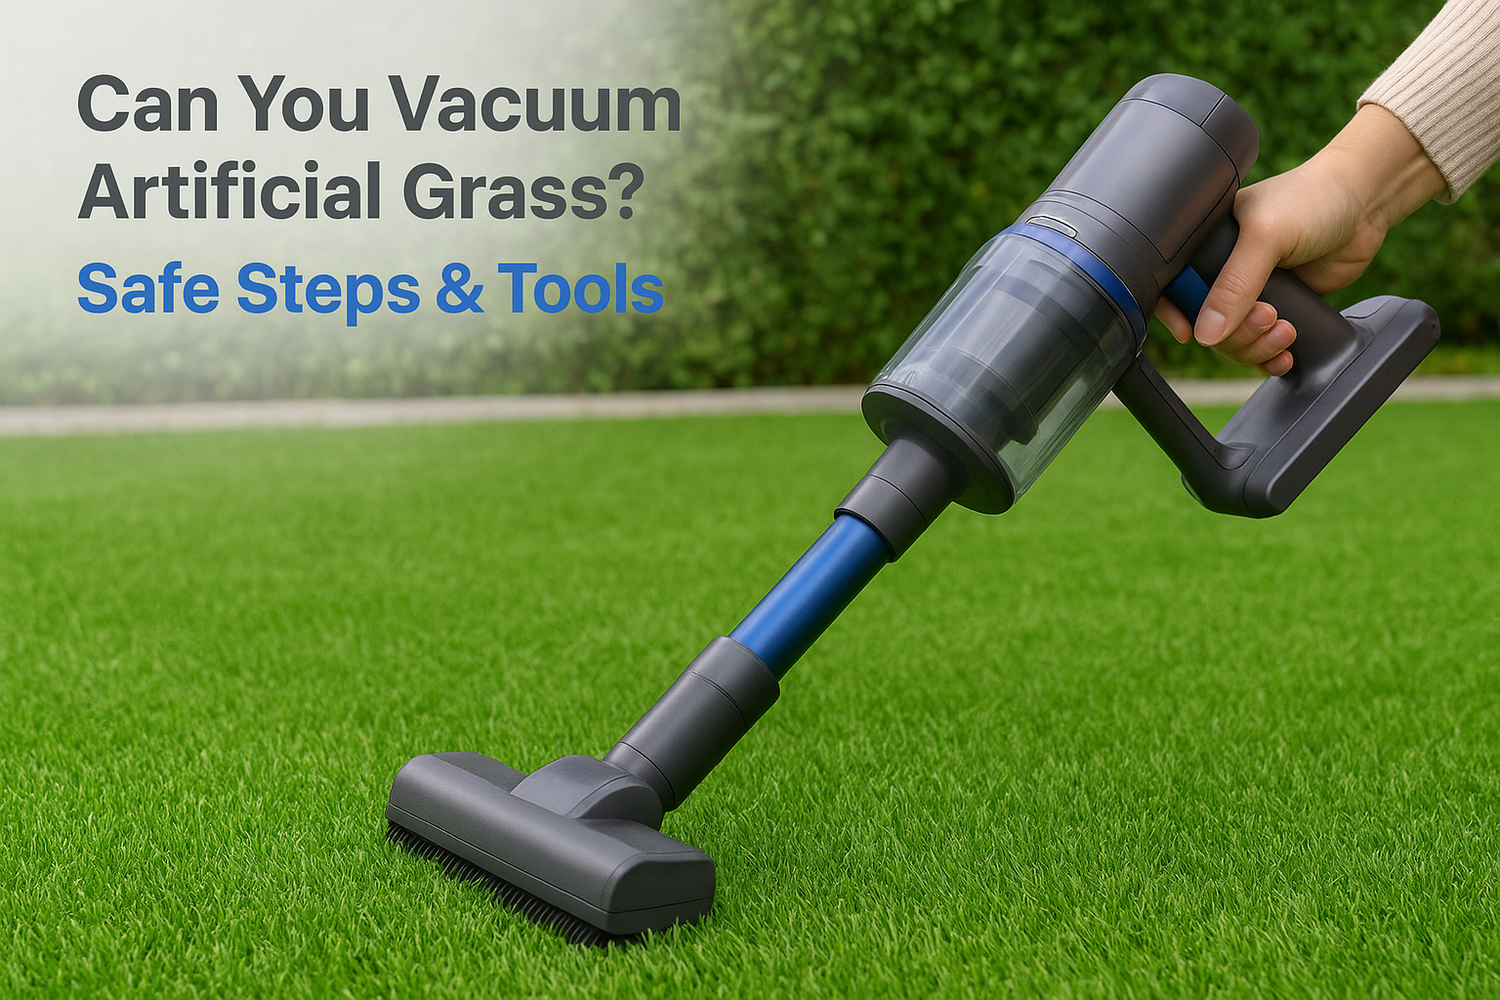
If you've invested in synthetic turf for your home or commercial space, keeping it clean is essential for maintaining its appearance and longevity. One common question we hear from property owners is: can you vacuum artificial grass? The short answer is yes, but only if you use the right technique and equipment.
Using a standard household vacuum on artificial turf can cause problems, from pulling up infill material to damaging the grass fibers. However, with proper methods and tools, vacuuming can be an effective part of your maintenance routine. The key lies in understanding what works and what to avoid so you don't accidentally shorten your turf's lifespan.
At Konzept Garden, we've installed and maintained countless artificial grass projects across Malaysia through our Noble Grass product line. In this guide, we'll walk you through safe vacuuming steps, explain which tools work best, and share professional tips to keep your synthetic lawn looking pristine for years to come.
When vacuuming artificial grass is safe
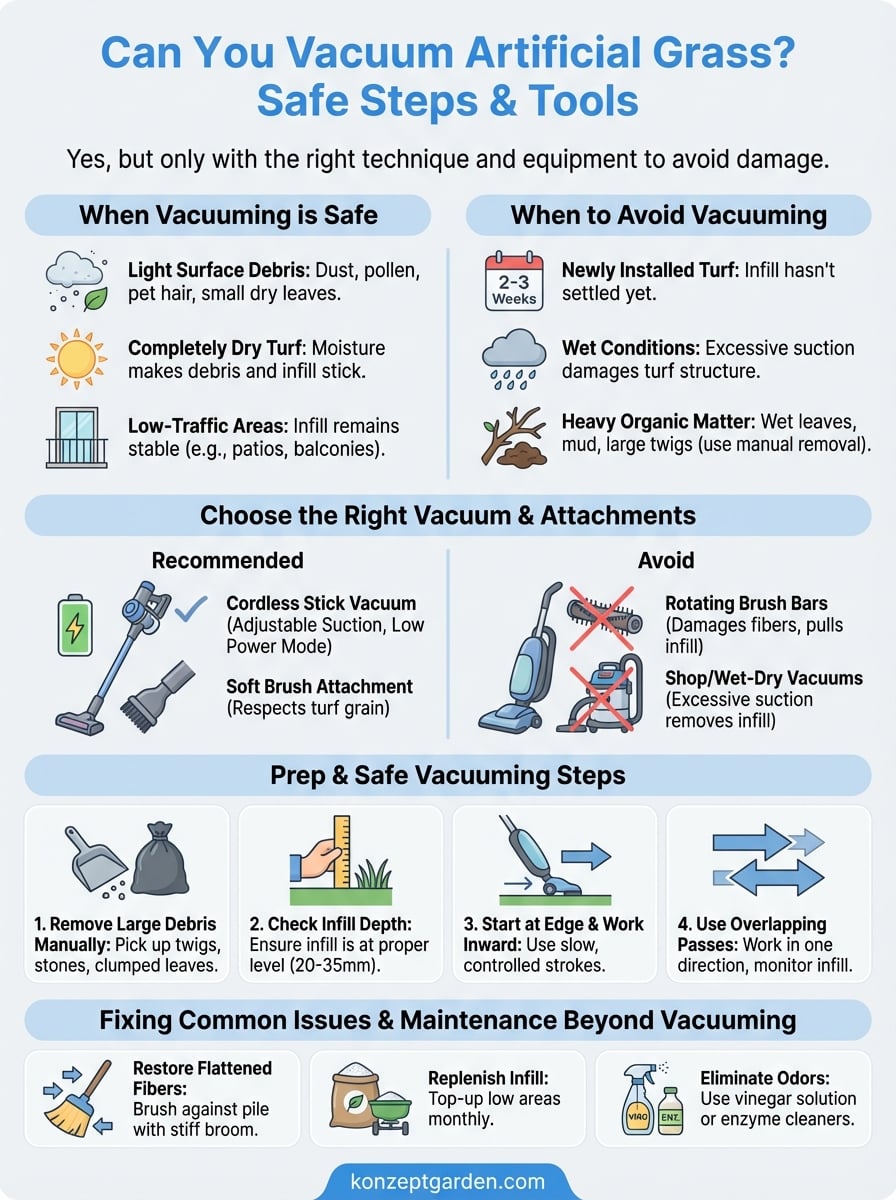
You can vacuum artificial grass safely when dealing with light surface debris like dust, pollen, pet hair, and small dry leaves. The critical factor is understanding that vacuuming works best as a supplementary cleaning method, not your primary maintenance approach. Most artificial turf systems rely on infill material (silica sand or rubber granules) to keep the blades upright, and aggressive vacuuming can remove this essential component.
Light debris and routine maintenance
Your synthetic turf benefits most from vacuuming when you need to remove fine particles that brushing alone won't capture. Pet hair, for example, often embeds itself between grass blades and requires gentle suction to extract completely. Similarly, pollen accumulation during spring months creates a dusty film that dulls your turf's appearance, making a quick vacuum pass ideal for restoration.
The safest time to vacuum is when your artificial grass is completely dry. Moisture causes organic debris to stick to the fibers and makes the infill heavier, which increases the risk of accidentally removing too much material. You should also vacuum before the debris settles deeply into the turf, typically within 24 to 48 hours of accumulation. Regular light passes prove more effective than infrequent deep cleaning sessions.
Specific conditions that make vacuuming effective
Vacuuming works exceptionally well on low-traffic areas where the infill remains stable and the grass fibers stay upright. Patios, balconies, and decorative sections around your garden receive less foot pressure, so their infill stays firmly in place during the cleaning process. These zones also tend to collect lighter debris that responds well to controlled suction.
Consider your turf's pile height before deciding whether can you vacuum artificial grass in a particular area. Products with shorter pile heights (under 30mm) handle vacuuming better because the infill sits closer to the backing and resists displacement. Longer pile varieties require more caution since their taller blades can trap the vacuum brush and pull at the infill more aggressively.
Always check your artificial grass manufacturer's maintenance guidelines before vacuuming, as some warranty terms specifically prohibit certain cleaning methods.
When to avoid vacuuming completely
You should never vacuum newly installed artificial grass until the infill has settled for at least two to three weeks. Fresh installations need time for the infill to compact naturally through weather exposure and light foot traffic. Vacuuming too early will remove critical support material that keeps your turf looking full and resilient.
Skip vacuuming if you notice exposed backing in high-traffic areas, loose seams, or sections where the infill level appears significantly lower than recommended. These conditions indicate that your turf needs professional attention, and vacuuming will only worsen the problem. Wet conditions also make vacuuming unsafe because moisture adds weight to debris and infill, creating excessive suction pressure that damages the turf structure.
Heavy organic matter like wet leaves, mud clumps, or large twigs requires manual removal or power washing instead of vacuuming. Your vacuum simply lacks the capacity to handle these items safely, and attempting to remove them will clog your equipment and potentially tear the grass fibers.
Choose the right vacuum and attachments
Your vacuum choice directly impacts whether you can vacuum artificial grass safely or risk damaging your investment. The wrong equipment pulls up infill, tears fibers, and creates uneven patches that require costly repairs. Understanding which vacuum types work best and how to configure them properly ensures effective cleaning without compromising your turf's structural integrity.
Vacuum types that protect your turf
Cordless stick vacuums represent your safest option for artificial grass maintenance. These lightweight models provide adjustable suction control that prevents excessive force on the infill while still capturing surface debris. Look for models with suction settings below 100 air watts, which offers enough power to remove pet hair and dust without disturbing the sand or rubber granules beneath your grass blades.
Traditional upright vacuums with rotating brush bars pose the highest risk to your synthetic turf. The spinning bristles grab and pull at grass fibers, potentially loosening the backing or creating permanent matting. You should only consider uprights if they feature a complete brush bar shutoff option, not just a height adjustment, because even elevated brushes can catch on longer pile heights.
Never use shop vacuums or wet/dry vacuums on artificial grass, as their industrial-strength suction will remove infill faster than you can spread it back.
Handheld vacuums work well for small patches and spot cleaning, particularly on balconies or compact decorative areas. These compact tools give you precise control over problem spots without committing to a full vacuuming session. Battery-powered models from major retailers eliminate the cord management issues that cause accidental turf snags.
Essential attachments for artificial grass
Your vacuum needs a soft brush attachment or upholstery tool to interact safely with synthetic fibers. Hard plastic nozzles create friction that generates static electricity, causing grass blades to stick together and appear matted. The soft bristles on furniture attachments gently lift debris while respecting the turf's directional grain.
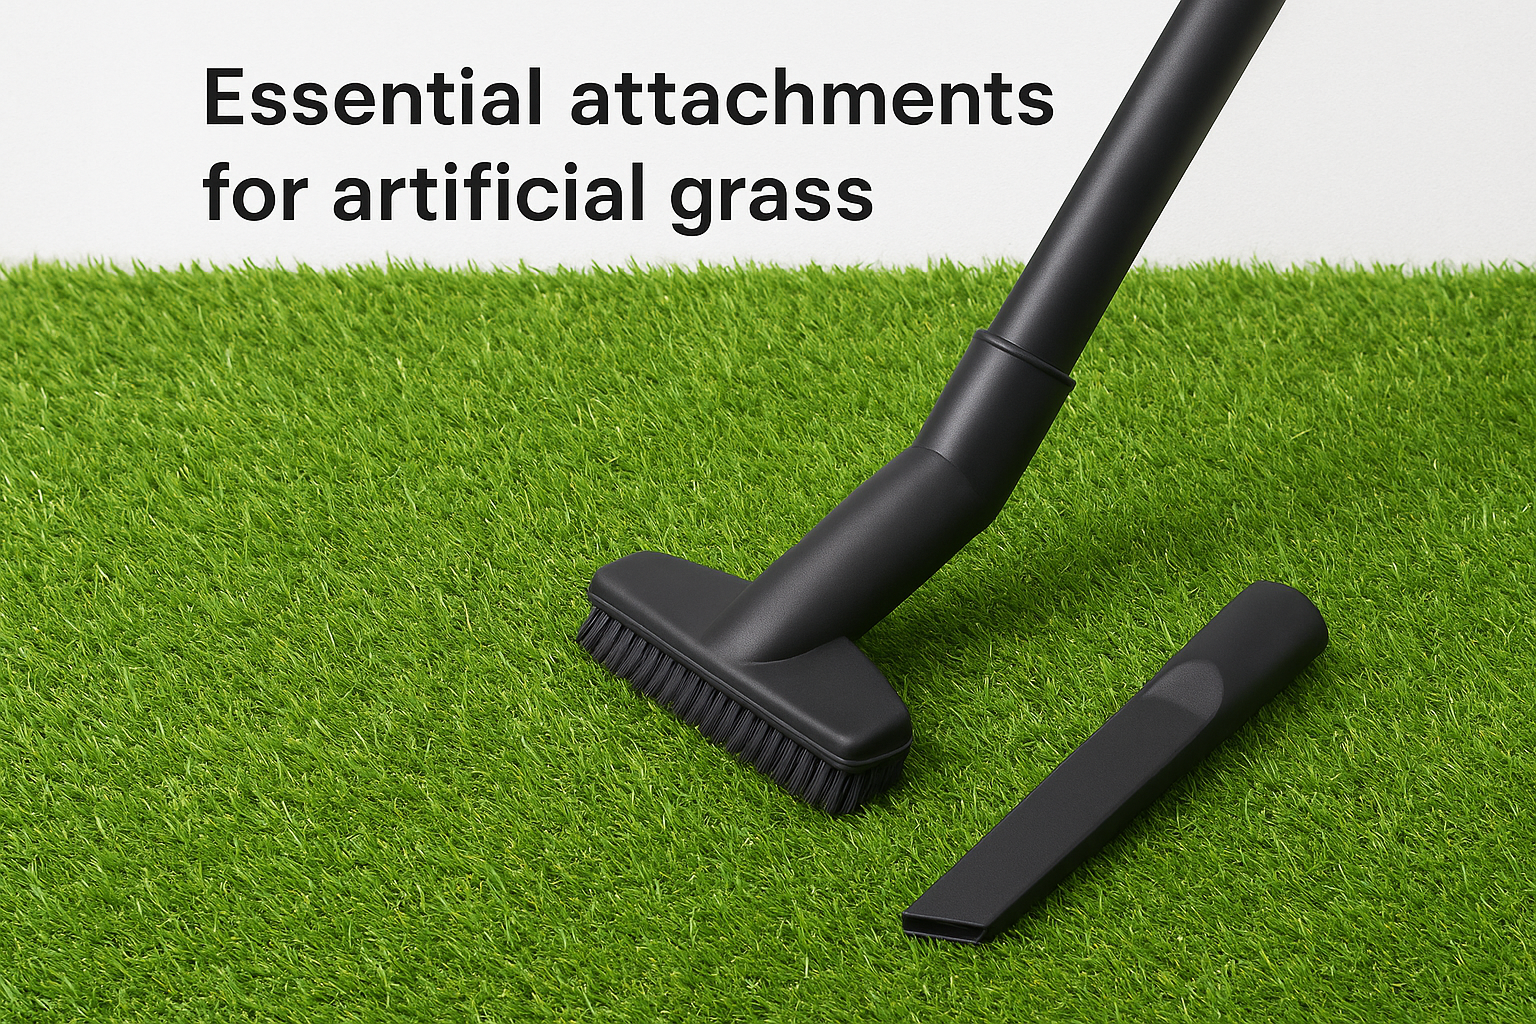
Crevice tools prove invaluable for cleaning along seam lines and edges where your artificial grass meets hardscaping. These narrow attachments reach tight spaces without applying pressure to the infill-dense border areas. You should avoid using beater bars, turbo brushes, or any motorized attachment that actively agitates the surface.
Prep the turf so you don't ruin the infill
Your artificial grass needs proper preparation before you can vacuum artificial grass safely. Skipping these steps leads to infill displacement, which creates low spots and exposes the backing material underneath. A few minutes of prep work protects your turf from damage and ensures your vacuuming session actually improves its appearance instead of creating new problems.
Remove large debris manually first
Walk your entire turf area and pick up any visible debris larger than a fingernail. Twigs, stones, plastic wrappers, and clumped leaves will jam your vacuum's intake or scratch the grass fibers as the suction drags them across the surface. Use a handheld dustpan or your hands to collect these items, placing them directly into a trash bag rather than sweeping them to the edges.
Pay special attention to areas under trees where acorns, seed pods, and bark pieces accumulate. These dense organic materials weigh enough to damage your vacuum's motor if they get caught in the intake. You should also check for any pet toys, lost gardening tools, or outdoor furniture accessories that might have worked their way into the grass pile.
Check your infill depth before starting
Push your fingers down through the grass blades to feel where the infill layer ends and the backing begins. Healthy artificial turf should have infill reaching about two-thirds up the blade height, which typically means you feel resistance 20 to 35 millimeters down depending on your product specification. If you hit the backing immediately or feel sparse granules, your turf needs infill replenishment before any vacuuming occurs.
Vacuuming artificial grass with insufficient infill accelerates fiber damage because the blades lack structural support and bend unnaturally under suction pressure.
Mark any low infill zones with small garden flags or chalk so you avoid these areas during your vacuuming session. These sections require professional top-up services rather than routine cleaning, and disturbing them further will worsen the visible depressions.
Adjust your vacuum to the lowest power setting
Turn your vacuum's suction dial to its minimum setting before you touch the turf. Most cordless stick vacuums feature three power modes, and you want the eco or low mode that manufacturers design for delicate surfaces. This reduced power still captures dust and pet hair while protecting your infill from displacement.
Test your vacuum on an inconspicuous corner of your artificial grass for 10 to 15 seconds. Examine the area immediately after to confirm no infill granules have migrated to the surface or disappeared from between the blades. If you see any displacement, your vacuum's power remains too high and requires further adjustment or a different tool entirely.
Vacuum safely step by step
Following a systematic approach prevents mistakes when you vacuum artificial grass and ensures consistent results across your entire turf area. Your technique matters as much as your equipment choice, because proper movement patterns and constant monitoring protect the infill while removing debris effectively. These steps work for both residential and commercial installations.
Start at the turf's edge and work inward
Position your vacuum at the perimeter of your artificial grass, specifically where it meets hardscaping or border edging. This starting point gives you a clear reference line and prevents you from accidentally backing into uncleaned sections that might contain larger debris you missed during manual removal. Place the vacuum's soft brush attachment flat against the surface without applying downward pressure.
Move the vacuum forward in slow, controlled strokes at roughly half the speed you would use on indoor carpet. Your pace should allow the suction to capture loose particles without dwelling long enough to grab infill granules. Keep the attachment level with the turf surface rather than tilting it, which concentrates suction force on a smaller area.
Use overlapping passes in one direction
Work across your artificial grass in parallel lines that overlap by approximately 5 to 8 centimeters on each pass. This overlap ensures complete debris removal without requiring you to go over the same spot multiple times, which increases the risk of infill displacement. Follow the natural grain direction of your grass blades when possible, as vacuuming against the pile creates unnecessary friction.
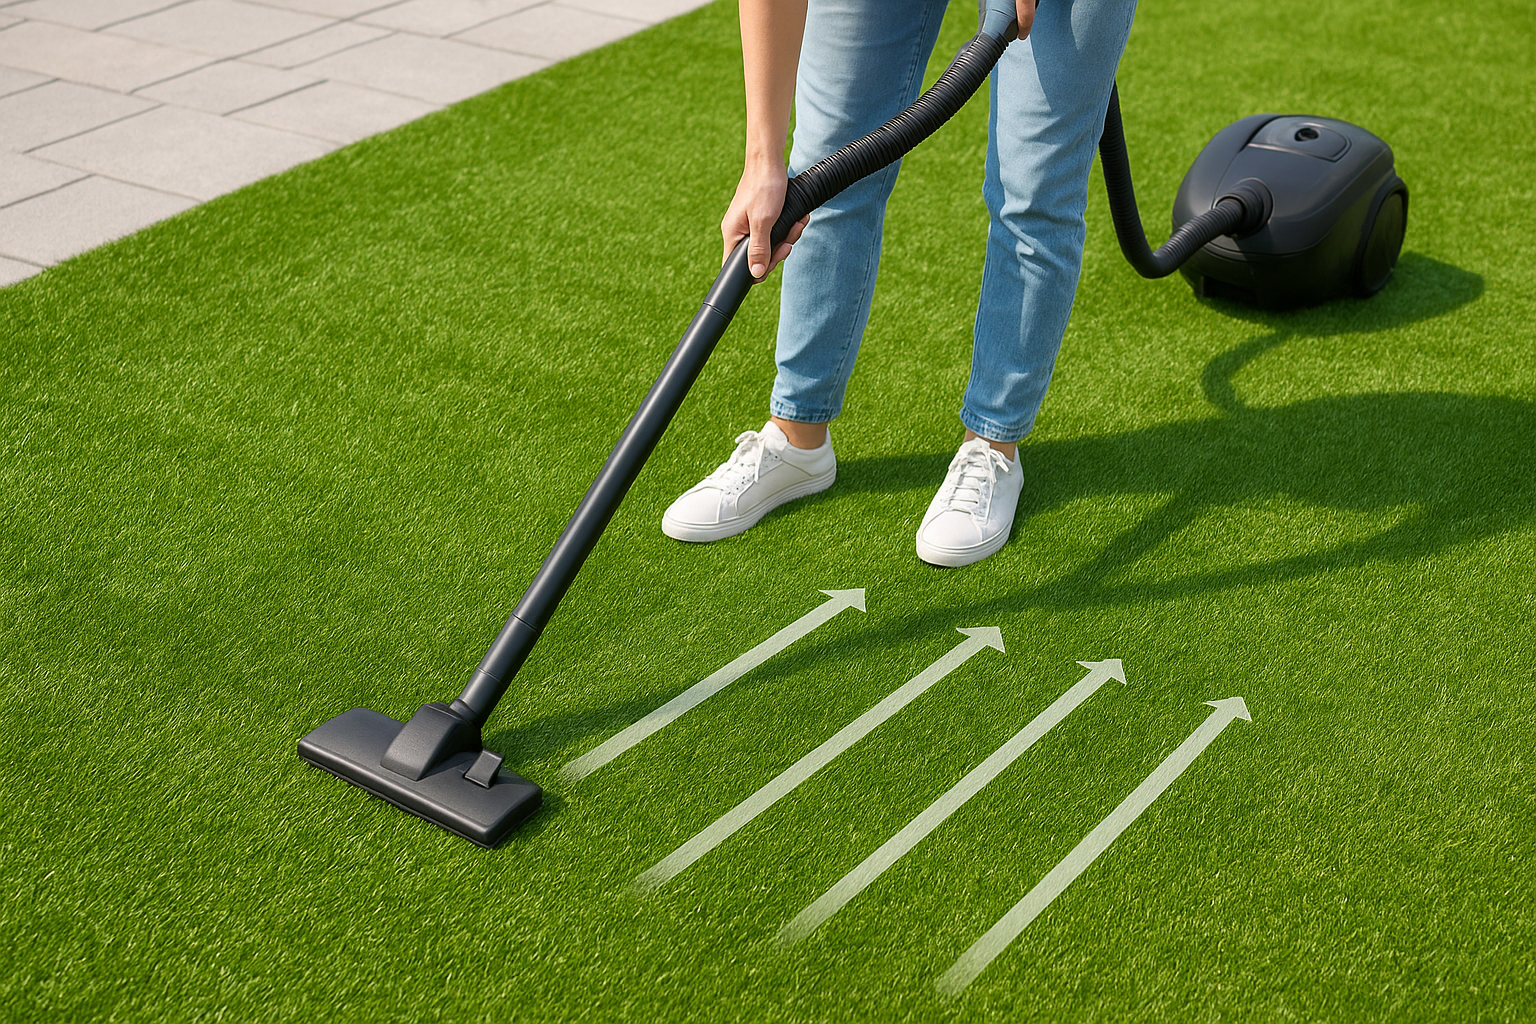
Never vacuum in circular or random patterns, as this approach makes it impossible to track which areas you've already cleaned and often results in excessive passes over the same spots.
Complete one entire section before moving to the next, rather than jumping between different areas of your turf. This systematic coverage prevents you from missing patches or accidentally re-contaminating cleaned zones by walking through debris-filled areas.
Monitor infill levels throughout
Stop every two to three passes to examine the areas you've just cleaned. Crouch down and run your hand through the grass blades to verify the infill still reaches its proper depth and the surface feels firm beneath your touch. If you notice any visible displacement or feel the backing through the blades, stop vacuuming immediately and redistribute the affected infill before continuing.
Fix flattening, infill loss, and odors
Even when you vacuum artificial grass correctly, certain issues can still develop over time through normal use and environmental factors. Your synthetic turf may show flattened sections, experience infill depletion, or develop unpleasant smells that regular vacuuming cannot resolve. These problems require targeted solutions beyond routine maintenance to restore your turf's appearance and functionality.
Restore flattened grass fibers
Flattened areas appear when heavy foot traffic or furniture compresses the grass blades into a matted position. You need a stiff bristle broom or a specialized artificial grass rake to lift these fibers back upright. Work against the natural pile direction using firm strokes that separate the individual blades without pulling at the backing material.
Apply this brushing treatment to high-traffic zones at least once every two weeks, or immediately after moving outdoor furniture or hosting events. Your goal involves redistributing the infill slightly while lifting the fibers, which creates the structured appearance your turf had when first installed. Focus extra effort on entryways and seating areas where compression occurs most frequently.
Brushing flattened artificial grass immediately after you notice the problem prevents permanent fiber memory that makes restoration increasingly difficult over time.
Replenish displaced infill
Check your infill depth monthly by inserting a ruler vertically through the grass blades until you feel resistance from the backing. Your infill should measure between 20 to 35 millimeters deep depending on your turf's pile height specification. Purchase the exact infill type your installer used, whether silica sand or rubber granules, because mixing different materials creates uneven compaction and color variations.
Spread new infill across depleted areas using a drop spreader set to its lowest distribution rate. You want gradual coverage that lets you monitor the depth accurately rather than overshooting and creating overly firm spots. After spreading, brush the area thoroughly to work the granules down between the grass blades where they provide structural support.
Eliminate persistent odors
Address smell issues by mixing one part white vinegar with eight parts water in a garden sprayer and applying the solution directly to affected zones. This treatment neutralizes organic waste and bacteria without damaging your synthetic fibers or creating residue that attracts new dirt. Allow the solution to sit for 15 to 20 minutes before rinsing thoroughly with clean water.
For stubborn pet odors, enzyme-based cleaners formulated specifically for artificial grass break down urine crystals that standard rinsing cannot remove. Apply these products according to manufacturer instructions during cooler parts of the day to prevent rapid evaporation that reduces effectiveness.
Quick recap
You can vacuum artificial grass safely when you follow the right approach and use appropriate equipment. Start by removing large debris manually, then check your infill depth to confirm your turf can handle vacuuming. Choose a cordless stick vacuum with adjustable suction control and a soft brush attachment, never a rotating brush bar. Work in slow, overlapping passes across one direction while monitoring for infill displacement throughout the process.
Regular maintenance goes beyond vacuuming alone. Your synthetic turf needs monthly brushing to restore flattened fibers, periodic infill replenishment in high-traffic zones, and proper odor treatments when necessary. These combined efforts keep your artificial grass looking fresh and performing well for years.
Need professional guidance on maintaining your artificial grass or designing a complete outdoor space? Our team at Konzept Garden specializes in creating beautiful, low-maintenance landscapes across Malaysia. Contact us today for expert advice on your garden project.