
Installing artificial grass on tiles is an excellent way to add a touch of greenery to hard surfaces, making them more comfortable and aesthetically pleasing. Whether it's for a patio, balcony, or indoor area, artificial grass provides a low-maintenance solution that looks great year-round. In this guide, we'll walk you through a quick and easy installation process. Plus, we've included a video to visually demonstrate each step, ensuring that even beginners can achieve professional results in no time. Let’s get started on transforming your tile surface with artificial grass!
Materials and Tools Required
Before you begin installing artificial grass on your tile surface, it's essential to gather the right materials and tools to ensure a smooth installation. Here's what you'll need:
Materials
- Artificial Grass: Choose a high-quality, durable artificial grass that suits your aesthetic needs. Make sure it is suitable for tile surfaces and offers good drainage if used outdoors.
- Adhesive/Glue: Use an adhesive that is specifically designed for outdoor surfaces and works well on tiles. Look for one that provides strong bonding and is weather-resistant.
- Joining Tape (Optional): If you're covering a large area and need to join two pieces of grass, joining tape will help create a seamless connection between them.
- Sand or Silica Infill (Optional): Depending on the type of artificial grass you're using, adding infill can help improve its stability and appearance by weighing it down and keeping the blades upright.
Tools
- Utility Knife or Scissors: You’ll need a sharp utility knife or a pair of strong scissors to cut the artificial grass to the correct size. A utility knife often provides more precision, especially when cutting thicker grass.
- Measuring Tape: Accurate measurements are key to ensuring the grass fits your tile surface perfectly. A measuring tape will help you measure the dimensions of your tile area before cutting the grass.
- Brush or Roller: To smooth the adhesive and help it bond properly, you’ll need a brush or roller to spread the glue evenly across the tile surface.

By preparing all the necessary tools and materials in advance, you’ll be ready for a seamless installation process. Having everything on hand also reduces mistakes and ensures a professional finish.
>> Read more: Why you still have real grass for your Garden?
Step-by-Step Installation Process
Now that you have all the materials and tools ready, let's dive into the actual installation process. Follow these step-by-step instructions to install artificial grass on tiles effectively.
Step 1: Preparing the Tile Surface
Before you start, it's crucial to ensure the tile surface is clean and free of debris. Dirt, dust, and grease can prevent the adhesive from bonding correctly.
- Clean the Tiles: Use a broom or vacuum to remove any loose debris from the tile surface. For outdoor areas, you can hose down the tiles, but make sure they are fully dry before applying adhesive.
- Inspect the Surface: Look for any uneven or damaged tiles. If you find any, fix or level them out to create a smooth foundation for the grass.
Step 2: Measuring and Cutting the Grass
The next step is to cut the artificial grass to the correct size to fit your tile surface.
- Measure the Area: Use a measuring tape to accurately measure the dimensions of the tile area where the artificial grass will be installed.
- Cut the Grass: Lay the artificial grass face down and cut it according to the measurements. It’s best to cut from the backside of the grass with a utility knife for more precision. Make sure the edges align neatly with the tile edges for a professional look.
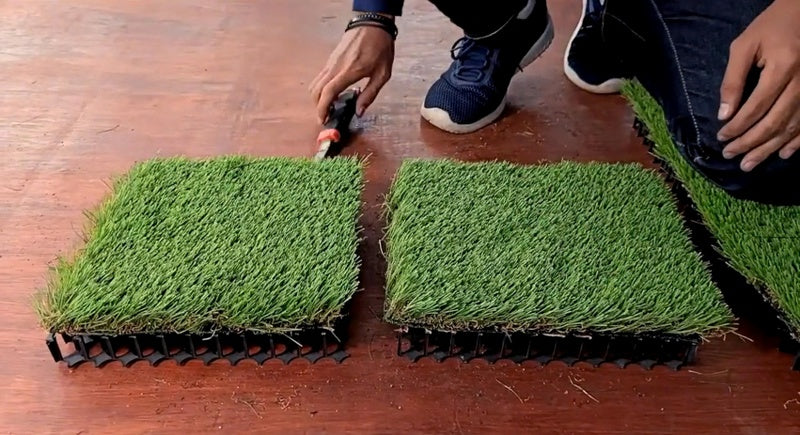
Step 3: Laying and Gluing the Grass
Once the grass is cut to size, it's time to adhere it to the tile surface.
- Apply Adhesive: Spread the adhesive or glue evenly across the tile surface. Work in small sections to avoid the glue drying too quickly. Use a brush or roller to ensure the adhesive is applied smoothly.
- Place the Grass: Carefully lay the artificial grass onto the tile, making sure it aligns with the edges. Press the grass down firmly as you go to ensure a good bond with the adhesive.
- Smooth the Grass: Use a roller or press the grass firmly with your hands to eliminate any air pockets and ensure full contact with the adhesive.
Step 4: Trimming and Securing Edges
After the grass is in place, you may need to trim excess material for a neat finish.
- Trim the Edges: Using a utility knife or scissors, carefully trim any excess grass around the edges. Make sure the grass is flush with the edges of the tile.
- Check the Corners: Pay special attention to the corners and edges, ensuring they are firmly adhered to the surface to prevent lifting over time.
Step 5: Optional - Adding Infill
Depending on the type of artificial grass you have chosen, you may want to add sand or silica infill to help improve stability and keep the blades upright.
- Spread the Infill: Evenly spread the infill across the surface of the artificial grass using a broom. This step is optional but recommended for outdoor or heavily trafficked areas to help with durability and appearance.
Following these steps will ensure a professional and long-lasting installation of artificial grass on your tiles. If you're covering a larger area or have specific design needs, you may also need to use joining tape to connect two pieces of grass seamlessly.
For a visual guide, don’t forget to check out our quick video steps to see how easy the process can be. With professional-quality artificial grass and a straightforward installation process, you'll have a stunning new space in no time!
Finishing Touches
Now that your artificial grass is installed, it’s time to focus on the finishing touches to ensure a polished, professional look and optimal performance over time. Here’s what to do next:
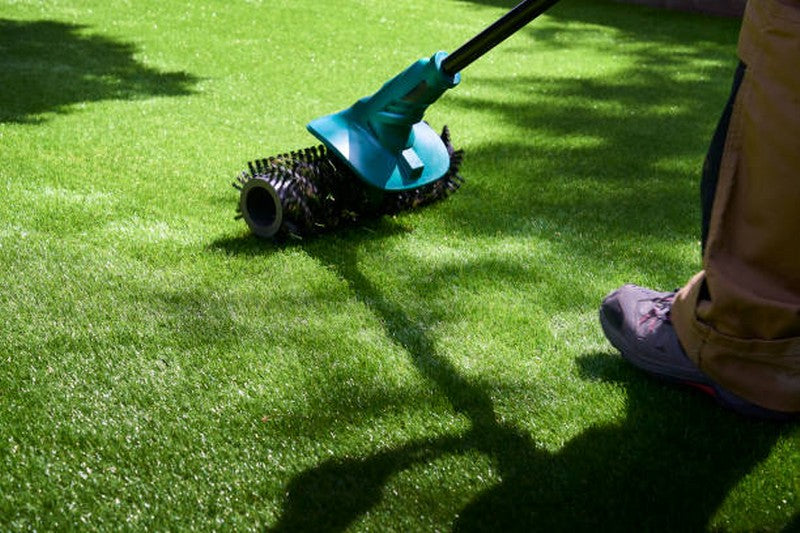
Step 1: Brush the Grass Fibers
- Why Brush the Grass? After installation, the grass blades might be flattened from handling and installation. Brushing the fibers helps them stand upright and restores the natural look of the artificial grass.
- How to Brush: Use a stiff-bristled brush to gently sweep the grass fibers in the opposite direction of their natural lean. This step ensures the grass looks more natural and plush.
Step 2: Secure Any Loose Edges
- Check the Edges: Walk around the perimeter of the tile area and inspect for any loose or lifting edges.
- Reapply Adhesive if Needed: If any part of the grass isn’t sticking properly, lift it slightly and apply more adhesive to secure it. Press the grass down firmly to ensure a tight bond with the surface.
Step 3: Trim Excess Grass
- Final Trimming: Once the grass is laid and secured, perform a final trim around the edges. Use a sharp utility knife to cut any remaining excess grass that extends beyond the tile surface. Neat edges will give your installation a professional appearance.
Optional: Add Decorative Elements
- Enhance Your Space: Depending on the location and purpose of the artificial grass installation, you might want to add decorative touches such as potted plants, outdoor furniture, or stepping stones. These elements can further enhance the aesthetic of the area and create a welcoming space.
By completing these finishing touches, you’ll ensure that your artificial grass looks as good as it performs. Regularly brushing and inspecting the surface will keep it in great shape for years to come.
>> Read more: How to Install Artificial Grass for Beginners
Maintenance and Care
Artificial grass is a low-maintenance option compared to natural grass, but it still requires some basic upkeep to ensure it stays in top condition. Here are some simple maintenance tips to help you keep your artificial grass looking fresh and well-maintained over time.
1. Regular Cleaning
- Outdoor Installations: For outdoor areas, it’s essential to keep the surface clean from dust, leaves, and debris. Use a leaf blower, broom, or garden hose to clean the grass. For small debris, a quick sweep with a stiff brush will do the trick.
- Indoor Installations: For indoor or covered areas, regularly vacuuming or sweeping the grass will help remove dirt and maintain its appearance.
2. Brushing the Grass
- Keep the Fibers Upright: Over time, the grass fibers may flatten, especially in high-traffic areas. To maintain the natural look, use a stiff-bristled brush to brush the fibers against their natural direction every few weeks.
- Avoid Metal Brushes: Use a soft or plastic-bristled brush to avoid damaging the fibers.
3. Stain Removal
- Spills and Stains: Artificial grass is stain-resistant, but it’s important to clean up spills as soon as possible to avoid long-term damage. For minor spills, use water and mild detergent to clean the area.
- Pet Waste: If the grass is exposed to pets, simply scoop solid waste and rinse the area with water. For extra cleaning, you can use a pet-friendly disinfectant.
4. Checking the Adhesive and Edges
- Inspect for Lifting Edges: Over time, the adhesive bonding the grass to the tile may weaken, especially in outdoor installations exposed to weather. Periodically check the edges for any signs of lifting, and apply more adhesive if necessary.
- Reinforce High-Traffic Areas: Pay attention to high-traffic areas that may wear down faster. If you notice any loosening, take action early to avoid further damage.
5. Long-Term Maintenance Tips
- Avoid Heavy Objects: While artificial grass is durable, placing very heavy objects on it for extended periods can cause it to flatten. If you must place something heavy, such as furniture or decor, consider moving it periodically to prevent indentations.
- Prevent Moss Growth: In outdoor, shaded areas, moss may develop over time. Use a moss killer or gently scrub the area with a mixture of water and vinegar to keep the surface clean and moss-free.
With these simple maintenance tips, your artificial grass will remain clean, vibrant, and functional for years. Regular brushing, cleaning, and monitoring will help you get the most out of your installation while keeping it looking fresh.
Konzept Garden's Noble Grass Products – A Premium Choice for Your Space
When it comes to choosing the best artificial grass for your tile installation, Konzept Garden's Noble Grass collection stands out as a premium option. Designed for both durability and aesthetics, Noble Grass is the perfect solution for homeowners looking to enhance their spaces with a high-quality, natural-looking grass surface.
Why Choose Noble Grass?
- Natural Appearance: Noble Grass products are meticulously crafted to resemble real grass, offering a soft texture and vibrant green color that mimics natural lawns.
- Durability: Whether you're installing it indoors or outdoors, Noble Grass is designed to withstand various weather conditions and high foot traffic, making it ideal for patios, balconies, and tiled garden areas.
- Low Maintenance: Like all artificial grass, Noble Grass requires minimal upkeep. Occasional brushing and cleaning will keep it looking fresh and pristine, allowing you to enjoy a beautiful green space with little effort.
Noble Grass for Tile Installations
With its easy installation process and robust quality, Noble Grass is perfectly suited for tile installations. It adheres well to a range of surfaces and can be customized to fit any size or shape. Plus, its soft, comfortable surface makes it an excellent choice for spaces where you want to create a cozy, welcoming environment.
Upgrade your tile surfaces today with Noble Grass by Konzept Garden, and enjoy the beauty and benefits of premium artificial grass that lasts for years.
Conclusion
Installing artificial grass on tiles is a simple yet effective way to transform your outdoor or indoor spaces into green, inviting areas. With the right materials, a bit of patience, and following the step-by-step guide, you can create a beautiful, low-maintenance surface that enhances the aesthetics and comfort of your home.
By choosing high-quality products like Noble Grass from Konzept Garden, you ensure a durable and long-lasting installation that mimics the look and feel of natural grass. Whether you’re looking to revamp your patio, balcony, or even a tiled walkway, artificial grass is a versatile solution that requires minimal upkeep while providing maximum visual appeal.