
An outdoor kitchen turns your garden into a space where you actually cook, eat, and spend time with people, not just something you look at through a window. But figuring out how to design an outdoor kitchen that works for your home, your climate, and your budget takes more than picking a grill and dropping it on a patio. You need a clear plan covering layout, materials, utilities, and must-have features before any construction begins.
At Konzept Garden, we've designed and built outdoor living spaces across Malaysia for years, from full garden transformations to specific features like kitchens, ponds, and entertainment areas. We know what works in our tropical climate and what ends up as an expensive regret. That hands-on experience shapes every recommendation in this guide.
This article walks you through the entire process step by step: choosing the right location, planning a functional layout, selecting durable components, and making smart decisions on budget and materials. Whether you're starting from scratch or adding a kitchen to an existing garden, you'll have a clear framework to work with by the end.
What you need before you start
Before you start thinking about how to design an outdoor kitchen, gather the information that will shape every decision you make. Jumping straight into appliance selections or layout sketches without this foundation leads to costly revisions later. You need accurate site measurements and a clear picture of your actual usage habits before a single spec is written.
Know your space and how you use it
Walk your garden and measure the area you're working with, including the distance from your indoor kitchen, the location of any existing structures, and the path people will naturally take between spaces. These numbers directly affect your layout options. A space that's only 2.5 meters wide rules out certain counter configurations, while a long narrow area suits a galley-style setup better than an L-shape.
Think about how you actually cook and entertain. Do you grill for a crowd of ten every weekend, or is this mostly weeknight family dinners? Your cooking frequency and typical group size determine how much counter space, storage, and seating you realistically need. Overbuilding for occasions that happen twice a year wastes budget on space that sits unused most of the time.
The more specific you are about your real habits before you design, the more useful your outdoor kitchen becomes on a daily basis.
Check permits and utility access
In Malaysia, any permanent outdoor structure that connects to gas or electricity typically requires approval from your local authority (PBT). Check with your local council before committing to a design that relies on running new gas lines or a dedicated electrical circuit outdoors. Skipping this step can mean tearing out finished work and paying to redo it correctly.
Note where your existing water, gas, and electrical connections are located. The closer your kitchen sits to these supply points, the lower your installation cost will be. Ask your contractor to map out a basic site utility layout before you lock in any position decisions.
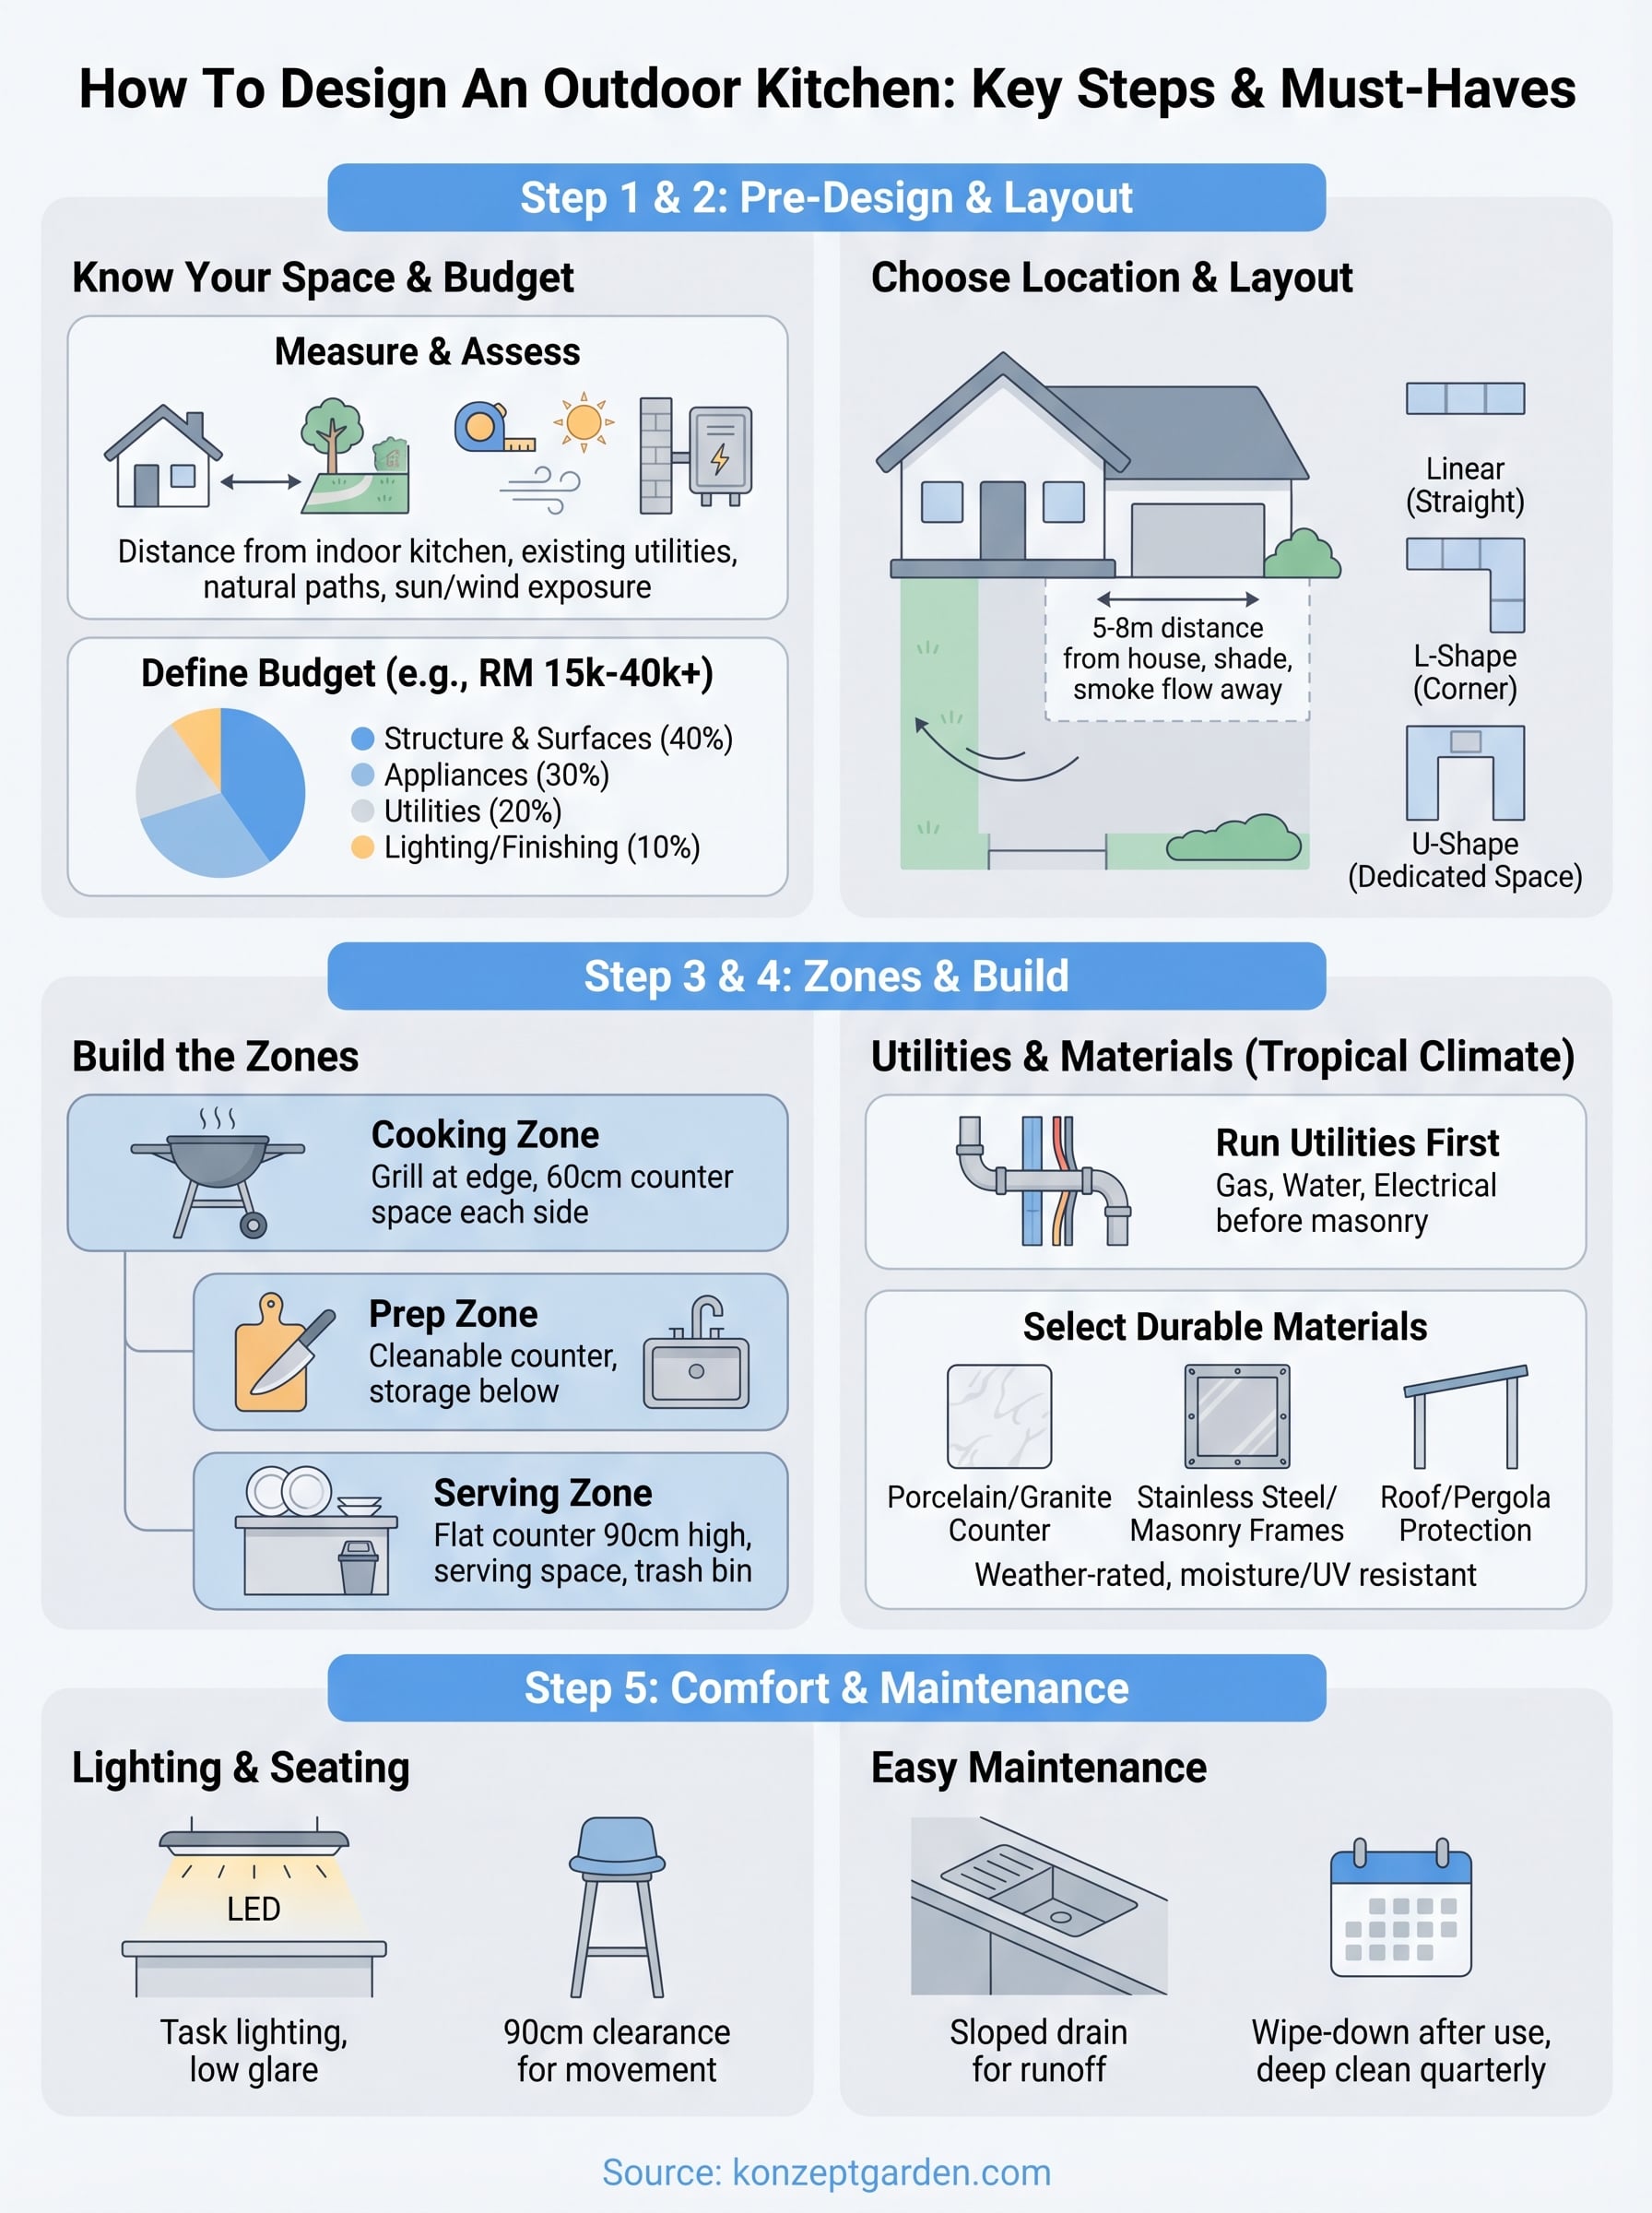
Step 1. Define your budget and how you'll use it
Budget sets the boundaries for everything else in your outdoor kitchen design. Before you look at a single product spec, decide on a firm number and split it across three categories: structure and surfaces, appliances, and utilities. This prevents you from spending 80% of your budget on a premium grill before you realize you have nothing left for countertops or drainage.
Set a realistic budget range
In Malaysia, a basic outdoor kitchen with a built-in grill, a concrete counter, and simple cabinetry typically starts around RM 15,000 to RM 25,000. A fully equipped setup with side burners, a sink, refrigeration, and tiled finishes runs RM 40,000 or more. Use this breakdown as a starting allocation guide:
| Component | Estimated Budget Range (RM) |
|---|---|
| Structure and countertops | 5,000 - 15,000 |
| Grill and appliances | 3,000 - 12,000 |
| Utilities (plumbing, electrical) | 2,000 - 8,000 |
| Lighting and finishing details | 1,000 - 5,000 |
Match your kitchen to your cooking style
When you think about how to design an outdoor kitchen that fits your actual life, your real cooking frequency matters more than a wish list. If you grill twice a week for four people, put your money into a quality built-in grill with solid prep space rather than a pizza oven you'll use three times a year.
Build for how you cook now, not for a future version of yourself that entertains every weekend.
Step 2. Choose the best location and layout
Location affects smoke flow, sun exposure, and how far you carry food between your indoor and outdoor spaces. When you think about how to design an outdoor kitchen, placing it in the wrong spot creates daily friction that no appliance or finish upgrade can fix. Position your kitchen where prevailing winds carry smoke away from your seating area, not directly into your guests' faces during a meal.
Pick a spot that works with your home's layout
Your outdoor kitchen should sit close enough to your indoor kitchen to make food prep and supply runs practical. A distance of 5 to 8 meters is workable; anything beyond 10 meters turns every trip for a forgotten ingredient into a real inconvenience. Shade from a roof overhang, pergola, or existing wall also matters in Malaysia's heat and rain, so check what structures are already in place before you lock in a final position.
Place your kitchen near the house but far enough from windows and doors to keep smoke outside.
Match your layout to your available space
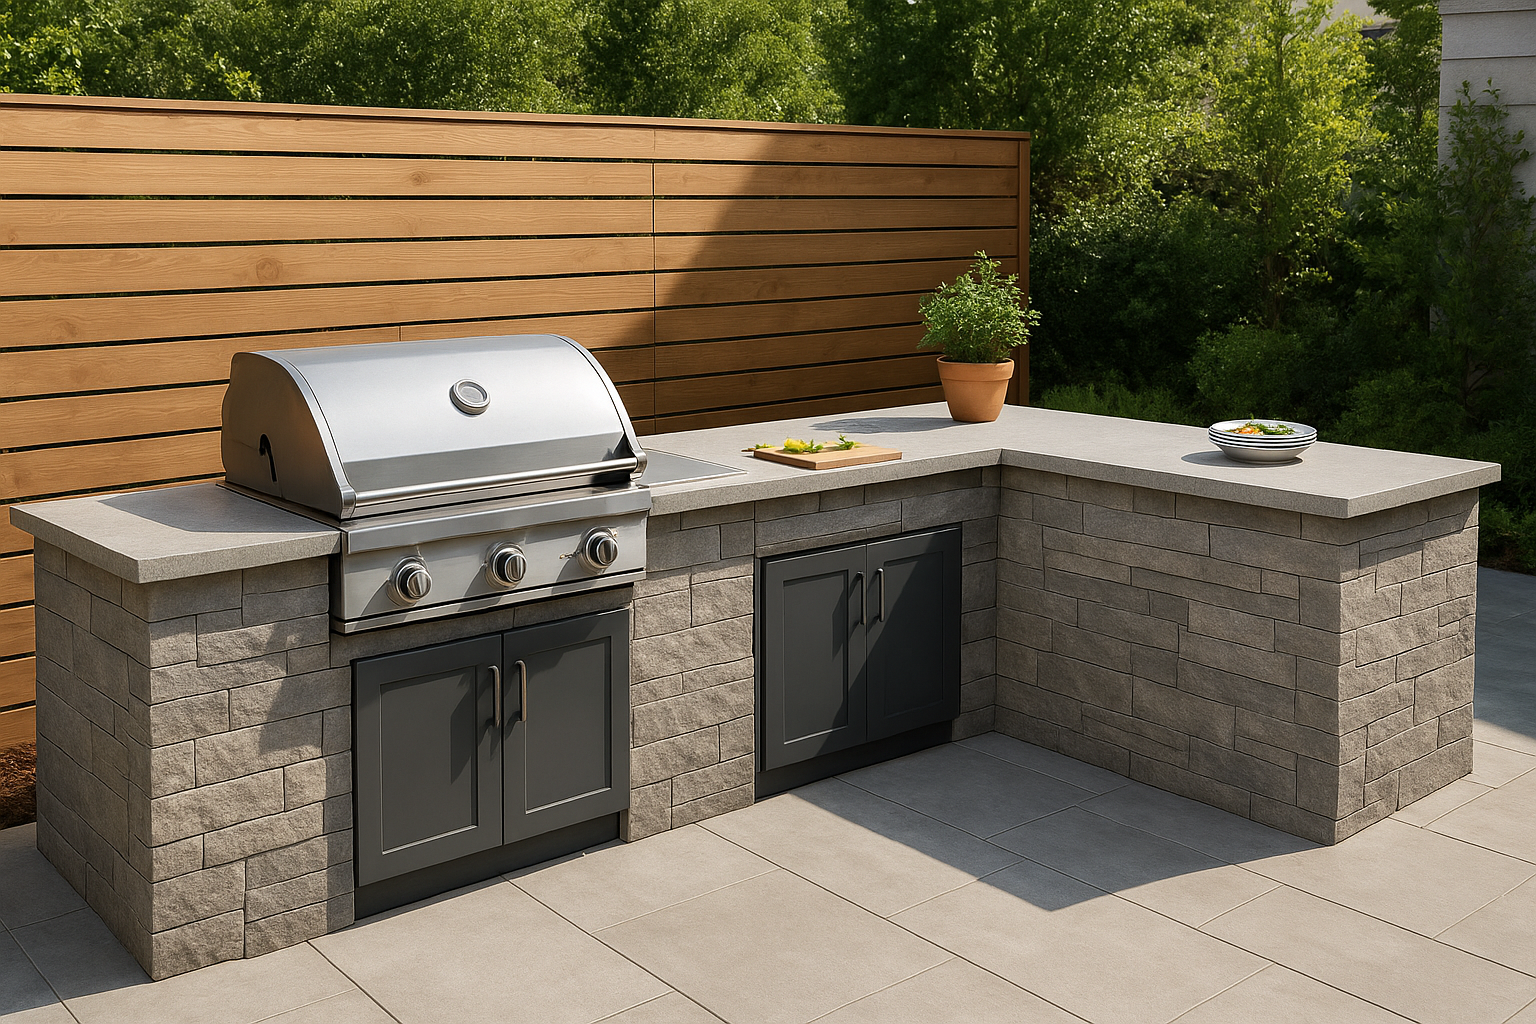
Choose a layout shape based on what your measurements actually allow. A straight linear layout suits narrow areas and works well along a wall or fence line. An L-shape fits corner zones and separates cooking from prep naturally, while a U-shape suits larger, dedicated kitchen spaces with higher appliance counts. Pick the shape that fits your space, not the one that looks best in a catalog.

Step 3. Build the cooking, prep, and serving zones
When you think about how to design an outdoor kitchen, dividing your space into three distinct zones prevents chaos during meal prep and service. Each zone has a specific job: cooking, preparation, and serving. Mixing them together without clear boundaries creates bottlenecks when multiple people are working in the space at the same time.
Set up your cooking zone first
Your grill is the anchor of the cooking zone, so position it at the edge of your layout where heat and smoke can disperse freely. Allow at least 60 cm of counter space on each side of the grill for handling hot food safely. If you're adding a side burner or pizza oven, keep them within arm's reach of the grill without crowding it.
Create a dedicated prep and serving area
Keep raw food prep and plated food completely separate to avoid cross-contamination and confusion during service.
Your prep zone needs a solid, cleanable countertop surface and storage for tools, cutting boards, and utensils directly below or beside it. For the serving area, place a flat counter at around 90 cm high so guests can pick up plates without bending awkwardly. Adding a small built-in trash or compost bin near the prep counter keeps your workflow clean and cuts down on unnecessary movement between stations.
Step 4. Plan utilities, materials, and weather protection
When figuring out how to design an outdoor kitchen in Malaysia, material selection and utility planning are where many people make expensive mistakes. Tropical heat, heavy rain, and high humidity will destroy the wrong materials within two to three years, so every choice here needs to hold up against daily moisture and UV exposure, not just look good in a showroom.
Choose materials that handle Malaysia's climate
Your countertops and cabinet frames need to be weather-rated from day one. Porcelain tile, granite, or sealed concrete all handle moisture well and clean easily. For cabinetry frames, use marine-grade stainless steel or masonry instead of wood or standard metal, which corrode quickly in humid outdoor conditions. Avoid powder-coated finishes on structural components as the coating chips and lets moisture underneath.
Choose materials rated for permanent outdoor use, not materials that need constant sealing or repainting to survive.
Run utilities before you build around them
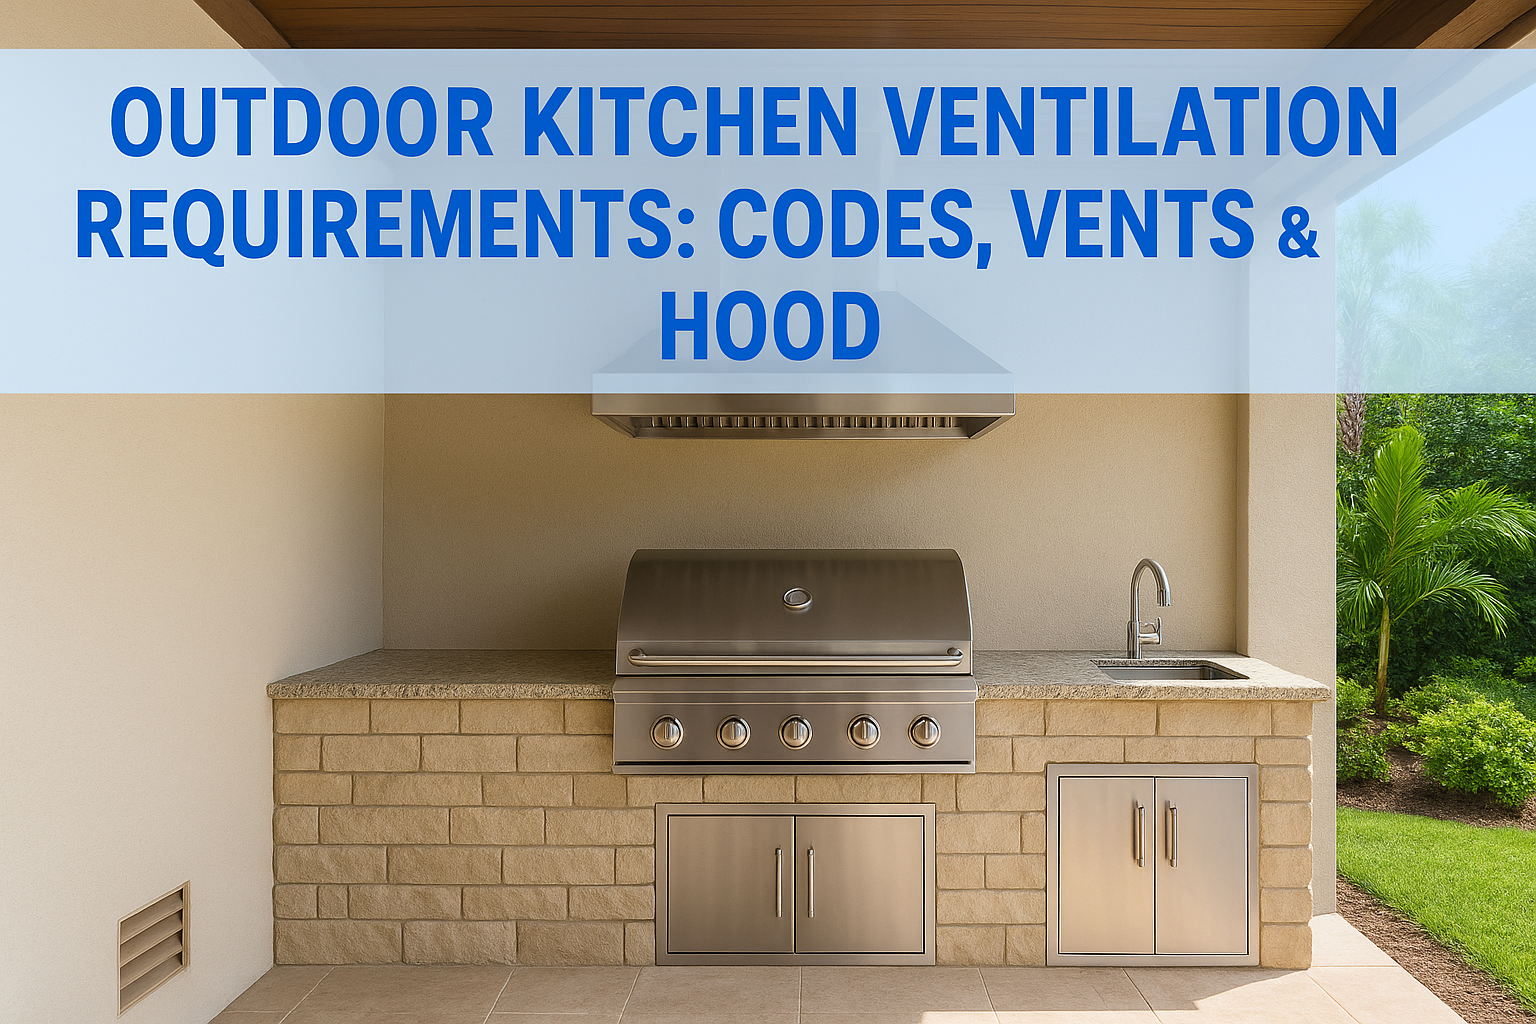
Plan your gas, water, and electrical runs before any masonry work starts, since retrofitting these lines after cabinets are built is costly and disruptive. For weather protection, a solid roof structure, either a pergola with polycarbonate roofing or a permanent concrete slab overhang, protects your appliances and keeps your kitchen usable year-round rather than only on dry days.
Step 5. Add comfort, lighting, and easy maintenance
The final part of learning how to design an outdoor kitchen is making sure the space stays comfortable to use and simple to clean after the build is complete. Comfort features and a basic maintenance plan are often the last things people think about, but they directly affect how often you actually use the kitchen once it's built.
Design for lighting and seating
Task lighting directly above your grill and prep counter is non-negotiable if you cook after dark. Use [weatherproof LED strip lights](https://konzeptgarden.com/blogs/news/outdoor-kitchen-lighting-ideas) or recessed downlights under your pergola or overhang, positioned so they illuminate your work surfaces without glare. For seating, leave at least 90 cm of clearance between your counter edge and any bar stools so guests can move freely without crowding your workspace.
Place task lighting low and directed at your counters, not just overhead ambient lights that create shadows where you need to see clearly.
Plan for easy cleaning from day one
Smooth, sealed countertop surfaces clean faster than textured ones, so factor that into your material choice at the design stage. Build in a sloped drain near your sink and prep area so water runs off rather than pooling. Schedule a quick wipe-down of your grill grates and countertops after each use, and do a full deep clean of your appliances and cabinetry every three months to prevent grease buildup and corrosion.
Bring it all together
Designing an outdoor kitchen comes down to making decisions in the right order. Budget and site conditions set your boundaries, your layout locks in your workflow, and material choices determine how long everything holds up in Malaysia's climate. When you work through each step with your actual space and habits in mind, you end up with a kitchen that gets used regularly, not one that looks good in photos and sits idle the rest of the year.
Knowing how to design an outdoor kitchen is one thing; executing it well in a tropical climate takes real experience with local conditions, materials, and building requirements. If you want a design that fits your garden and your life without the guesswork, talk to a team that has built these spaces before. Get a free consultation from the Konzept Garden team and turn your outdoor kitchen idea into something you'll actually cook in.
