
A garden path does more than connect point A to point B, it shapes how you move through and experience your outdoor space. DIY concrete stepping stones give you full control over that experience, from the shape and texture to the spacing and layout. They're also one of the most budget-friendly hardscape projects you can tackle in a weekend.
At Konzept Garden, we design and build complete garden landscapes across Malaysia, and stepping stone paths are a feature we regularly incorporate into our projects. We know what works in Malaysian soil and climate conditions, and we've put together this guide so you can get solid, lasting results on your own, no guesswork involved.
Below, you'll find a complete material list, step-by-step instructions, and practical tips to help you create stepping stones that actually hold up. Whether you're building a short path through a planter bed or a full walkway across your garden, this guide covers the process from mixing to placing.
What you need before you start
Gathering everything before you start mixing saves you from stopping mid-project with wet concrete sitting in the mold. For diy concrete stepping stones, you need a short list of materials and tools, most of which you can find at any local hardware or home improvement store. Getting organized upfront also helps you estimate your total cost and avoid unnecessary trips out once you've started.
Materials you'll need
The core ingredients are straightforward. Bagged concrete mix (a pre-mixed product works well for small batches) is your base. You'll also need water, a release agent (vegetable oil or cooking spray works fine), and optional additives like concrete colorant or decorative aggregates for texture and visual interest. One standard 20kg bag typically produces two to three medium-sized stones, so plan your quantities around the number of stones your path requires.
Buy slightly more concrete mix than you think you need. Running short mid-pour forces you to remix a fresh batch and risks inconsistent stone strength.
Here's a quick materials checklist:
- Bagged concrete mix (one 20kg bag covers roughly 2-3 medium stones)
- Water
- Cooking spray or petroleum jelly (mold release)
- Concrete pigment or oxide powder (optional)
- Pebbles, glass pieces, or pressed leaves for surface decoration (optional)
Tools you'll need
You don't need expensive equipment for this project. A plastic mixing tub or wheelbarrow handles the mixing, and a trowel or stiff mixing stick works for stirring and smoothing the surface. You'll also want your chosen molds, a flat work surface, and plastic sheeting to protect the ground while you pour.
| Tool | Purpose |
|---|---|
| Mixing tub or wheelbarrow | Mix and hold the concrete |
| Trowel or mixing stick | Stir and smooth the surface |
| Mold (tray, cake pan, etc.) | Shape each stone |
| Plastic sheeting | Protect your work area |
| Rubber gloves | Protect your hands from the mix |
Step 1. Plan your path and choose a mold
Before you mix anything, walk your intended path and mark where each stone will sit. Use stakes or spray chalk to mark the positions, then step through the layout naturally. Your foot placement tells you exactly where each stone needs to land, which prevents awkward spacing once the concrete is set.
Map out your spacing
A comfortable stride for most adults lands between 45 and 60 centimeters from the center of one stone to the center of the next. Measure this distance before you commit to a stone size, because undersized stones placed too far apart create a path that feels unstable and looks disconnected.
Lay cardboard cutouts at your marked positions and walk through them before pouring a single stone. Adjust spacing until the path feels natural underfoot.
Pick your mold
The mold you choose determines the final shape of your diy concrete stepping stones, so pick something that fits your garden style. Circular cake pans give you clean round stones, rectangular storage lids create a more formal look, and old tires or wooden frames let you make larger, irregular pieces.
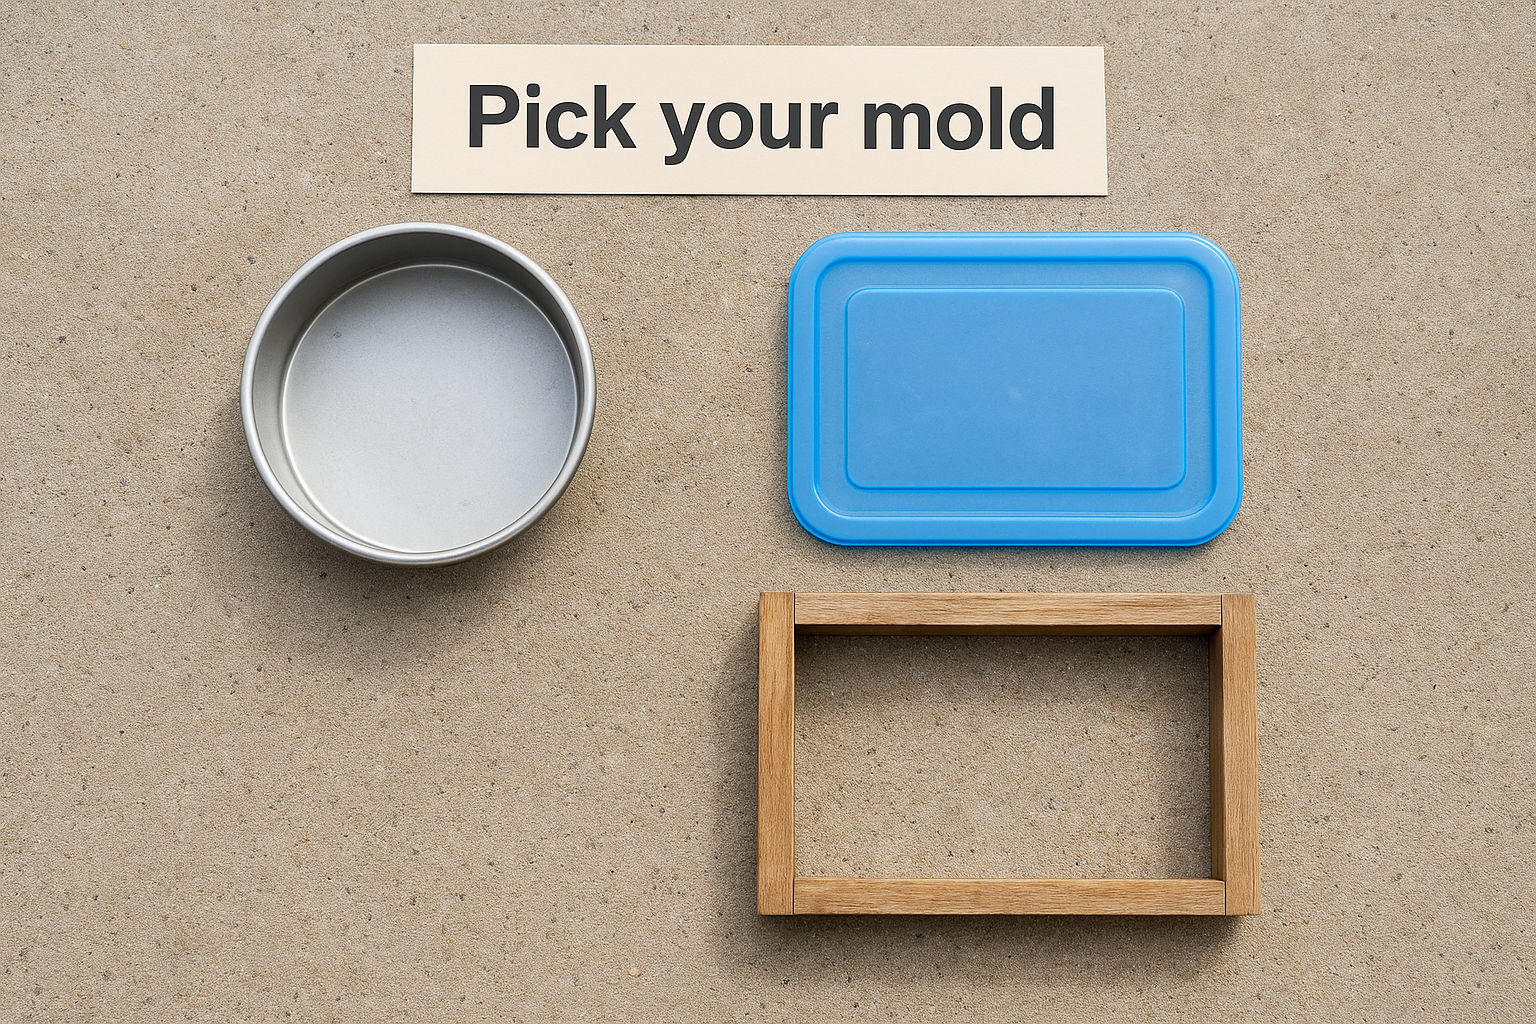
| Mold option | Shape | Best for |
|---|---|---|
| Cake pan | Round | Informal, curved paths |
| Plastic storage lid | Square/rectangle | Formal, straight paths |
| Wooden frame | Custom | Large or irregular stones |
Step 2. Mix and pour the concrete
Once your molds are prepped and lightly coated with release agent, you're ready to mix. Getting the water ratio right is the single most important part of this step, and it's where most first-timers make a mistake.
Get the consistency right
Your concrete mix for diy concrete stepping stones should resemble thick oatmeal. It holds its shape when you press a handful together, but doesn't pour or run freely. Add water slowly and in small amounts, stirring between each addition. Most 20kg bags need roughly 2.5 to 3 liters of water, but always follow the bag's instructions and adjust based on how the mix looks.
If your mix runs or pools in the mold, it has too much water and the finished stone will be weak and likely to crack under foot traffic.
Pour and remove air pockets
Pour the mix into your prepared mold in one steady motion, filling it to the rim. Tap the sides of the mold firmly with your hand or a rubber mallet to bring trapped air bubbles to the surface. Then use a trowel to smooth the top flat, since this face becomes the underside of the stone once you flip it out after curing.
Step 3. Add texture, color, and details
This step is where your diy concrete stepping stones go from plain gray slabs to something that actually fits your garden. You have a window of roughly 15 to 30 minutes after pouring before the surface starts to set, so work with purpose.
Add color to the mix
Concrete oxide powder is the most reliable way to add color. Mix it directly into your dry concrete before adding water, using about 1 to 2 tablespoons per 20kg bag for a subtle tint, or up to 4 tablespoons for a deeper tone. Earth tones like terracotta, charcoal, and sand brown tend to work best in garden settings and hold their color well over time.
Test your chosen color on a small sample batch first. Wet concrete always looks darker than the cured finish, so don't panic if the shade looks intense right after pouring.
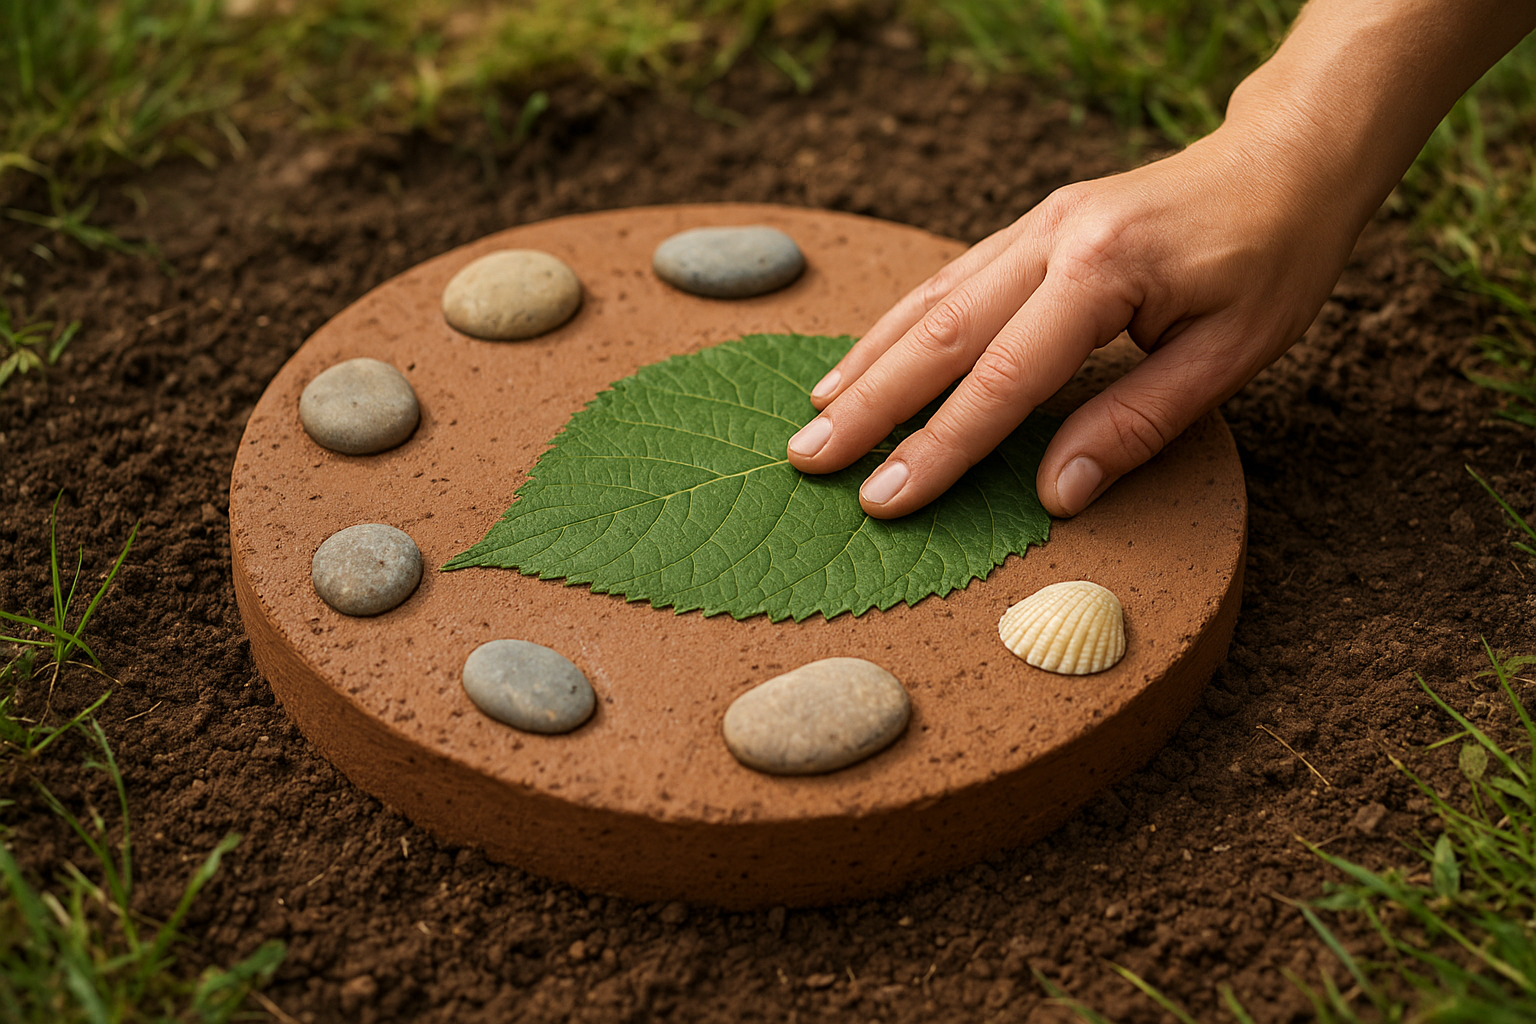
Press in surface details
Once the stone surface firms up slightly but still feels soft to the touch, press your decorative elements in gently. Smooth river pebbles, seashells, or mosaic tiles all work well. Lay leaves flat onto the surface and press lightly for a natural imprint, then peel them off after 10 minutes. Keep your design balanced and spaced evenly so the stone looks intentional rather than cluttered.
Step 4. Cure, unmold, and lay the stones
Your diy concrete stepping stones need time to reach full strength before you handle or place them. Skipping or shortening the curing period is the most common reason homemade stones crack within the first season.
Unmold without cracking
Keep each stone in its mold for at least 24 to 48 hours, and mist the surface with water every few hours while it sits covered loosely with plastic sheeting. The plastic slows moisture loss and gives the concrete more time to cure evenly throughout.
Concrete gains most of its strength between days 3 and 7, so continue misting the unmolded stones daily and keep them shaded for a full week before placing them in the path.
Once the stone pulls away from the mold cleanly, flip it face-up and let it finish curing on a flat surface. If it sticks, flex the mold sides gently and wait a few more hours before trying again.
Set the stones in place
Dig out 5 to 8 centimeters of soil at each marked position and fill the base with compacted sand. Check the surface with a small level after placing each stone so it sits flush and doesn't rock underfoot.
Fill gaps around each stone with fine gravel or soil. This locks the stone in position and stops it from shifting during heavy rain or over time as the ground settles.

Ready to build your garden path
Making your own diy concrete stepping stones takes one weekend and a short list of materials, but the results last for years. Each step in this guide builds on the last, from spacing your path correctly and choosing the right mold, to mixing concrete at the right consistency and curing each stone fully before you place it. Follow the sequence and you'll avoid the common mistakes that cause homemade stones to crack or shift early.
Your garden path shapes how people move through and experience your outdoor space. A well-laid stepping stone path adds structure, character, and purpose to any garden, whether you're working with a small planter bed or a larger yard. If you want to take your outdoor space beyond a simple path, talk to our landscape design team to explore what a professionally designed garden could look like for your property.

