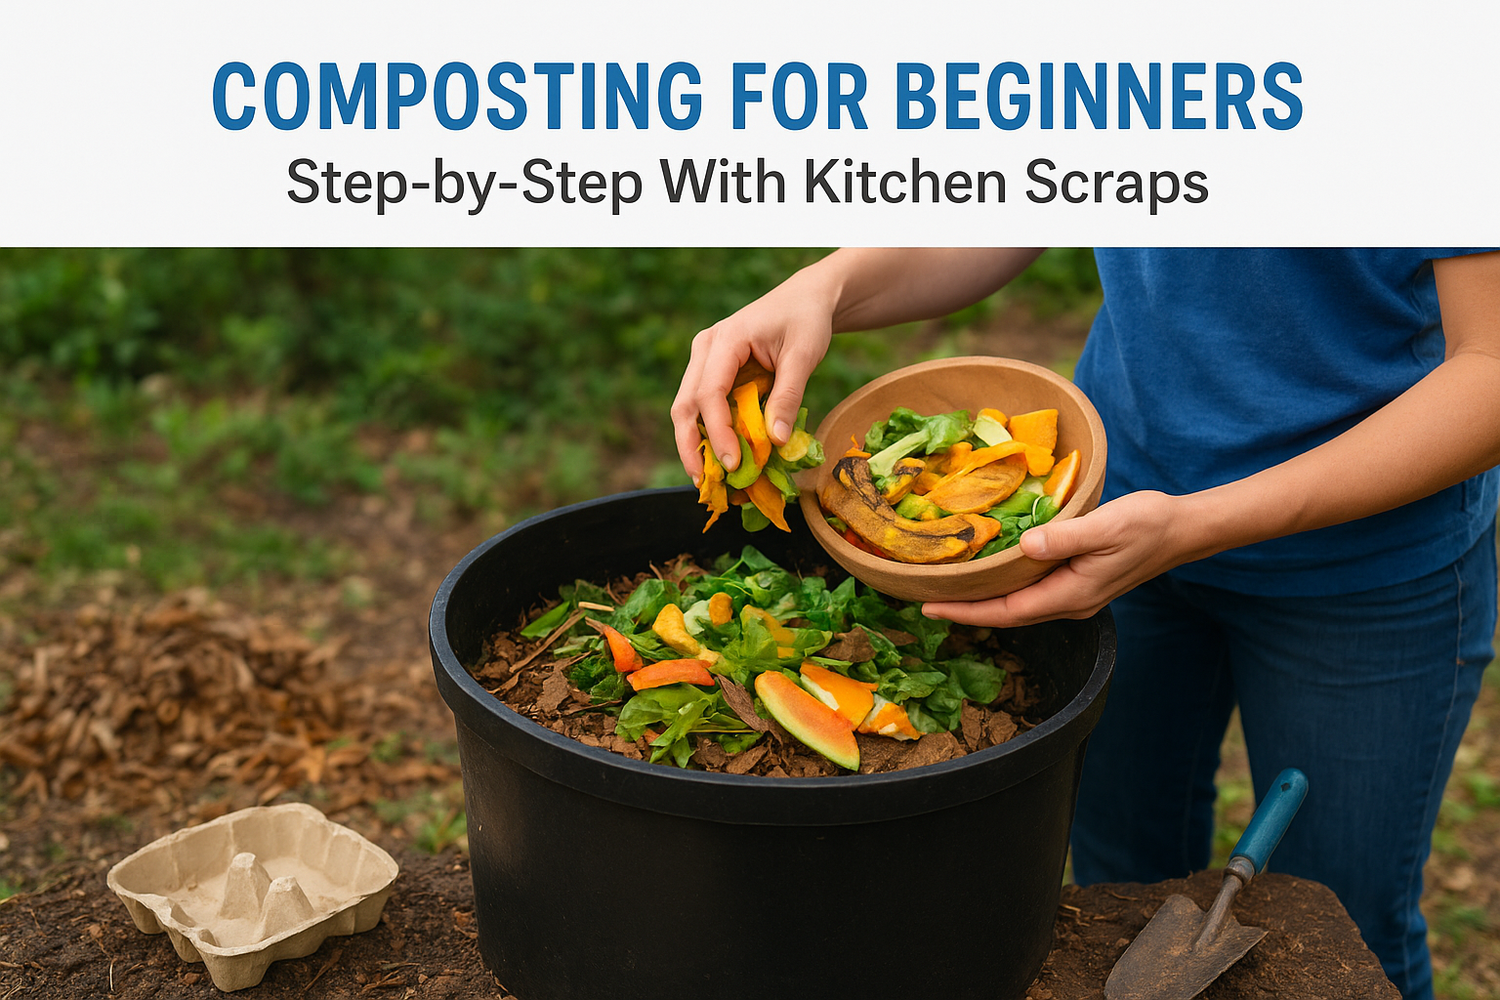
That banana peel you tossed in the trash this morning? It could have fed your garden instead. Composting for beginners sounds intimidating at first, all that talk about carbon ratios and decomposition, but the process is surprisingly straightforward once you understand the basics. And the payoff is huge: nutrient-rich soil that your plants actually crave, produced right from your kitchen scraps.
At Konzept Garden, we design and build gardens across Malaysia that are meant to thrive long after the last stone is laid. Through hundreds of residential and commercial projects, our team has seen firsthand how healthy soil transforms a landscape. Compost is one of the simplest, most effective ways to get there, and you don't need a sprawling yard or special equipment to start.
This guide walks you through the entire process step by step: choosing a bin, balancing your greens and browns, knowing what to toss in (and what to keep out), and troubleshooting common problems. Whether you're working with a small balcony garden or a full backyard, you'll have everything you need to turn kitchen waste into garden gold.
What composting is and what you need to start
Composting is the controlled breakdown of organic matter into a dark, crumbly material called humus. Microorganisms, worms, and fungi do most of the work; your job is to give them the right conditions. When you supply carbon, nitrogen, moisture, and oxygen in the correct proportions, these organisms multiply rapidly and break down your kitchen scraps and garden waste in weeks rather than years. The result is a soil amendment that improves drainage, feeds plants slowly, and builds long-term soil health far better than most store-bought fertilizers.
How composting actually works
Decomposition happens in two stages. First, bacteria and fungi colonize your pile and generate heat as they consume organic material. A hot, active pile can reach 55 to 65°C in the center, which kills most weed seeds and pathogens. Second, once the initial feeding slows, earthworms and slower decomposers move in and refine the material into finished compost with a crumbly, soil-like texture.
A healthy compost pile should smell like fresh earth, not like rot. If yours smells bad, the balance of materials or moisture is off, and the fix is usually simple.
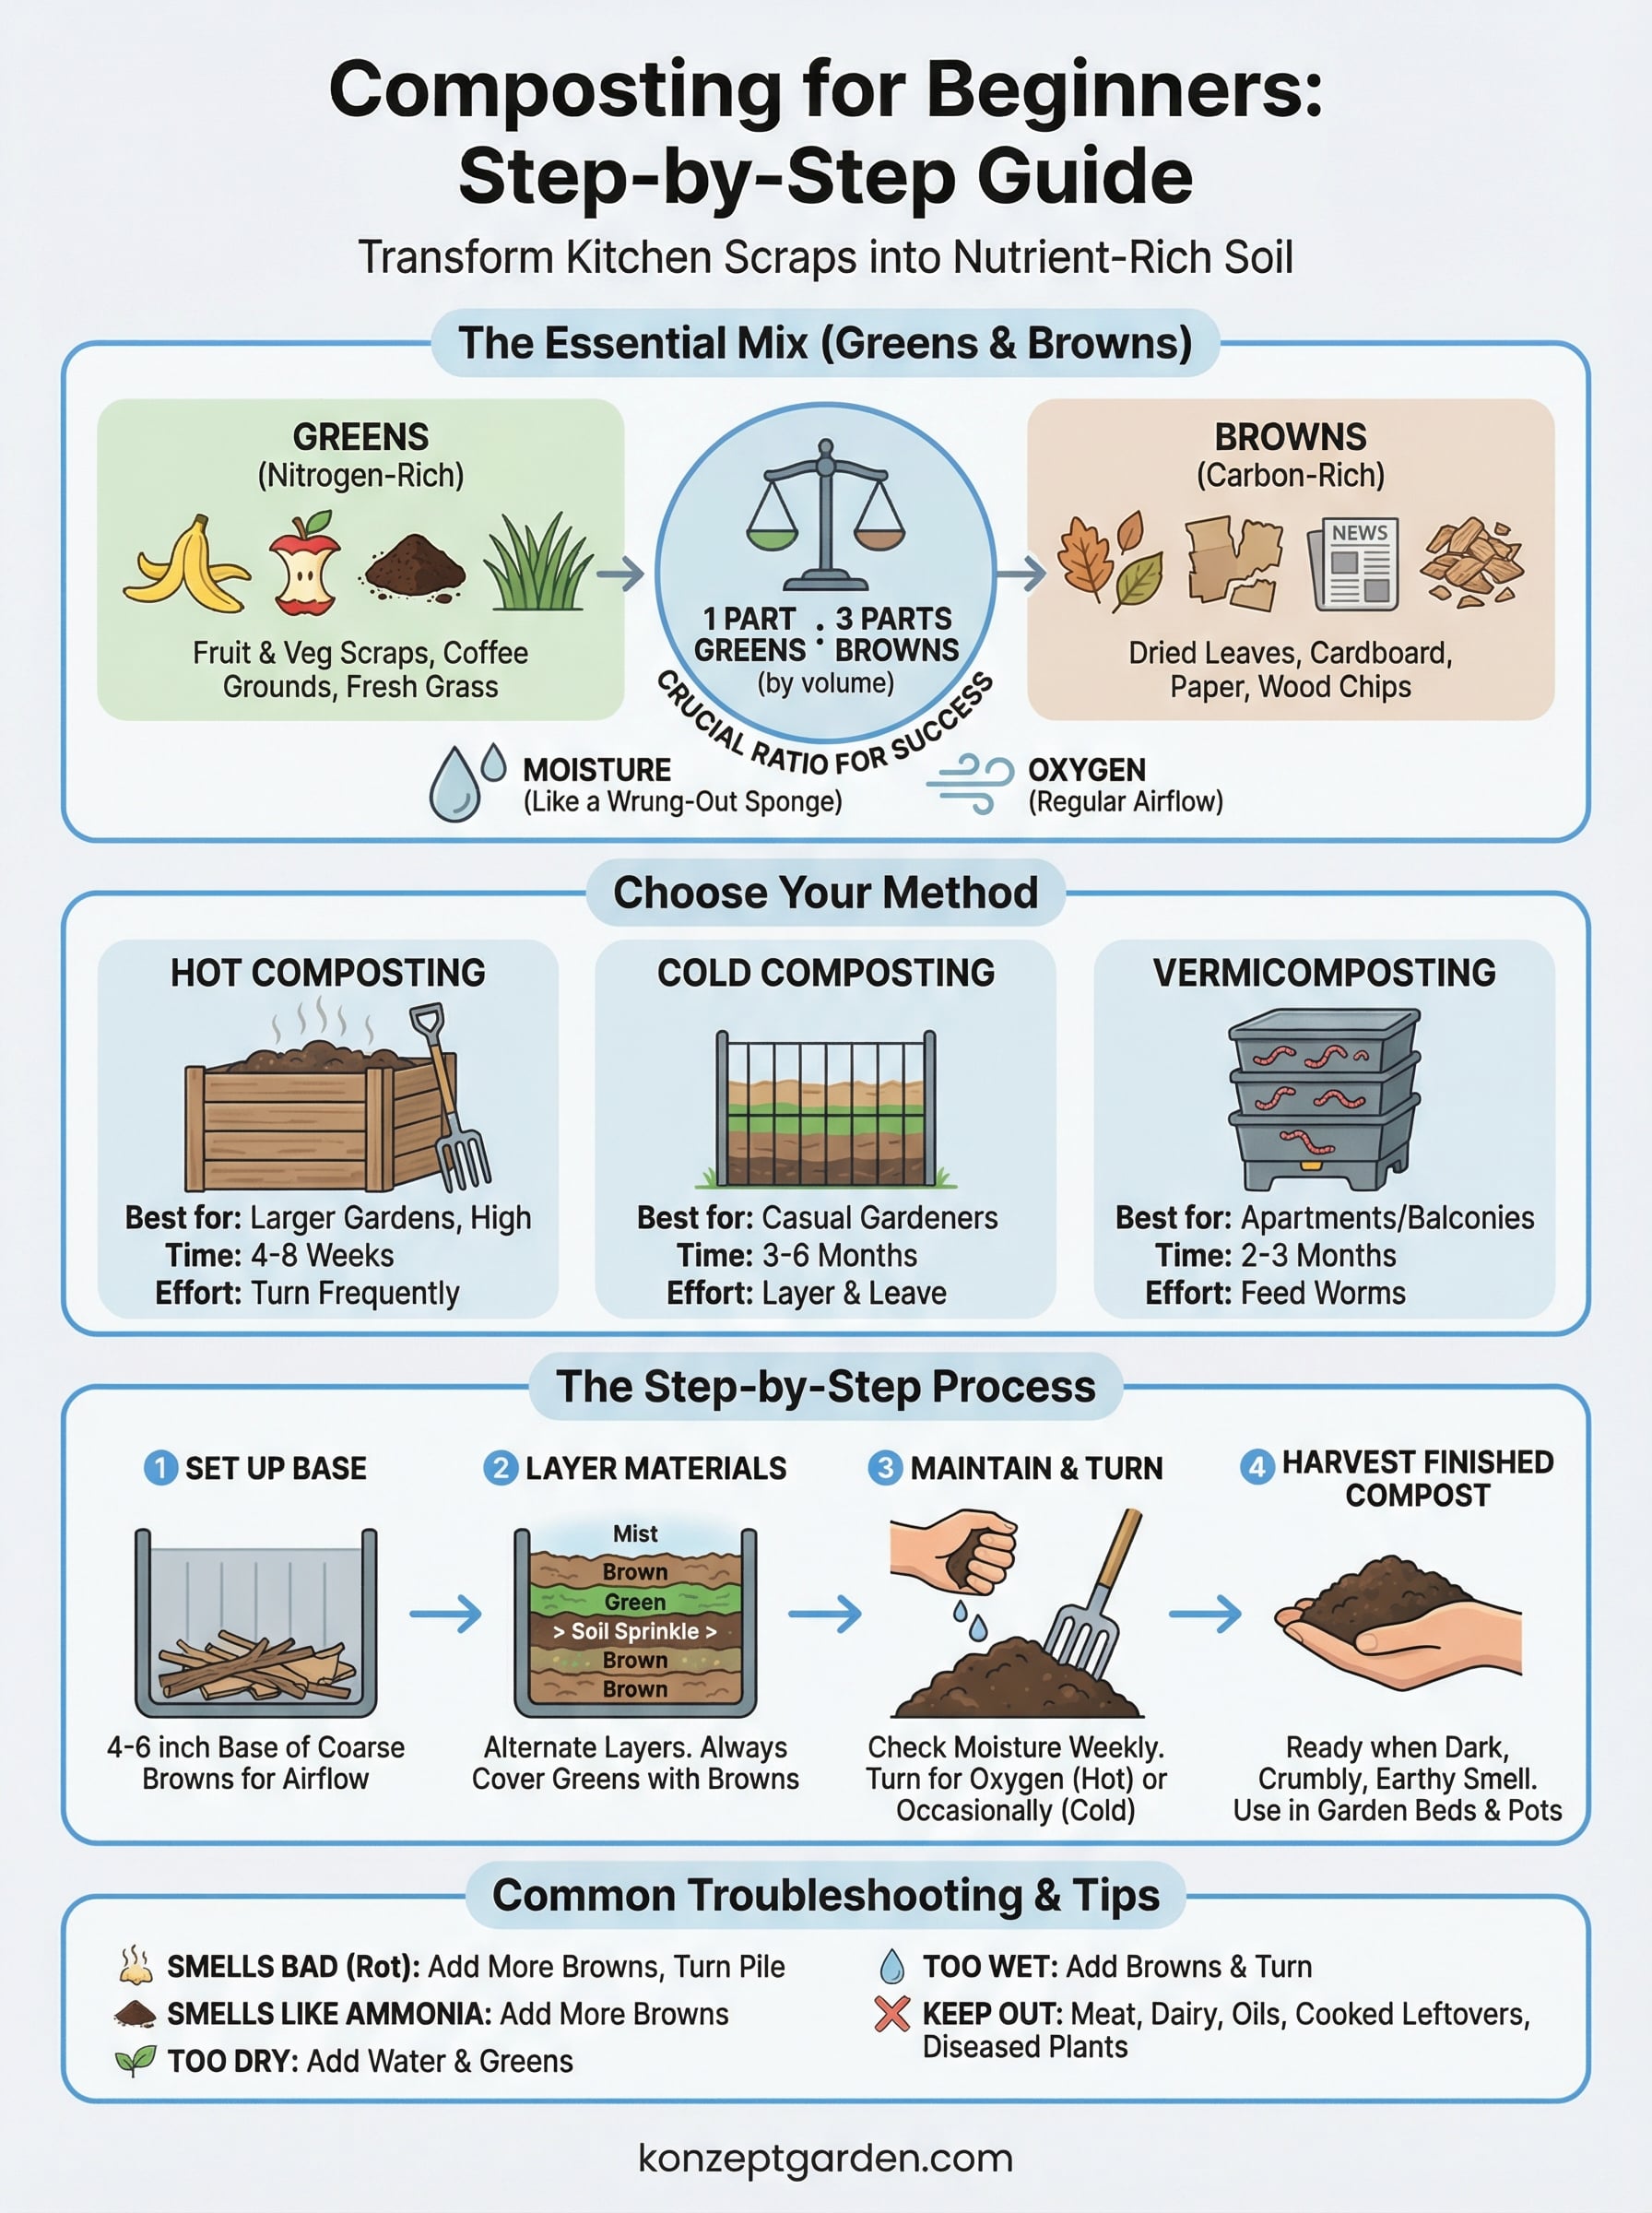
The two categories of material you work with are greens and browns. Greens are nitrogen-rich items: fruit peels, vegetable scraps, coffee grounds, tea bags, and fresh grass clippings. Browns are carbon-rich items: dried leaves, torn cardboard, paper bags, and wood chips. A rough ratio of 1 part greens to 3 parts browns by volume gives the microorganisms what they need without producing a soggy, odorous pile. For composting for beginners, memorizing this single ratio saves most of the common headaches people run into early on.
What you need to get started
You don't need expensive equipment to begin. A few basic items are all it takes to convert kitchen waste into a useful soil amendment, and most of them you likely already have.
| Item | Purpose | Budget Option |
|---|---|---|
| Compost bin or enclosed area | Contains materials and retains heat | Wire mesh cylinder or wooden pallet enclosure |
| Browns (carbon materials) | Balances nitrogen and adds structure | Dried leaves, torn cardboard, newspaper |
| Greens (nitrogen materials) | Feeds microorganisms actively | Fruit peels, vegetable scraps, coffee grounds |
| Garden fork or long stick | Aerates the pile | Any old rake handle or sturdy branch |
| Watering can or spray bottle | Adjusts moisture levels | Any container that distributes water evenly |
Choose a spot with partial shade for your bin. In Malaysia's climate, direct full-sun exposure dries the pile out quickly and stalls decomposition. A shaded corner of your garden, a covered utility area, or even a shaded section of a balcony all work well. Also confirm the location has good drainage so that heavy rain doesn't flood the bin and push conditions into a low-oxygen state, which produces bad odors and slows the whole process.
Step 1. Pick the right composting method for your space
Your available space determines which composting method will actually work for you. Before buying any equipment, honestly assess what you're working with: floor space, sun exposure, and how much kitchen waste your household generates each week. Picking the wrong system leads to a neglected bin and abandoned effort, so matching the method to your situation is the single most important decision in composting for beginners.
Three methods that cover most situations
The three most practical options for home composters are hot composting, cold composting, and vermicomposting (worm composting). Each suits a different living situation and level of ongoing effort, so pick one based on your space and how much time you can realistically give it each week.

| Method | Best for | Space needed | Time to compost |
|---|---|---|---|
| Hot composting | Larger gardens, high waste volume | 1 sq meter minimum | 4 to 8 weeks |
| Cold composting | Casual gardeners, low maintenance | 0.5 sq meter minimum | 3 to 6 months |
| Vermicomposting | Apartments, balconies, indoor use | A single bin (45x60cm) | 2 to 3 months |
If you live in a landed property in Malaysia, hot composting delivers the fastest results. If you're in a condo or apartment, a worm bin fits neatly under the kitchen counter.
Hot composting requires turning your pile every few days and maintaining a volume of at least 1 cubic meter to generate and hold enough heat to speed decomposition. Cold composting is far more forgiving: you add materials gradually and let the pile break down on its own schedule without regular turning. Vermicomposting uses red wiggler worms (Eisenia fetida) to process food scraps inside a contained bin, making it the most space-efficient choice and the cleanest option for indoor setups.
Pick vermicomposting if your outdoor space is limited. Pick hot or cold composting if you have a garden bed or shared outdoor area where you also generate leaf litter and garden trimmings alongside your kitchen scraps.
Step 2. Set up your bin and start with the right mix
Once you've chosen your method, setting up the bin correctly from day one saves you a lot of troubleshooting later. Your first layer sets the foundation for everything that follows, and skipping it is the most common mistake beginners make. Place a 4 to 6 inch base of coarse browns like wood chips or torn cardboard directly at the bottom of your bin before adding anything else. This layer lets air circulate underneath the pile from the start.
Layer your materials correctly
Composting for beginners gets much easier when you think of the bin as a layered structure rather than a random pile. After your base layer, alternate between greens and browns in roughly a 3:1 ratio by volume (three parts browns to one part greens). Each time you add kitchen scraps, cover them immediately with a layer of dry browns. This prevents odors, deters pests, and keeps the moisture level balanced.
Covering fresh kitchen scraps with browns every single time is the single habit that keeps a compost bin clean and manageable.
Here's a simple layering template to follow each time you add to your bin:
- Add your kitchen scraps (greens) to the top of the pile
- Sprinkle a light handful of soil or finished compost over the scraps
- Cover everything with a 3x volume of browns such as dried leaves or torn cardboard
- Lightly mist the top layer if it looks completely dry
What to add and what to keep out
Fruit and vegetable peels, coffee grounds, crushed eggshells, and tea bags all belong in your bin and break down quickly. Keep out meat, dairy, oily foods, and cooked leftovers because these attract rodents and produce strong odors that signal anaerobic conditions. In Malaysia's humid climate, diseased plant material is also worth excluding since pathogens can survive in a cold pile that never heats up enough to neutralize them. Citrus peels and onion scraps are fine in small amounts, but adding large quantities slows decomposition slightly.
Step 3. Keep it active with moisture, air, and browns
A compost pile that sits untouched quickly stalls. The microorganisms doing the work need three things consistently: the right moisture level, regular oxygen, and enough carbon material (browns) to balance the nitrogen from your kitchen scraps. Neglect any one of these and decomposition slows to almost nothing, even in Malaysia's warm and humid climate where conditions are otherwise ideal for fast breakdown.
Check and adjust moisture regularly
Your pile should feel like a wrung-out sponge when you squeeze a handful from the center: damp, but not dripping. If it dries out, the bacteria die off and activity stops entirely. If it gets too wet, you push conditions into an oxygen-poor state that produces foul odors and attracts pests. Check moisture every three to four days by grabbing a handful from the middle of the pile and squeezing it firmly.
If your pile smells like ammonia, add more browns immediately. If it smells like rot, add browns and turn the pile to push in fresh air.
Use this quick moisture check each time you inspect your bin:
- Too dry: No moisture appears when you squeeze a handful. Add water with a watering can and mix in fresh greens.
- Just right: A few drops appear when squeezed. No action needed.
- Too wet: Water streams out easily. Layer in dry cardboard or dried leaves and turn the pile right away.
Turn the pile to add oxygen
Turning pushes fresh oxygen into the center of the pile, where the most active microbial work happens. For hot composting, turn every three to five days using a garden fork. For cold composting, once every two to three weeks is enough to keep things moving. Each time you turn, pull material from the outer cooler edges into the center so every section gets exposure to heat and active microbes.
Composting for beginners often stalls at this step because turning feels like extra work. Keep a garden fork leaning directly against your bin so the habit stays easy to follow without any extra thought.
Step 4. Harvest finished compost and use it safely
Knowing when to harvest is one of the parts composting for beginners gets wrong most often. People either pull compost too early, before it's fully broken down, or they let a finished pile sit indefinitely without using it. Finished compost improves your garden soil when applied correctly, but unfinished compost can actually harm plants by pulling nitrogen away from their roots as it continues to break down.
How to tell when compost is ready
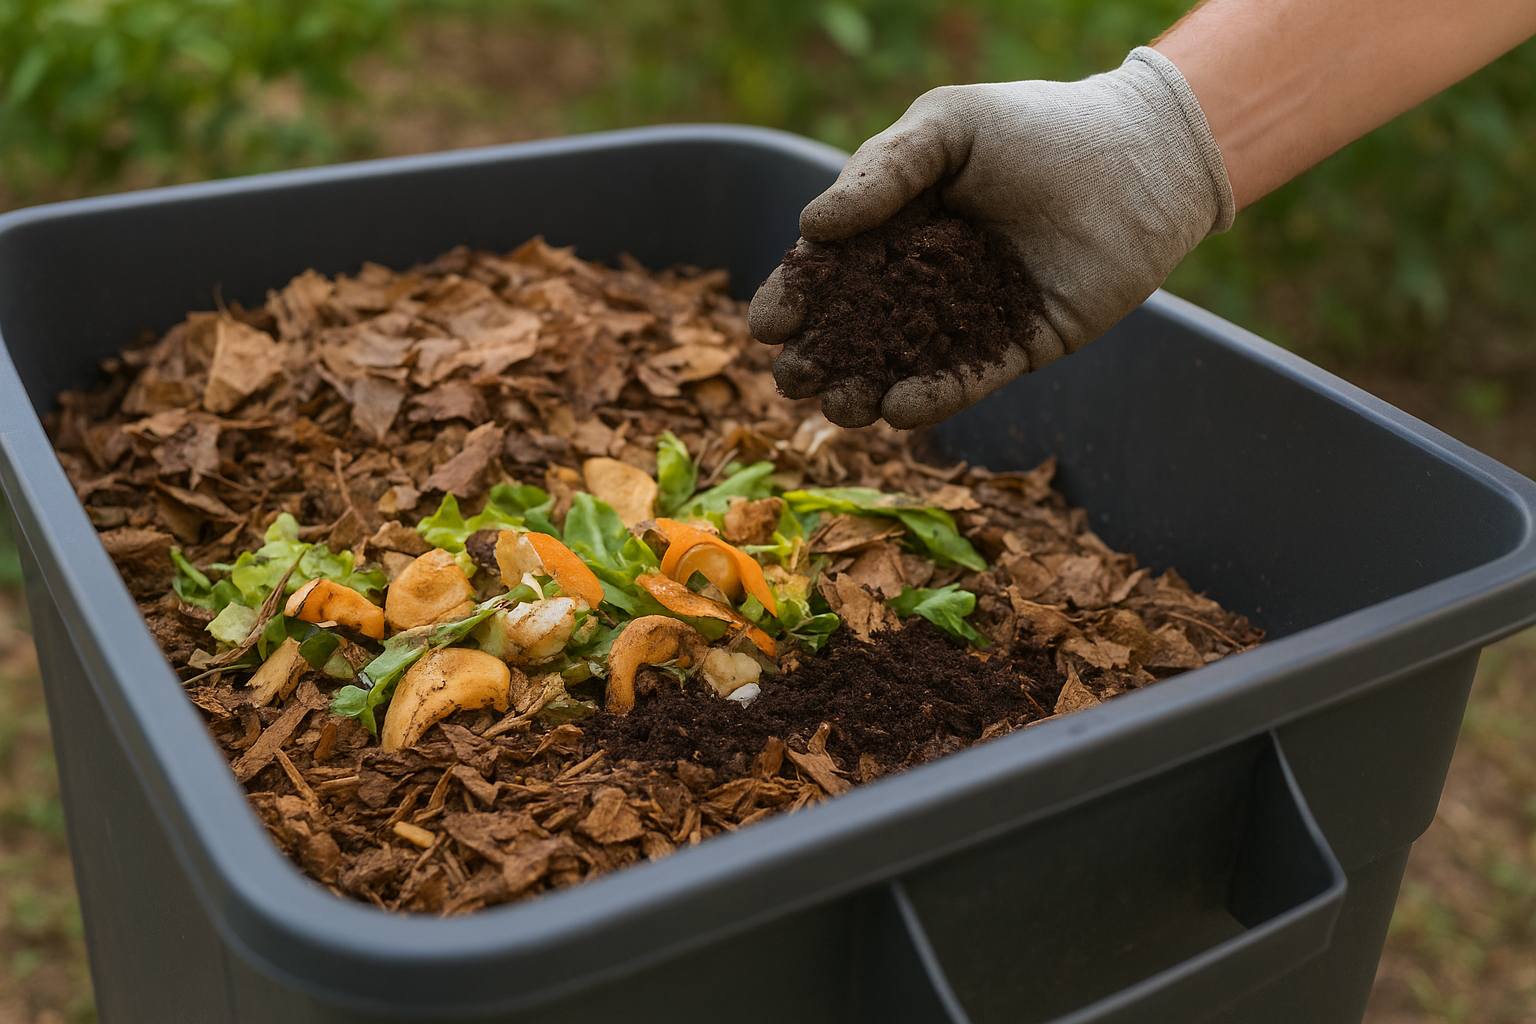
Finished compost looks, feels, and smells distinctly different from raw scraps. Dark, crumbly, and earthy are the three words that describe it accurately. You should not be able to identify the original materials anymore. No visible banana peels, no cardboard corners, no coffee grounds. The texture should hold together slightly when squeezed but break apart easily, similar to rich potting soil from a high-quality garden store.
If you can still identify what went into the pile, give it another two to four weeks before harvesting.
Use this checklist before pulling compost from the bin:
- Color is uniformly dark brown, not patchy or green
- Smell is clean and earthy, not sour or ammonia-like
- Texture is crumbly and consistent throughout
- Temperature in the center has dropped close to ambient (no more heat generation)
- No original materials remain identifiable
How to apply compost to your garden
Scoop finished compost from the bottom or center of your bin using a garden fork or trowel since that material finishes first. Spread a 2 to 3 inch layer over garden beds and mix it gently into the top 6 inches of soil. For potted plants, replace up to 30 percent of the potting mix with finished compost rather than applying it as a full replacement.
Avoid pressing fresh compost directly against plant stems or tree trunks since concentrated organic material sitting against bark traps moisture and promotes rot. Keep a small gap around the base of each plant and water lightly after application to help the nutrients move into the root zone.
Bring it to your garden
Composting for beginners comes down to three repeatable habits: balance your greens and browns, keep the pile moist but not soggy, and turn it regularly to let air in. Follow those three steps consistently and your kitchen scraps become a steady supply of nutrient-rich compost that feeds your soil season after season. You don't need a perfect setup or expensive equipment to get results worth using.
Your garden reflects the quality of what goes into the ground beneath it. Good compost builds the foundation that makes plants root deeply, resist stress, and look their best year-round. If you want to take your outdoor space further than what compost alone can do, our team at Konzept Garden designs and builds gardens built to thrive in Malaysia's climate. Talk to our garden design team and find out what your space can become.

