
One healthy parent plant can give you dozens of new ones, for free. If you've ever wondered how to propagate plants from cuttings, the process is far simpler than most people expect. A clean snip, the right medium, and a bit of patience are often all it takes to multiply your garden without spending a single ringgit at the nursery.
At Konzept Garden, we work with plants every day, selecting species for residential gardens, designing planting plans, and advising clients on what thrives in Malaysia's tropical climate. Propagation is one of the most practical skills we recommend to any garden owner. It lets you fill borders, replace aging plants, and share favorites with neighbors, all while deepening your understanding of how plants actually grow.
This guide walks you through both water and soil propagation methods, step by step. You'll learn which cuttings to take, when to take them, how to encourage strong root development, and which mistakes to sidestep along the way. Whether you're growing a single potted Monstera or stocking a full garden bed with tropical shrubs, the fundamentals covered here will set you up for success.
What you need before you start
Starting without the right setup wastes cuttings and time. Before you learn how to propagate plants from cuttings, gather your tools and pick a clean workspace. Working with sharp, sterile equipment from the beginning dramatically improves your success rate and protects both the parent plant and each cutting from infection.
Tools and materials
You don't need a greenhouse or specialized equipment to propagate successfully. A few basic items, kept clean and ready, cover nearly every situation you'll encounter. The most important tool is a sharp, clean cutting instrument, either pruning shears or a scalpel-style knife. Dull blades crush stem tissue rather than cutting it cleanly, which slows rooting and opens the door to rot.
Here's a straightforward checklist of what to prepare before your first cut:
- Sharp pruning shears or a clean knife (sterilized with isopropyl alcohol between cuts)
- Clear glass or jar for water propagation (clear sides let you monitor root development)
- Small pots or propagation trays (10-12 cm pots work well for most stem cuttings)
- Rooting hormone powder or gel (speeds root development on slower or woody species)
- Plastic bags or a humidity dome (to maintain moisture around cuttings in soil)
- Isopropyl alcohol or diluted bleach solution (for sterilizing tools between cuts)
- Labels and a marker (keeps track of species and cutting dates)
Sterilizing your cutting tool between each snip is one of the most overlooked steps in propagation, but it's one of the most effective ways to prevent disease from spreading through your batch.
Choosing the right growing medium
The medium you root your cuttings in matters more than most people realize. Water works well for soft, fleshy stems, but soil or a custom rooting mix consistently produces stronger, more established roots for woody and semi-woody plants. A good rooting mix drains fast and holds just enough moisture to encourage root development without staying waterlogged.
For soil propagation, avoid using regular potting mix straight from the bag. Standard potting mixes often retain too much water and can suffocate developing roots. Instead, combine equal parts perlite and coco coir, or blend coarse river sand into a peat-free potting medium at a 1:1 ratio. This gives cuttings the airy, moist environment their roots need to form quickly.
Plants that propagate well from cuttings
Not every plant responds equally well to cutting propagation. Some species root within two weeks; others take months or simply fail. Softwood and semi-hardwood cuttings from actively growing plants tend to root the fastest, especially in Malaysia's warm, humid climate.
The following plants are reliable choices if you're starting out:
| Plant | Cutting Type | Rooting Method |
|---|---|---|
| Pothos | Softwood stem | Water or soil |
| Monstera | Node cutting | Water or soil |
| Hibiscus | Semi-hardwood | Soil with rooting hormone |
| Bougainvillea | Semi-hardwood | Soil with rooting hormone |
| Coleus | Softwood stem | Water or soil |
| Ixora | Semi-hardwood | Soil |
| Ficus | Softwood or semi-hardwood | Soil |
Tropical plants common in Malaysian gardens tend to root faster than temperate species because warmth accelerates cell division and root initiation. If you're working with a plant not listed here, check whether it propagates from stem, leaf, or root cuttings before making your first cut, as the method varies significantly between species.
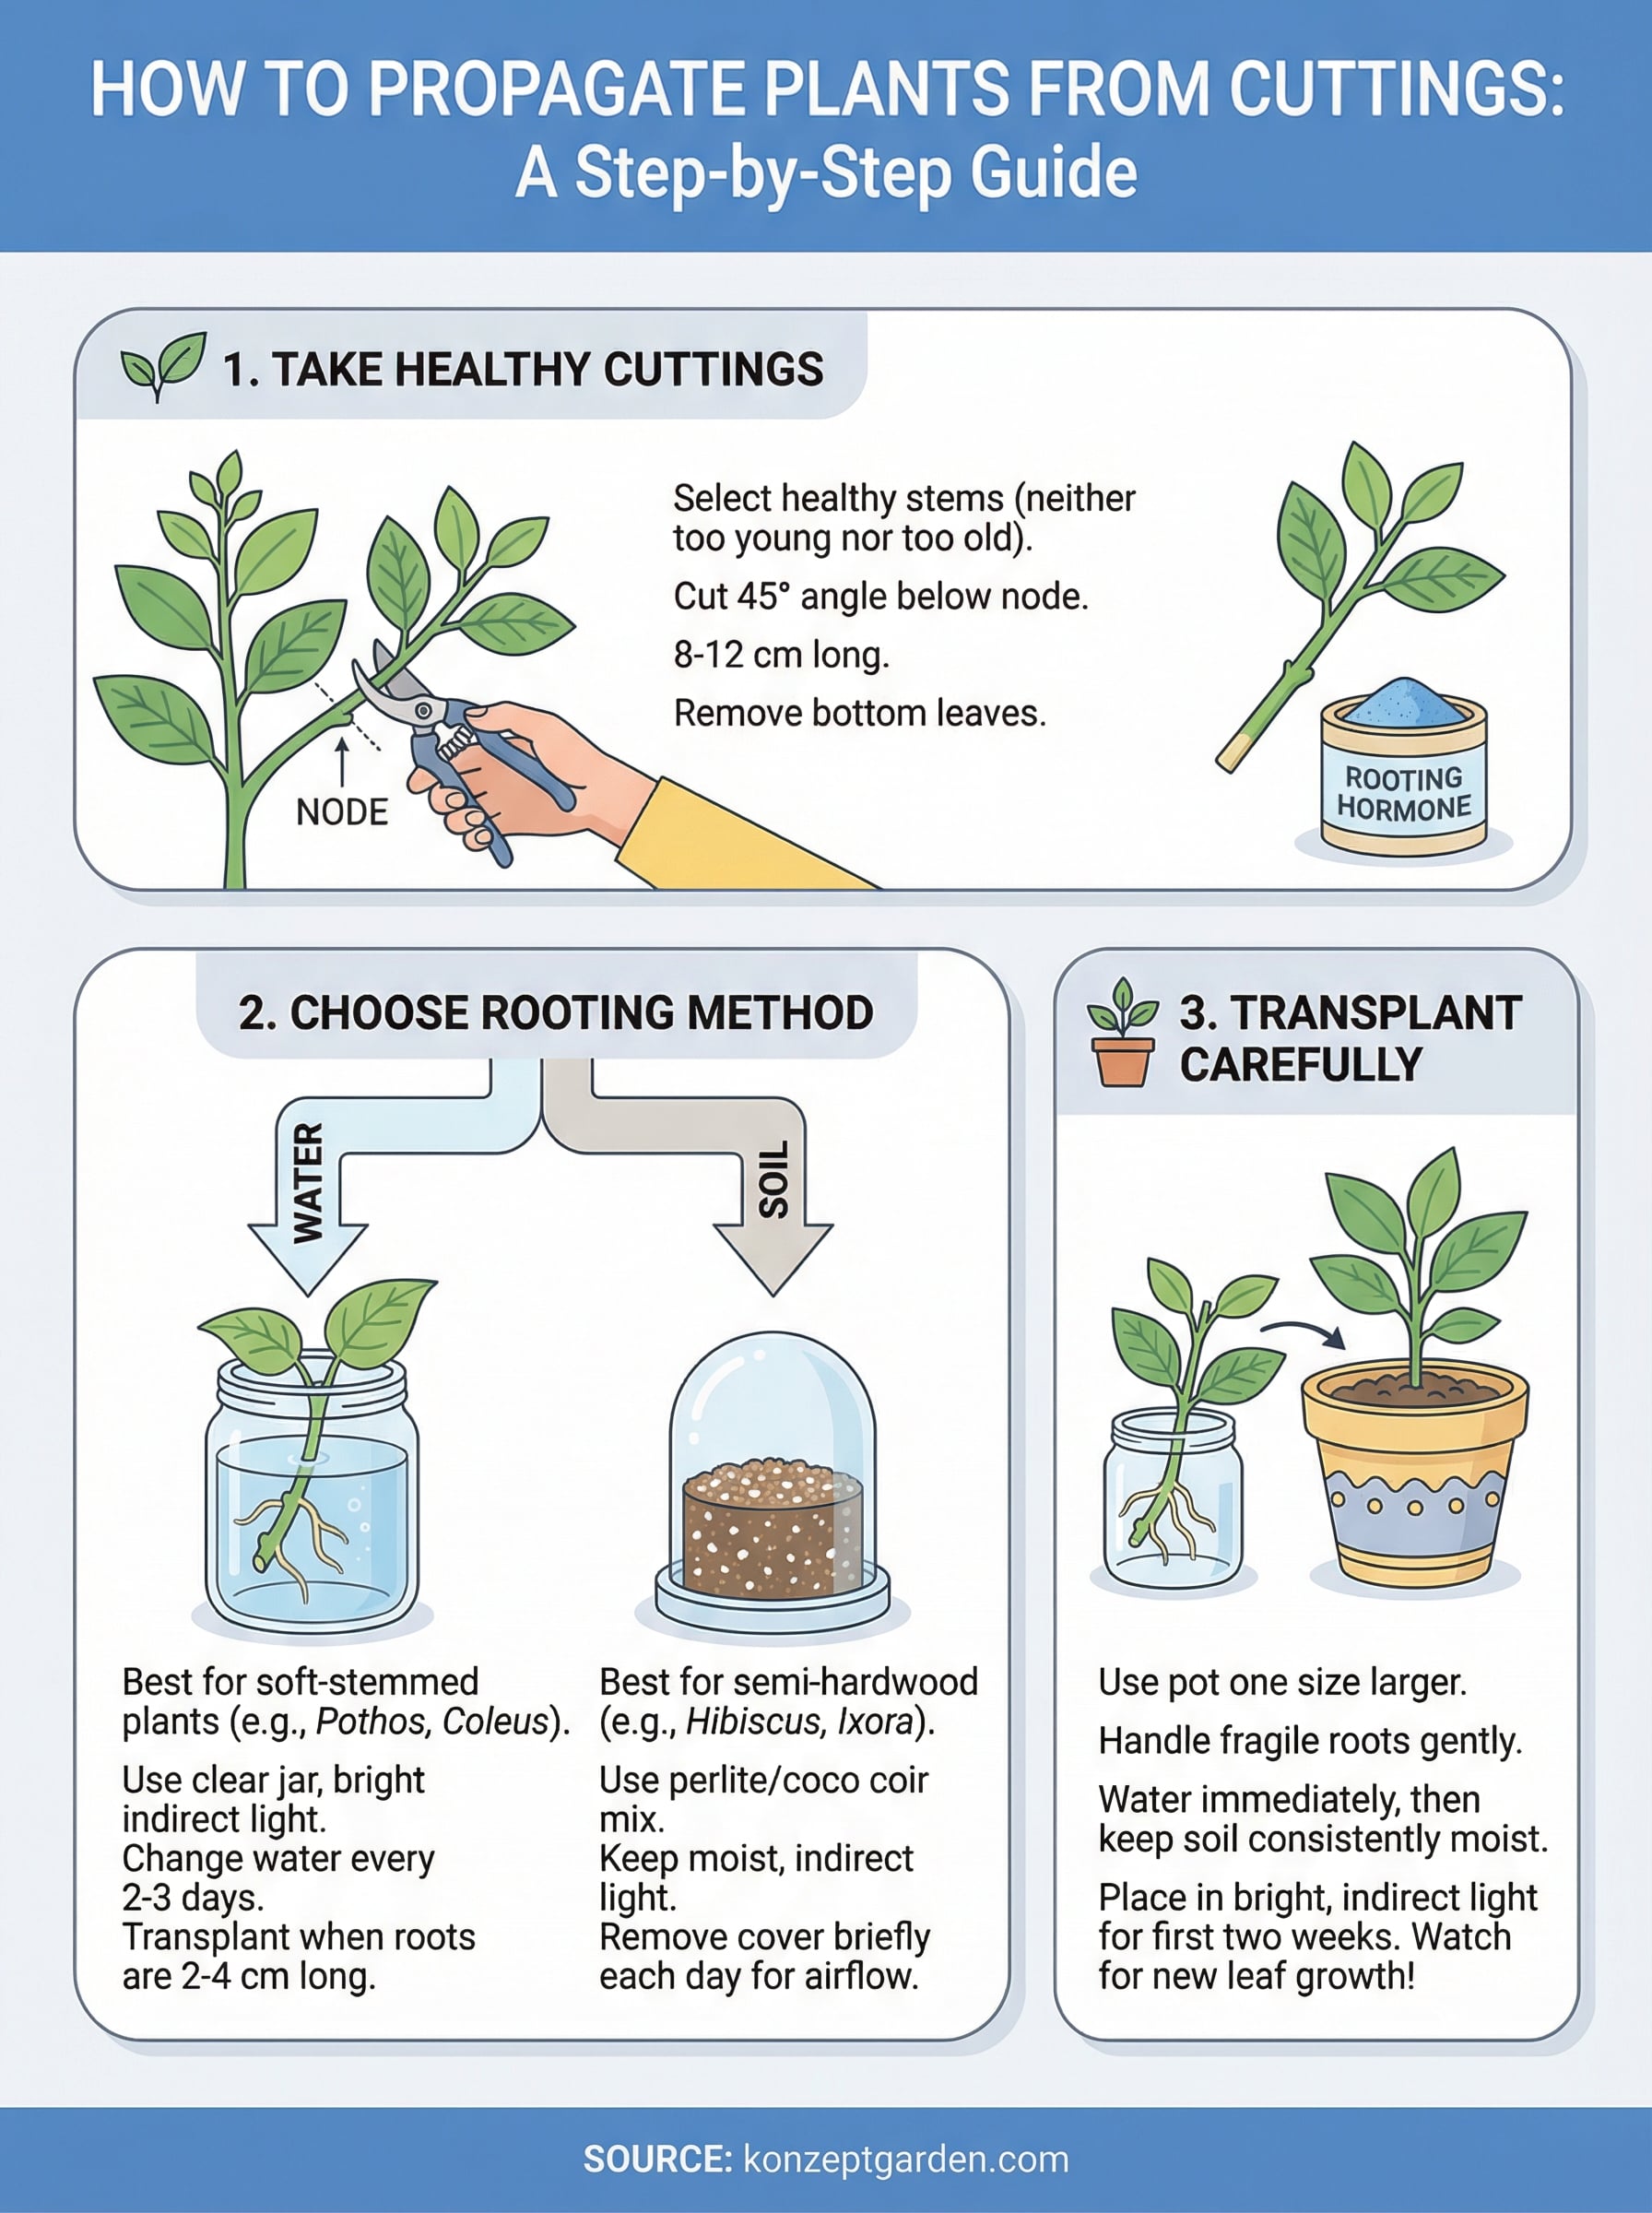
Step 1. Take healthy cuttings that root fast
The quality of your cutting determines most of what happens next. Healthy, actively growing stems root faster and resist disease better than weak or stressed ones. The first step in learning how to propagate plants from cuttings is selecting the right material, so before you make a single cut, spend a few minutes inspecting the parent plant carefully.
How to identify a good cutting
Look for stems that are neither too young nor too old. Stems that are very young and flexible often lack the cell structure needed to form roots quickly. Woody, mature stems take far longer to root without specialized treatment. The ideal cutting comes from new growth that has just started to firm up, typically near the tip of a healthy, disease-free branch.
Avoid any stem showing yellowing leaves, spots, pest damage, or stress. Your parent plant should have been watered normally in the days before you take cuttings. A drought-stressed plant produces cuttings that wilt and fail before roots ever develop.
The right cut: length, angle, and node placement
Once you've identified your stem, cut just below a node, which is the small bump or joint where a leaf attaches to the stem. This is where roots emerge most reliably. A cutting between 8 and 12 cm long gives you enough stem to anchor in your medium while keeping the cutting small enough to root without burning through its stored energy.
Cut at a 45-degree angle using your sterilized shears or knife. An angled cut increases the surface area in contact with your rooting medium and prevents water from pooling on the wound, which directly reduces the risk of rot.
Taking your cuttings early in the morning, when stems are fully hydrated from cooler overnight temperatures, gives you noticeably better results than cutting during midday heat.
Prepare the cutting before rooting
Remove all leaves from the bottom half of the stem, leaving only two or three leaves at the top. This reduces moisture loss through transpiration while the cutting has no roots to draw up water. If the remaining leaves are large, cut them in half to further reduce water stress. Dip the cut end in rooting hormone powder or gel, tap off any excess, and move straight to your chosen rooting method.
Step 2. Root cuttings in water
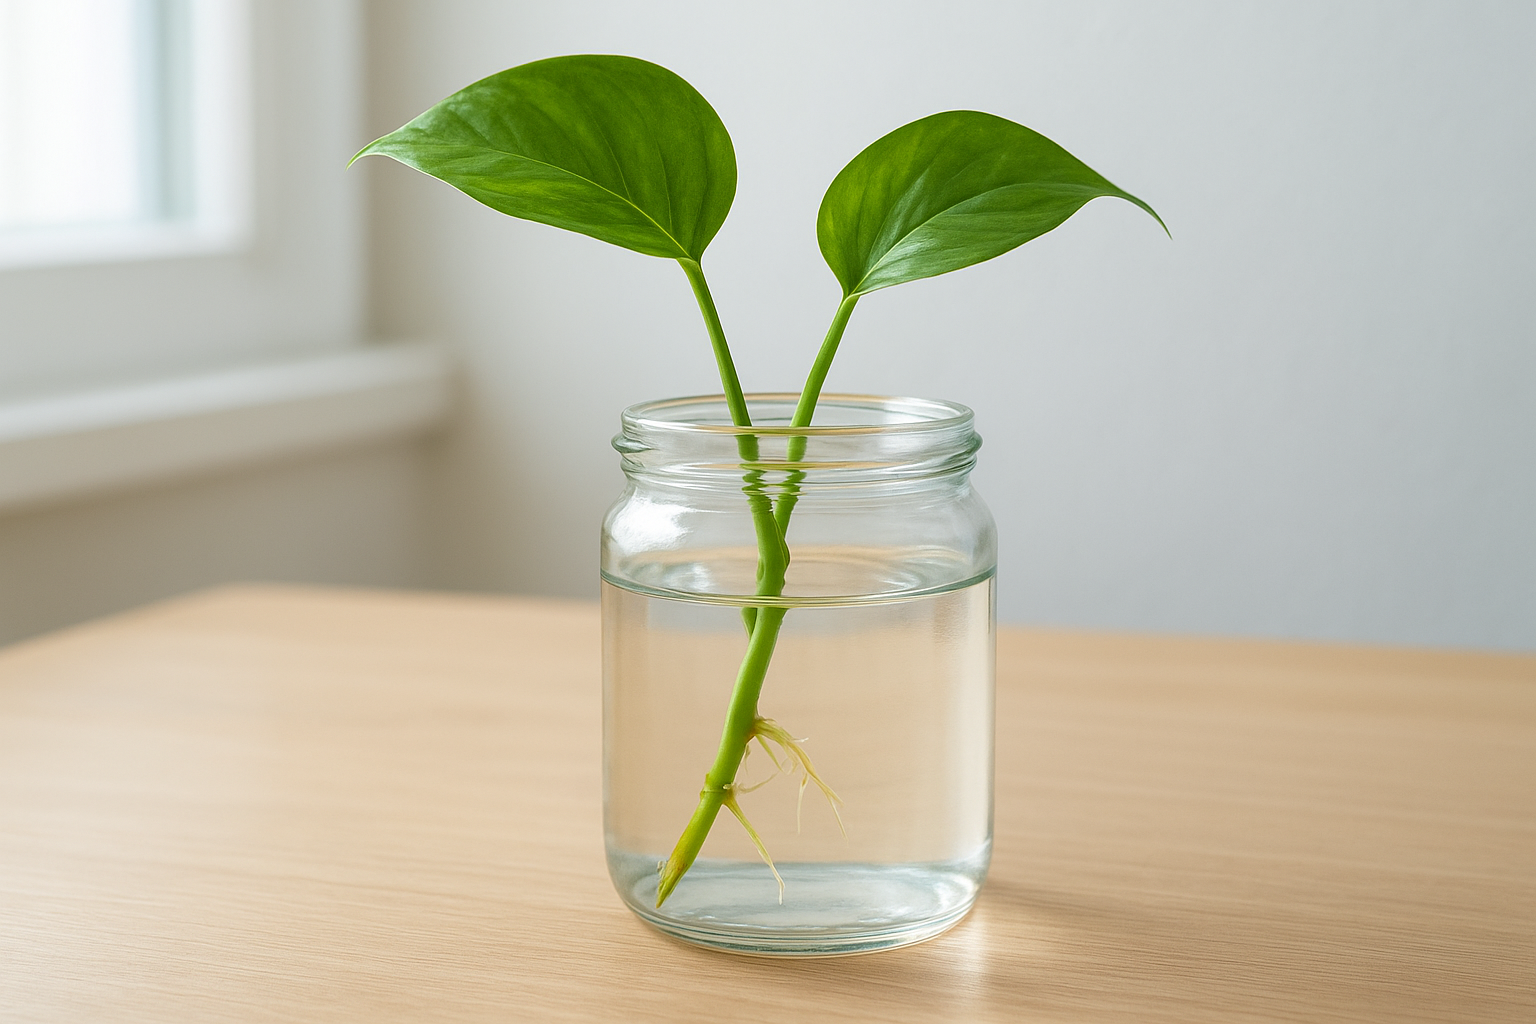
Water propagation is the most visual method in the entire process of how to propagate plants from cuttings. You can watch roots develop in real time, which makes it easy to know exactly when your cutting is ready to pot up. It works best with soft-stemmed plants like Pothos, Monstera, Coleus, and most tropical vines common in Malaysian homes and gardens.
Setting up your water container
Choose a clear glass or jar so you can monitor root growth without disturbing the cutting. Fill it with clean, room-temperature water and place your prepared cutting so the bottom node sits submerged while the leaves stay above the waterline. If leaves touch the water, they rot quickly and contaminate the entire jar.
Keep the jar in a bright spot away from direct sunlight. Direct sun warms the water too fast and encourages algae growth, which competes with your cutting and clouds your view of the roots. A north or east-facing windowsill works well for most tropical species in Malaysia's natural light conditions.
Change the water every two to three days to keep oxygen levels high and prevent bacterial buildup, which is the main cause of stem rot during water propagation.
Monitoring root development and knowing when to pot
Most soft-stemmed cuttings show visible root nubs within seven to fourteen days. You're looking for roots that reach at least 2 to 4 cm in length before you move the cutting to soil. Roots shorter than this tend to break during transplanting and force the plant to start regenerating from scratch.
Use this progress tracker to guide your timing:
| Days After Cutting | What to Look For | Action |
|---|---|---|
| 1-5 | No visible roots, stem stays firm | Leave undisturbed |
| 7-14 | Small white nubs forming at node | Continue water changes |
| 14-21 | Roots reach 2-4 cm | Prepare pot for transplant |
| 21+ | Roots tangled or circling jar | Transplant immediately |
Avoid leaving cuttings in water beyond four to five weeks. Roots that develop too long in water form a structure that struggles to adapt to soil, which leads to transplant stress and slow establishment. Move your cutting to its growing medium as soon as the roots hit the target length.
Step 3. Root cuttings in soil or rooting mix
Soil propagation produces roots that are structurally stronger and better adapted to garden conditions than water-rooted cuttings. If you want to know how to propagate plants from cuttings that will thrive long-term in a tropical garden bed, starting in soil is often the more reliable path, particularly for semi-hardwood plants like Hibiscus, Ixora, and Bougainvillea.
Planting the cutting correctly
Fill your small pot or propagation tray with your perlite-coco coir mix and water it lightly before inserting the cutting. The medium should feel moist but not wet when you squeeze a small handful. Overly wet soil suffocates the stem before any roots develop, and it is the most common reason cuttings rot in soil propagation.
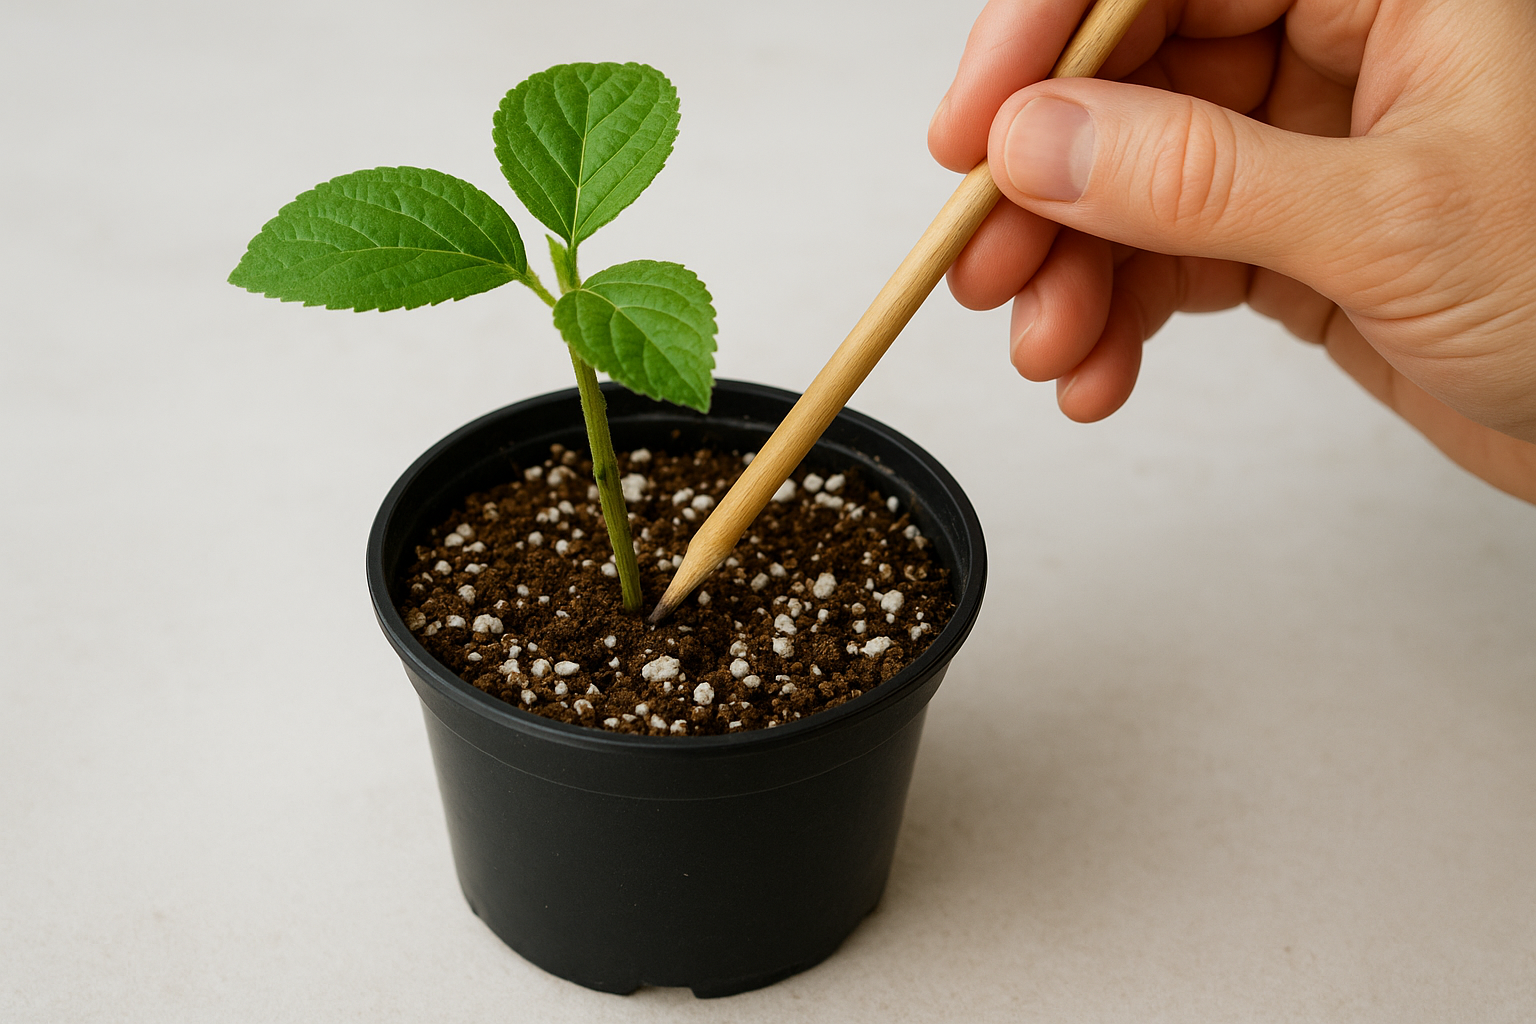
Use a pencil or chopstick to make a narrow pilot hole in the center of the mix before inserting the cutting. Pushing the cutting in without a pre-made hole drags rooting hormone off the stem tip, reducing how well it works. Insert the cutting so at least one node sits below the surface, then gently firm the medium around it to close any air gaps.
Always pre-moisten your rooting mix before inserting the cutting rather than watering heavily afterward, because even moisture distribution encourages uniform root development across the buried node.
Maintaining the right conditions
Cover the pot with a clear plastic bag or humidity dome to trap moisture and create a warm microclimate around the cutting. In Malaysia's climate, you rarely need a heat mat because ambient temperatures already stay within the 25 to 32 degrees Celsius range that most tropical species root best in. Position your setup in bright, indirect light, such as a shaded balcony or a spot roughly two meters back from a bright window.
Remove the cover for fifteen to twenty minutes each day to refresh the air and prevent fungal buildup on the leaves. After two to three weeks, give the cutting a gentle tug between your fingers. Resistance means roots have formed and anchored into the mix. Once you feel consistent resistance across two or three checks spaced a day apart, your cutting is ready for the next stage.
Step 4. Transplant and aftercare for strong growth
Transplanting is the moment when everything you've done in how to propagate plants from cuttings pays off, but it's also where most people unknowingly cause damage. Moving a rooted cutting from water or a propagation mix into a larger growing medium disrupts roots that are still young and fragile. Handle this stage carefully and your new plant will establish quickly; rush it and you'll lose weeks of growth to transplant stress.
Moving your cutting to its final pot
Choose a pot one size larger than your propagation container, roughly 15 to 20 cm in diameter for most tropical species. Too large a pot holds excess moisture around the roots, which slows establishment. Fill it with a well-draining tropical potting mix, and make a hole in the center deep enough to accommodate the root system without bending or folding any roots.
Before you place the cutting, water the new pot lightly so the roots meet moist rather than dry medium. Lower the cutting straight in, fill around it gently, and firm the mix down to eliminate air pockets. Avoid pressing too hard, as this compacts the soil and restricts root expansion.
Water the transplanted cutting once immediately after planting, then wait until the top 2 cm of soil feels dry before watering again.
Watering and light in the first two weeks
Your newly transplanted cutting needs consistent moisture but not saturated soil during its first two weeks. The roots are adapting to a new medium, and overwatering during this window causes the same rot risk you faced during propagation. Check the soil daily by pressing your finger 2 cm into the mix rather than watering on a fixed schedule.
Place the plant in bright, indirect light for the first two weeks regardless of how much direct sun the species normally tolerates. Positioning a fragile young plant in full tropical sun immediately after transplanting causes leaf scorch and forces it to divert energy from root establishment to stress recovery.
Signs your cutting has established successfully
Watch for new leaf growth as the clearest indicator that roots have anchored and the plant is drawing nutrients actively. Once you see one or two new leaves forming, you can gradually introduce the plant to its permanent conditions, whether that means more direct sun exposure, a garden bed, or a larger decorative pot.
Quick wrap-up
Learning how to propagate plants from cuttings comes down to three core decisions: picking a healthy stem, choosing the right rooting method, and giving the cutting the conditions it needs to establish without stress. Water propagation works well for soft-stemmed tropicals, while soil or a perlite-coco coir mix gives semi-hardwood species like Hibiscus and Bougainvillea the stronger root structure they need for long-term garden performance.
Each step in this guide builds on the one before it. Sharp, sterile tools protect your parent plant. The right cut angle and node placement give roots the best starting point. Consistent moisture, indirect light, and patience carry the cutting through to a healthy transplant. Follow these steps and your propagation success rate will improve significantly with every batch you attempt.
If you want professional guidance on designing a garden that makes the most of your propagated plants, talk to the team at Konzept Garden for expert advice tailored to Malaysia's climate.
